


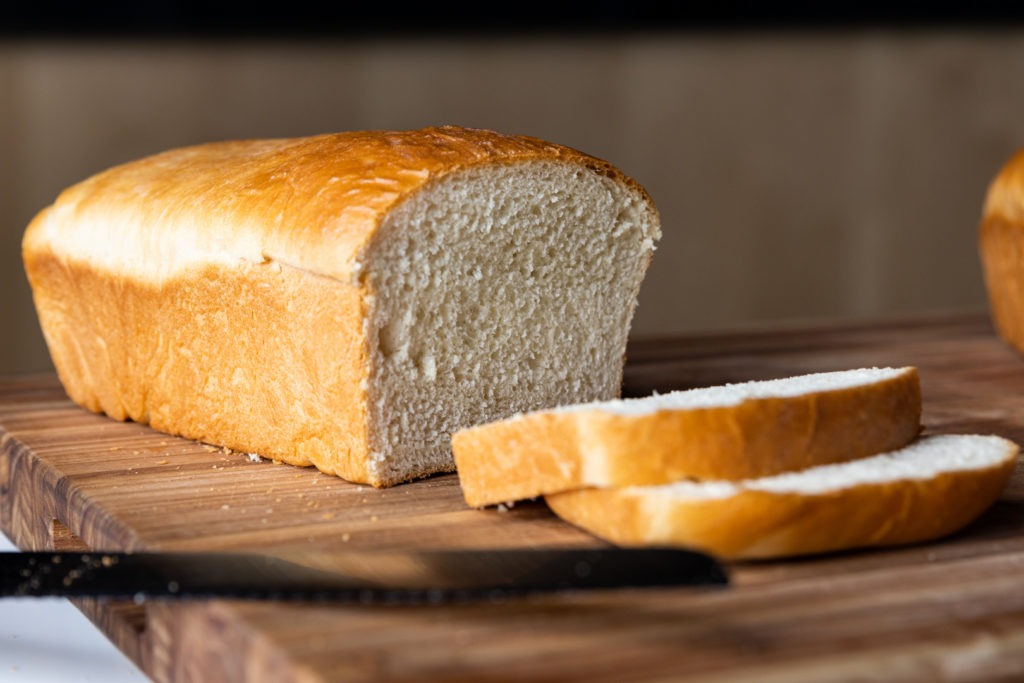
Delicious Homemade Sandwich Bread: Easy to Make With Thermal Tips
In my Great-grandmother’s time, and her mother’s time, and hers before that, it was not the norm to buy all of your bread at the store. Heck, not even all of it came from the baker. Speaking in broad generalities, many people used to make their daily bread. Now, I’m not advocating for a return to that kind of life, but I think sometimes, when we think of artisan sourdough and dimpled brioche buns, we forget just how easy it can be to cook a good, wholesome, basic, sandwich bread. You know, like what the stuff in the plastic bags at the store is pretending to be.
The truth is, if you have three hours of prep time in the evening, you can have fresh bread for tomorrow. And most of that time is hands-off. With our temperature tips, your bread can turn out light and fluffy and perfect for slicing.
Bread temps
We’ve talked about bread temperatures before, but it never hurts to review! There are three key places where temperature matters in bread baking: the ingredient temperatures, the fermenting/proofing temperatures, and the doneness temperature. Let’s take a quick look at all three.
Bread ingredient temperatures
Yeast is a wonderful but finicky thing. It flavors and lightens our breads, but it is picky about what temperatures it prefers. Too cold and it just won’t work. Too hot and it dies. Using room-temperature ingredients will guarantee that your dough isn’t too cold for the yeast to get to work altogether, but warming things up just a bit will help move things in the right direction. This recipe, from our friends at King Arthur Flour, calls for hot water to be mixed with the milk before being added with the other ingredients. This thermal boost won’t be so hot that you scald your yeast, but it will help to wake it up and get it moving.
How hot should the water be? Read on to find out. But know that the yeast-kill temperature is 140°F (60°C). Add water that is at that temp or higher and you risk killing some (or all) of your yeast.
Bread fermenting/proofing temperature
There are two stages of fermentation for bread. The first, called the bulk ferment, is when the whole pile of dough rises all at once in an amorphous blob. After the blob stage, the bread is shaped and allowed to ferment further, to rise into its final shape. This is called proofing. This process is dependent on happy yeast to happen quickly, and according to Harold McGee, the happiest temperature for fermenting and proofing bread dough is 85°F (29°C).
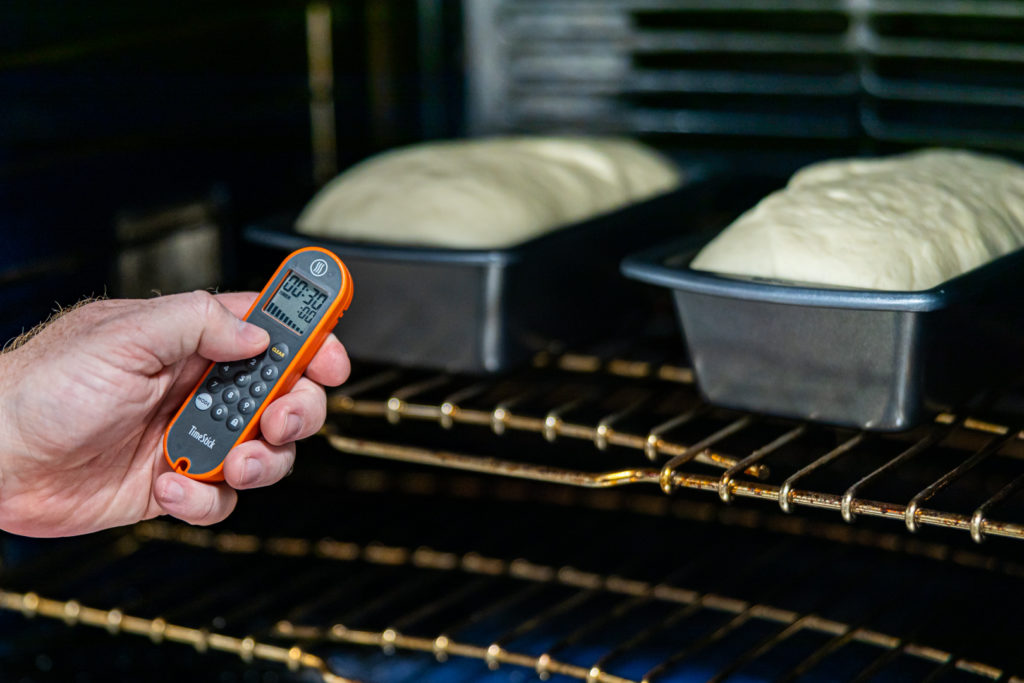
We used our oven with a proof setting for this step, which is very convenient. You can buy temperature-controlled proofing boxes if you’re serious about bread baking. But in general, a cooler with hot water in it or an oven with a pan of hot water or a pilot light will provide a hospitable environment for your fermentation. It should be noted that 85°F (29°C) is optimal, but it is not the only temp that will let dough rise. You can use a ChefAlarm® to watch your proofing cooler/oven/box/countertop. Knowing how far you are from optimal temp will help you know how long your bread will take to rise. If your yeast is healthy and your proofing-box is at the right temperature, this recipe should take about 90 minutes to complete its bulk fermentation and another hour to complete its proofing.
Bread doneness temperature
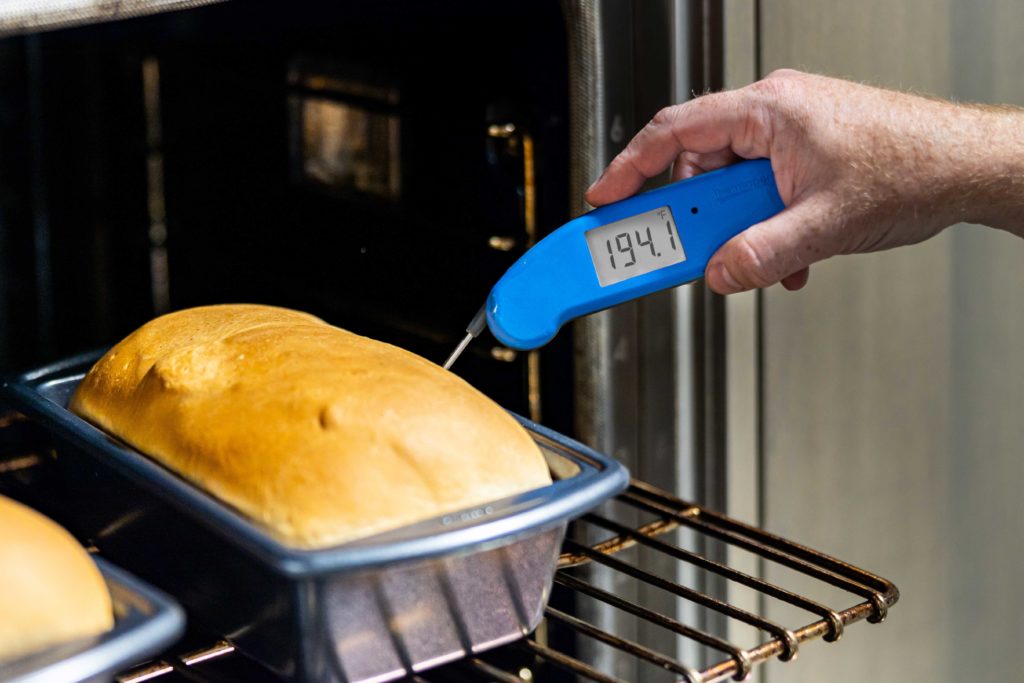
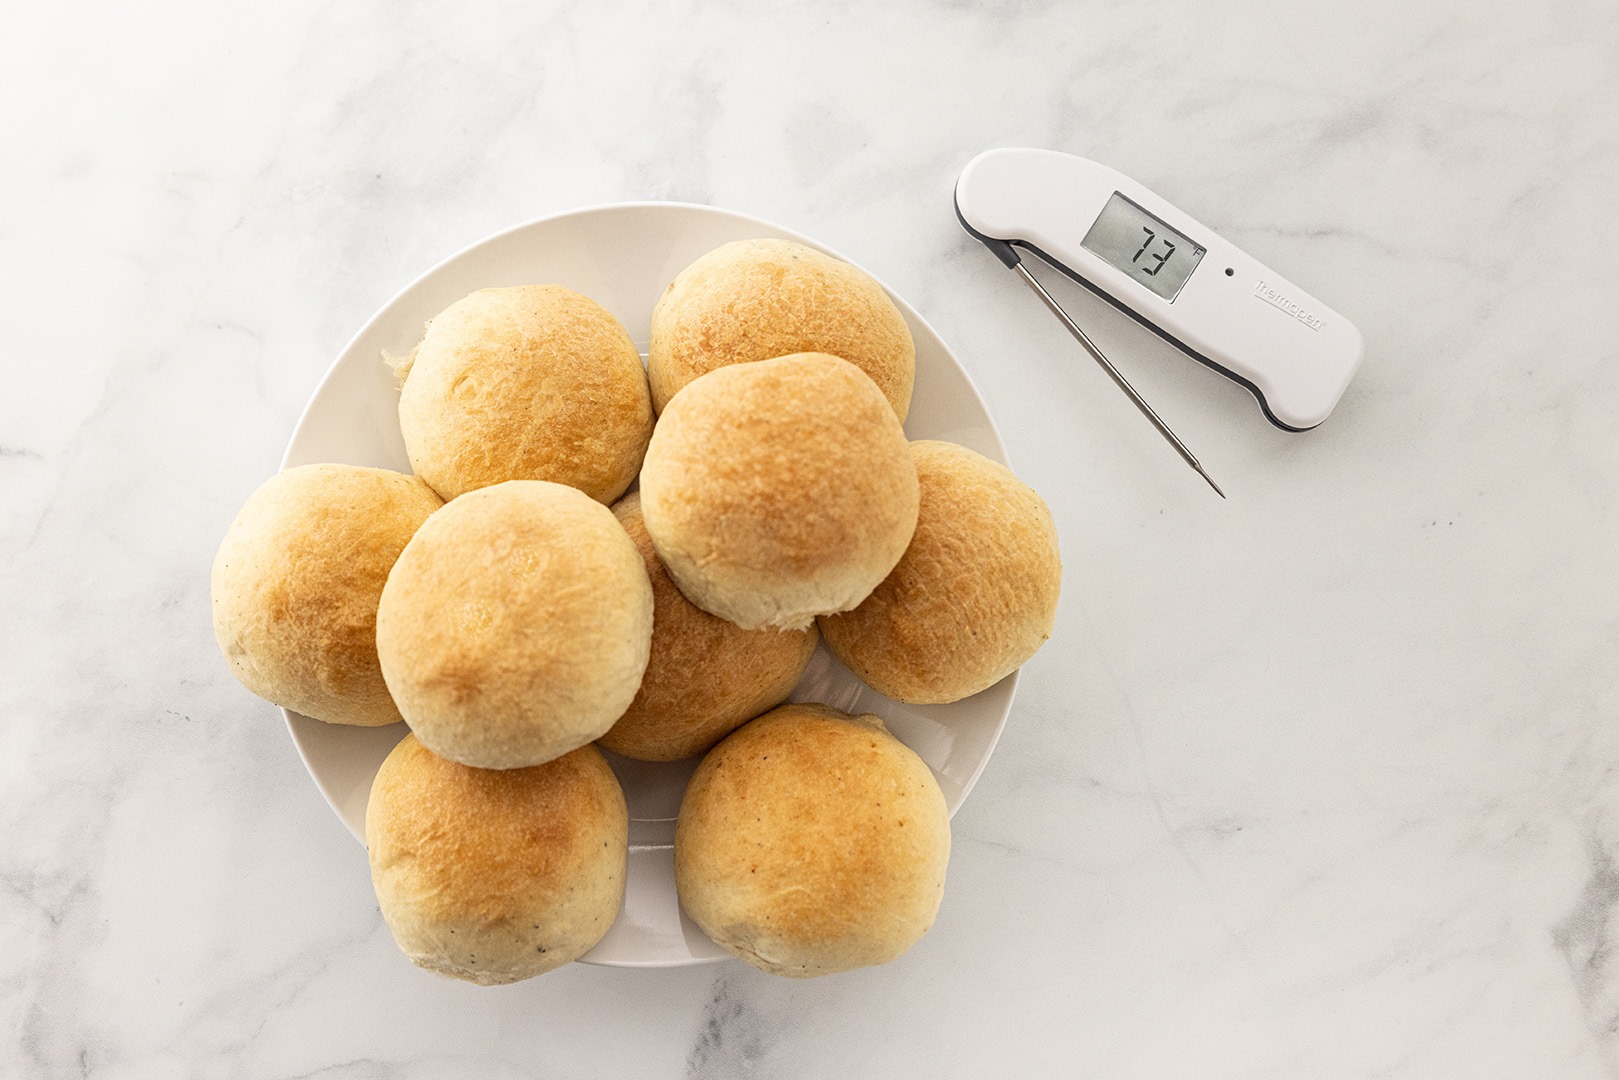
A rich-dough bread like this one is done when the internal temperature reaches 180–190°F (82–88°C). This one has quite a bit of liquid in it, as it goes, so we’ll push for the higher end of that range: 190°F (88°C). Baking at 350°F (177°C), this bread should take about 30-40 minutes to cook. When you reach the 30 minute mark, check the internal temperature using Thermapen® ONE. Insert the probe deeply, all the way into the bread and slowly pull it out. Look for the lowest temp that you see—when that lowest temp is 190°F (88°C), it’s ready to remove from the oven. With a panned bread like this, it’s absolutely impractical to even attempt the “thump the bottom” test, which is completely subjective anyway. Bakers worth their salt know that actual temperature readings are best!
A note on bread-baking methods
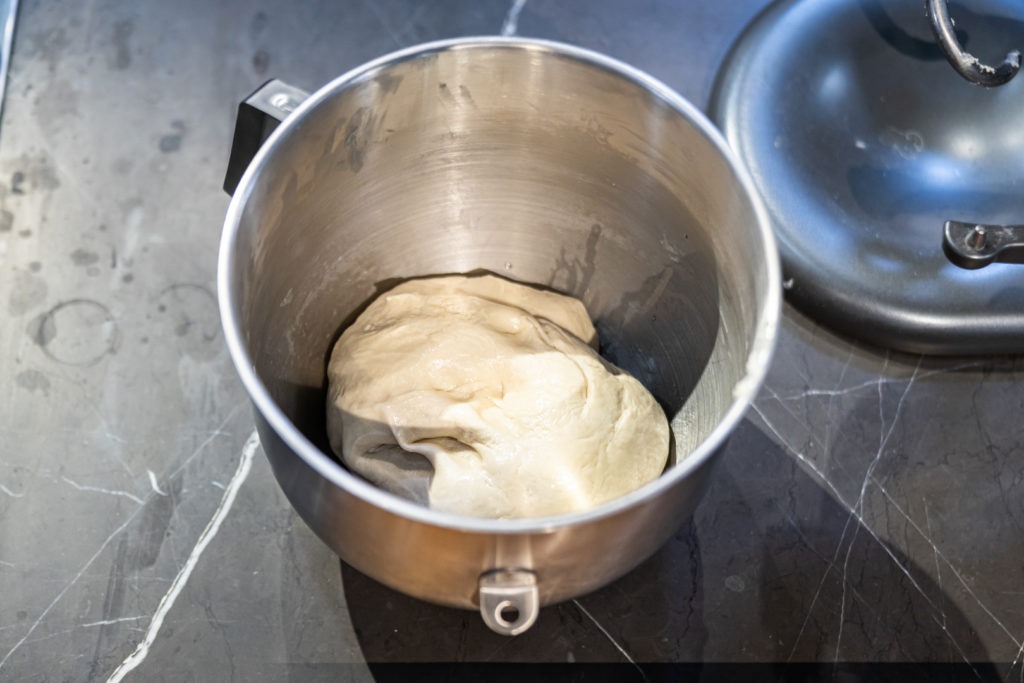
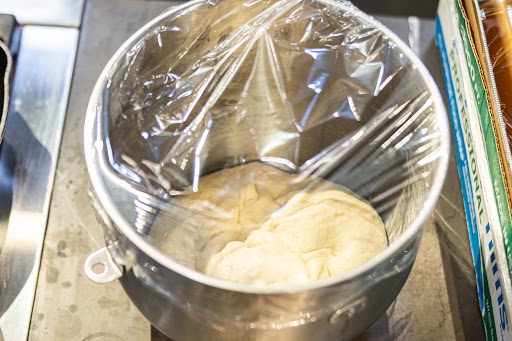
There are literally thousands of ways to make bread, and we cannot cover them all here. Suffice it to say that the method on this loaf is delightfully easy. Add all the ingredients to your mixer and knead it with a dough hook until it is smooth and elastic, then let it rise in an oiled bowl. Form it into loaves (they don’t even have to look nice!) and place them in greased loaf pans. Let them rise again and then bake for about 35 minutes.
This is the kind of bread you have time for! So let’s take a look at that recipe, shall we?
Classic sandwich bread recipe
This recipe comes originally from King Arthur Flour and is a real winner. Slice it for sandwiches or carve thick slabs for amazing toast.
Though this recipe includes the volumetric measurements (cups, etc), baking always works best if you go by mass. If you have a scale, use it! At the very least, use it for the flour, which has the most volume/mass differential.
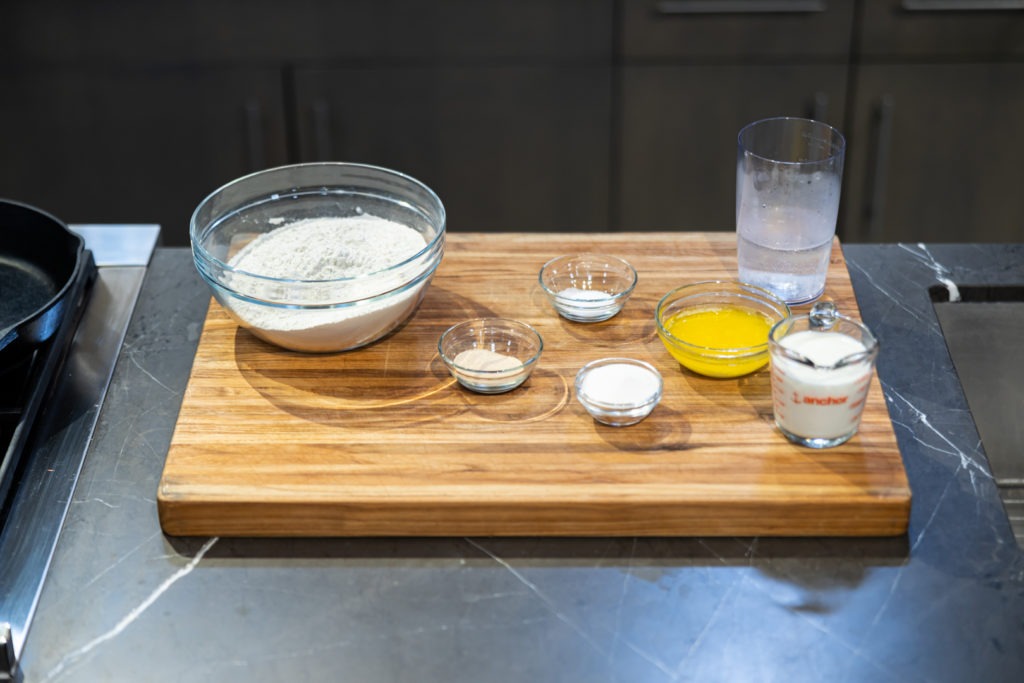
Ingredients
- 6 C (722g) King Arthur Unbleached All-Purpose Flour
- 1 C (226g) milk
- 1 to 1-1/3 C (226g to 304g) hot water, (local humidity will affect how much water you need. Add enough to make a soft, smooth dough.)*
- 1/2 C (114g) melted butter
- 4 Tbsp (50g) granulated sugar
- 2-1/2 tsp salt
- 2 packet active dry yeast dissolved in 1 Tbsp warm water (75-85°F [24-29°C]) OR 4 tsp instant yeast (no additional water needed)
- Additional butter for finishing
* Once you add the hot water to the cold milk, the resulting mixture should also ideally be somewhere between 75-85°F (24-29°C) before adding to the dough.
Instructions
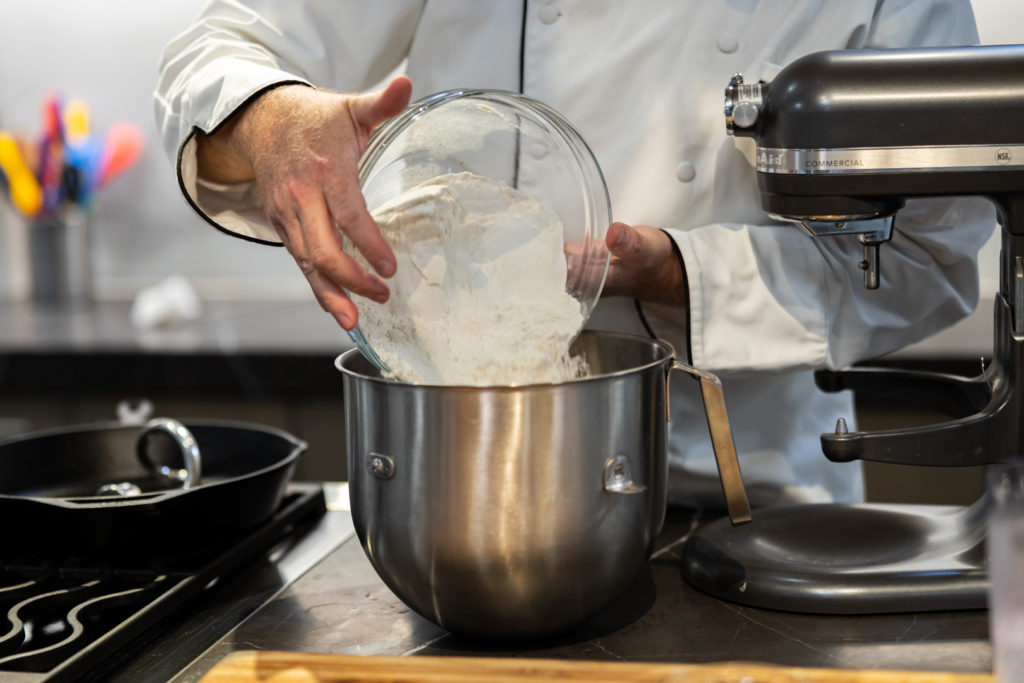
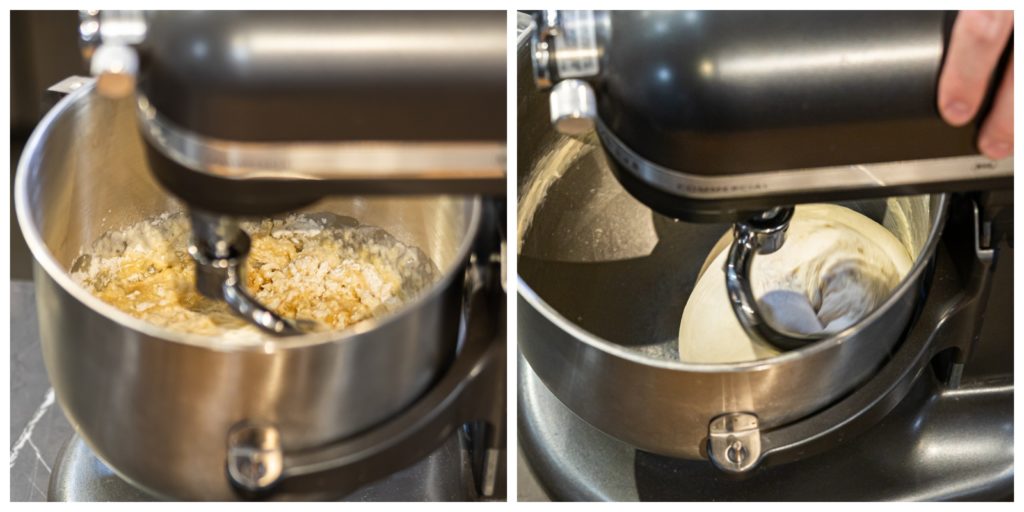
- Put all the ingredients into the bowl of a stand mixer and mix with a dough hook. Mix on low, initially, increasing speed after all the flour is incorporated.
- Knead on medium-high speed for about 6 minutes, until the dough becomes smooth and elastic.
- Lightly oil a bowl and put your dough in it. Cover the bowl with plastic wrap or a damp towel and place it in your proof box/cool oven/warm part of your counter. Shoot for 85°F (29°C) for the optimal blend of flavor and speed.
- Allow the bread to rise for 1–2 hours until nearly doubled in bulk (not necessarily all the way doubled).
- Lightly oil a work surface and turn your dough out onto it, gently deflating it.
- Divide the dough into two equal-size pieces. Form each into an 8-inch long log and place each in a buttered 8-1/2 X 4-1/2 inch loaf pan.
- Cover the pans with lightly-oiled plastic wrap and place back in your proofing-area for about another hour, until the bread has risen to about 1 inch above the rim of the loaf pan.


- As you approach the proper proof, preheat your oven to 350°F (177°C).
- Place the loaf pans in the oven and bake for 30–35 minutes.
- When you get to 30 minutes, check the internal temp of the bread with your Thermapen ONE. You want a lowest-recorded temperature of 190°F (88°C).
- When it’s done, remove the bread from the oven and place the pans on a cooling rack.
- After a couple of minutes, turn the bread out of the pan and, while it is still warm, rub the top of the bread with a stick of butter, melting it onto the bread, or baste with melted butter. This will soften the top crust and make slicing easier.
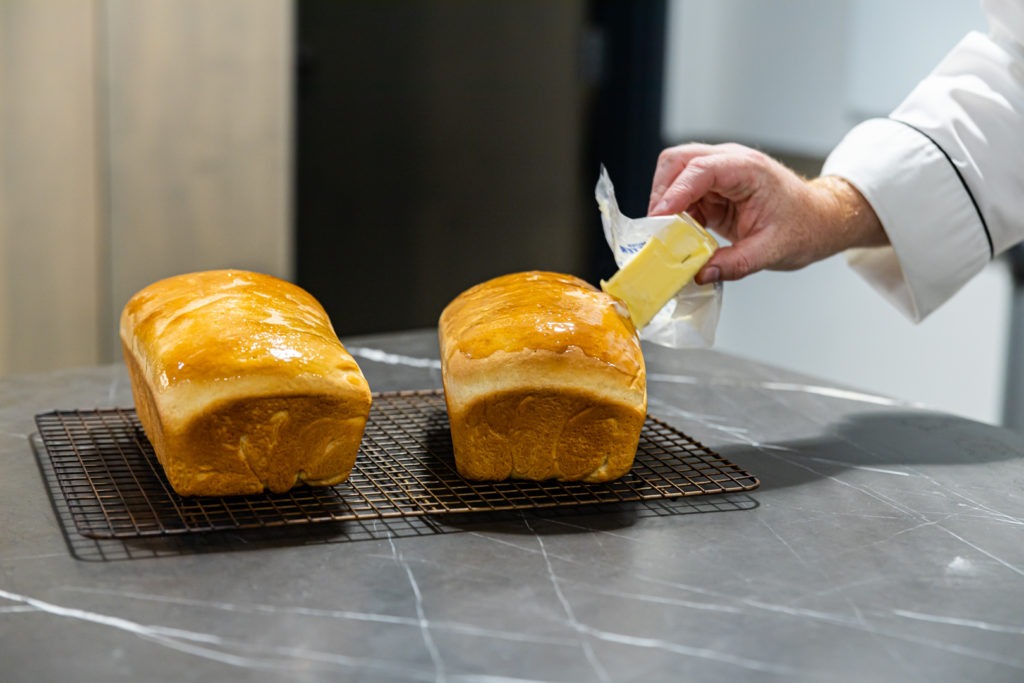
- Allow the bread to cool before slicing. (As if! Try to give it as much time before slicing as you can stand.)

- Eat it with butter and jam. Or just butter. Or some thin-sliced smoky ham with good lettuce and sliced tomato, whole-grain mustard, and a little garlicky mayo.

As a culture, we have in many ways forgotten not only the joy of homemade daily bread, but also how easy making that daily bread can be. But with modern conveniences like stand mixers, instant yeast, and high-accuracy thermometers, there’s really no reason why someone who is at home for even just a few hours (or maybe even sheltering at home?) can’t make amazing, fragrant, tender bread.
Try this recipe today. You and your family will be amazed at how simple it can be to bake amazing bread at home.
Shop now for products used in this post:


Encouraging! I want to try .this
Might want to adjust article to indicate what kind of milk (skim? 1/2%? 2%? Whole?). Maybe even explain how different milks might affect the recipe (buttermilk? Whipping cream?)
Whole milk is best, just for the sake of richness.
I’m not aware that the difference in fat will be very appreciable when it comes to structure, etc. in this recipe. The range of milkfat would fall within the error of fat in the beef and pork. Making it with cream sounds fascinating…
This turned out great! I’ll forever be grateful! Always wanted to make this kind of bread, and mine turned out beautifully, and it taste great too!
Made this bread yesterday. I rate it the highest possible rating! I actually used freshly ground whole wheat flour (2.5 cups) along with the white all-purpose flour. The bread turned out to be very tasty as well as beautiful. I can fold it over a slice after I spread my almond butter on it and it doesn’t fall apart.
The next day, the bread still retained its great taste and flexibility. Definitely, a recipe that I will keep and use frequently. Thank you for your great article on thermometers, which is what brought me to this recipe.
Max,
I’m so happy you like the recipe and the atricle! This has absolutely become my go-to bread, and I should try it with a portion of fresh whole-grain!
Do you add to the flour with the whole wheat or do you substitute 2.5 cups of all-purpose flour for with the whole wheat flour? Thanks.
I’m going to go ahead and answer for Max here, in case he doesn’t see it. It’s a substitution, not an addition. So take out 2.5 C of the AP and add in 2.5 C of the whole sheat.
I have made this bread receipt at least 4 times. It has turned out excellent each time I make it. I usually add 1 1/2 cups of freshly ground wheat. It stays perfect for a few days, whereas most of my breads have dried out in a day or two.
Excellent!
This sounds super easy and delicious! Any suggested adjustments for making this bread at high altitude (5,280 ft)? Also, any suggestions on how best to store the bread if you don’t eat it all in one sitting? Can you freeze a loaf since it makes two loaves?
We’re at 4500 ft and make it as written. If you’re higher and it isn’t working for you, you might want to add a little more water. You can certainly freeze a baked loaf, well-wrapped, or freeze a raw loaf, not yet proofed, to bake later.
You’ll save energy (that’s money) if you bake multiple loaves of bread at the same time. The cooking time stays about the same, but the pre-heat is where the savings occurs. I generally freeze bread sliced so I can take out only what I need when I need it. I double or triple the plastic bag to prevent freezer-burn. Don’t crowd the oven, but use it efficiently. Bake less often; save more money.
This ingredient/instruction line doesn’t look quite right: “1 to 1-1/3 C (226g to 204g) hot water”
Specifically: 226g to 204g. One website I checked said 1 1/3 c water = 320 grams. I don’t think this is any way a crucial error, but I have a feeling it wasn’t what the author intended to write.
Fixed it! that should have said 304g (1 1/3 C water is 302.4g).
Substitute 4 tsp of honey for the 4 Tbsp of sugar for a slightly different but still delicious loaf…
Can you freeze one of the loaves for cooking later? I can’t go through two in a few days and don’t want to waste one.
Yes, you can! Make the loaf and freeze it prior to proofing. Then thaw, proof, and bake.
This bread sounds really great! My wife and I plan on making this soon. What I would like to know is how to add fiber to this bread? I see Max adds 1 1/2 cups of freshly ground wheat flour. What makes a good high fiber in bread?
Subbing part whole-wheat flour is one of the best ways to go. You could also pre-soak some steel-cut oats and mix them in with the dough to get a multi-grain effect. I’d start with a half cup of those soaked in a cup of water for a few hours.
Can I substitute King Arthur Bread Flour weight-for-weight for the All-Purpose Flour?
Thank you.
Bread flour will give you a different texture (chewier) and may take a little more time to proof because of the tighter gluten structure. But I’ve done it and it works out fine.
Could I use this recipe to make Cinnamon Swirl Bread?
Oh yes! And please do!
Can you add instructions for those of us who don’t have a dough hook enabled stand mixer? My mother’s late-50s Mixmaster only came with beaters.
Oooh…that’ means kneading by hand. I’d bring half the flour and all the other dry ingredients together with the wet ingredients, mix well with the beaters, then add flour until the beaters just start to bog down, then move that mass to another bowl and mix in the rest of the flour and knead it by hand on the countertop until smooth and elastic.
Great info! I have been using a Thermapen for some time to check the temperatures of the liquids added to my bread and the bread itself as it bakes. Making your own bread is not only fun but a good skill to have. Keeping the ingredients in your pantry is easier and will have a longer shelf life than any store bought bread. With the supply chain issue we all experienced in the not to distant past and in some case still experience, my family never wanted for bread because we bake our own weekly.
Nice article on bread baking. I’ve been temping my breads for years, makes a huge difference over thumping the bottoms! Might do an article on no-knead breads. I’ve been making bread since 1964, yes I’m that old. I never heard of the no-kneads until several years ago. Oh my gosh, they’re a great way to make bread!!! Also, maybe an article on cheesecakes. I’ve been temping those for YEARS with your Chef Alarm, using the smaller pointed probe. The cheesecakes come out perfect every time, no more jiggling or guessing for doneness. Keep up the good work. I love your products and love the articles.
Our sourdough bread article is a no-knead variety (very similar to the Tartine method), and we have a DELICIOUS cheesecake post you should check out!
Bookmarked this article ages ago and finally got to try it out! I did make a few minor changes as I use freshly ground flour (1 part hard red to 3 parts hard white berries)… I added 6 tablespoons of extra water and 3/8 cup of wheat gluten. Turned out amazing! Thanks!
Can i use less salt?
Yes, the salt quantity is not crucial to the build. It will taste…less.