


Steak Temperature Guide: How to Nail Perfect Doneness Every Time
Few things taste better than a perfectly cooked steak. That sizzling sear, the savory crust, the juicy center—it’s the kind of meal that makes you feel like you nailed life. But great steak doesn’t happen by accident. Want that perfect doneness every time? It’s not luck—it’s temperature control. Let’s show you how to master it.
Why Steak Temperature Matters
Cooking steak to the right temperature isn’t just about preference—it’s the difference between a juicy, flavorful masterpiece and a dry, disappointing chew toy.
Temperature affects everything:
- Flavor & Texture: Medium-rare locks in juices and tenderness, while well-done cooks out both fat and moisture.
- Food Safety: Undercooking (especially below 125°F) can pose health risks, especially for ground or mechanically tenderized meat.
- Consistency: A thermometer eliminates guesswork, so you get perfect doneness every time—whether it’s ribeye or filet.
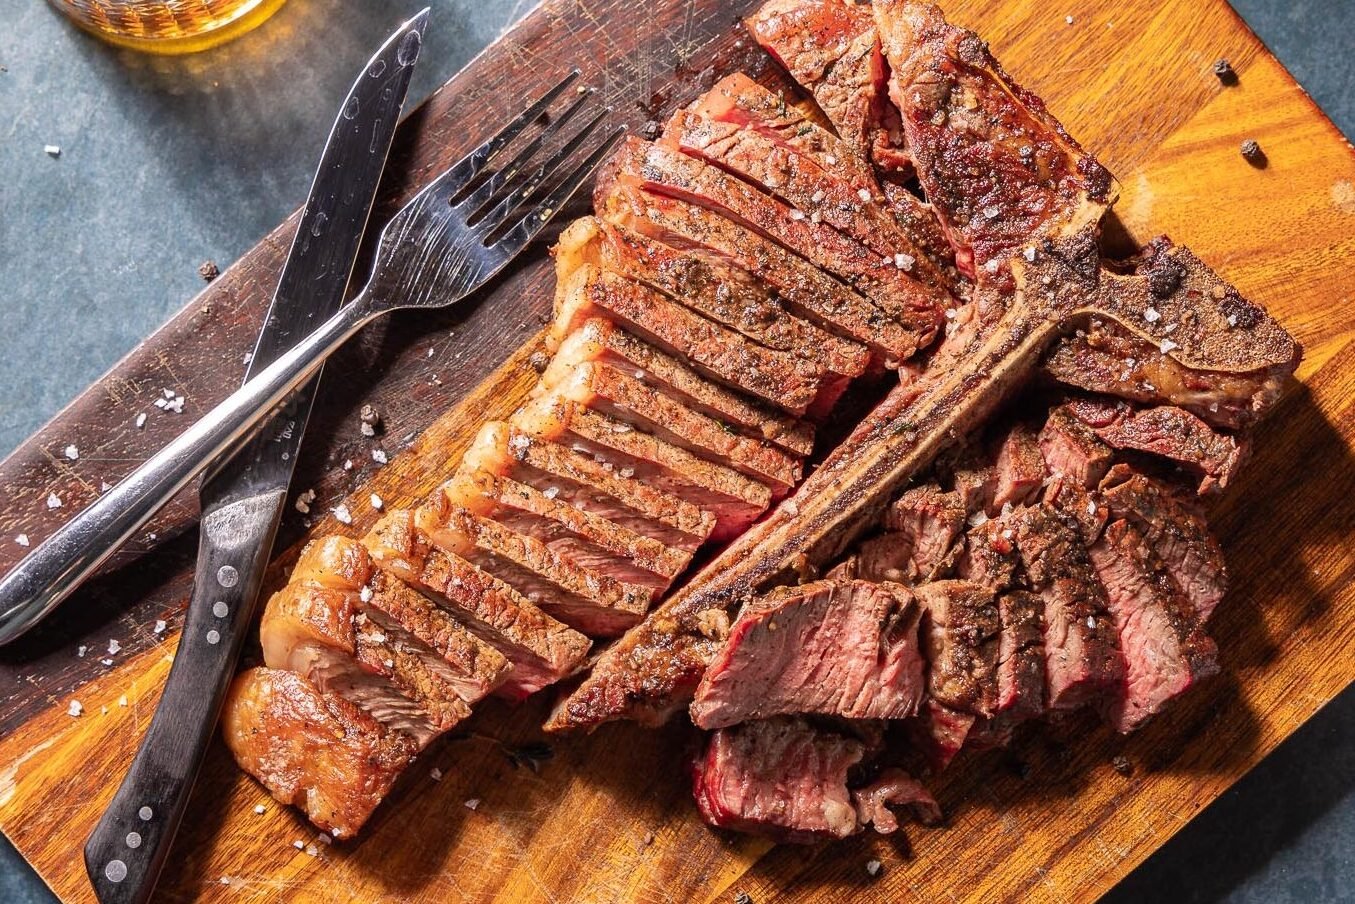
- Presentation: Slice into a steak that’s beautifully pink from edge to edge (not gray on the outside and raw in the middle) and you’ve nailed the gradient pros aim for.
Steak isn’t cheap—don’t leave doneness to chance. A few degrees make all the difference, and using a thermometer gives you control, not just hope.
Steak Doneness Levels & Temperature Chart
Whether you’re a rare minimalist or a well-done warrior, steak doneness is all about internal temperature—not guesswork, color, or cutting it open. Hitting the right number means nailing the texture, flavor, and juiciness you want every single time.
Here’s the breakdown of doneness levels with their corresponding internal temps:
Steak Temperature Chart
| Steak Doneness | Temperature (°F) | Temperature (°C) |
| Bleu Steak | 110°F | 43°C |
| Rare Steak | 120–130°F | 49–54°C |
| Medium Rare Steak | 130–135°F | 54–57°C |
| Medium Steak | 135–145°F | 57–63°C |
| Medium Well Steak | 145–155°F | 63–68°C |
| Well Done Steak | 155°F and up | 68°C and up |
Pro Tip: Always pull your steak off the heat about 5°F before your target temp. It’ll keep cooking as it rests—this is called carryover cooking, and it’s the key to not overshooting
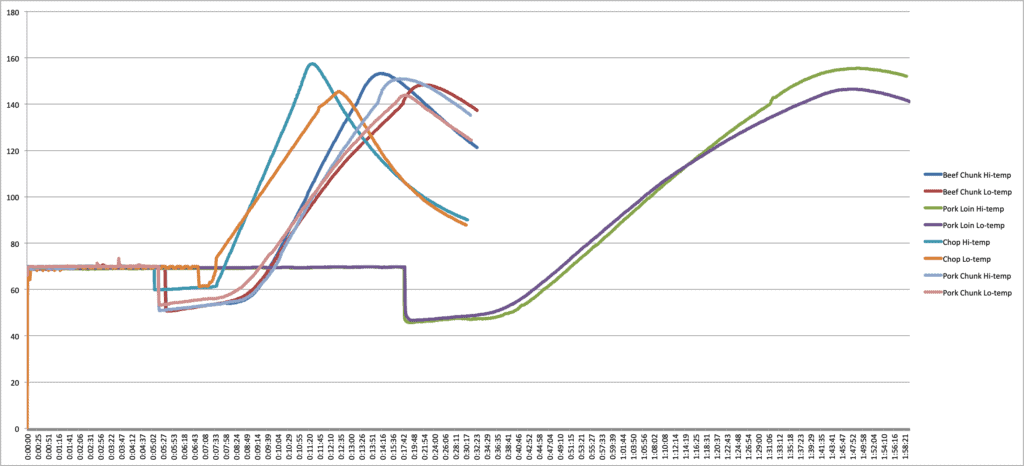
Carryover Cooking in Steaks
Heat is not static. Heat moves. In fact, heat tries its best to reach a state of equilibrium. When you take a steak out of a hot pan, the heat at the exterior of the steak will work its way into the center of the steak, raising the temperature inside the steak. This is what we call “carryover cooking”. Unless you’re cooking your steak sous vide, you will experience carryover cooking, and you need to plan for it. Thinner steaks like skirt steak have less thermal mass and thermal momentum and will experience less carryover than thick steaks. Thick steaks like porterhouse or tomahawk have more thermal mass and more carryover.
Carryover Cooking Rule of Thumb
In general, low heat carries over less and high heat carries over more. When cooking a steak on low heat, your pull temps will be 2–5 degrees below your target. The higher the cooking temp, the greater the pull gap, up to 10° or maybe even 15°F, depending on the size of the cut.
As Harold McGee says “The extent of afterheating depends on the meat’s weight, shape, and center temperature, and the cooking temperature, and can range from a negligible few degrees in a thin cut to 20°F in a large roast.”
In general, you can plan on 3–5°F (2–3°C) of carryover for a thinner steak and anywhere from 10–15°F (6–8°C) carryover for larger ones. Using RFX MEAT™ wireless probe to track the carryover via the min/max function can help you understand how carryover behaves in your kitchen with your steaks.
Steak Temps Don’t Change By Cut
Many websites that give information on steak doneness list the temperatures by steak-type. In reality, that is an unnecessary distinction, as all steaks experience doneness stages at the same temperatures. Whether you’re cooking up a porterhouse steak or a ribeye, medium doneness is 135–145°F (57–63°C). (The best way to get that temperature just right is, of course, to use a fast and accurate meat thermometer like Thermapen® ONE.)
To understand steak doneness, we need to look at what’s happening on a physical, thermal level. Doneness depends on the ways that the proteins have reacted to the thermal energy. When meat protein fibers cook to rare doneness—120–130°F (49–54°C)—they begin to denature, coiling and changing their structure. This changes everything about them. They become less slick and translucent. They start to lose their protein-bound water. And naturally-occurring tenderizing enzymes in the meat become very active.
If you heat the steak further to medium rare—130–135°F (54–57°C)—the protein fibers become slightly more fibrous, losing most of their slickness and turning an opaque, lighter red. The tenderizing enzymes actually deactivate, and juices will run from the steak if cut. And here’s the important thing: this is the same for every cut of steak, regardless of type. The proteins in a filet don’t behave any differently than the proteins in a NY strip.
Why Color Isn’t a Reliable Indicator of Meat Doneness
Judging doneness by color is both subjective and unreliable. What one person considers “rosy and slightly dark,” another might see as “pink and light.” These kinds of color-based descriptions are vague at best and misleading at worst. Color simply isn’t a precise or consistent indicator of doneness—especially when cooking meat. If you want results you can trust, temperature is the only way to know for sure.

Even if we could agree on exact colors for steak doneness, it still wouldn’t matter as they don’t always hold true. External factors can change the way myoglobin—the protein that colors the meat red—behaves. The presence of nitrates, carbon monoxide, and even certain vegetables can affect meat color independent of meat temperature.
Color can lie, and minutes per side doesn’t take YOUR steak into account. In truth, the only objective way to know if your steak is done is to take its temperature. And don’t worry, sticking it with a probe does not make it lose more juice!
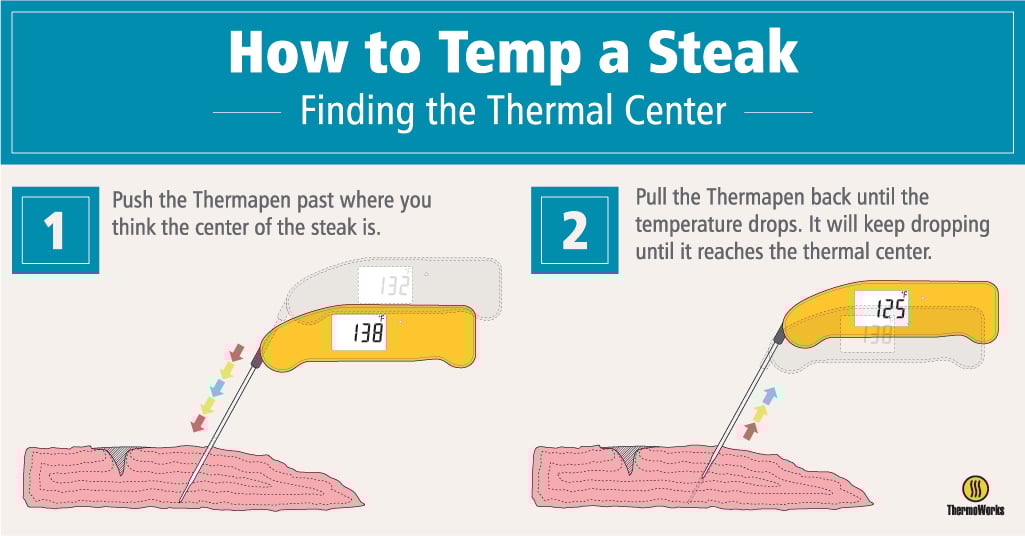
How to Temp a Steak Like a Pro
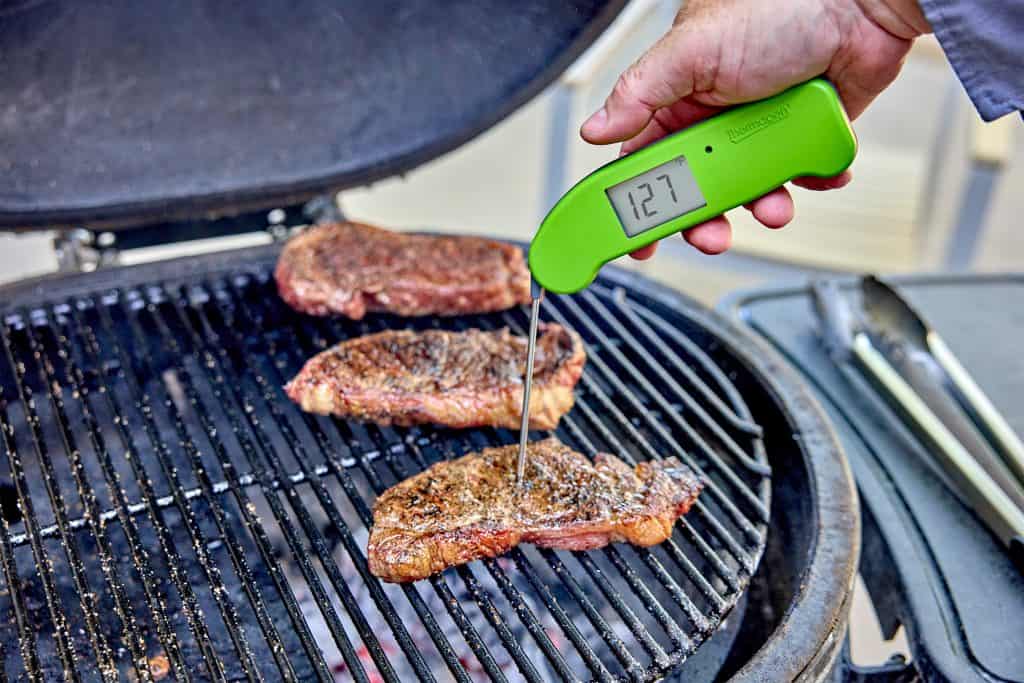
To temp a steak, you must be sure you’re reading the temperature in the coolest part of the steak. The exterior of a steak is likely to have a significantly higher temperature than the center, so it’s critical that you measure the thermal center of the steak.
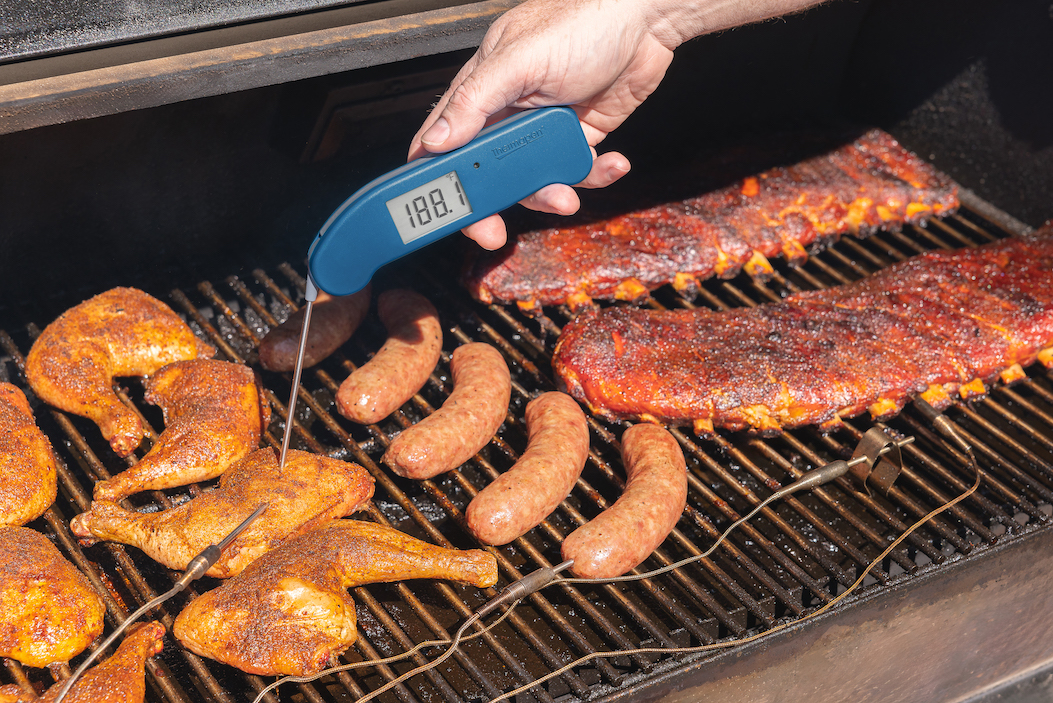
In order to get that temp just right, use a fast and accurate instant-read thermometer like Thermapen ONE. Thermapen is fast enough to show changing temperature gradients as you pull the probe through meat in real-time. Insert it most of the way through the steak, and draw it slowly out, watching the temperature change as you move the probe through the temperature gradients. Look for the lowest temperature in the steak.
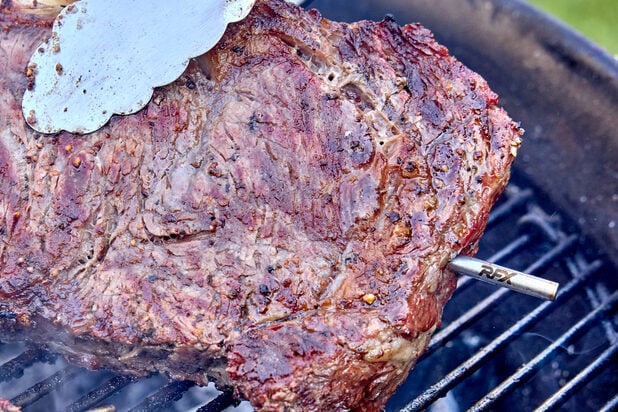
Tips for Perfect Crust: Reverse Sear
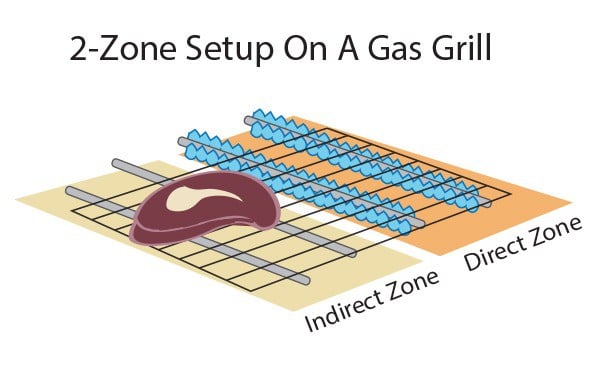
One of the best ways to cook a steak is to use a reverse-sear method. In this method, you cook your steak at a low-ish temperature to reach a desired temperature, then sear the steak for the last few degrees to give it that wonderful charry crust. It works great on the grill with a two-zone setup or inside with a low oven and a hot cast-iron pan.
Not only is the reverse sear a great way to get a steak done right, it’s also a great way to get a lot of steaks done quickly. You can cook them all at once over indirect heat, then sear them off quickly to serve all at once. We’ll break down the steps for you here, so you can see for yourself.
- Preheat your grill for indirect (two-zone) cooking by turning the burners on one side of the grill to high while leaving the others off or stacking your charcoal under one side of the grill.
- Season the steaks generously.
- Place steaks on the indirect-cooking side.
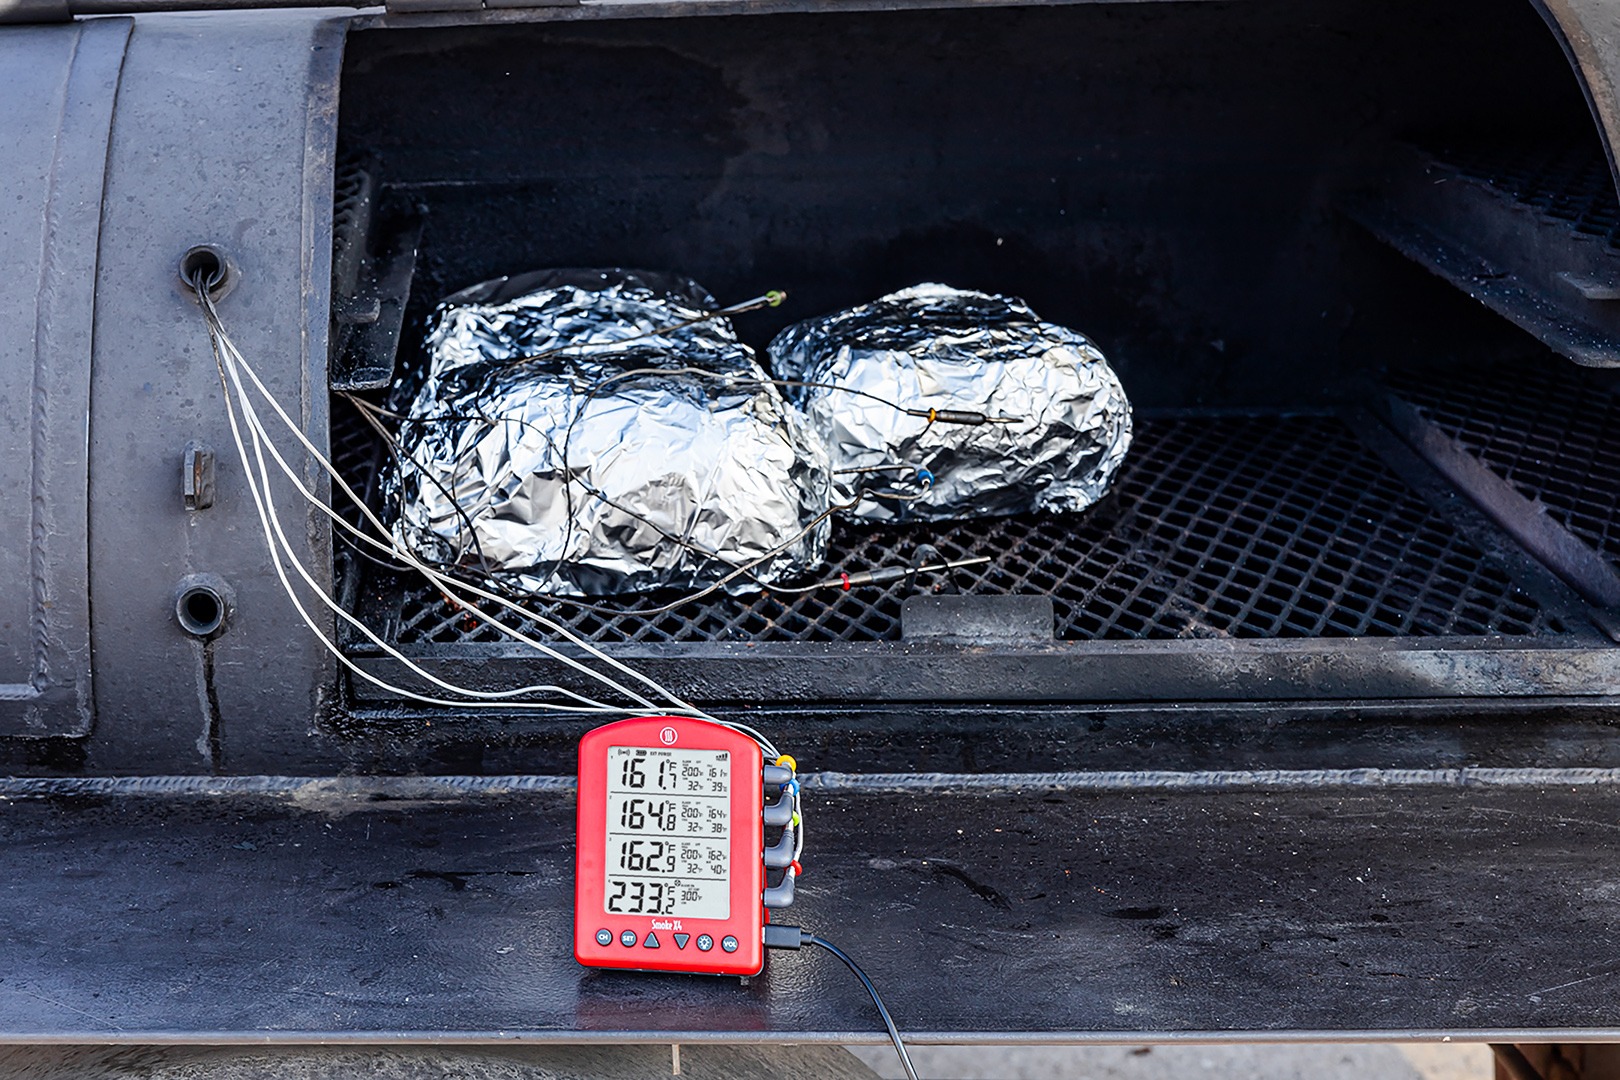
- Probe at least one steak with an RFX MEAT wireless probe thermometer and set the high-alarm about 20°F (11°C) lower than your desired final temperature. We like medium rare steak, so we set it for 110°F (43°C). (If you’re using a wired-probe, make sure your cables don’t run across the hot part of the grill.)
- When the high alarm sounds, move your steaks to the hot side of the grill and sear them over medium-high heat for 2–3 minutes per side.
- Use your Thermapen ONE to check the temperature of each steak as soon as you flip them. Be aware that the last few degrees can go quite quickly. Also, keep an eye on the temperature rise in the app—if the temperature is climbing very fast, take the steaks off sooner.
- As each steak reaches about 10°F (6°C) below your desired finish temp, pull them from heat and allow them to rest.
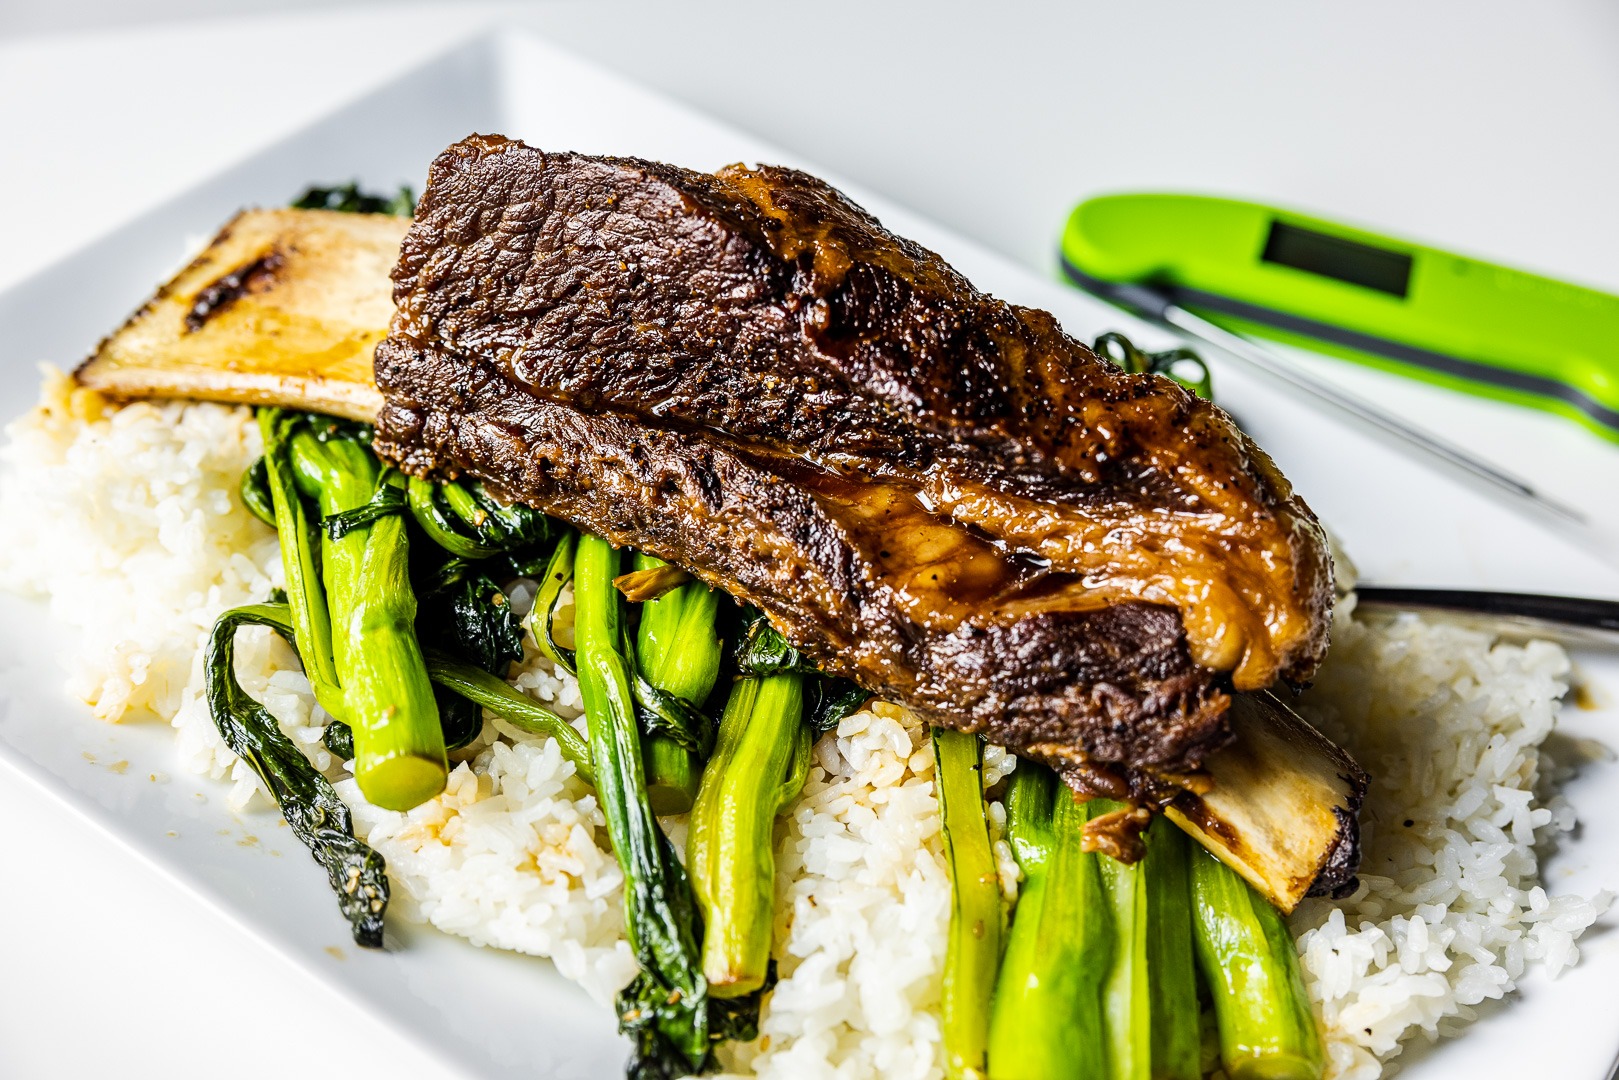
- Let the steaks rest to finish their carryover. It’s extremely hard to do, but well worth it. Maybe grill something else while you let them rest to distract you. Toss some asparagus with a little olive oil, salt, and pepper (maybe some garlic, shallot, or lemon zest) and grill it. The distraction will take your mind off the juicy, meaty steaks that are resting on that plate over there, calling your name.
- Eat those steaks!
Steak doneness isn’t guesswork—it’s science.
With the precision of RFX MEAT and Thermapen ONE, you’ll hit your perfect temp every time. Forget cooking by color or timing it by feel—those methods are as outdated as overcooked sirloin. Whether you’re aiming for medium, rare, or somewhere in between, temperature is how you get steak done right.


Wonderfully clear and informative, thanks for the concise explanation. I have been using your thermopen and chef alarm for a long time, they are indispensable.
Thanks
My question remains: why reverse sear? Why not sear first, then bring to desired temperature over low heat? Isn’t this more predictable? You can get the degree of sear you want without risking overcooking, then bring the meat to temperature. It seems to me that if you reverse sear you may have to pull the meat before you get the desired degree of crust.
Michael,
There is some great controversy surrounding the two methods. One of the reasons for a reverse sear is a desire to have a very fresh crust on the sear. By searing first and then cooking, the crust can soften to some degree. That may be a bit of a weak reason for some, but for some it is reason enough. (And it depends on the strength of the sear in the first place.)
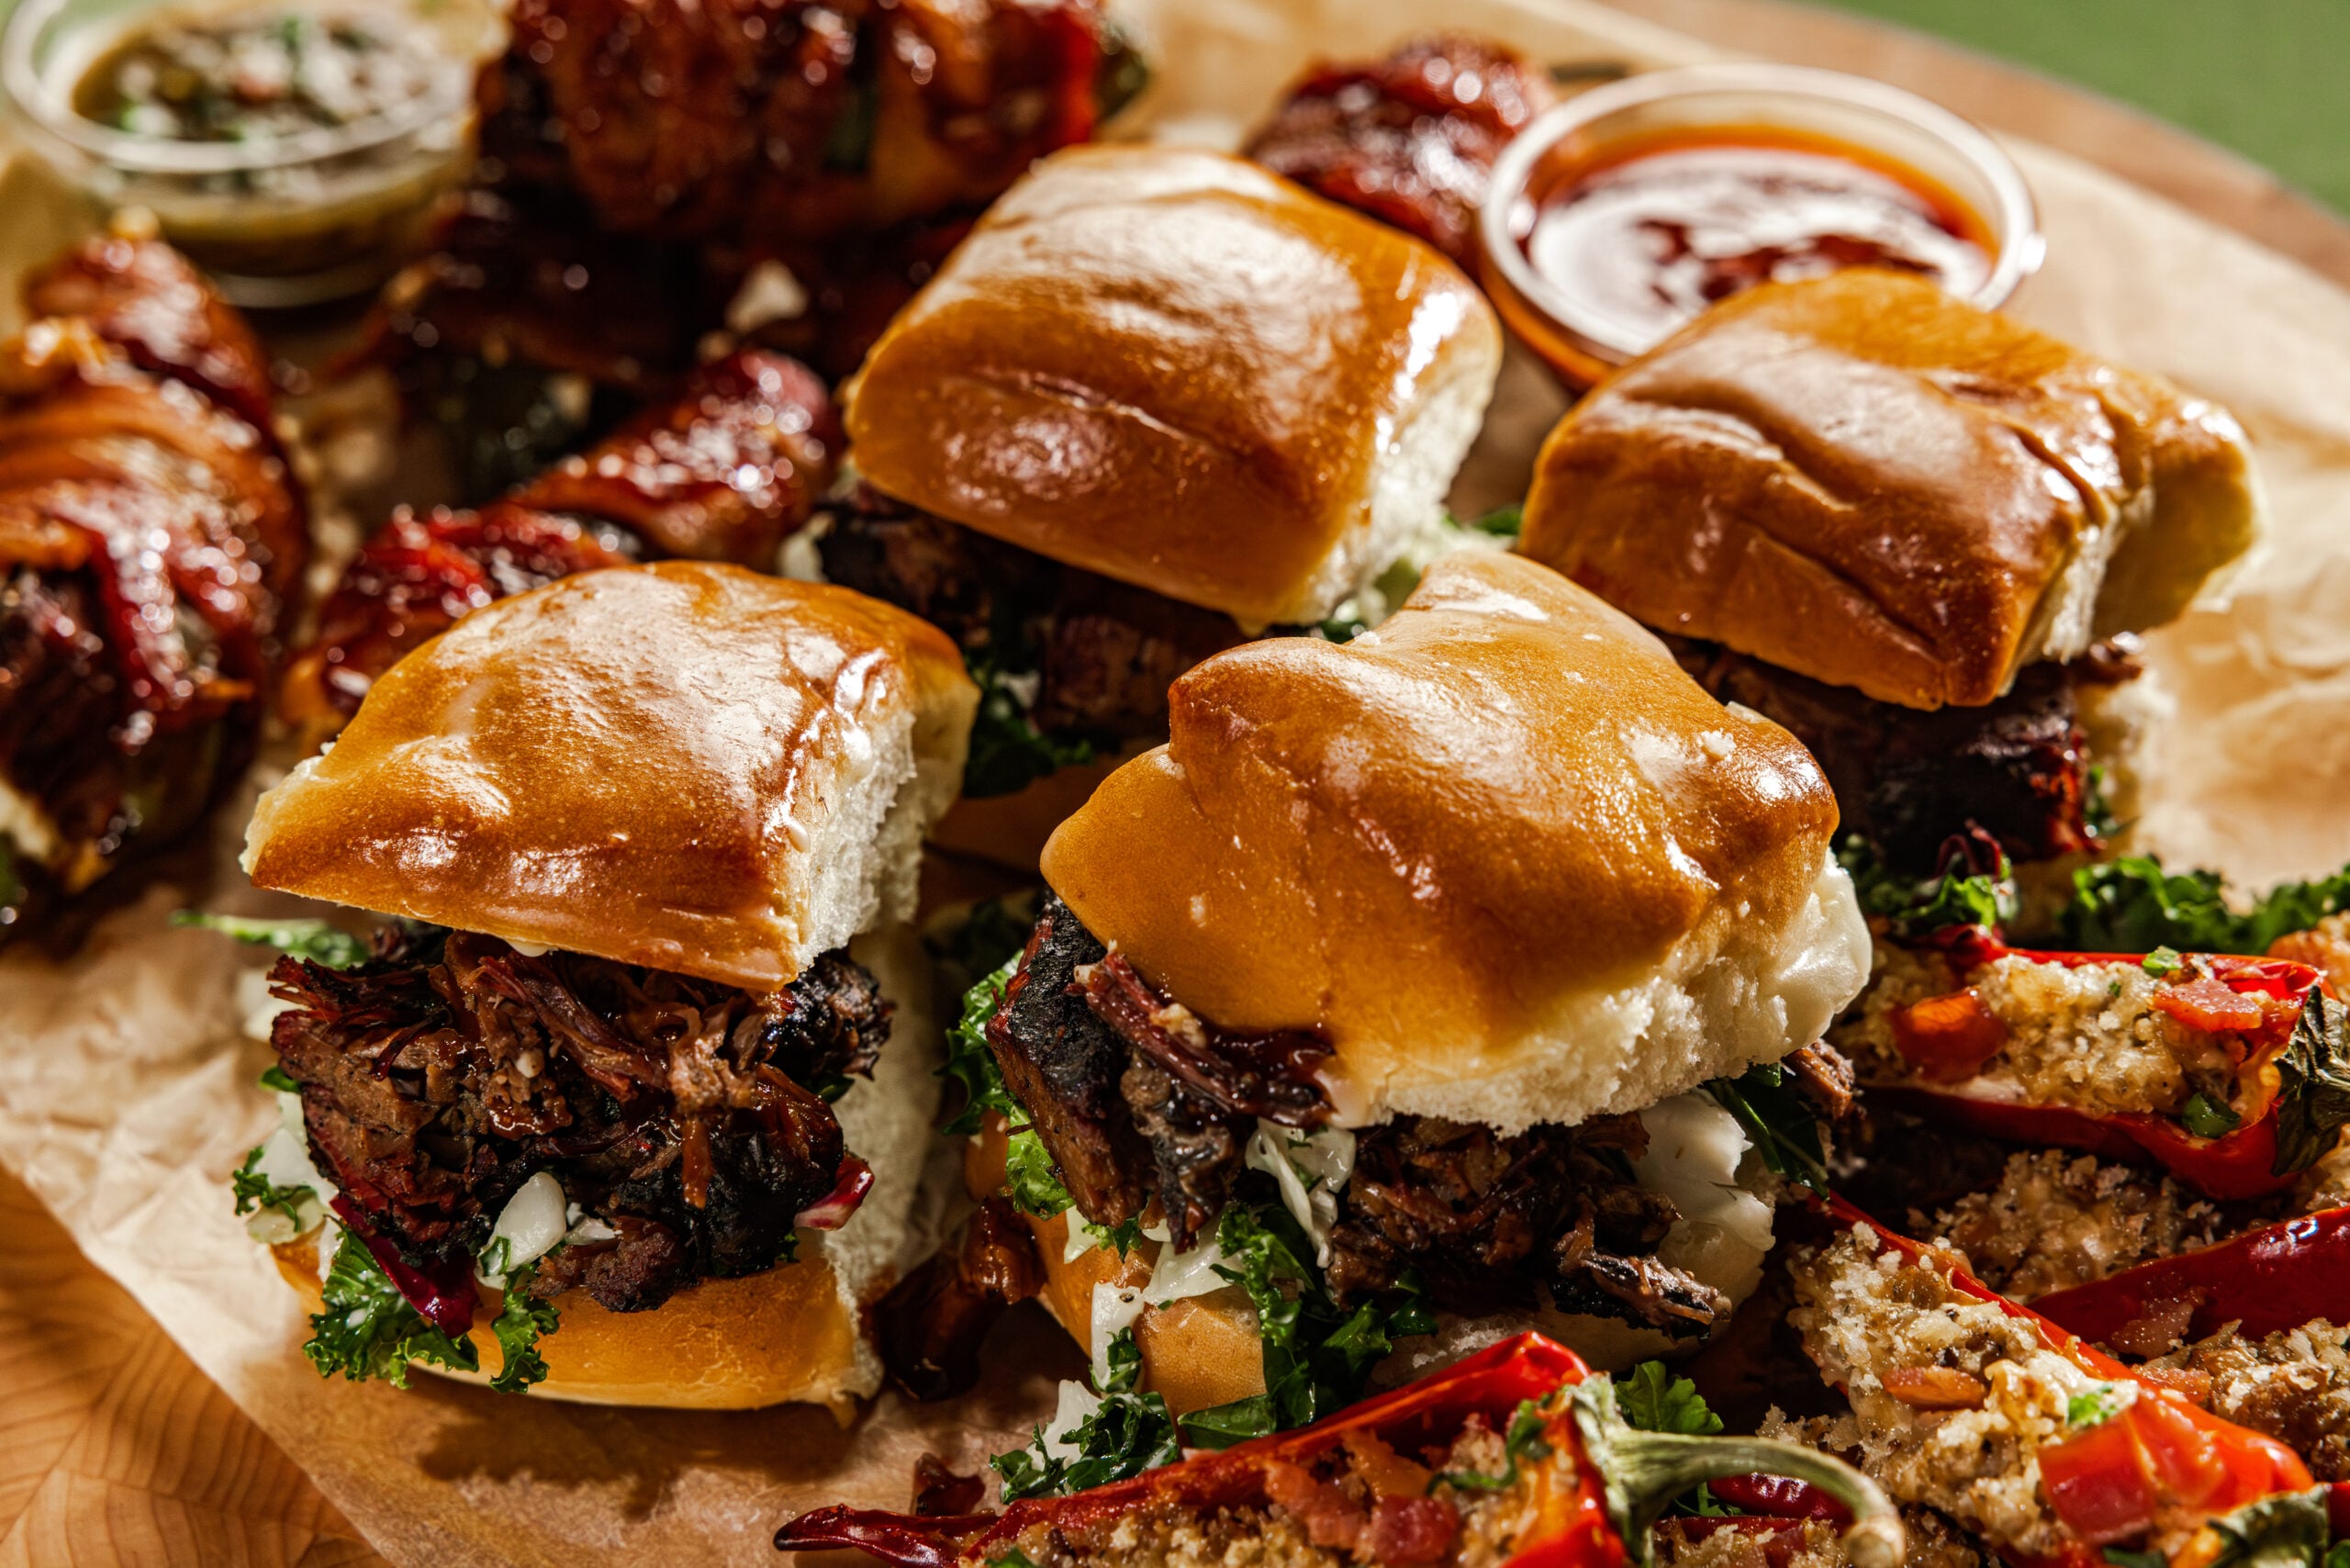
Another reason for the reverse sear is logistical. If you have to cook a lot of steaks—say, for a summer cookout—it can be much easier to have the steaks “cooked” most of the way and just needing to be seared off. In fact, you can cook the steaks to about 10-15°F lower than your desired pull temp well in advance of your party, toss them in the fridge, and when it’s time to cook, just sear them and send them out.
Of course, if you’re cooking good steak perfectly to temp with a standard sear, there’s no reason to change! I also love a standard sear. I use each method, just depending on how I feel and what I’m trying to accomplish.
Michael:
The reverse sear is actually done for flavor. I have a smoker, and use it for the first part of the cook, and then use my grill for the reverse sear. Doing this the other way, with the sear first and then in the smoker actually blocks the meat from absorbing the smoke flavor. I do this with Tri-tip, and Prime Rib. Have you ever seen a nicely cooked piece of Prime Rib, or a steak with a fairly large gray streak of meat on the outside? Do the reverse sear, and that band of grey will be very small.
What I find nice about the reverse sear is that the longer time at low temperature dries out the surface of the meat more. So when the time comes to sear the meat, there is less water to keep the meat temperature at 100C as the water evaporate. This allows the Maillard reaction (~150C) that gives the steak a nice flavorful crust to happen earlier, therefore a thinner gray outer ring. You can imagine that if you have to wait for 5 minutes while the surface temperature stalls at 100C before it can go up to 150C, the outer surface is actually being boiled at 100C for 5 minutes, creating a thicker gray outer ring for the steak.
Micheal, you are getting many responses to your “controversial ” question. Good job posting it, lol!
I agree with Mike. I almost consider the reverse sear to be a sous-vide in a smoker. If you wanted to be overly precise, you could set your smoker at 110 (150 is the lowest I can get mine, but I usually do 220 for the sake of time), and let the steak slowly (several hours) come up to 110, then pull it off and crutch it until you are ready to serve, then give it a ridiculously hot sear on both sides before it hits the plate. I like to get my Grill Grates up to 800 degrees, then 90 secs grill, 90 turn for another 90 secs, then flip and do same on other side.
It achieves all the things everyone else has said.
Searing first and finishing low heat lets the outside crust get soft any the steaks outside temp drop to low when the steak is resting. You also can finish all your steaks off together to serve when the searing is done last.
was very surprised to see that you do not speak to sliding the temp probe in from the side of the steak–I always temp my steaks from the side and it seems to be very accurate without sliding the probe in and out to find the coolest spot. Just an observation–love your products !
Good information – adds to my knowledge. I do use a Thermapen® Mk4.
Your generous sharing of expertise never fails to amaze (and educate) us. Thank you again for taking the time to do this. There is always something new to learn!
I used to consistently burn or at least overcook my steaks. My family always thought the only way my food came off the grill was overdone or more overdone. I started using the temperature method a few years ago and haven’t ruined a steak yet. I am comfortable grilling a $35.00 Costco 1 1/4″ thick steak to perfection every time. I won’t cook meat without a temperature probe any more. I was burning my fingers with my 6″ long thermometer so I ordered a 12″ long probe from Thermoworks. It should be in today and I can’t wait to try it out!
Thanks again for a wonderful article. I like to cook but rarely take the time to read instructions beyond the recipe…but I always read these articles you link via email, not only for cooking methods but for the food science education as well.
I had a birthday in May and bought myself a Cowboy Cut Ribeye steak. I prepared it just as you direct in this article (echoed in another one of your articles I read). I rubbed Kosher salt and pepper on the steak, put it on a cake cooking rack, and let it sit uncovered in the fridge overnight (almost 24 hours). As instructed, I used the indirect method and monitored the temp with my ThermoPop, flipping the steak every few minutes. I then seared it over the hot coals, pulled it and let it rest, watching the temperature rise and then start to slowly drop. Then I ate it!
I hit 65 that birthday, have loved to cook my entire life, and have eaten in many of the finer restaurants in the Washington DC area. That was easily one of the best steaks I have ever had.
Please keep these great articles coming!
Bill,
That is wonderful to hear! I hope you have many more such excellent steaks!
Great article. Unfortunately I am unable to grill and must rely on top of gas stove or oven (broiler in my apartment inconvenient for MANY reasons and I don’t use it. SO, when you suggest med low oven and then cast iron pan to sear– what is considered Low cook F. temp- and does one cook it in the same cast iron pan as is then high heated to sear? Help please. Also, I must rely on my new thermopop- which I like! since it was already a money stretch. Just FYI- I am not a new cook- have been cooking for over 60 years and can’t imagine not using a thermometer now! Sure beats the “spongy finger” test.
P.,
When I do this method I will set my oven anywhere from 250°F 275°F. I’ll do the initial cook on a sheet tray pan and then when it comes out of the oven I’ll heat up the cast iron to roaring hot. And way to go leaving the spongy-finger test behind and getting a ThermoPop!
Happy cooking!
Cooking my steaks (rib eye or New York) on the stove has actually become my preferred method, though I love to grill and use the Weber for tri-tip and chicken. But you can’t beat the sear/crust you get in a cast iron pan.
Here’s what I do: Diamond Crystal kosher salt and pepper all over, letting it rest on a rack in the refrigerator if I have the time. I stick the remote probe in the non-fat side, parallel to large surface of the cut, trying to get it right in the center of the thickest part. I oil the pan with neutral oil and wipe it almost dry as the pan is heating to pretty darn hot. Then I sear the fat edge for a couple of minutes, then sear each side for a similar time (I find two minutes per side gives me a great sear without too much temperature rise in the center). You need open windows or a good exhaust hood — this method produces a lot of smoke! I also find it helpful to sponge up the fat as it sears with a paper towel held in tongs — keeps the spatter down. Then I place the pan in a 300 degree oven and pull around 115 degrees. I find the carry-over gets it to 125 which is where I like it. I’ve used hotter oven temps since sometimes I’m sharing oven space with a baking potato, and it works well too, but I think the cooler oven is a bit better.
Bobby Flay does the cast iron pan sear and finishes under the broiler. That’s great too, but a bit harder to temp.
“Steak Temps: Getting It Right” is a very informative article with honest information. No brag, just fact.
I have had similar results with the temps listed and will try the carryover formula and the reverse-sear method.
The short and concise article gave me a much better understanding of the grilling process.
I am interested in being able to cook a lot of steaks most of the way over low indirect heat and then searing them off later but I’m not sure how the cooking process works when searing steaks that are cool or cold.. I presume that we sear the steaks until they reach the desired pull temp (say 125F for medium rare). I don’t understand why a partially cooked steak doesn’t overcook when searing from cold. I assume that it would take just as long to bring a partially cooked cold steak to, say 125F, as it would to cook a raw steak to the same temperature.
Ray,
You make a valid point, but there is another way to look at this. If you cook the steaks in low heat until they are just done, then refrigerate them, you needn’t cook them all the way to 125°F or 130°, you just need to get the interior hot enough to feel cooked and to be enjoyable—cold meat actually tastes different than hot meat because of how the flavors work. So getting the interior to 110°F is going to be just fine. Is that a long sear? maybe so. Maybe too long.
But overcome that, you could keep your steaks cool until a half hour before serving, then bring them out and let them come to room temp before tossing them on for a sear. Less total thermal distance to travel means less chance of overcooking.
Sous vide is really amazing for this because you can keep them at temperature and just sear them, but that’s not something that everyone has access to.
Thank you for your excellent articles on the “science” of cooking meats. Those pieces of wisdom are important for me to understand the why’s and how’s meats are cooked to perfection.
I have one comment on “reverse searing” steaks, tri tips etc. I understand the reason we sear is to give the additional flavor the maillard reaction searing at a minimum 550F surface. So, the more surface maillard reaction, the more flavor. I advise people to not sear on an open grate, instead sear on a cast iron skillet. I sear on a skillet either on the grill or on my stove, using a thermoworks IR gun to measure surface temp to 550. The reason I tell people not to sear on an open grate is the high temp is not accurate and it takes longer to create maillard reaction endangering an “overcook”. The sear on a flat skillet gives full surface contact of the meat for an efficient quick maillard without endangering the accuracy of the desired internal temps.
I agree with this! I prefer a pan sear to a grill sear almost every time.