

Perfect Prime Rib Roast: The Traditional Method Isn’t Best
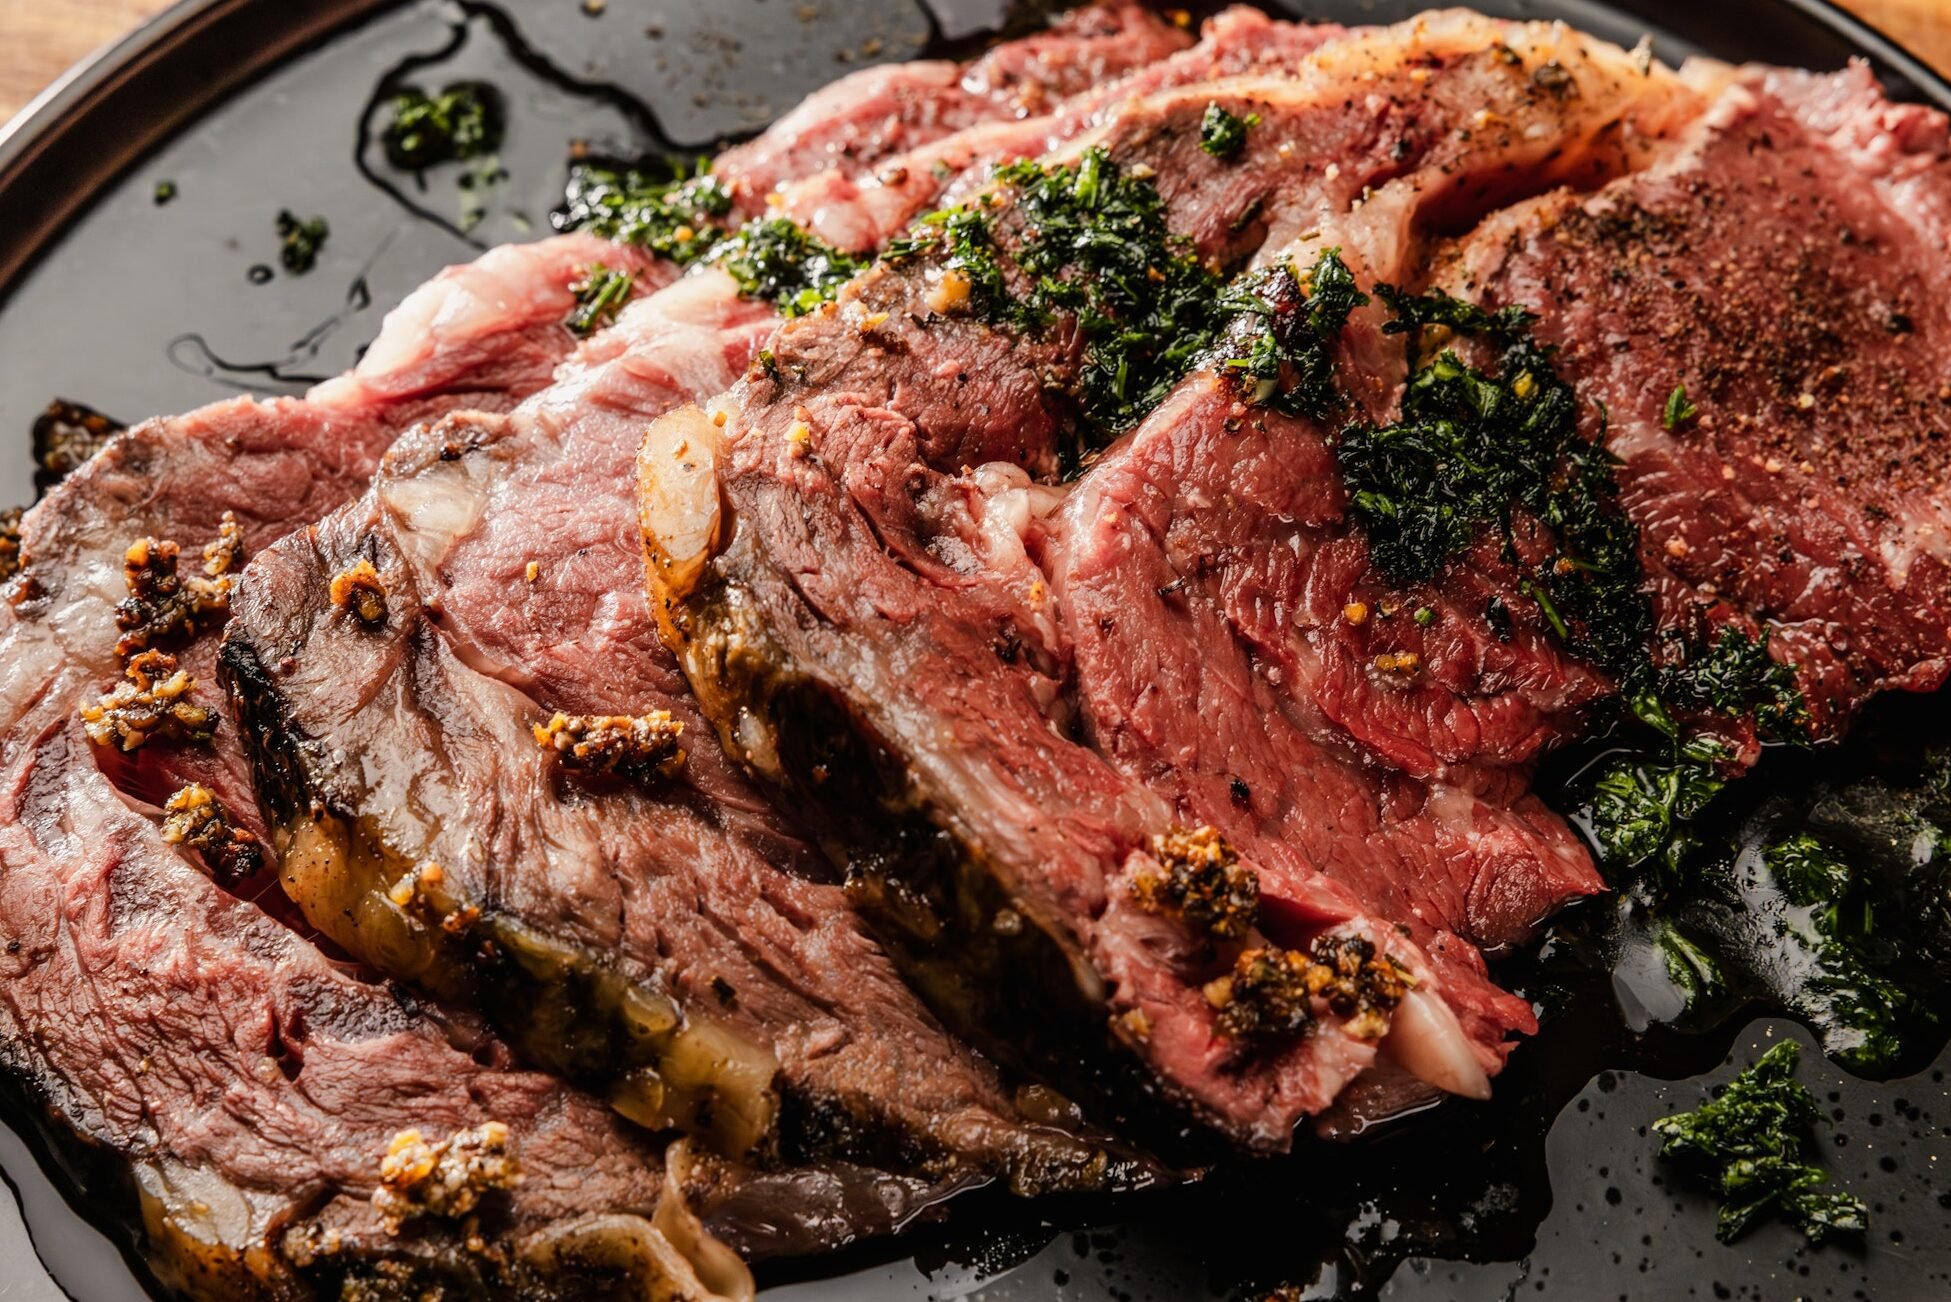
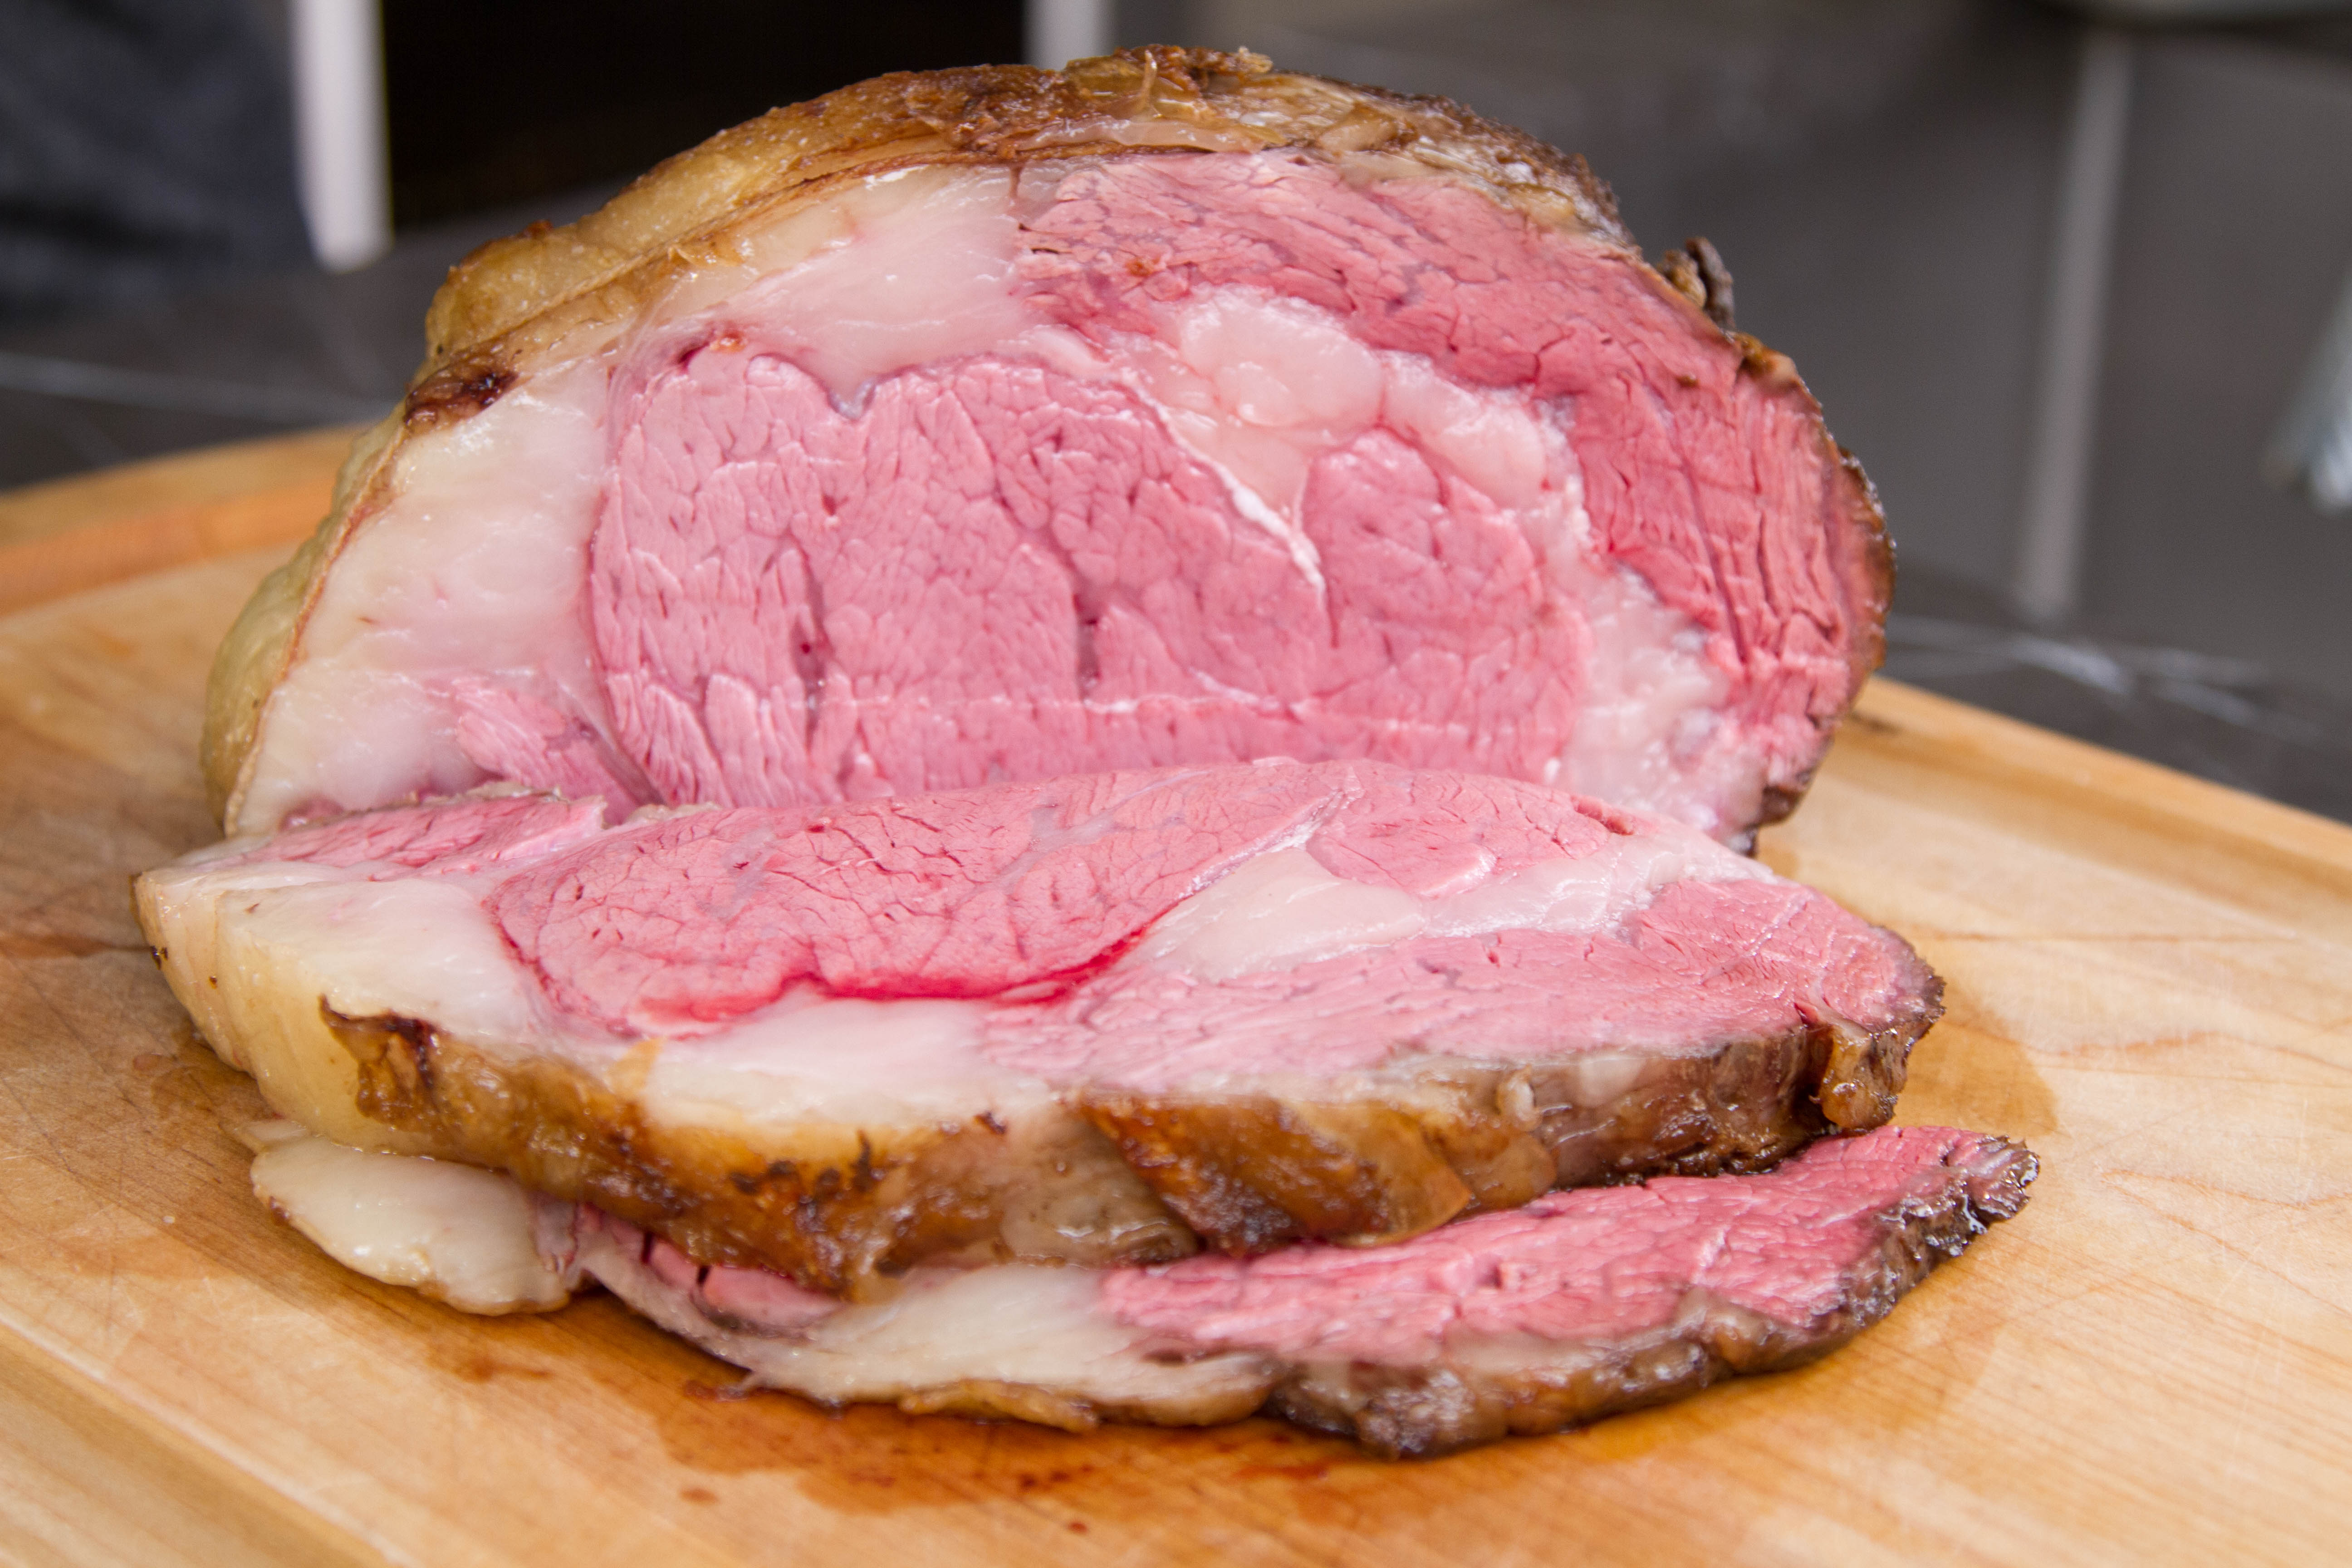
If you’re looking for that spectacular, rich, savory crust outside, combined with edge-to-edge pink doneness on the inside with no unsightly gray band, look no further. You won’t find better advice on the internet. That’s because the secret of a perfectly done Prime Rib that your friends and family will be talking about for years to come is all about temperatures—before, during, and even after you cook. If you get the temperatures right, your Prime Rib will be perfect. If you don’t get the temperatures right, it won’t. And who knows more about temperature than ThermoWorks? No one, that’s who.
Prime Rib Temp for Perfect Doneness: 125°F (52°C)
An internal temperature of 125ºF (52ºC) should be the lowest temperature you see in the roast before pulling from the heat. There will be carryover cooking that will gently carry your rib right up to medium rare without going over. If you prefer Medium doneness, pull the meat at 130°F (54°C).
How To Cook Prime Rib: A Quick Overview
This topic is worth a deep dive, but we’ve pulled together a quick summary of the important information right here at the top for easy reference. We’ll get into each piece in depth, but if you’re in a hurry for the goods, here’s the tl;dr.
(Time: 3-5 hours)
- Selection: Buy the highest grade meat you can afford. Prime grade is best, but Choice grade works great. Plan on half a pound per guest.
- Trim it: Trim any excess gristle or fat. Shoot for no more than 1/4″ fatcap.
- Tie it: An even roast cooks better.
- Season it: Generously apply kosher salt and fresh-ground black pepper to all sides. (Or use your favorite seasoning.)
- Chill your rib: Put your tied prime rib into the freezer until it measures 30°F (-1°C) just below the surface. (More on this below.)
- Sear it: Sear your prime rib in a piping hot skillet (cast iron if you’ve got one) with a surface temp of 400°F (204°C) or more until a dark brown crust forms all around. Don’t neglect the ends!
- Roast it (or smoke it): Place your seared prime rib on a rack on a shallow baking sheet in an oven preheated to 225°F (107°C).
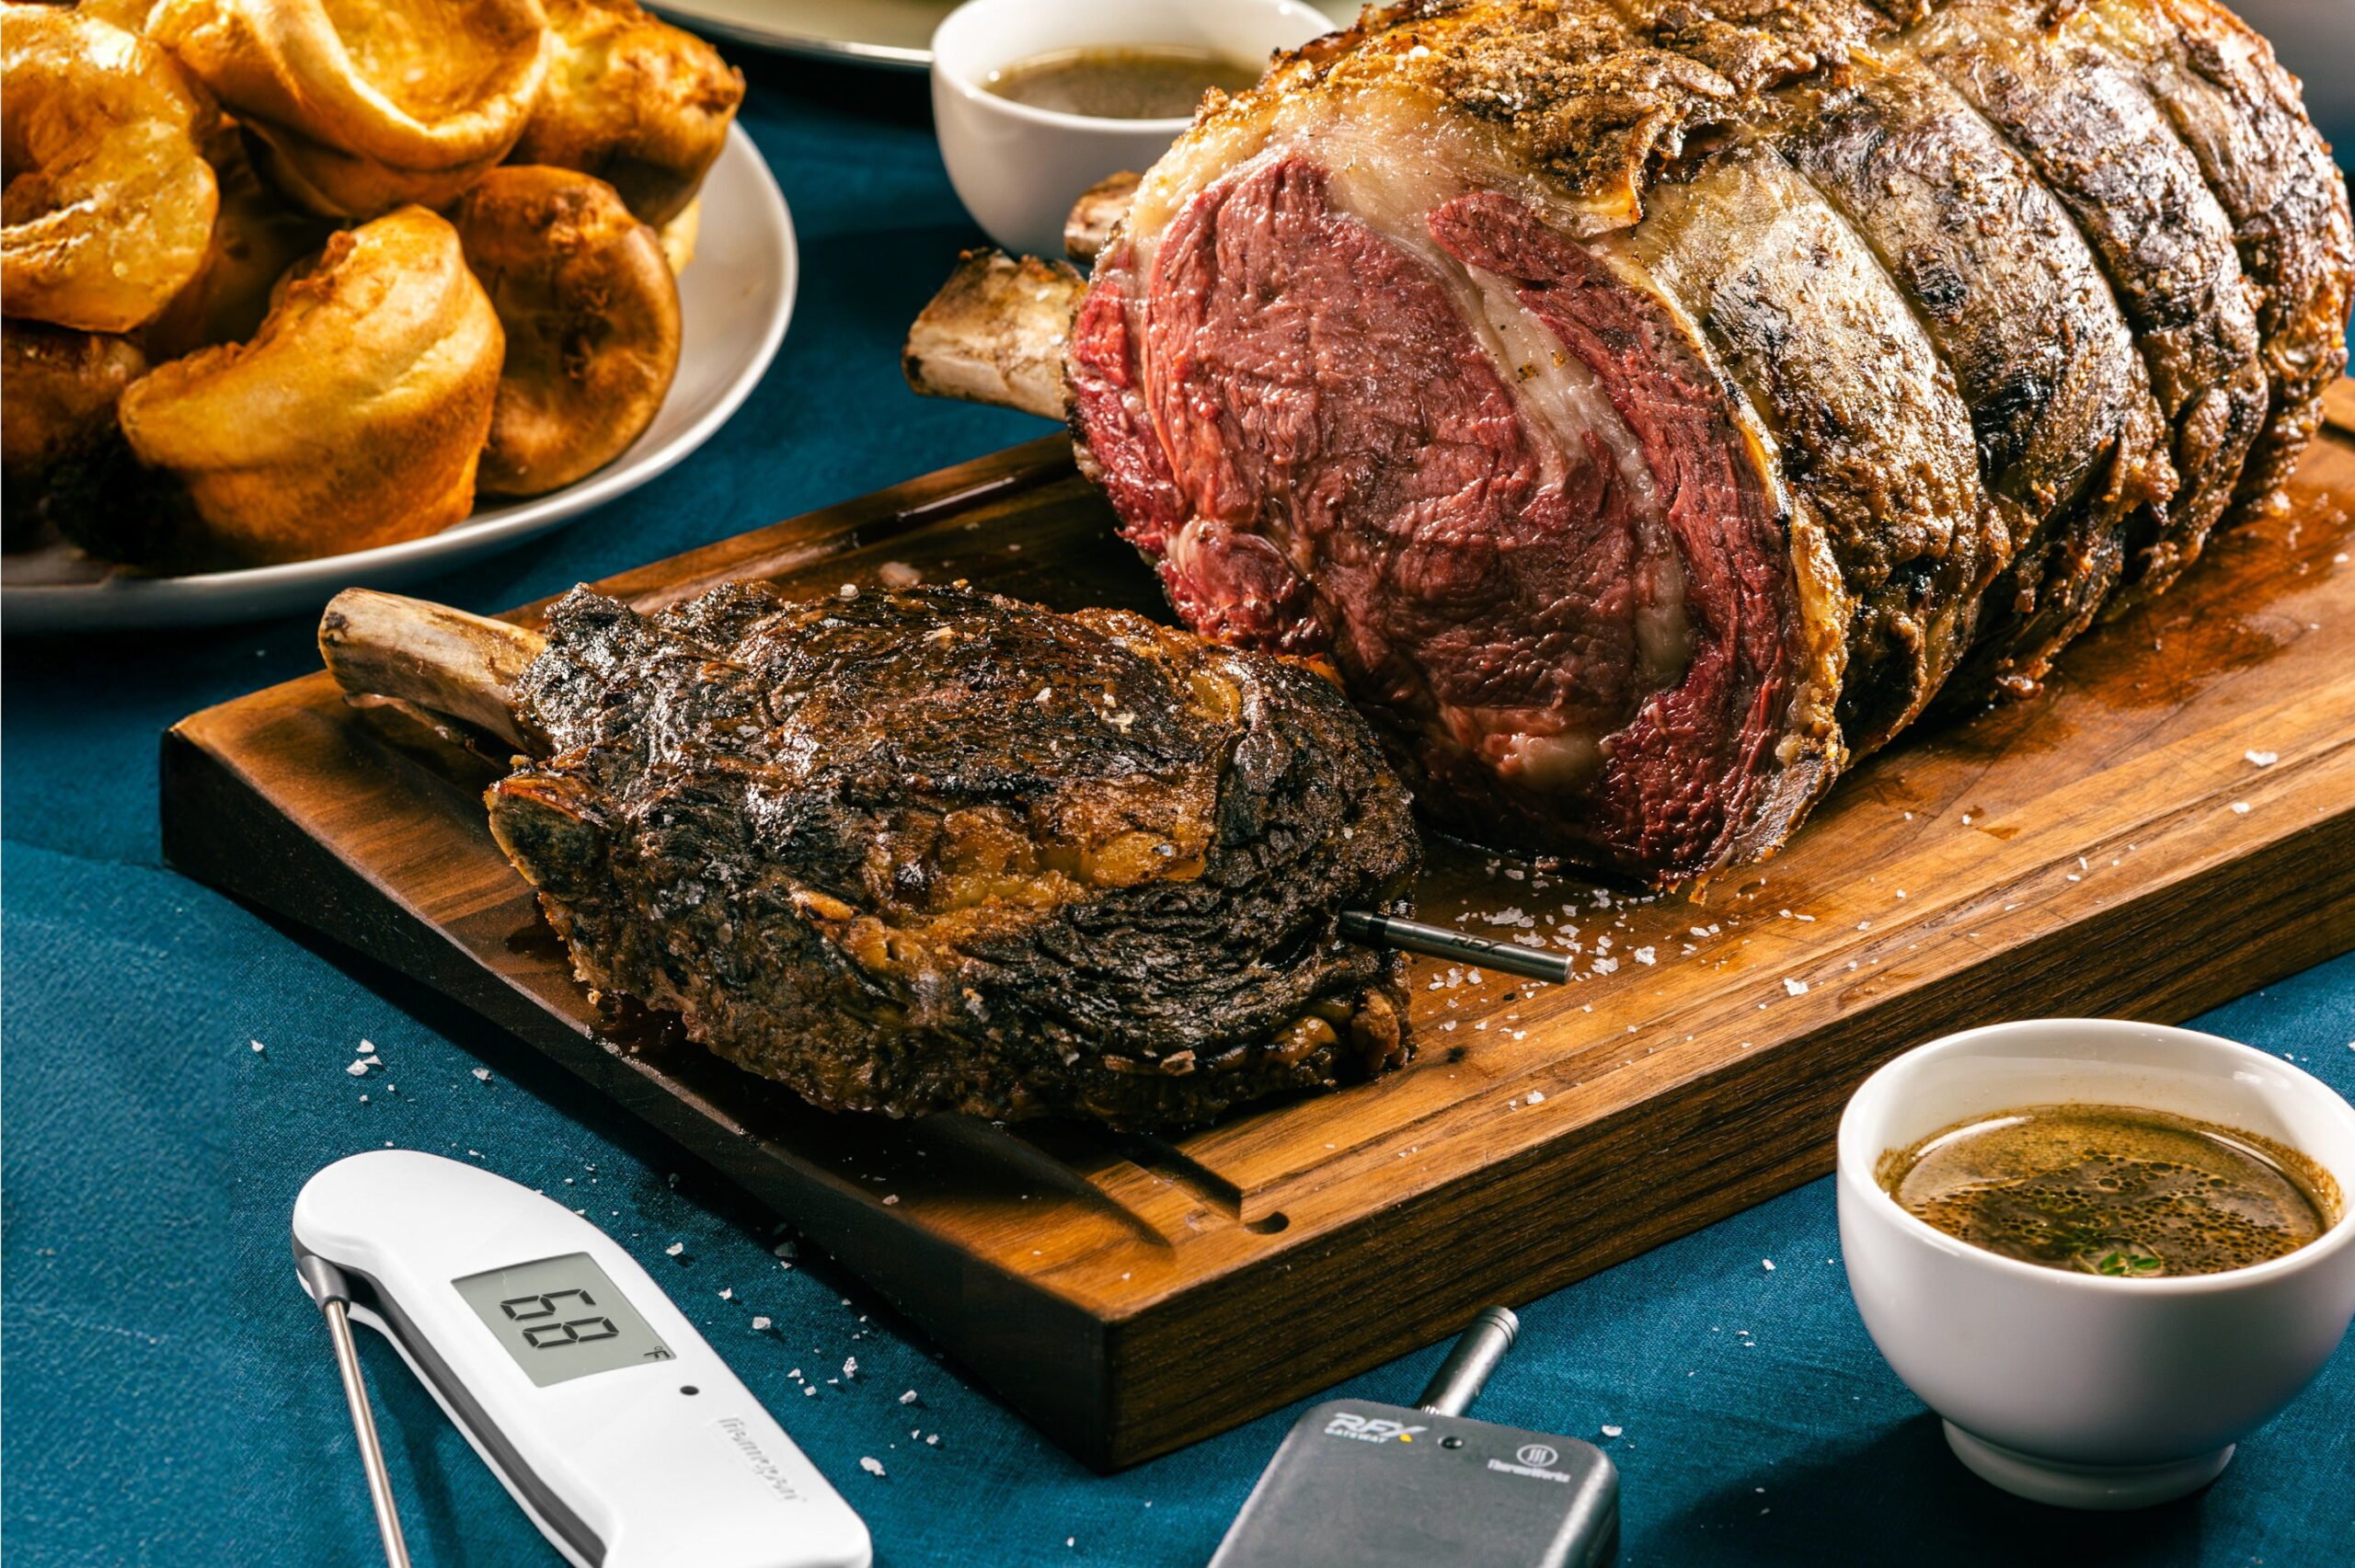
- Verify Doneness: Cook your Prime Rib Roast until the lowest internal temperature you can find with an instant-read thermometer is 125°F (52°C) for Medium Rare or 130°F (54°C) for Medium doneness.
- Rest it: Remove the roast from the oven. Loosely tent with foil and let it rest on the counter for 30 minutes to allow for carryover cooking. It should get to between 130 and 134°F (55-57°C) for Medium Rare or to between 135 and 140°F (58-60°C) for Medium.
- Carve it: Carve to your desired thickness.
- Bask in the praise from your friends and family. If you carefully follow this method, you should have a deep brown, rich, savory crust outside, with perfect, edge-to-edge pinkness inside.
How to Cook Prime Rib: An in-depth look at everything you need to know
How you prepare and cook the meat itself is where all the glory is to be found. It makes no difference whether you like your Prime Rib bone-in, boneless, or with the bone cut off and tied back on. The preparation and attention to temperature are what really matter. So, here’s how to do it.
First, What Even Is Prime Rib?
A prime rib can go by other names—beef rib roast, ribeye roast, or standing rib roast (so called when it is bone-in and can be roasted without the meat touching the pan)—but regardless of what it is called, it comes from the 6th through 12th ribs of a steer, sandwiched between the chuck and the short loin.
It is primarily composed of the longissimus dorsi muscle that runs next to the spine. Because of its location high up on the back of the steer, this muscle is not well used. This lack of use means that this muscle develops to be much more tender than, say, the rear-leg muscles (the Round of beef): it is anatomically predisposed to tenderness.

Tenderness is, of course, only one of the attractive characteristics of this cut of meat. Perhaps the most notable feature of this cut is the deep, rich fat marbling. The “eye” of the rib is encircled by a ring of fat and connective tissue, outside of which lies the “lip” of the roast. Much of the whole roast is covered by a fat cap of varying thickness. It is those seams of fat that deliver rich flavor and a velvety texture, as well as keep the meat from drying out easily.
How to Select the Best Prime Rib Roast
Picking out a rib roast at the store is a big deal. You want the best roast you can get in your price range, but you don’t want to come up short at dinner. So what should you buy and how much of it should you get? Let’s look first at grading and quality.
The USDA’s method of grading beef is solely based on fat marbling. It has nothing to do with how the beef is raised or its flavor. The more thoroughly marbled the beef, the higher the grade. Higher-grade beef will tend to be juicier, more tender, and more flavorful, but it will also cost significantly more. Which is why you want to buy the highest grade you can afford.
You may have heard that Prime Rib refers to a prime-grade rib roast. This is not true—at least, not necessarily. The term “prime rib” predates the USDA meat grading system and is a reference only to the fact that it is the best part of the rib section. In fact, in the USDA Food Standards and Labeling Policy Book, (pg 146), the USDA clearly states that, “PRIME RIB OF BEEF OR STANDING BEEF RIB ROAST FOR PRIME RIB: These products do not have to be derived from USDA prime grade beef” (emphasis in original).
Prime rib can be graded USDA Prime (it will cost you!), but it can also be USDA Choice or USDA Select. Choice is a nice intersection of quality and price, usually.So how much of this delicious, pricey beef do you need? That really depends on you and your guests, but as a general rule, figure about 1/2 pound of pre-cook weight per person on a boneless roast, or one bone per two people on a bone-in roast.
Bone-In or Boneless?
Which one should you buy? The debate has gone on for years, with the pro-bones arguing that the bones contribute more flavor, and, if pressed, insisting that the marrow was seeping in from the bones to the meat. This has been shown by J. Kenji López-Alt , a team at Texas A&M’s Meat Science Department, and Meathead Goldwyn to be untrue. The marrow in the ribs is the wrong kind for “seeping” and the bones themselves are pretty impenetrable—even to the gooey, tasty kind of marrow.
But there is one way in which leaving the bone in can actually have an effect: as a heat buffer. Having a shield of bone and connective tissue on your meat can help to prevent overcooking. But if you like your roast rare to medium-rare, it can actually lead to chewy, undercooked meat right near the bone.
In the end, you’ll have to decide based on your preference. A standing rib roast (which can be as small as two bones or as long as the full seven) is beautiful to behold, but more difficult to carve—you will probably just cut the bones off to serve it anyway. Yes, a bone-in roast will usually be cheaper per pound, but you will be paying for bone weight, which is not directly useful to you.*
On the other hand, boneless prime rib roasts are easy to cook, easy to carve, but cost more per pound. The choice is yours, but in the ThermoWorks kitchen, we most often cook boneless roasts.
Preparing Your Prime Rib Roast
Whether you have a boneless or bone-in roast, you should spend a moment examining your roast with a knife in hand before roasting. Giving it a proper trim will improve the flavor and accelerate the cooking.
How to Trim Your Prime Rib Roast:
- Trim off any gristle and silver skin on the surface. (There is also often silver skin deeper in the fat, but leave that alone.)
- Trim excess fat. A nice fat cap can enhance the mouthfeel of the Prime Rib but you don’t want more than ¼ inch of thickness.
- Whether boneless or not, you have the option to trim off the flat part that extends away from the main muscle, called the “tail.” We always do. This evens out the shape of the roast, which will help it cook more evenly.
* If you choose to get a bone-in roast, we recommend having your butcher prepare it “cut and tied,” with the bones cut off and tied back onto the muscle. This creates an easy carving situation while maintaining presentation and heat-buffering advantages. The bones are fun and tasty to gnaw on after dinner, or you can use them to make a tremendous beef stock.
How to Tie Your Prime Rib Roast:
Prepare your trimmed roast further by tying it with butcher’s twine.
Tying your prime rib creates a more uniform shape and density along its length with three benefits:
- More even cooking, with less chance of a gray ring around the inside edge of your holiday-table centerpiece.
- A more even surface, allowing for better browning in the sear phase.
- A better-looking finished product that is easier to slice.
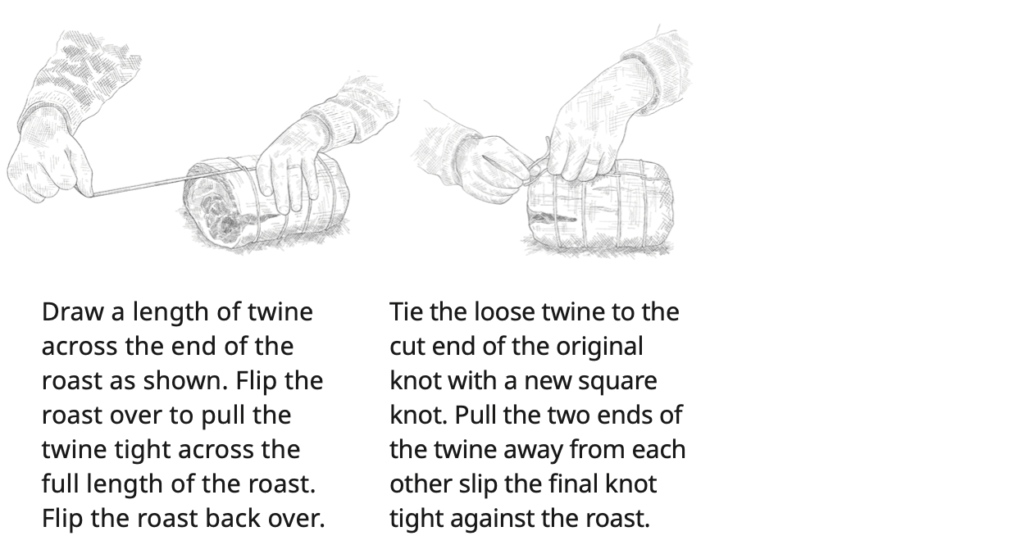
Here are the steps to tying your roast…
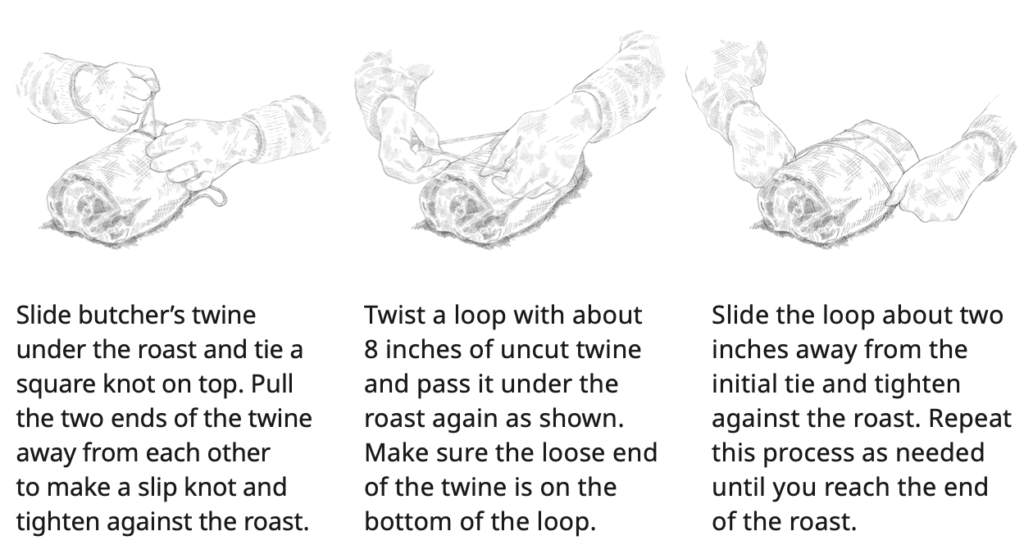
Quick Tip: If you have a bone-in roast, tie between each of the bones and across the length of the roast. If you have a boneless roast, space your string every inch or so. Tie the strings taut to hold the roast as compact as possible.
How to Season Your Prime Rib:
Prime rib doesn’t need a lot to dress it up, and will, in fact, do swimmingly with nothing but salt and pepper. You may be tempted to put all kinds of powerful spice rubs on your rib roast, especially if you are smoking the meat. But this premium cut of beef really shines with the classic flavors of salt and pepper.
- Salt every surface well with Kosher salt. Don’t neglect the sides.
- Allow the salt to penetrate the surface for 5 minutes.
- Then apply freshly ground pepper to all surfaces. Look for about a 2 to 1 ratio, salt to pepper.
On the other hand, if you really want to dress it up and stay within a classic flavor palate, we recommend making a wet-rub of 3 cloves minced garlic, the minced leaves of 2 fresh rosemary sprigs, 1 teaspoon black pepper, 1.5 tablespoons dijon mustard, and 1/4 cup olive oil. Apply that paste after the sear.
Pre-chill Your Prime Rib Roast
There is sadly no agreement on the appropriateness of a counter-rest phase in preparing a prime rib roast. Some say to go right into the oven from the fridge, others say that a 2-hour rest on the counter is essential. All this ambiguity can be perplexing, so we tested it ourselves.
We wanted to determine the effects of various thermal preparations. We roasted 5 boneless prime rib roasts, carefully monitoring the thermal state of each roast through our various stages of preparation, cooking, and resting. For two of the prime ribs, we rested the meat on the counter prior to searing and roasting. For three prime ribs, we placed the meat in the freezer prior to searing and roasting. We were curious to see which of these methods produced the best results. We wanted a crispy outer crust but with no discernible gray ring between the seared crust and the rosy pink meat inside!
We found that the best results came from seasoning the roast, placing it in the freezer until the outside 1/4″ reached 30°F (-1°C), then moving right to the sear. This resulted in an almost undetectable gray ring on the roast.
SO, to properly prepare your Prime Rib Roast for searing without a resulting gray band…
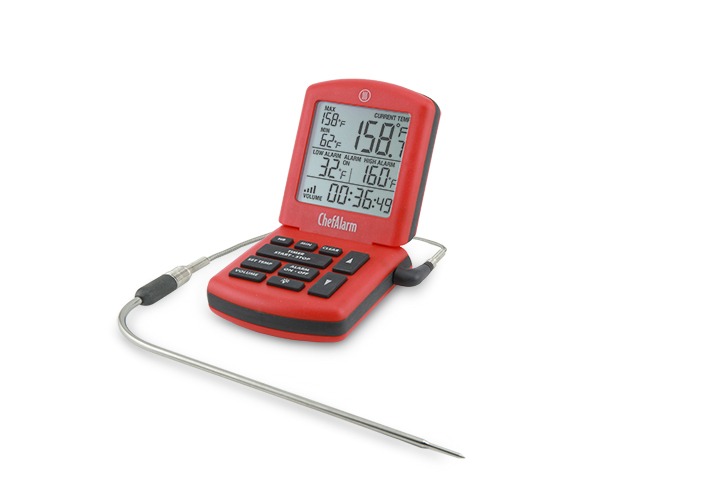
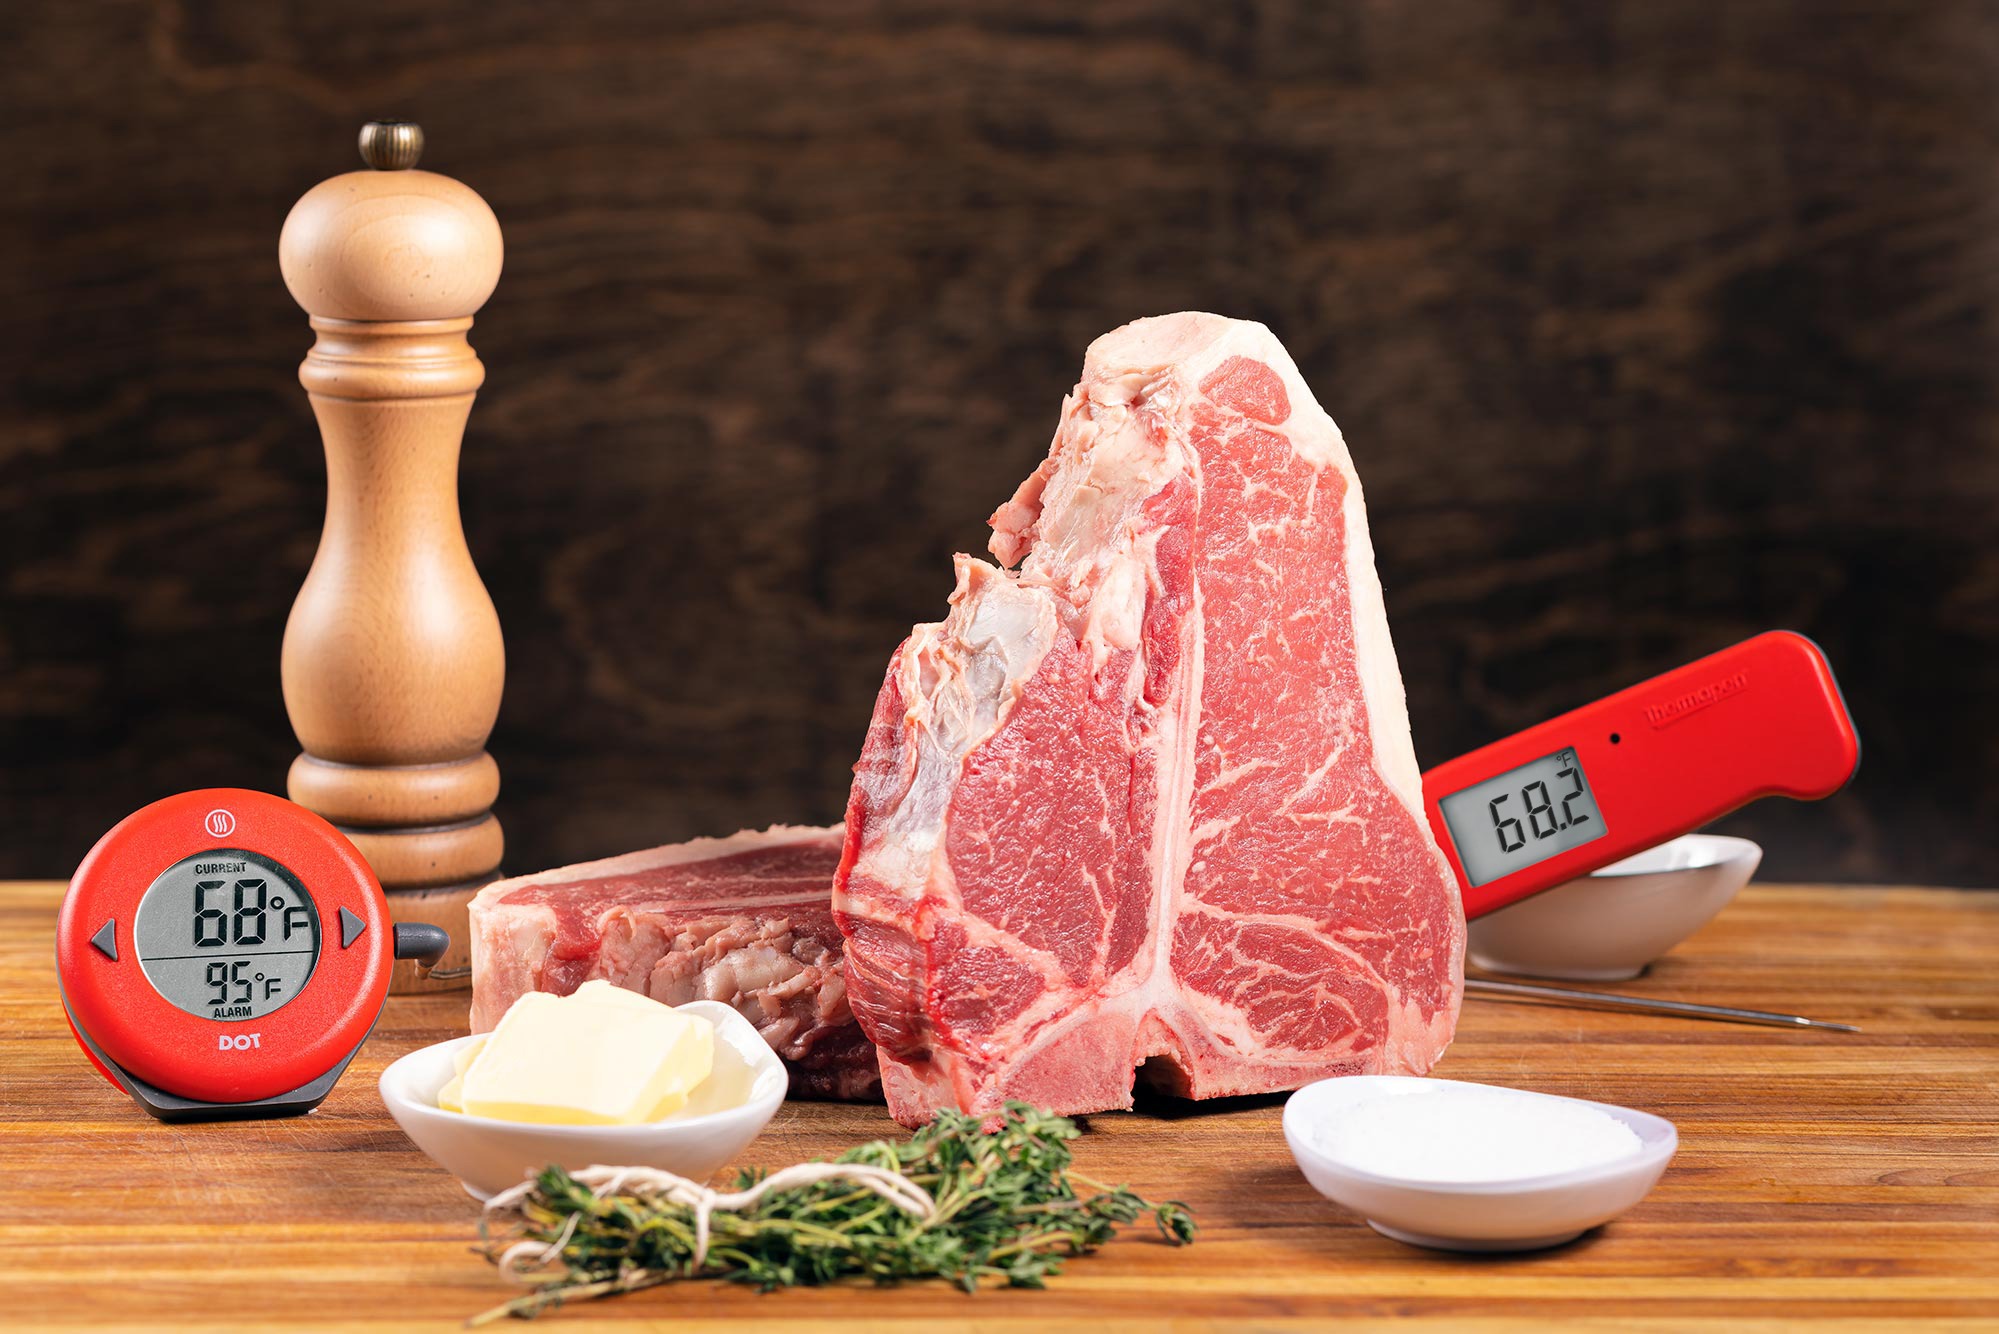
- Insert the probe of an alarm thermometer like ChefAlarm® or RFX MEAT™ into the roast just below the surface.
- Set your LOW alarm to 30°F (-1°C).
- Place the seasoned, probed roast on a tray and put it in your freezer.
- Keep the roast in the freezer until the low alarm sounds. This step should take about an hour.
Sear Your Prime Rib:
Searing is essential for tasty prime rib. For one thing, searing the roast first will kill the surface bacteria, which is a nice touch, especially when you are roasting at lower temperatures. However, searing is important from a culinary standpoint, as well.
The sear gives us a bit of a nice crisp-meat crust, but more importantly, it creates a coating of Maillard-reaction browning all over the roast. This natural flavor enhancement is what makes prime rib delicious.
To sear your roast…
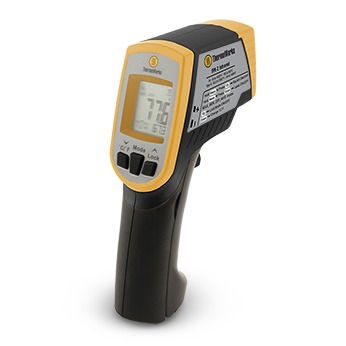
- Preheat your skillet (cast iron is best) to 500°F (260°C) as measured with an infrared thermometer like our Industrial IR with Circle Laser (IRK-2).
- Take your roast out of the freezer and remove the probes.
- Sear the cold roast on all sides, giving each surface about 2 1/2 minutes against the pan, resulting in a “nicely browned” exterior. Don’t neglect the ends.
How to Cook a Perfect Prime Rib Roast:
Preheat your oven or smoker to 225°F (107°C). Directly after searing your Prime Rib roast…
- Place the tip of your alarm thermometer probe as near the physical center of the roast as you can.
- Set the HIGH alarm to 125°F (52°C) on your alarm thermometer, like RFX MEAT™ or ChefAlarm for a perfectly pink Medium-Rare, or 130°F (54°C) for Medium doneness.
- Place the roast on a shallow baking tray to allow the hot air of the oven to circulate around as much of the roast as possible while it cooks. A deep roasting pan prevents hot air from getting to the bottom of the roast, creating uneven cooking.
Because a prime rib Roast is such a large cut of meat, it will experience some real Carryover Cooking (from 5-8°F [2-4°C] depending upon the size of the roast) while it rests. Your serving temperature should end up being around 130-134°F (55-57°C) throughout the roast which is just right!
Note that you really should cook such an expensive roast to Medium Rare to experience all of the beefy goodness you paid for. Normally, those who like a little darker brown on their portion (like the children in the room) can pull from the end slices. If you DO want to cook to medium, however, you can add an additional 5°F (2°C) or even—dare we say it—10°F (6°C) to your pull temp. That means pulling your roast near 130°F (55°C) or 135°F (58°C) and finishing after the rest with a final internal temperature 135-144°F (58-62°C).
Advantages of chilling and slow cooking—enzymatic action
The combination of the freezer pre-chill and low-temp cooking provides us with a thermal advantage that goes beyond “just” perfect edge-to-edge pinkness. It actually makes the roast more tender.
Meat naturally contains enzymes that break proteins down and create a more tender product. 1 Those enzymes are more active at higher temperatures, up to a certain point. Calpains drop off around 105°F (40°C) and cathepsins stop working at about 122°F (50°C). The longer we can hover in a range below these temperatures, but still warm enough to be cooking, the more tender our roast will be. (See Harold McGee’s On Food and Cooking, pg 144.)
When we tested the various methods, we found that our freezer method provided more tenderization time.
- The counter-rested roast spent just 24 minutes within the range of double enzyme activity, and 113 minutes with any activity at all.
- The freezer-rested roast spent 35 minutes in the double-enzyme zone, maintaining a single enzyme action for the entire length of the cook—137 minutes.
With 11 extra minutes of double enzymes and 24 extra minutes of single enzyme action, the freezer-rested roast will have an enzymatic advantage in tenderness over the counter-rested roast. an enzymatic advantage in tenderness over the counter-rested roast.
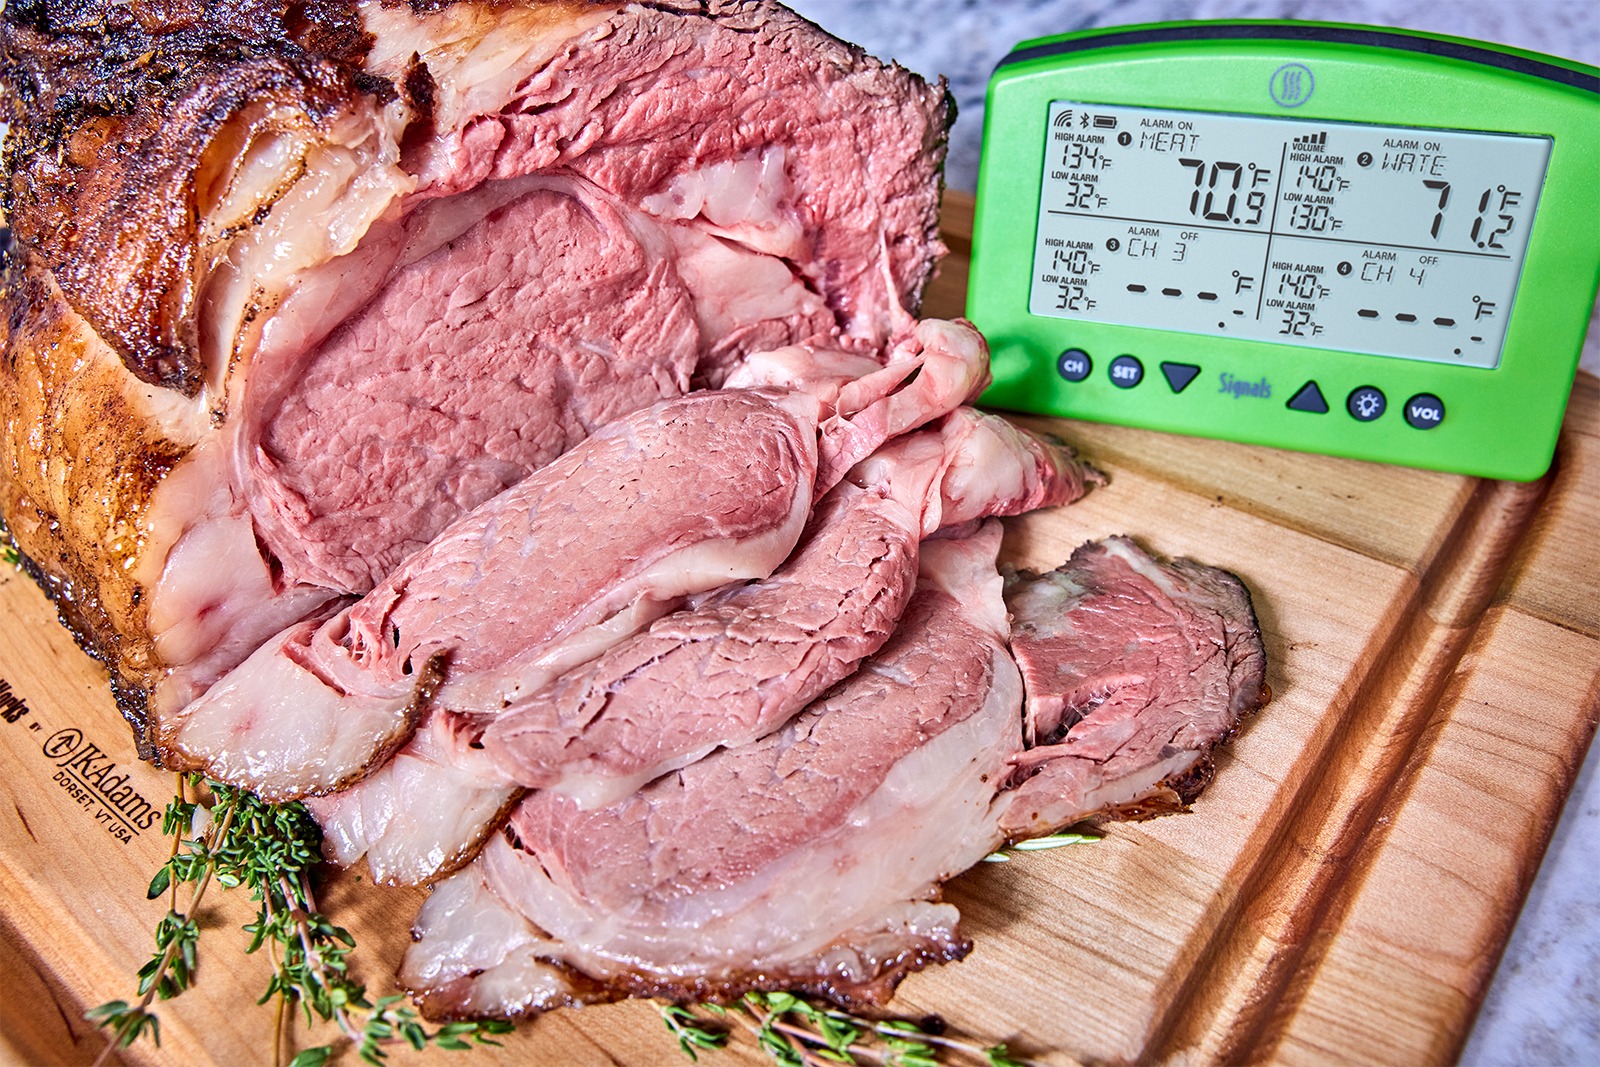
Prime Rib Internal Temp: How to Know When Your Roast is Done Cooking
Using a leave-in probe thermometer like ChefAlarm or RFX™ Wireless Meat Thermometer is important for making sure you don’t accidentally overshoot your target doneness temperature, but a probe that is not placed 100% correctly in the meat will also give you bad info about doneness. If the probe is too close to the surface, you’ll have colder meat deeper in the center. That’s why it’s important to also verify the doneness of the roast with an accurate instant-read thermometer like Thermapen® ONE.
When your ChefAlarm or RFX sounds…
- Insert the probe tip of your instant-read thermometer, like Thermapen ONE, deep into the meat.
- As you pull it up slowly through the roast, look for the lowest temperature you see. Meat is only as done as its least-done part!
- If you find a lower temperature than the one displayed on your leave-in thermometer, move the leave-in probe to the cooler spot and continue cooking. If you don’t find any lower temps, you’re good to move to the resting stage.
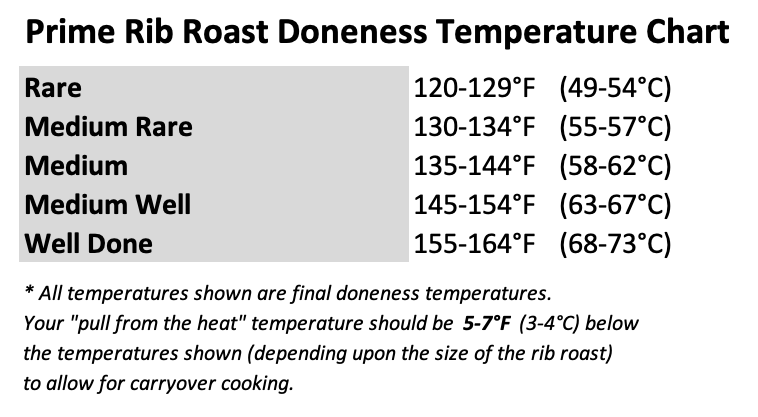
And, just in case you prefer a different doneness temperature, here is a helpful prime rib doneness temperature chart as a downloadable image…
Rest Your Cooked Prime Rib:
Once your roast reaches 125°F (52°C) for Medium Rare, or 130°F (54°C) for Medium, and you verify its temperature with Thermapen ONE, remove it from the oven. Then tent it loosely with aluminum foil to rest. All meats should be rested before cutting and serving them. The rest period allows for temperature gradients in the meat to even out, slowly cooling the exterior while the interior meat continues to rise in temperature.
We did some tests on this and found that during the rest period, our exterior temperature dropped while the interior temperatures continued to rise slightly. Perfect.
How to Carve Your Prime Rib Roast:
How you choose to carve your meat is up to you, but there are two—rather obvious—things that we want to point out…
- Take off all the string you used to tie the roast up! No one wants to find a piece of cotton butcher’s twine caught in their teeth during a delicious dinner.
- Slice perpendicular to the cylinder. Don’t carve down the length of the roast…it will not be good!
Those two basics aside, thin slices or fat slabs are your prerogative. Use a sharp knife and go for it.
Other Considerations:
What About Reverse Searing?
One of the appealing features of a prime rib is the salty, seasoned, beefy outer layer. Many methods include an instruction to reverse sear (sear after cooking) your roast to increase the crispiness. We wanted to keep the flavor and food safety advantages of pre-searing but also wanted to see if a final sear could give us just one little bit of extra enjoyment. So, we cooked another rib roast. For this one, we set our ChefAlarm to 115°F (46.1°C) so that we would be able to move the meat to a hot oven with thermal room to spare. As the roast approached pull temp, we preheated a second oven to 500°F (260°C).
When the alarm sounded, we reset it to 120°F (49°C) and moved the roast to the hot oven. The roast started to sizzle and sing almost immediately. It became steadily more brown and crisp on the outside. When we reached the next alarm point (set lower to account for the increased oven heat that would drive more carryover cooking), we removed the roast, let it rest, cut into it, and were disappointed to find a very noticeable gray ring, up to 1″ thick. In the end, the thicker crust that we got from the final sear was not worth the vast swaths of rosy pink meat that were lost.
We recommend a low, slow cook preceded by a good sear. Whatever crust you may get from the final sear is just not worth the risk to the rest of this exquisite cut of meat. And with the freezer method, you can get a harder sear without worrying about a gray ring from the beginning.
How to Cook the Perfect Prime Rib Roast: Recipe
Ingredients
- 1 prime rib size determined by need
- Kosher salt
- Freshly ground black pepper
Instructions
- Trim your rib how you like it best.
- Generously salt the roast, insert a thermometer probe, like a Pro-Series® Probe connected to ChefAlarm or an RFX MEAT Wireless Thermometer near the edge of the roast, set the low-temp alarm for 30°F (-1°C) and place the roast in the freezer.
- Meanwhile, preheat your oven to 225°F (107°C).
- When the low-temp alarm sounds, remove your roast from the freezer.
- Heat a heavy skillet (cast iron is preferred here) over high heat.
- Sear the roast well on all sides in the skillet.
- Season with pepper and/or any other seasonings you like.
- Place the roast on a rack set into a rimmed baking sheet. Insert a probe into the very center and set the high-temp alarm for 125°F (52°C).
- Cook the roast in the oven until the high-temp alarm sounds. Verify that there are no lower temperatures in the meat with your Thermapen ONE.
- Remove the meat from your oven and let it rest for 30 minutes, lightly tented with foil.
- Carve and serve!
Shop now for products used in this post:

References
Harold McGee, On Food and Cooking
Meathead Goldwyn, AmazingRibs.com
J. Kenji López-Alt, SeriousEats.com, The Food Lab
That’s what happens in the aging process.↩
Excellent article. I’ve never cooked Prime Rib before. I will now.
Bob,
Thank you for the compliment, and I hope it goes well when you try doing a rib! Let us know how it turns out!
My nephew told me about the “X method” of cooking bone-in prime rib. You can Google it. The results are absolutely perfect every single time and it couldn’t be any easier to do. No searing first….
Dave,
I just looked it up and while it looks like it could absolutely work, it doesn’t take many factors into account (starting temp of the roast, for instance), and because it’s based on time rather than temperature, it is by default a for of “flying blind.” If I were to try that method, I would be sure to use one—if not two—leave-in probes to keep an real eye on what’s actually going on. Thanks for reading!
Thank you for the detailed information on the different methods. A question: In another of your articles on prime rib, the cooking temperature was listed as 225F. Just curious, have you noted any significant differences in the final results in avoiding the gray band and overall taste/texture with a slightly higher or lower cooking temp?
Interesting and enjoyable comments as to the many methods people have used to prepare a prime rib with fantastic results. For larger groups, rather than buying one larger roast ( 10+ lbs), I’ve cooked two, smaller ones – love the end pieces so twice the joy! I’ve used an overnight refrigerated seasoning method ( inserted slivers of garlic around the meat and a light rosemary/salt/pepper) rub and the countertop warm up before cooking but will try sear and the lower temp approach this year.
Getting up the nerve to try my hand at smoking a $100+ roast using the tools I have from Thermoworks. Happy Holidays!
Greg,
Thanks for your comments! We have listed 200°F as the cooking temperature before, and now 225°F. Keeping it in the “low and slow” realm is the important thing to do. If you have it already, it would be a good idea to temp your oven with an air probe, you may find that it is up to 25°F off already!
By the way, buying 2 smaller roasts is a great way to handle larger crowds! Yes, you get double end pieces (also my favorite), but smaller roasts are much easier to sear.
Again, thanks for reading and get in touch if you have questions about daring the smoker!
Good luck!
Thanks for the good point on the empty oven temp check. Ours is a newer gas fired oven and uses convection method for roasting – but certainly not a professional model/brand. I have Dot and Smoke to help me do the oven check and an MK4 to boot for the roast.
excellent, but one important modification was not addressed, which interested me.
using indoor oven stove indoors.
bbq with propane,
bbq with natural gas
bbq with charcoal
bbq with charcoal wood chips-(cherry, etc.). direct heat
bbq with charcoal wood chips-(cherry, etc.), indirect heat
bbq with charcoal wood chips-(cherry, etc.), indirect heat with water pan..
i have bbq prime rib with charcoal, wood chips-(cherry chips). indirect heat with water pan, using thermoworks temperature equipment which i must say is a must and it had a delightful flavor but i am sure you will offer more promising techniques in cooking prime rib improving the natural flavor..
.
Res,
The thermal principles involved in each of the cooking methods you mention are the same. A mastery of any of the techniques will allow you to create a proper thermal environment for the low-slow cooking of a prime rib. You may be interested in out piece on smoking prime rib!
“When the alarm sounded, we reset it to 120°F (49°C) and moved the roast to the hot oven. The roast started to sizzle and sing almost immediately. It became steadily more brown and crisp on the outside. When we reached the nest alarm point (set lower to account for the increased oven heat that would drive more carryover cooking), we removed the roast, let it rest, cut into it, and were disappointed to find a very noticeable gray ring, up to 1″ thick”
1. What is meant by the phrase “the nest alarm point” – not used elsewhere in your article.
2. You fail to mention how long the roast was under the broiler. Perhaps a shorter time would yield acceptable crust and less thermal pressure in the spinalis dorsi?
Of note, Serious Eat’s J. Kenji Lopez Alt, has videos testing and recommending “reverse-searing” methods.
There also recommendations of doing both pre and post sears.
Finally, searing methods may also lead to different results. I’ve seen using chimney starters, Searzall device on propane torches etc.
Rick,
Thank you for reading and for your comment. “Nest alarm point” should have been “next alarm point,” (i.e. the nest time the alarm sounds) an edit I have made in the post. Thak you for catching that and I apologize for the confusion!
You are correct that a shorter time may have yielded better results. In answering the many comments on this post, I have come to see some mistakes I may have made, including moving the roast from cooking directly to oven searing. A cool-down period may have saved it by, as you say, reducing the thermal pressure.
Thanks again and happy cooking!
I prefer the “reverse” method: Essentially low-and-slow to desired temp. Remove roast and crank the heat to 500+(F) and return roast for 5-12 minutes to get the correct outer crust.
http://www.seriouseats.com/2015/12/step-by-step-food-lab-reverse-sear-prime-rib.html
-Ron, did somebody say Yorkshire pudding?
Ron,
Yes please on the Yorkshire! The reverse oven sear I think can certainly work, if done correctly. Our error was perhaps having a second oven ready to go and moving the meat right into it. Removing the meat from the oven and waiting for the oven to come up to temp will give the roast a chance to cool, and moving it further from the gray-ring danger zone. Happy cooking!
Yes, the rest period before the sear is a critical step in the reverse sear method, typically 30-90 minutes for the rest. Then into a 500 degree oven for 10 minutes for the sear. After the sear, no rest is required.
Nice write up. Two comments really. First, wish you had made and hammered home the point that cook time for PR is determined by chamber temp, starting temp AND thickness of the loin, not the weight. Lots of people mistakenly believe that since a 4 bone 8lb PR might take 4 hrs to cook, that a 7 bone 16lb PR would take twice as long.
Second, if you happen to have another loin laying around, try repeating the reverse sear method, but this time, let the loin rest for 30 mins after the initial cook, then blast it at 500 to sear.
Dave,
Great comments! You are right about the time factor, and I should have hit that harder. I think I did address it rather well in a comment here responding to Don.
And you are probably right about the reverse sear: a counter rest allowing the meat to cool so that the sear has to re-energize the meat is a great solution. We’ll have to give it a try.
Happy cooking!
This is exceptionally well done, with the obvious product mentions in place, but I love the science behind it. It doesn’t seem that many companies share the same infatuation as their customers for what their products are used for. Bravo, and I look forward to more.
– John
John,
Thank you so much and thank you for reading!
Great read! I’ve been a follower of Thermoworks, Meathead, J. Kenji López-Alt for awhile now with outstanding results! I have a tool belt that includes Thermapen Mk4, Smoke and other Thermoworks products too numerous to list. I’ve tried high heat roasting with great results in the past. However last year I did Prime Rib at 200 with outstanding results. You’re correct in that the gray band practically vanished as if it were done via Sous Vide. This year I’m doing a 4-bone Dry aged from Flannery Beef. I’ve got a Searzall as part of my tool kit and I think that I’ll use that for a pre sear instead of the cast iron. BTW you guys rock!! I’ve given away Thermapen’s like they were candy, no complaints whatever and you guys do stand behind your products. Hats off ???? to Thermoworks !!!
Dr. Howard,
Thank you for your comments! We are happy to be a part of your toolkit and your kitchen. Happy cooking!
Great information, thank you.
This is a very interesting article. Using the freezer sit method how many minutes per pound did you roast the meat and how much kosher salt do you use? Thanks!
Don,
I didn’t do any time calculations of minutes per pound, I only based the cooking on temperatures. There is a good geometrical reason for this: A rib roast can be idealized as a cylindrical shape, and heat will be entering the cylinder from all sides, but will be approaching the center of the cylinder from the circumference far more than the end faces. As we increase the size of the cylinder, we decrease the heat effect of the cylinder faces on the center until that effect becomes negligible.
So it is with a roast. A bigger (longer) roast (let’s say…8 pounds) of the same diameter as a shorter roast (maybe 5 pounds) will take heat to the center from the circumference of the roast more than the edges, but not significantly more so than the smaller roast, especially at these lower temperatures. A three-pound difference will not result in the same kind of cook-time differential in a rib roast as it would in, say, a chicken, the geometry of which significantly changes the surface exposure to heat. This is why w probe thermometer with an alarm is such a good idea for a roast like this.
All that being said, I used enough kosher salt to give the whole thing a nice coat A few tablespoons for a large roast should do. I usually just keep adding it until it looks “nice and salty.”
Thanks for your comment!
Recommended time spent in the freezer? Or, is it best to go by temperature, making sure area just under the surface is sub 32 degrees?
Dustin,
Time is relative, as always. It is best to go with temperature. 32°F doesn’t actually freeze meat, so go a little lower. We cooled ours to 29.5°F, which was cold enough to really solidify the fat and start to freeze the meat itself. Use a probe thermometer about 1/4″ below the surface in a part of the meat that isn’t as covered with fat cap. Our roasts spent about an hour to an hour and a half in the freezer, but that will vary based on freezer temp and initial beef temp. Good luck with yours!
Love the science of this article, and the fact that you incorporated all of the Thermoworks products to demonstrate this! I have a sous vide, and have been wanting to try a prime rib cooked in a water bath. I am curious, though, if I cook it at 130 then do a reverse sear if the “ring” would be too big and enough heat would be applied to continue to cook the inside. Should I cook to 128 and then sear?
Just wondering what feedback, if any, you have for sous vide. THX
Michael,
First, thanks for your comment and thanks for reading! The sous vide prime rib is actually a problem we have been considering in our demo kitchen, and you’ve hit right on some of the issues we’ve thought about. Here are my thoughts thus far on it:
First, a roast as big as a prime rib is going to take a LONG time to come up to temp in a sous vide bath, and that much time could lead to bacterial problems. Bacteria on the surface will eventually work their way down through the seams of the fat and meat in this marbled cut, and so first need to be destroyed. A quick blanch in boiling water before the actual cook would do that, and has been recommended by some for this purpose. But a pre-sear will also kill the surface bacteria and will give your meat a tasty Maillard marinade while it cooks. Your choice.
Next, there is the question of “pull temp.” With sous vide cooking, there will be NO carryover cooking. You set the temp of the whole piece of meat and you let it go until even the very center is at that temp. Because there will be no heat differential, there will be no carryover. This is excellent news for avoiding gray ring, because as long as you set it below the 140°F where meat starts to turn gray (like, for instance, 130°F for an excellent medium rare) you don’t have to worry about any gray in the meat from the cooking.
And that brings us to the final question of the sear. We found that the meat 1/4″ below the surface increased in temperature by about 25°F during a skillet sear. If you’ve cooked your meat to 130°F, you are risking a little gray in there, though as you saw from our data, we hit 150°F and had little to no ring. If you want an insurance buffer, let the roast cool outside of the sous vide bath for 20 minutes or so, and then sear it in a hot pan. The temperature reduction in the exterior of the roast will act as a buffer for the heat of searing.
If you decide to try it, we’d love to hear about it!
I have always seasoned meats before searing. You recommend the opposite. Does the sequence differ greatly and why sear first? Thank you, great article- I’m trying your tenderloin article for Christmas and standing rib for New Years!
Ron,
I prefer to season with the herbs after searing because I find they often just stick to the pan and not to the meat when I sear. I also like the fresh-herb flavor of adding the herbs afterward. If you are using a Montreal seasoning or just S&P, there’s no reason to wait until after the sear, as those flavors will actually wake up nicely in the sear, and the dry spices are more likely to adhere to the meat during the sear.
I’m glad you are giving these a try! let us know how they turn out!
Thanks, excellent article ! I will give it a shot for Christmas with a massive 14lb boneless roast. I will cut it in half for easier searing.
I have 1 question, and also have summarized your process below for a “quick reference” if anyone wants them.
Question: What did you decide on salting? I assume salting it 24 hours in advance is the way to go?
Summary:
Roast Selection:
o Prime is better than Choice, but more expensive.
o 1/2 lb per person if boneless, or one bone for two people if bone-in.
o Boneless vs. bone-in is a toss-up, but they usually do boneless.
o For long roasts, may want to cut in half – easier to sear, and 4 crusty ends (delicious) vs. 2.
Cooking Instructions (for 3 lb boneless roast):
1) tie the roast up, even if boneless. If bone-in, cut the bones off but tie them back onto the muscle.
2) Salt liberally (should look “salty”, several tablespoons for a large roast)
3) Bring to fridge temperature throughout – 38F
4) Partially freeze, until outer edge reaches 29.5F – took them about 1.5 – 2 hours for 3lb roasts.
5) Sear in cast iron. Preheat cast iron to 500F. Sear 2.5 minutes per side (perhaps different for long cylindrical prime roast).
6) Add seasoning (optional) AFTER the sear so it does not stick to the pan. “Salt and pepper is all you need. Or make wet rub of 3 cloves minced garlic, the minced leaves of 2 fresh rosemary sprigs, 1 teaspoon black pepper, 1.5 tablespoons dijon mustard, and 1/4 cup olive oil. Apply it after your sear and you will be hailed as a luminary of the kitchen.”
7) Cook at 225. Use an air probe to confirm oven temp if you have one.
8) Pull at 125F (maybe lower for larger roast). We are shooting for final temp of 130F after resting. Exterior temp when pulled will likely be around 150, just where meat starts to turn gray (140F).
9) Cover with foil and rest 30 minutes.
Randy,
Looks like a good summary! Salting overnight is probably just fine, a full 24 hours won’t hurt a thing. Enjoy and let us know how it goes!
Quite a while ago, Thermoworks had an article about the perfect prime rib with graphs explaining the temperature zones of different enzyme activity etc. Is there a link available to that article?
That information WAS in this post, but got taken out in an update. I’ll see about putting it back in in an upcoming edit—the post is due for a refresh soon anyhow.
As between the freezer first or no freezer first, was the taste test a “blind” taste test. It seems like you might have been sufficiently influenced by the size of the gray ring and extra effort spent to find a difference that may not be noticeable. And, whether or not noticeable around the edge, has there been a blind taste test for the meat in the center? Thanks for the fun analysis.
Art,
Yes, we did do blind tests on the center meat. The meat from each was delicious, but not all that different. As long as the cuts are of equal quality, and the centers are cooked to equal temps, the centers will be pretty similar. The edges are where a roast that is properly done starts to differentiate itself. Thanks for reading!
This was a very interesting article, I especially liked the information about enzymes & what temps to keep in mind for that range to have that extra bit of help from them. I’ve made a roast with reverse sear twice before but time between makes me feel like a newbie everytime so I like to review info. I’m definitely trying the sear in pan first. Thank you!
Lourdes,
I’m glad you liked this info. I think everyone feels like a newbie every time they cook this cut, because most people only cook about once a year, so you are not alone! I hope our post helps you with your next cook. Happy cooking!
Our rib roast was amazing because of your directions and insight. I made my first standing rib roast (3 ribs) New Year’s Day after much studying of your cooking method. I was always fearful of ruining such a fine and expensive roast. Thanks to your meticulous instructions, it turned out perfectly. I am getting way more credit than I deserve because it really belongs to you and Thermoworks Signals and Thermapen One.
Thank you for your gift of knowledge and detail. I will be working my way through more blog recipes because of this success.
Martin, thank you so much for this recipe. I used it yesterday (Christmas Day) to smoke a Porter Road Prime Rib roast. I prepped the roast the day before by dry brining it and removing the bones. I then followed your instructions on the day of the cook, just modifying them slightly by searing the meat on the grill and smoking the roast at 225 degrees in my Weber Slow-N-Sear setup. The roast came out perfect! It had a very dark exterior, but inside it was pink from edge to edge. And the taste was out of this world. Nicely smoked and with a wonderful beef flavor. The extra prep (chilling the meat to 30 degrees) was worth it. This will be my go-to method for roasts like this from now on.
I forgot to mention (oops) that all temperature monitoring in my smoker was done with a Thermoworks Smoke.
Fantastic!
Question – do you need to oil the cast skillet before the sear? We use a LeCreust braiser.
If you put the fat cap down to sear first, it should oil the pan enough for you. If you don’t a little high-heat oil like corn oil of leftover beef fat is a good idea.
Re the reverse sear, it seems knowledge is constantly evolving. My understanding of the most up to date method of reverse sear is to cook at 225, then pull the prime rib roast at 110 internal temp, then rest it on a kitchen counter, open air without a foil tent, for a long period, such as 45 minutes to an hour. The surface will cool dramatically, even as the IT increases. Then put it in the oven at 500 F for ten minutes. Then pull it out and rest it another 15 mins. Slice it. This will result in edge to edge pinkness without the grey.
Serve on pre-heated dinner plates! Nobody ever talks about the temp of the dinner plates!
Another comment I wanted to make is about the spinalis. A pink spinalis is lovely, but I think most of us know the spinalis actually tastes better if it’s cooked hotter that what is done with a conventional prime rib. A spinalis cooked to 145 is wonderful. It has so much marbled fat in it, that in my opinion, the texture and flavor is markedly better at 145. I think that’s one reason why ribeye steaks are so wonderful cooked to 135 but with the flames lapping at the edge of the fatty spinalis during the cook. And it’s ironic that, if there is gray in a slice of prime rib, it often seems to be in the spinalis! And while it may appear to be disappointing, I think it’s actually a bonus! But very few people know it! So that’s the dilemma.
Thank you
This was my first time cooking a Prime Rib Roast for Christmas 2023. The instructions were perfect and I was able to produce a picture perfect dinner by following the instructions and using my ChefAlarm and Thermapen One. Great job Thermoworks!
Excellent!
Should there be leftovers how do you suggest warming them?
Sous vide is the very best way. You can fake that with a zip-top bag and a pot of almost simmering water.
Martin. Thank you. I’d like to add to this knowledge base 12/27/23. We had a 10 lbs. USDA prime boneless rib roast. It was trimmed and tied to your specs. How do you sear the beast?
We thought of a gas grill or our Wolf oven. Right or wrong we cut it in half. We had two DOT thermometers and 1/2 chunks would sear/fit in a pan. Pan sear it was.
The two half’s were close but not identical. The beast had a slight taper. By using two thermometers we found one took 20 minutes longer. We had 4 end pieces as well. Some think this rocks.
I only shared this to add clean new data. It turned out beyond belief. If this data inspires you sir to expound on searing on a gas grill or in the oven great.
Concluding: if you have a huge roast that is tapered one part will cook faster. A great way to prime rib heaven is cut it in half and cook on the same pan using a thermometer for each. Pull when each hits 125.
Fantastic work, thanks for the comment! I’d have done it exactly the same way.
I am astonished. After trying to cook prime rib according the the Big Green Egg method, I decided the ThermoWorks recipe seemed the most logical. And it was! I cooked a beautiful prime rib on the first try using ThermoWorks recipe. It will take weeks for my cooking hubris to dissipate!
Hi! I used this method last year (2024] and it was excellent. The one thing is, I know time is trumped by temperature but a person sort of needs some approximation of time so that you’re not eating at 2pm or 11 at night. I have a feeling it took a couple of hours cook time roughly for a 4 pound roast? Does that sound like a ballpark?
Yes, a couple hours for a 4-pounder sounds about right.
1/2 lb per guest? On a diet? You can always use left overs. If you run out – you are out.