Foolproof Crème Brûlée
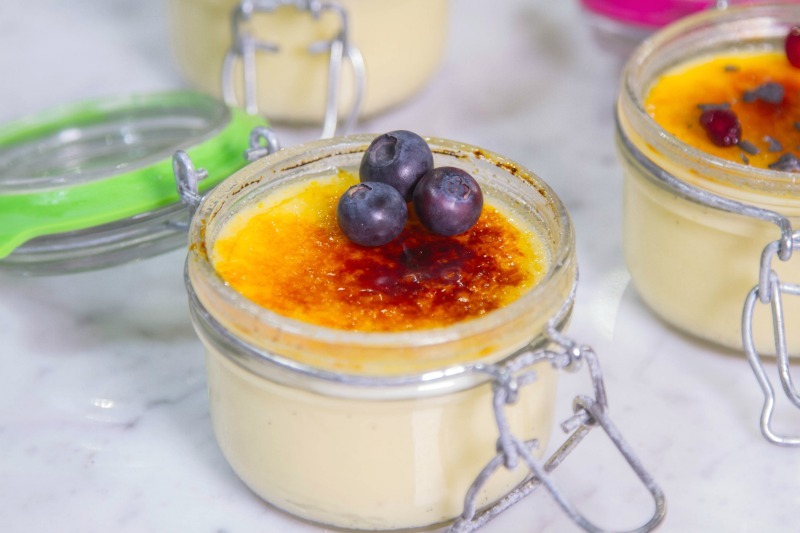
Crème brûlée is not only elegant but nearly as simple as a dessert can be. And the secret to getting it right is to gently cook it to the right temperature, and not a degree higher. Sous vide cooking makes this delicate custard foolproof, and we have all the thermal tips you need.
Custard Temperatures
The protein in eggs begins to firm up in the temperature range of 140–150°F (60–66°C). But egg mixtures—custards—set around 160–180°F (71–82°C). The more diluted the egg mixture, the higher the doneness temperature will be. The target doneness temperature for crème brûlée is 176°F (80°C).
Cooking Temperature Determines the Final Texture of Custards
Custards like crème brûlée, cheesecake, and pumpkin pie are sensitive to high temperatures. The cooking temperature is what determines the final texture.
In our post, How to Bake the Perfect Cheesecake, we explored two different baking methods. One with a high starting temperature and low finishing temperature. Another one baked in a water bath at a low temperature. Even though the filling was exactly the same, the textures were dramatically different. That’s because egg protein cooked at high temperatures becomes firm very quickly. But when egg protein is cooked slowly and gently at lower temperatures its texture is smooth and creamy.
Cook it Gently
Crème brûlée is a very soft-set custard and needs to be cooked gently to get its delicate texture just right. The traditional method of cooking creme brulee is to bake it in a low-temperature oven in a water bath for even heating (see our post, Thermal Secrets for Crème Brûlée). Even with this gentle method, it’s still possible to over bake the custards, resulting in curdled texture. When it comes to crème brûlée, accuracy and precision with temperature control matter.
Sous Vide Cooking: Precise Temperature Control
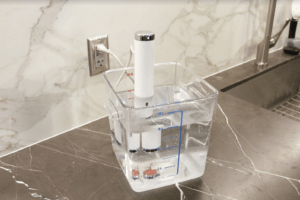
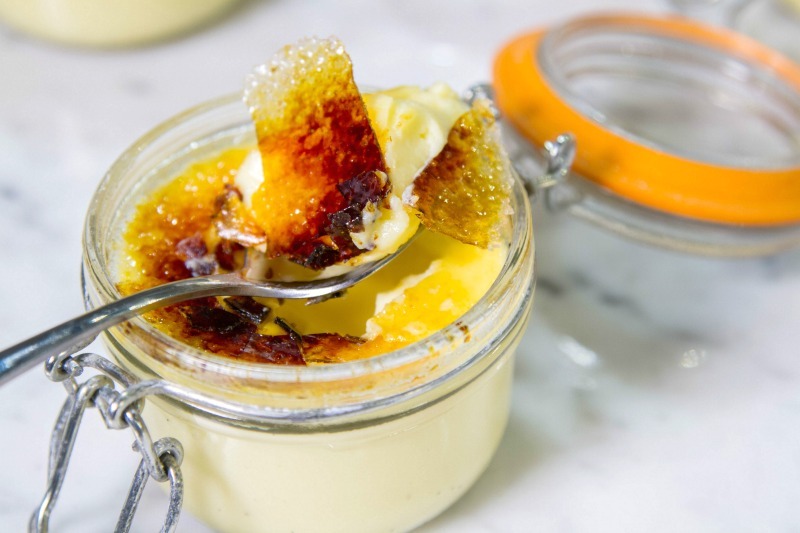
Most foods are cooked in plastic bags when cooked sous vide, but our crème brûlée are cooked in their own serving vessels, simple canning jars. The jars and lids are made to withstand being submerged in water at high temperatures, so they work perfectly for our sustained low-temperature underwater cook.
For this project, we used ChefSteps’ new sous vide circulator, Joule. It’s super easy to use and maintains a very accurate, stable water temperature throughout the duration of the cook.
We also used a Thermapen® Mk4 to verify the internal temperatures of the cream and the crème brûlée.
Sous Vide Crème Brûlée
Crème Brûlée recipe from ChefSteps, yields 5–6 servings
Ingredients
- 5.6 oz egg yolk (about 11 yolks)
- 3.2 oz granulated sugar, plus more for dusting
- 0.11 oz salt
- 1 lb 5.2 oz heavy cream
- 1 vanilla bean (optional)
Equipment
- Sous vide setup with Joule
- Fine mesh strainer
- Canning jars
- Torch
- Thermapen
Instructions
Prepare Water Bath
- Preheat sous vide water bath to 176°F (80°C) with Joule. We used a large Lexan container for our water bath. Any large pot or heat-tempered container will work.
Make the Custard Base
- Heat cream to 158°F (70°C) over low heat. Cream can scorch easily, so heat gently, and spot-check the cream with a Thermapen to verify its temperature.
- Scrape the vanilla bean (if using) and incorporate it into the sugar by rubbing between your hands.
- Whisk the egg yolks and salt into the vanilla sugar.
- While whisking, slowly pour the heated cream into the egg and sugar mixture. Strain the custard base through a fine mesh sieve. Cover, and set aside for about 20 minutes to allow all the bubbles to rise to the surface. After the 20 minutes, skim off any foam on the surface of the custard.
➤ Pro Tip: When whisking the hot cream into the egg mixture you’ll want the bowl to stay put on the counter. Use a Silicone Trivet! It’s grippy and won’t let the bowl slide around while you’re whisking.
Pour into Jars and Let Joule do the Work
- Pour the custard into the jars up to about 1/2″ from the top of the jar. If there are any bubbles on the surface, torch the top of the custard quickly to pop them. Secure the lids on the jars and place into the water bath using tongs.
- Cook the crème brûlée for 1 hour in the circulated water.
Cool and Chill
- After the timer has sounded, remove one creme brulee and verify its internal temperature with a Thermapen to be sure it has reached 176°F (80°C).
- Once verified, remove all custards from the water bath and allow them to cool at room temperature for one hour.
- Once cooled to room temperature, you can place the jars in an ice bath to chill the custard quickly or transfer them to the refrigerator. The jarred desserts will last up to a week in the refrigerator.
Burning the Sugar
This is the finishing touch right before serving. If you caramelize the surface too far in advance before serving, the burned sugar will absorb moisture from the custard and it’ll be soft rather than a glassy sheet of sugar you get to crack with your spoon.
- After chilling, open the lids and blot away any collected condensation with a paper towel.
- Evenly sprinkle granulated sugar on the tops of the custards, and it’s time to brûler!
- Using a torch with a low flame, wave the flame over the sugar (without directly aiming the flame on the glass to avoid possibly cracking the glass) and burn until all of the sugar is caramelized. You can burn more than one layer of sugar if a thicker layer is desired. Serve and enjoy!
Cooking crème brûlée sous vide-style is an excellent way to go! Not only is it easy, but the end results are nothing short of perfect. No overcooked, curdled custard, just edge-to-edge creamy crème brûlée perfection. If you haven’t given sous vide cooking a try before, this is a great beginning project with impressive results. And ChefSteps’ Joule is the easiest, most accurate sous vide tool we have found.
Products Used:




Where can I get those jars? I can’t seem to find them anywhere. Great idea btw!
Miles,
I purchased the particular 5-ounce jars that we used from a local supermarket. ChefSteps used standard Mason jars with threaded lids for their project, and you should be able to find those wherever canning supplies are sold. After searching online quickly I found these small jars from Williams Sonoma that would make a very nice presentation. I hope this was helpful!
Thanks,
-Kim
I have recently seen jars just like these filled with herbs and specialty salts at stores such as Home Goods, TJMaxx, and Tuesday Morning. They were priced at $4 to $5 each. I was really tempted, but resisted. I’ve also seen these jars sold empty at the same stores for nearly the same price. They stack nicely.
Other stores/websites where I’ve seen similar jars – The Container Store, Sur la Table, Fillmore Container (online store).
You can find them on Webstaraunt for under $3.00 each depending onnthe amount you want.
Can the RT600C Super-Fast Pocket Thermometer be used to measure the temperature of custard and for measuring candy and syrup temperatures?
Roberta,
For the most part, yes! The RT600C is a mighty little thermometer. Its thermal range is -40–302°F, covering the most of the full spectrum of cooking temperatures. You can use it to spot-check the internal temperature of meats, custards, cakes, chocolate when tempering, and many sugar-cooking stages. Since some sugar cooking stages are beyond its range you may want to consider a ThermoPop for its thermal range of -58–572°F. Hopefully this helps.
Thanks!
-Kim
Brilliant. I have long been a fan. My original Thermopen is still going strong after 14 years. I have purchased many Thermpens as gifts, and recommend Thermoworks products to my culinary students as well as my clients. We just made creme brulee in class (Baking I, so it was brand new to most of my students) and half were underbaked, most of the rest curdled. I love this idea for custards and will be putting Joule on my school’s semester-end wish list. Along with a couple more Thermopens and an Extra Big and Loud loud (with my hearing disability it is impossible to hear the oven timers in our noisy kitchen).
Cindi,
I’m sure that Joule will help keep your class’s creme brulee in check! I’m so glad to hear your ThermoWorks products are performing well for you. An Extra Big & Loud Timer will be a welcome addition to your busy kitchen. When we say it’s loud, it’s LOUD!
Happy Cooking,
-Kim
Is there a source for those canning jars? Thanks
John,
I purchased the particular 5-ounce jars that we used from a local supermarket. ChefSteps used standard Mason jars with threaded lids for their project, and you should be able to find those wherever canning supplies are sold. After searching online quickly I found these small jars from Williams Sonoma that would make a very nice presentation. I hope this was helpful!
Thanks,
-Kim
I just remembered reading a while back about wire-clasp canning jars with removable wires. I searched through old emails from the foodinjars.com blog to find the brand name and details. It’s a relatively new product from Luigi Bormioli called Lock-Eat. The jars cost a little more than the regular version, but the ability to remove the wire clasp, eat or serve easily from the container, and wash the glass jar and lid in the dishwasher could be worth the higher price.
Food in Jars
Luigi Bormioli
In addition to the Luigi Bormioli website store, I found the lock-eat jars for sale at Bed Bath & Beyond’s online store (didn’t see them in my local BB&B store) and Amazon. com.
Hope that helps.
Anna,
Those jars are so cool, thank you for sharing! I’m sure this will be helpful to readers.
Thanks!
-Kim
Do you completely submerge the jars in the sous vide water bath?
Karen,
Yes, the jars are completely submerged in the sous vide water bath.
Thanks!
-Kim
Any idea if Weck canning jars would work with this method? Weck jars have glass lids, a rubber gasket, and removable metal clips. I already have some Weck jars of the right size, shape. Because the clips are removable, the jars and lids can go in the dishwasher.
To preserve the appearance of the non-removable wire-clasps, it’s better to handwash the lidded jars . The wire clasp reacts with automatic DW detergent and takes on a corroded appearance.
Anna,
Yes, I believe Weck canning jars would work for this application. I actually ordered some last week and I’m looking forward to giving them a try. Thank you for all your input here!
-Kim
I’ve read that you can’t tight the lids completely if you don’t want to explode the glass. How did you manage that with those jars that have a locking mechanism? I keep getting water in my screw top mason jars ?.
Melissa,
We did not have any issue with our jars accumulating too much pressure during the cook. The thick rubber seals with our lids may have allowed enough easement for the expanding molecules due to the temperature increase. You may want to try screwing on your lids a bit tighter than you have been.
-Kim
Hello Kim.
So many great articles … but I have one suggestion.
First, I love the print friendly format. However, and I imagine that I am not the only one person who feels this way …. but very often there is useful information in the comments that people make.
As such, it would be VERY useful if there was an option after you choose “print friendly” that says “include comments?” and if selected, prints a nice copy, but WITH the comments.
Already a great site … and great printing …. but just an idea to make it even greater!
Thanks for passing this on to anyone who can give this some serious consideration.
Take care and keep up the awesome work.
Lance,
Thank you for the suggestion. We’re constantly working toward making our blog more reader-friendly. Your feedback is important to us!
-Kim