Have you heard of the turducken? The turkey-stuffed-with-duck-stuffed-with-chicken? This chimera of meat waded out of the Louisiana bayous sometime in the 1980’s and has been seen terrorizing thanksgiving tables ever since. Why do I say terrorizing? Because the turducken is a thermo-logistical nightmare. Think about it. You create a giant sphere of meat that must cook all the way to the center but the outermost layer of which is turkey, the most prone to dry out of the whole package. So by the time you get that center up to a food-safe temperature, the exterior—the turkey—is basically useless. And there is a hard and bitter truth embedded in this: any enjoyment people get from most turducken is false joy driven by novelty and gravy.
Some people may try cooking it more slowly, but that is an invitation for disease: the many hours it will take to cook it through slowly is time spent with the bacteria-rich skins of the birds festering in the temperature danger zone. No thank you!
So is there no way to do it right? Can you make a good turducken? Is there no option for a three-bird Thanksgiving? Yes, in fact there are two. If you’re up for a challenge, this is a cook you and your friends will never forget! You really can master the turducken and have moist, juicy meat from three fowls all wrapped inside of each other. What a concept. Here’s how…
Contents:
- Turducken problems and two solutions
- Turducken: three-birds method
- Turducken: real build method
- How to debone a chicken/duck/turkey
- Turducken recipe
The Three Bird Problem: turducken solutions
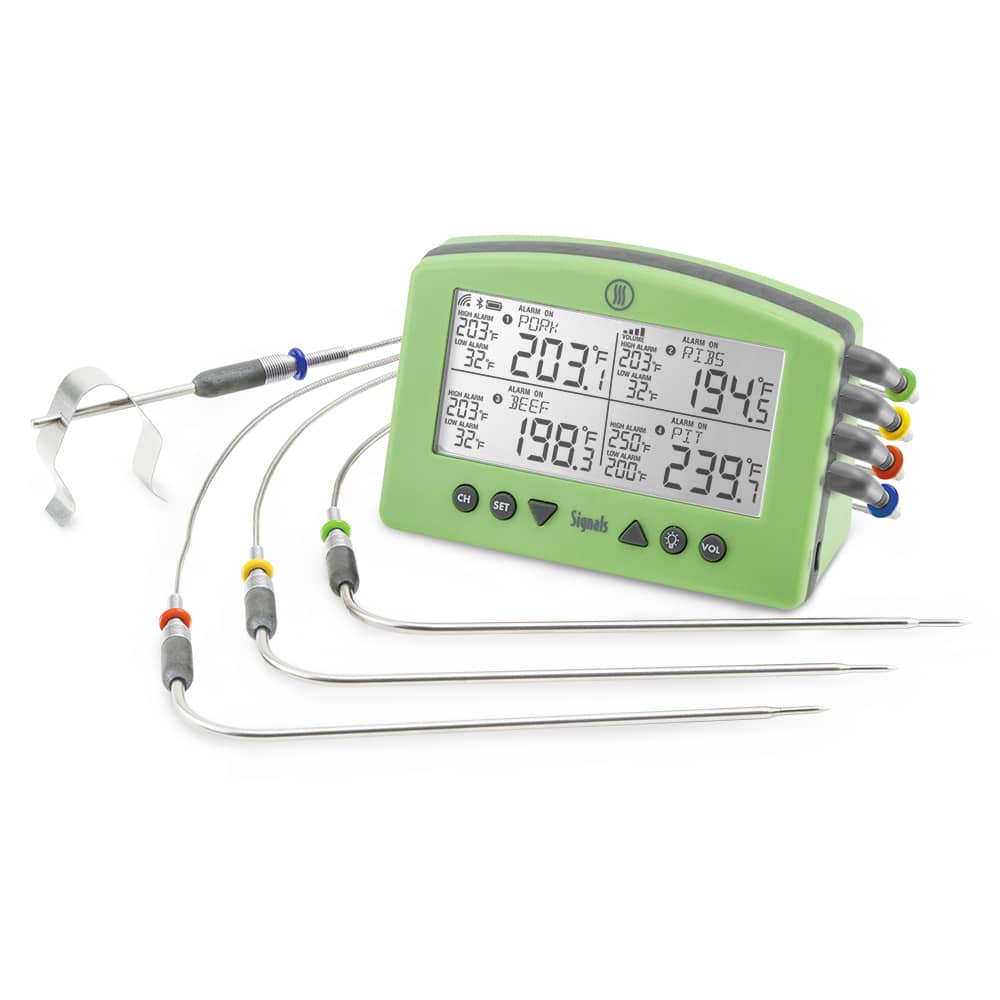
The first way to tame this holiday beast may seem like a bit of a dodge, but is actually as elegant a solution as it is simple. You simply cook a turkey, a duck, and a chicken all separately to their respective perfect doneness temperatures, carve them, and serve them together to your guests. This is the easiest way to moist, juicy perfection and, while cooking three birds at once without overcooking any of them is no walk in the park, it is the kind of problem that is made to order for the thermal tracking power of the new Signals™ four-channel alarm thermometer.
But if you want to do the whole bird-in-bird-in-bird thing, then you should follow the second method for turducken success: J. Kenji López-Alt’s multi-stage instructions for cooking a turducken from the inside outwards.
Three bird method
The easiest and least intensive way to present a turducken is to cook three birds separately. Yes, there are challenges with this method, too, but they are merely logistical—not challenges of craft.
What are the challenges? These three birds of three sizes need to be cooked to different temperatures. (You can read more about Chicken, Turkey, and Duck preparations here on our blog!) The solutions? Enough thermometers to go ‘round and a cooler.
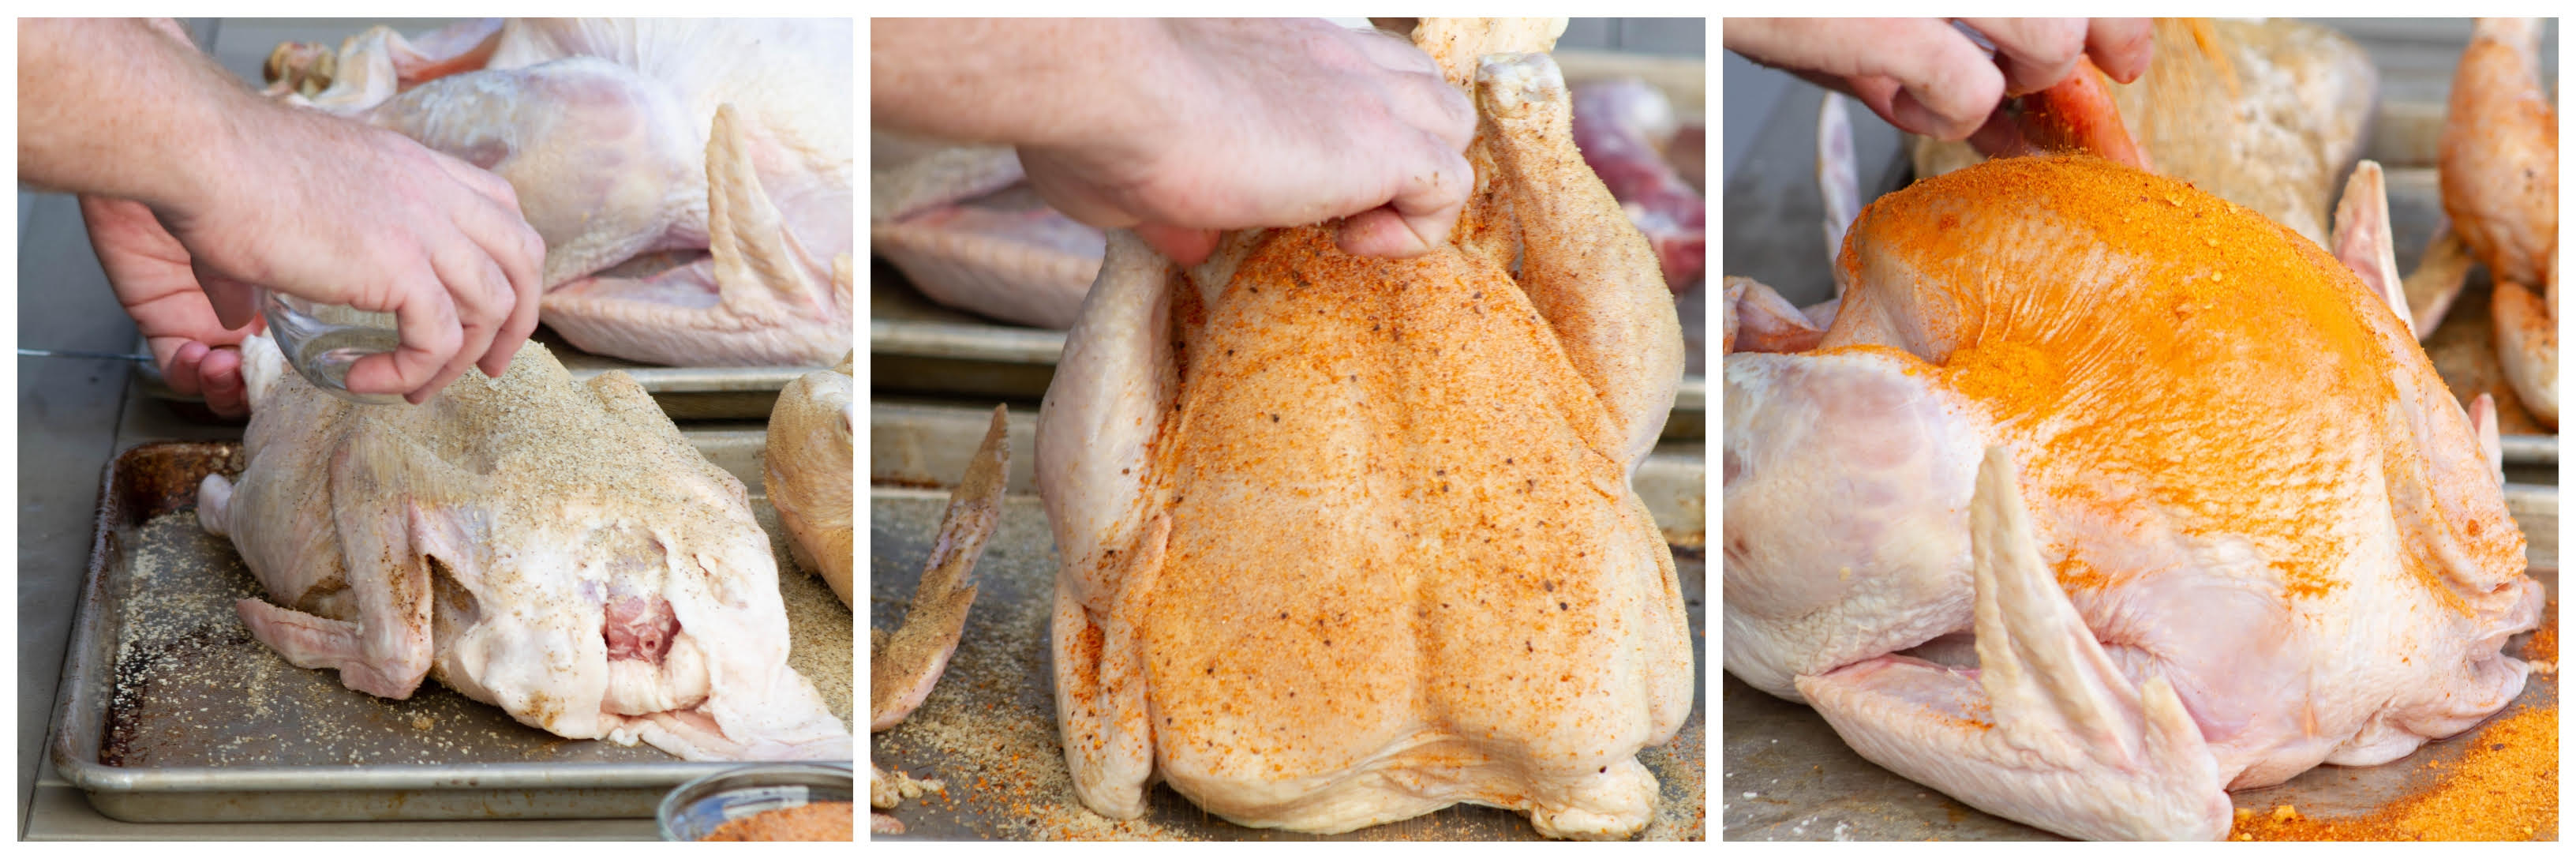
Turkey needs to have the breast cooked to 157°F (69°C), as does chicken. But duck really needs to be cooked to the neighborhood of 175°F (79°C). They can all be cooked at the same oven temperatures, though, so you can, for instance, fire up the smoker and put all three in. Season them how you see fit. I like using a variety of rubs for this.
Monitor each with one probe from the Signals, each with their own high alarms, while keeping an eye on your smoker temperature with the built-in air probe. Place your probes tips in the center of the breast of each bird. Set the high alarms at 157°F (69°C) for the chicken and turkey and to 175°F (79°C) for the duck and place them in the smoker. Set your high alarm for 250°F (121°C) and your low alarm for 200°F (93°C) for the air probe and attach it to the smoker grill grates with the grate clip. Loop the armored cables through the grommet in your smoker and shut the lid. Smoke those birds. When the alarms sound, double check your doneness temperatures with a Thermapen.
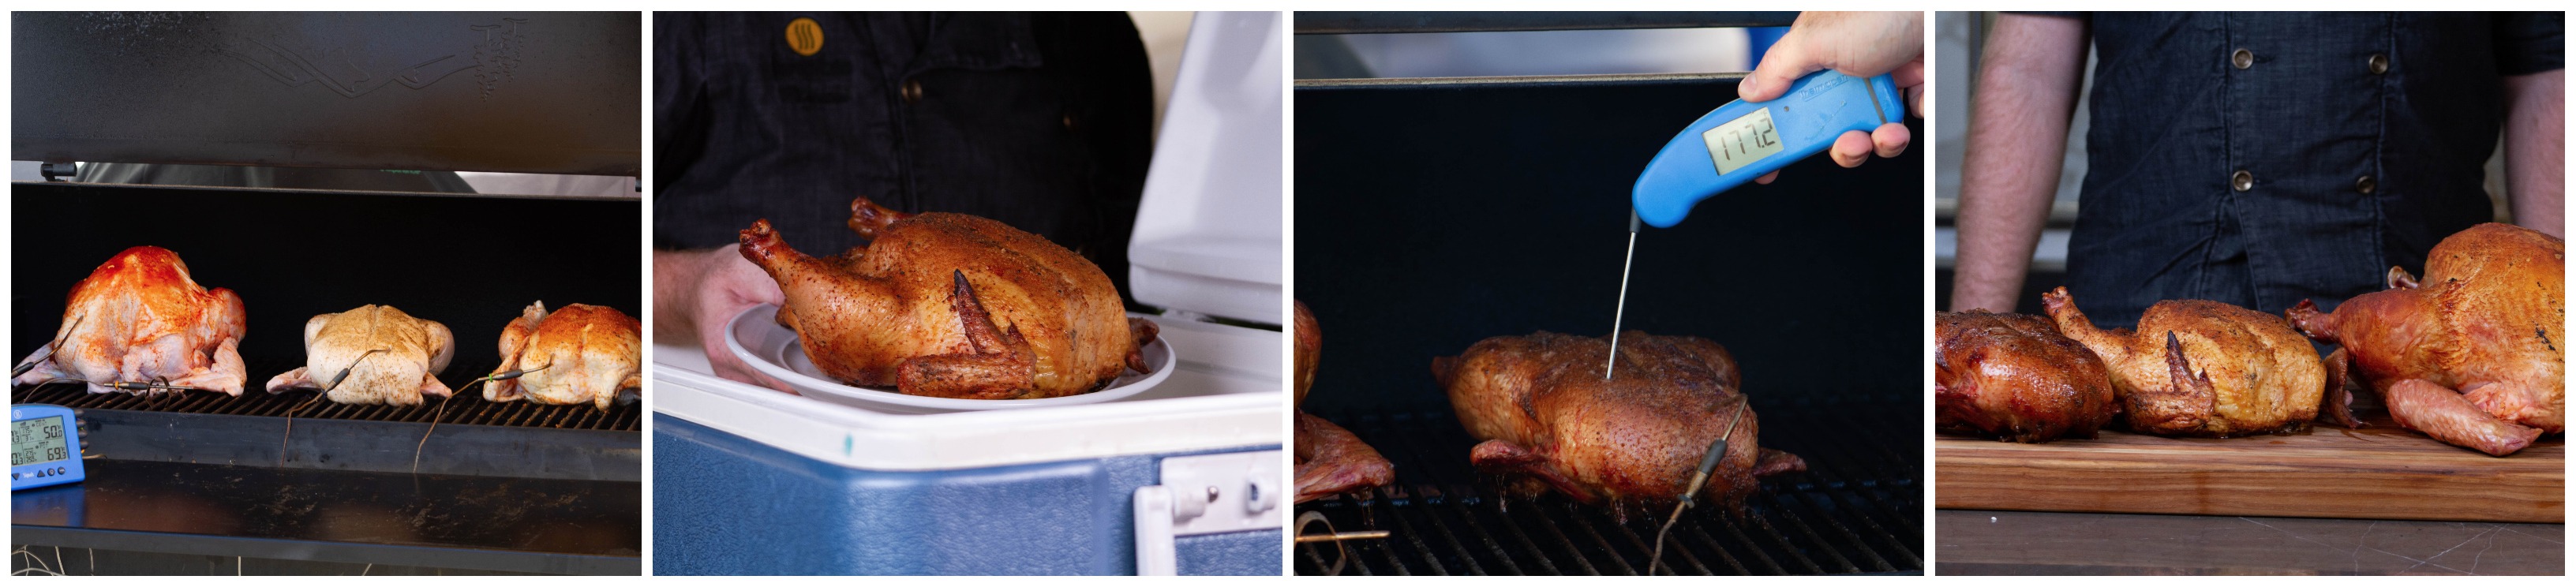
The chicken will almost certainly finish first. Remove it from heat, and place it on a plate in a cooler. This will keep it hot while the other birds finish cooking. The duck will be much smaller than the turkey (probably), but will need to cook to a higher temp. In our cook, they finished right at the same time. If one finishes before the other, stick it in the cooler with the chicken.
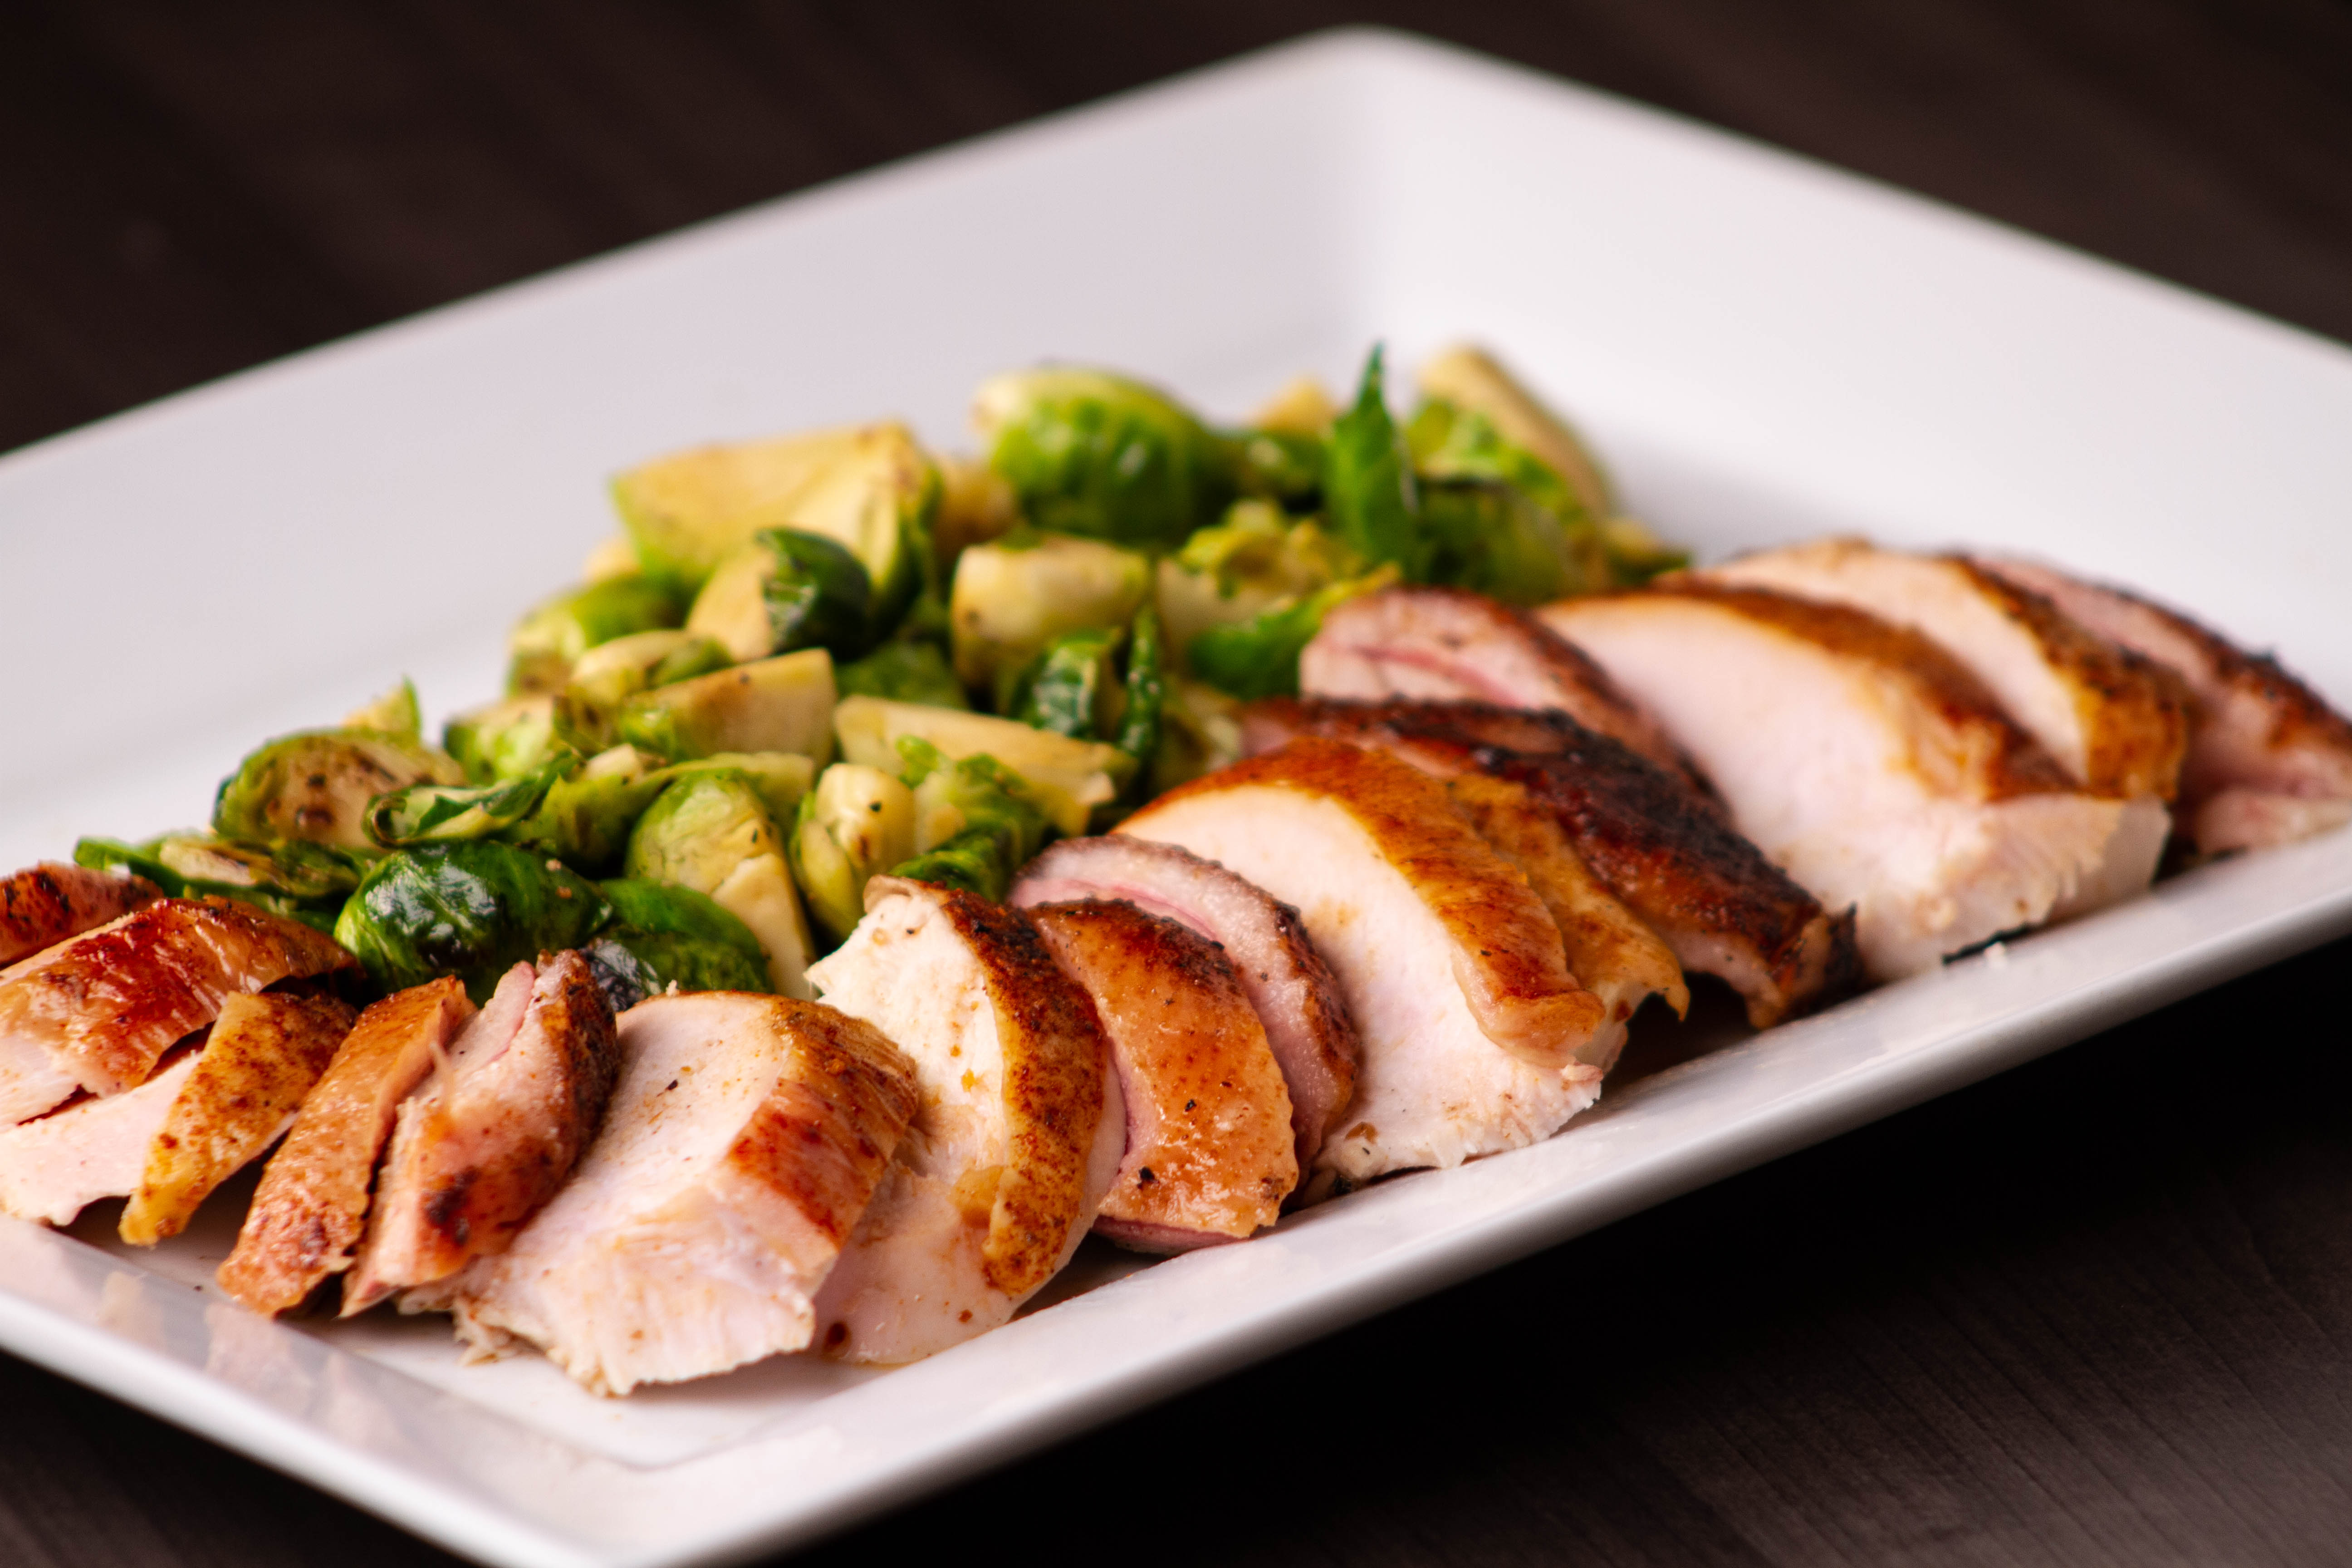
When all three birds have been cooked and are rested, carve them up and serve them layered on a platter. It’s a delicious—if not a little unwieldy—preparation. And while it’s not strictly a bird-in-bird-in-bird, it’s still a three-meat Thanksgiving that should satisfy the most vehement of avian-minded carnivores. The range of flavors, each cooked to the proper temperature, is something of a revelation right next to each other.
Turducken: the thermal solution
If cooking three birds separately just isn’t enough for you, then you need to think about this problem thermally. Traditional cooking really doesn’t work for turducken: the heat takes too long to get to the center. So…why not cook it from the center out? Sounds impossible, but you have to think outside the box a little. Kenji says:
[I]f I wanted the inside to reach its final temperature at the same rate as the outside, why not just cook it from the inside out? The unique three-tiered structure of a turducken allows you to do exactly that.
Rather than stuffing a raw chicken into a raw duck into a raw turkey, this time I stuffed my chicken with sausage, and sealed it in a cryo-vack bag (I’ve used butcher’s twine nearly as effectively). I then proceeded to poach it in warm water until the very center of the stuffing hit between the 140 and 145°F (60 and 63°C) mark. I then immediately and rapidly stuffed the still-warm chicken inside the boned duck.—J. Kenji López-Alt, SeriousEats.com
The process follows from the inside out from there, stuffing a partially cooked duck into a turkey. Not only do you not have to get heat penetration all the way to the center each layer, but you’re actually taking heat from the center.
It’s really quite ingenious, but it’s also quite complex. Not for the faint of heart.
To begin with, first you need to completely debone the chicken and the duck and partially debone the turkey so that you can properly stuff them all. (We’ll look at that in just a minute here.)
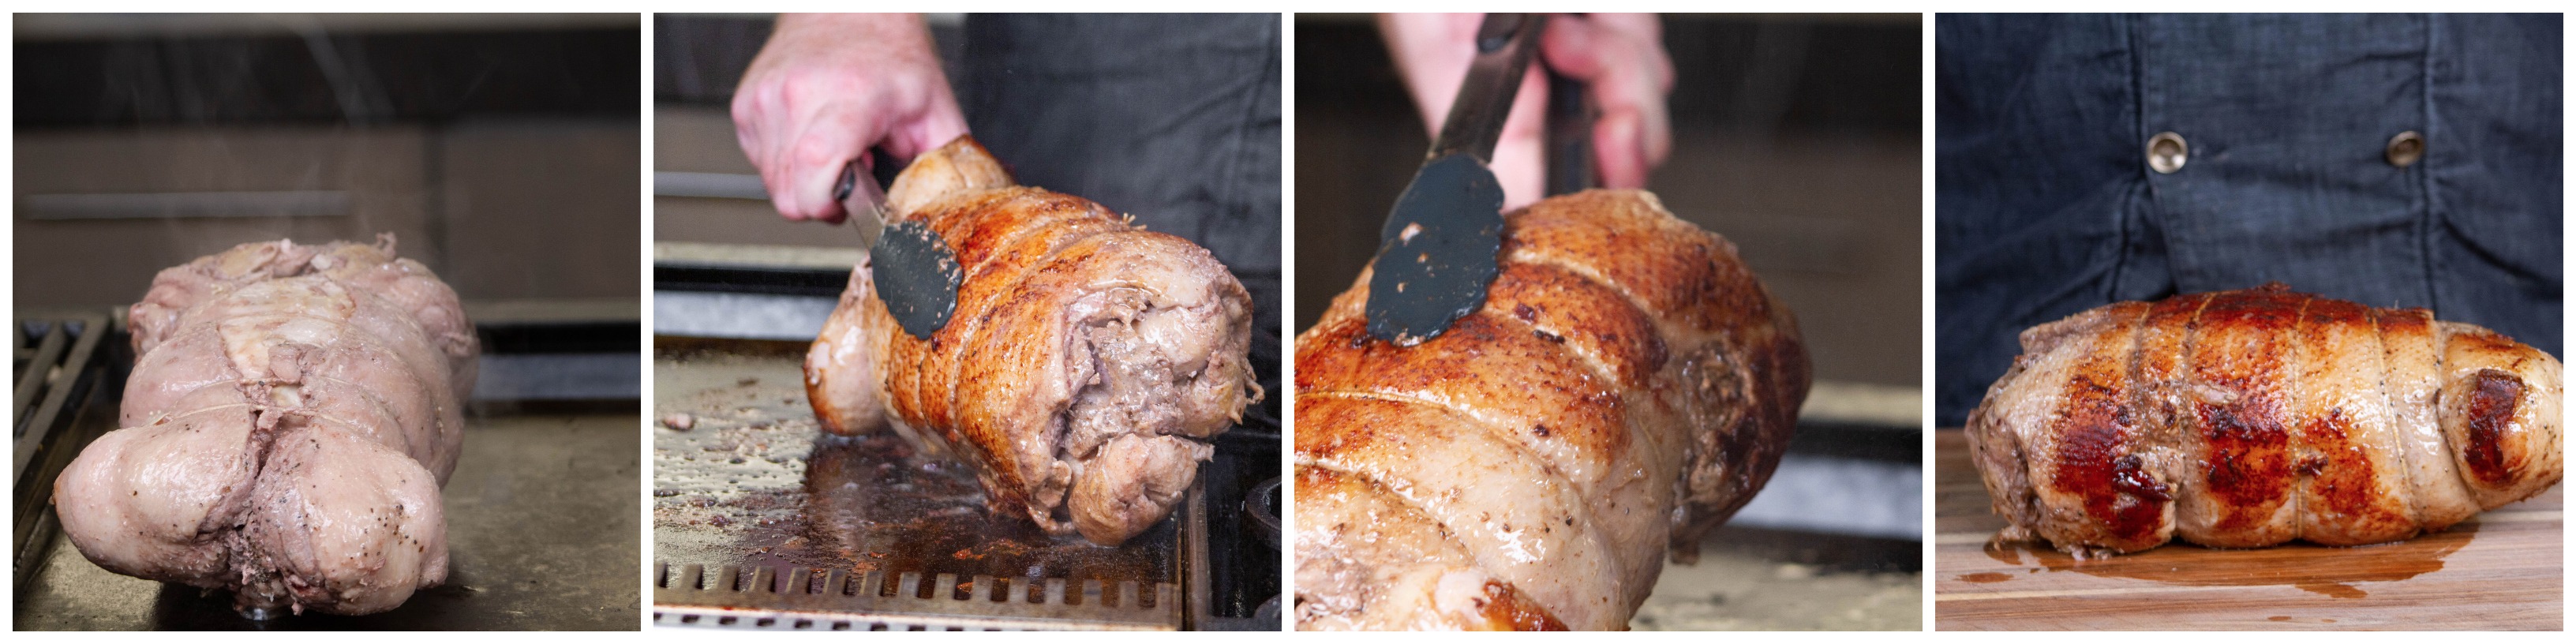
Then there’s the matter of the duck skin, which complicates things because ducks live in water. What? Well, living in water means they need to stay warm and staying warm takes fat and that fat is found just below the skin of the duck. If you don’t render that fat out to some degree, the skin is flabby, fatty, chewy and gross. So before stuffing the turkey with the duck, you need to sear the cooked duck to render some of that fat and deliciously brown the skin.
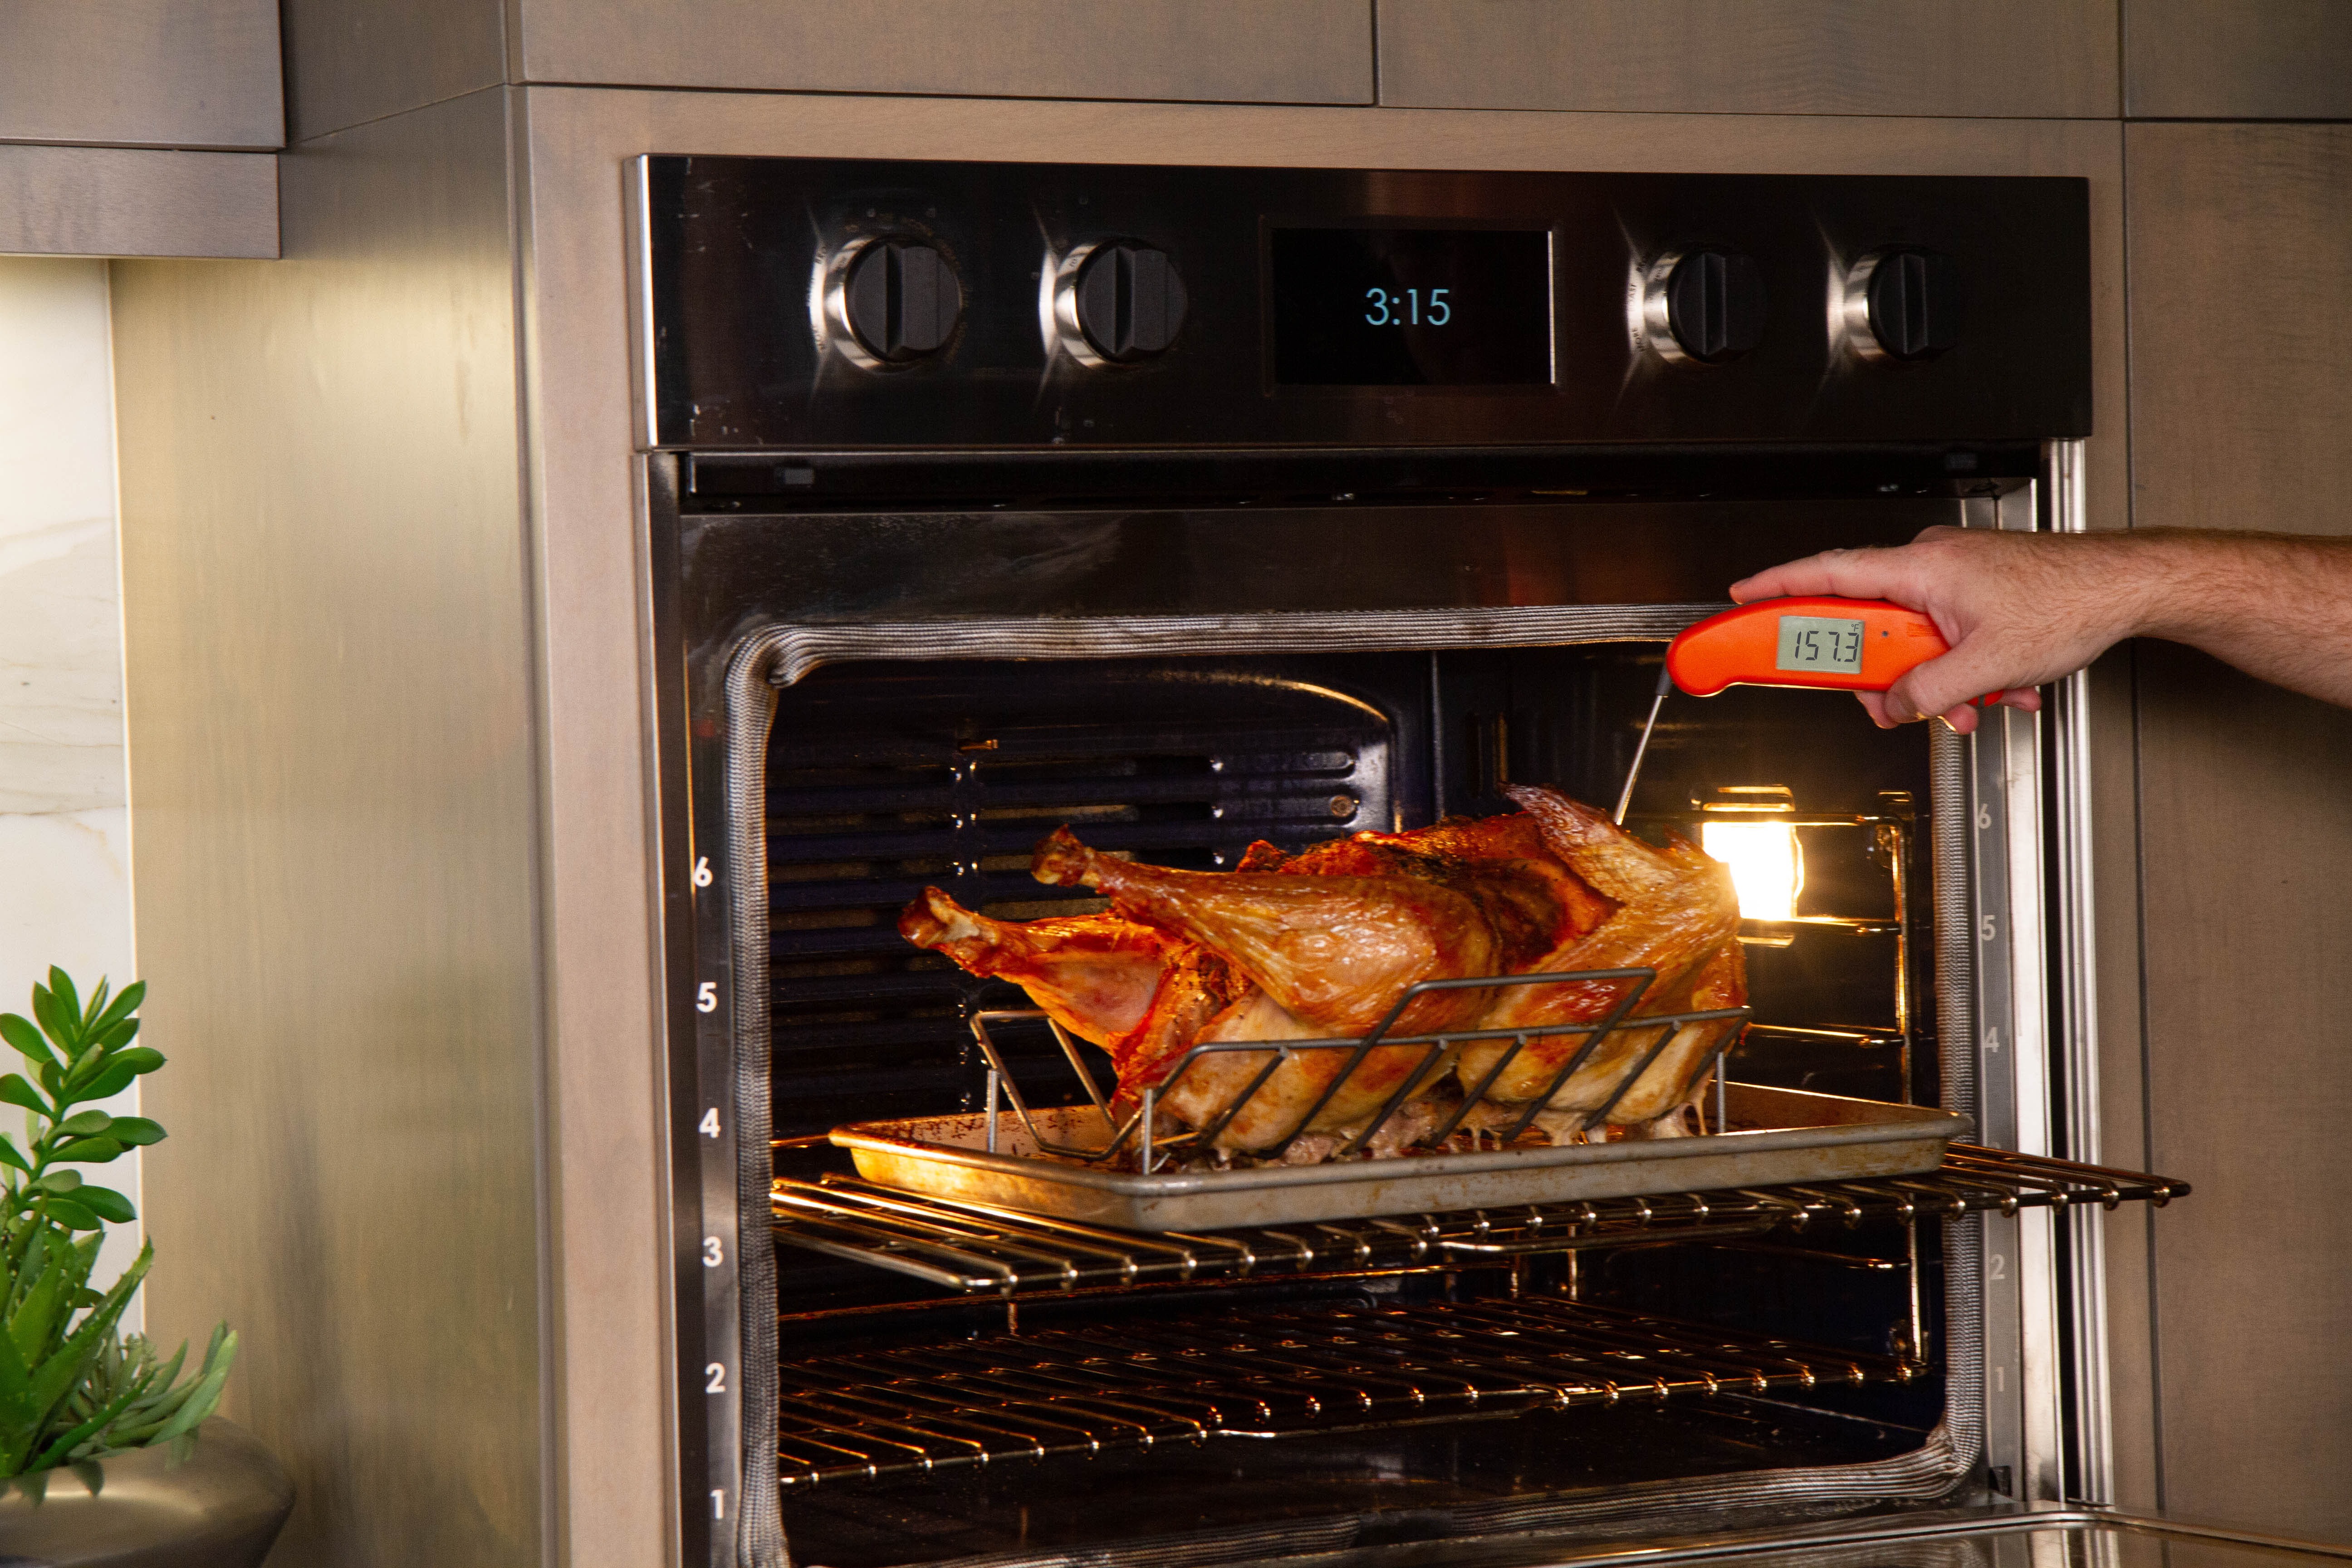
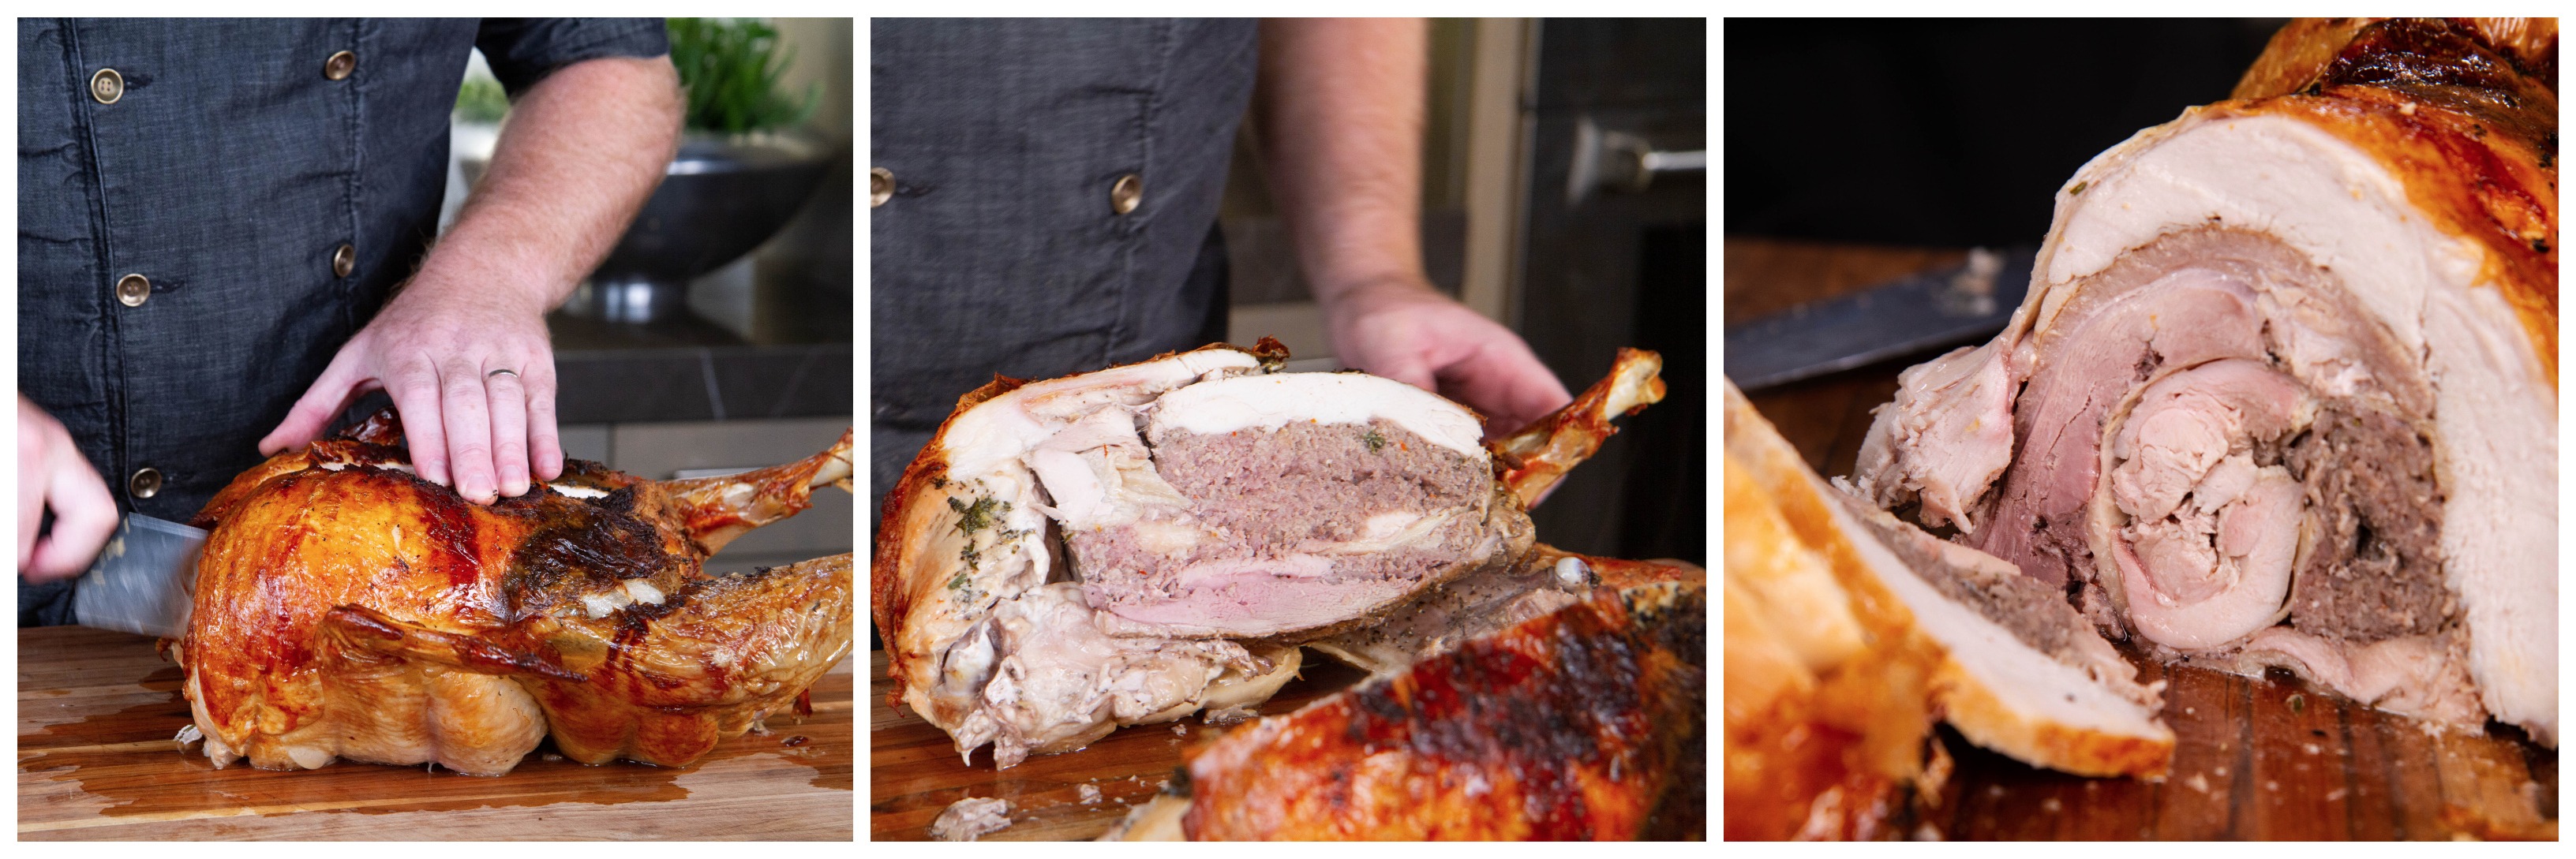
Finally, no, we don’t cook the turkey in a huge vacuum bag: we roast it just like a normal turkey to get that beautiful crispy skin. In fact, if you’ve deboned correctly and stuffed correctly, it will even look like a normal turkey from most angles. At least it will until you dramatically plunge the knife right into the center of the bird and ceremoniously cut it straight down the middle without any hindrance from any pesky bones!
So, about those bones…
Deboning a chicken/duck/turkey
Deboning a whole bird is not child’s play, but it’s not that bad once you’ve done it. I recommend buying an extra chicken to practice on before you go for the big time. All you need is a sharp boning knife and maybe a pair of kitchen shears or a sturdy chef’s knife. Also a clean kitchen towel will help with gripping and sliding.
To debone fowl:
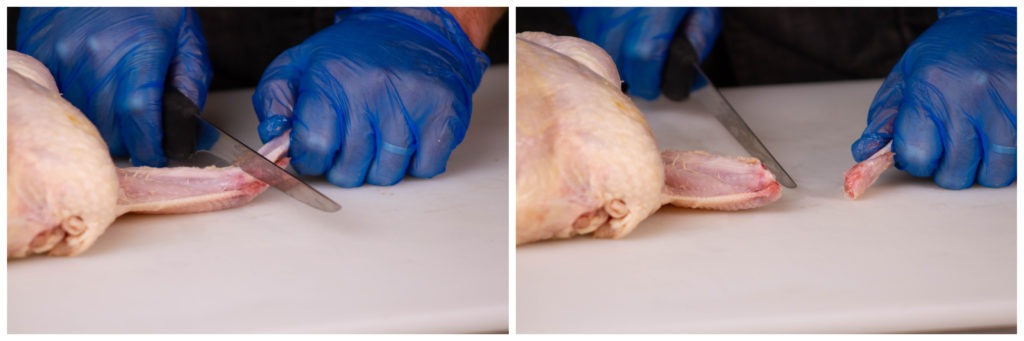
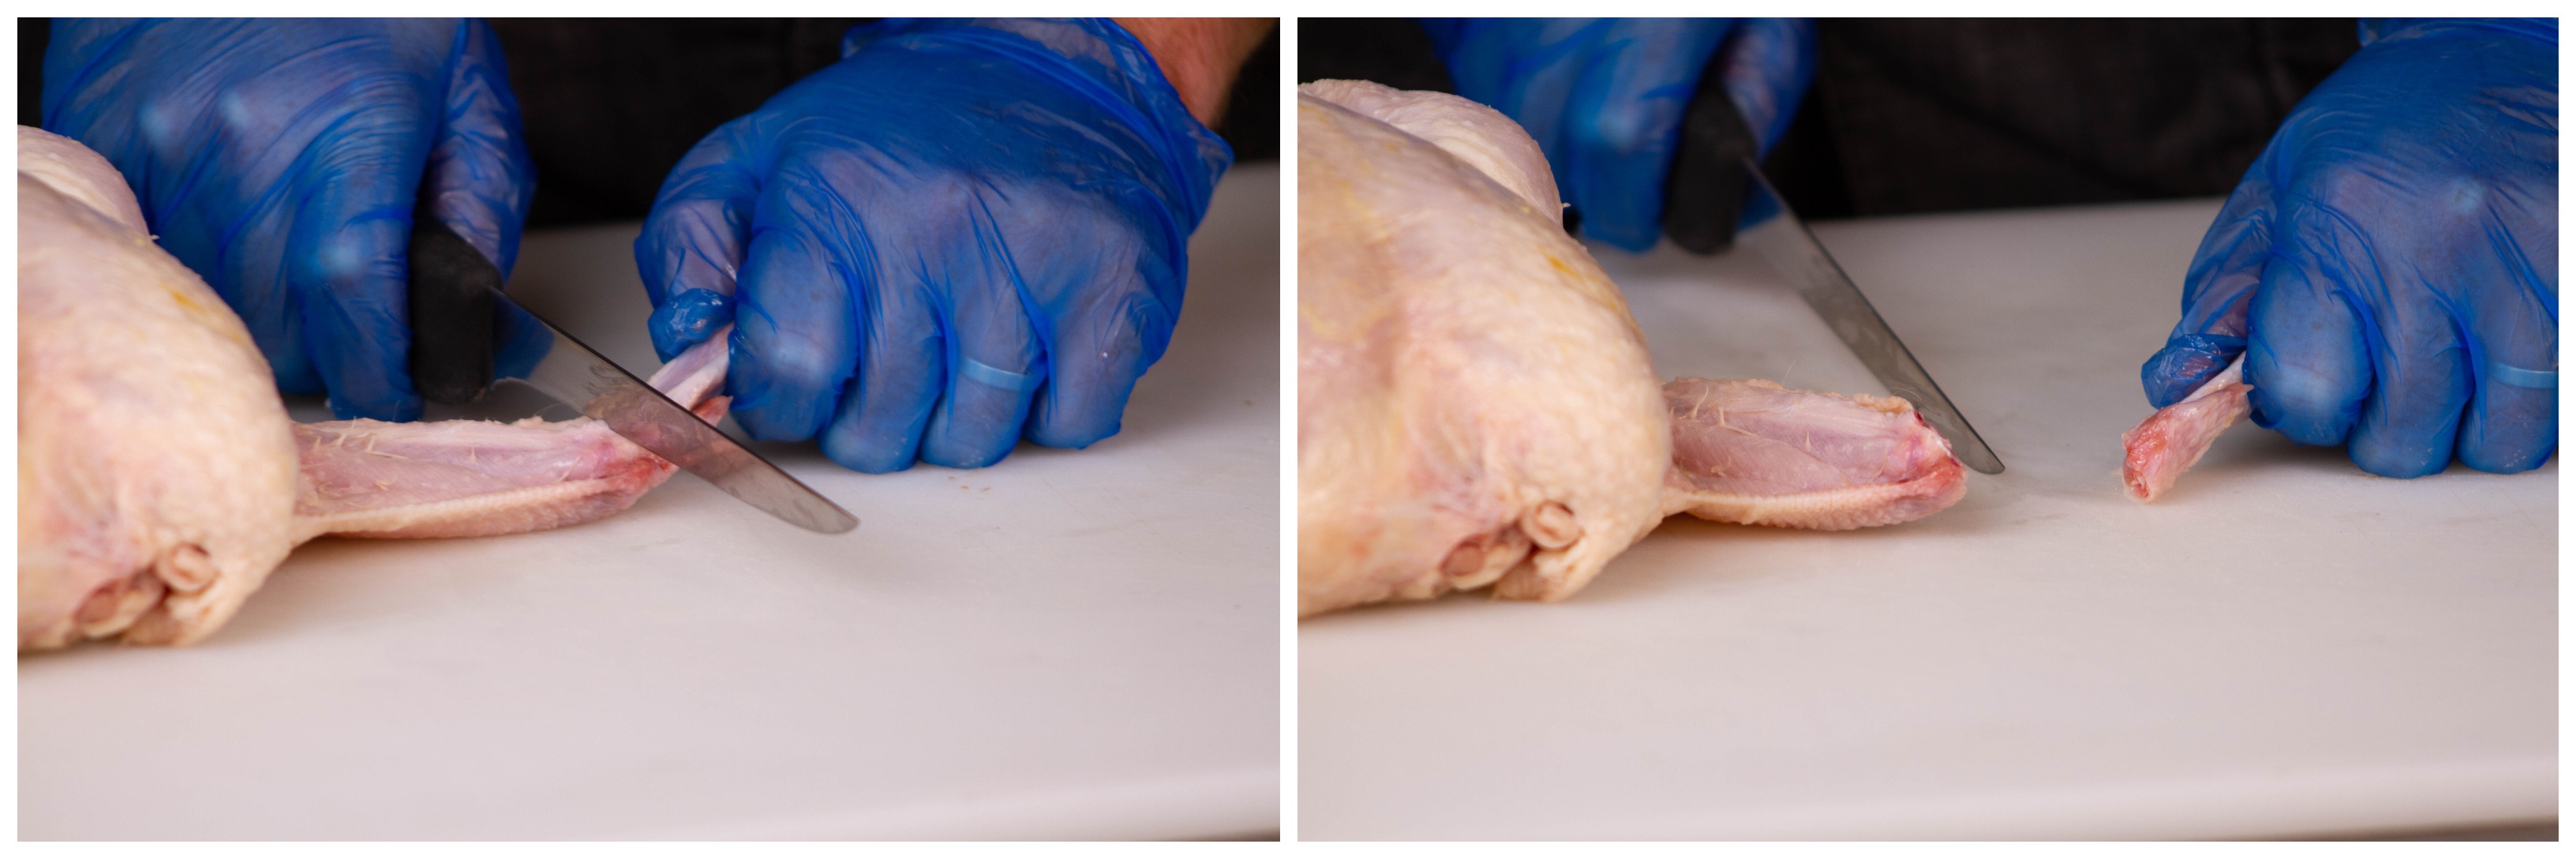
- Cut the wing tips off at the joint (not for the turkey!)
- Find the wishbone and cut it out by making cuts on both sides of each branch.
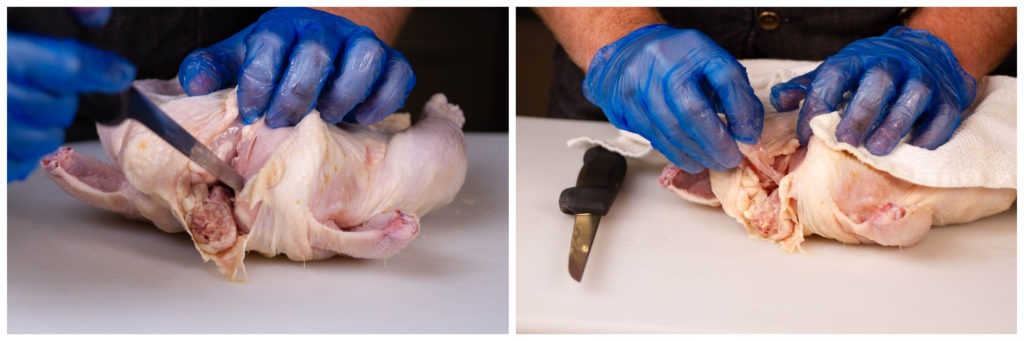
- Slice the skin down the backbone. Cut all the way down to the bone.
- Peel back some of the skin and meat by the neck and the wings.
- Cut through the wing joints and (in the case of the turkey and duck) detach the collar bones. This is the hardest joint to navigate. Do not cut the wing off.
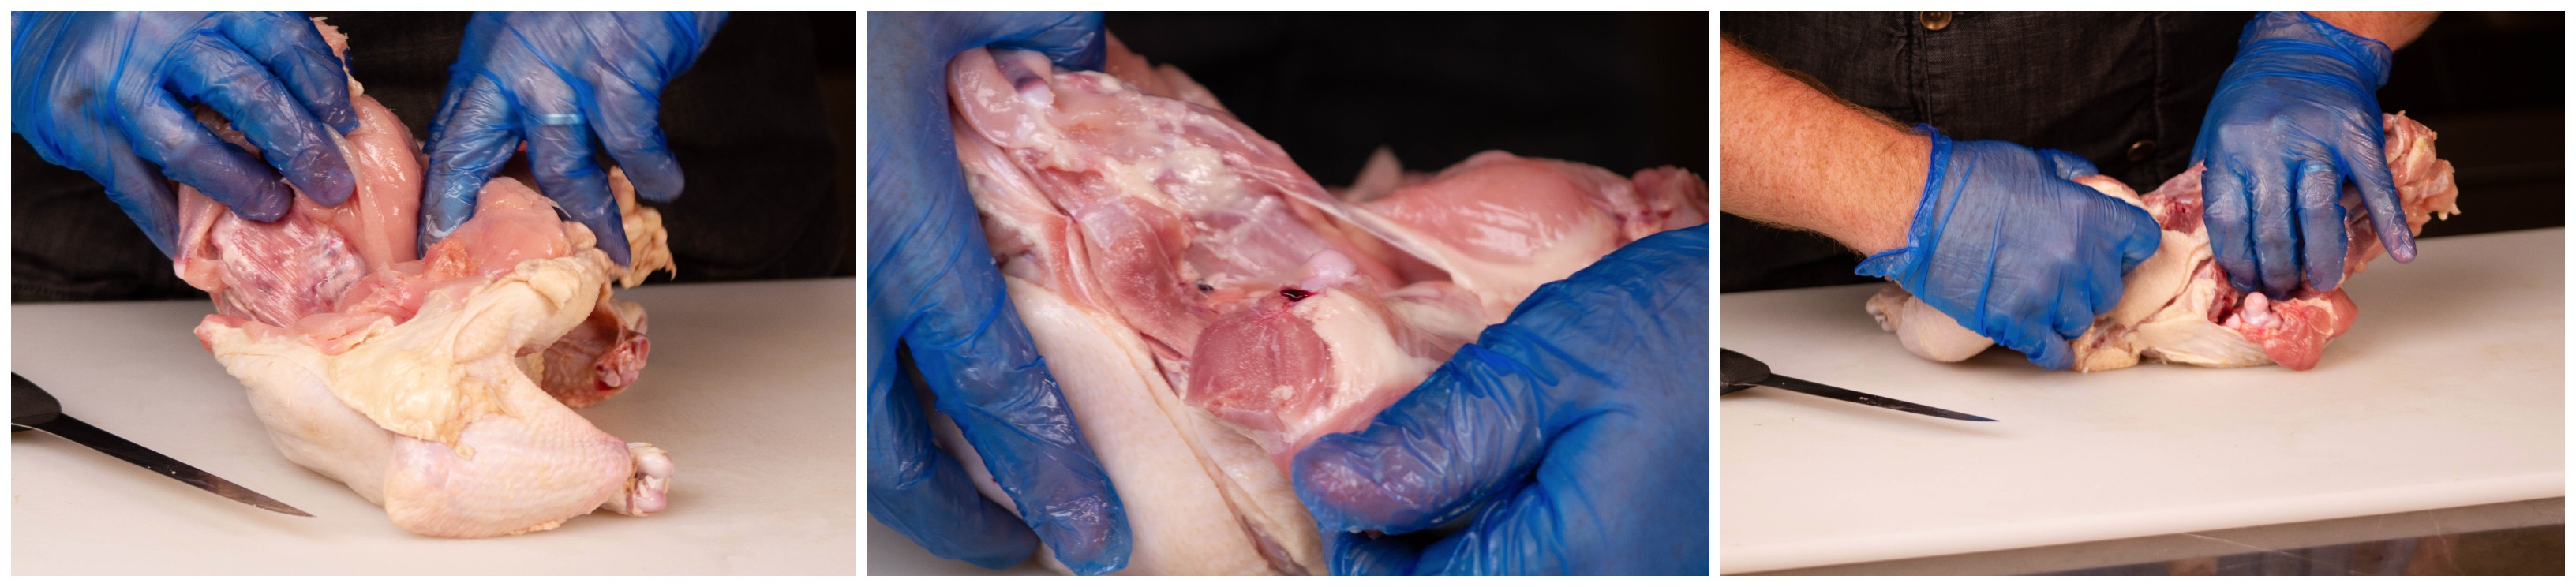
- One at a time, grasp a wing and pull the flesh off the carcass like a jacket until you expose the dark-colored ‘oyster’ muscle by the thigh. On the duck and turkey, this process may involve trimming some connective tissues with your boning knife. They don’t release as easily as the chicken.
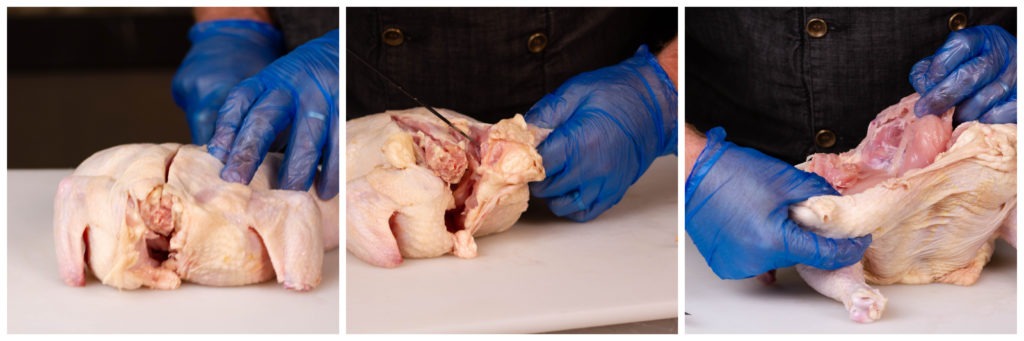
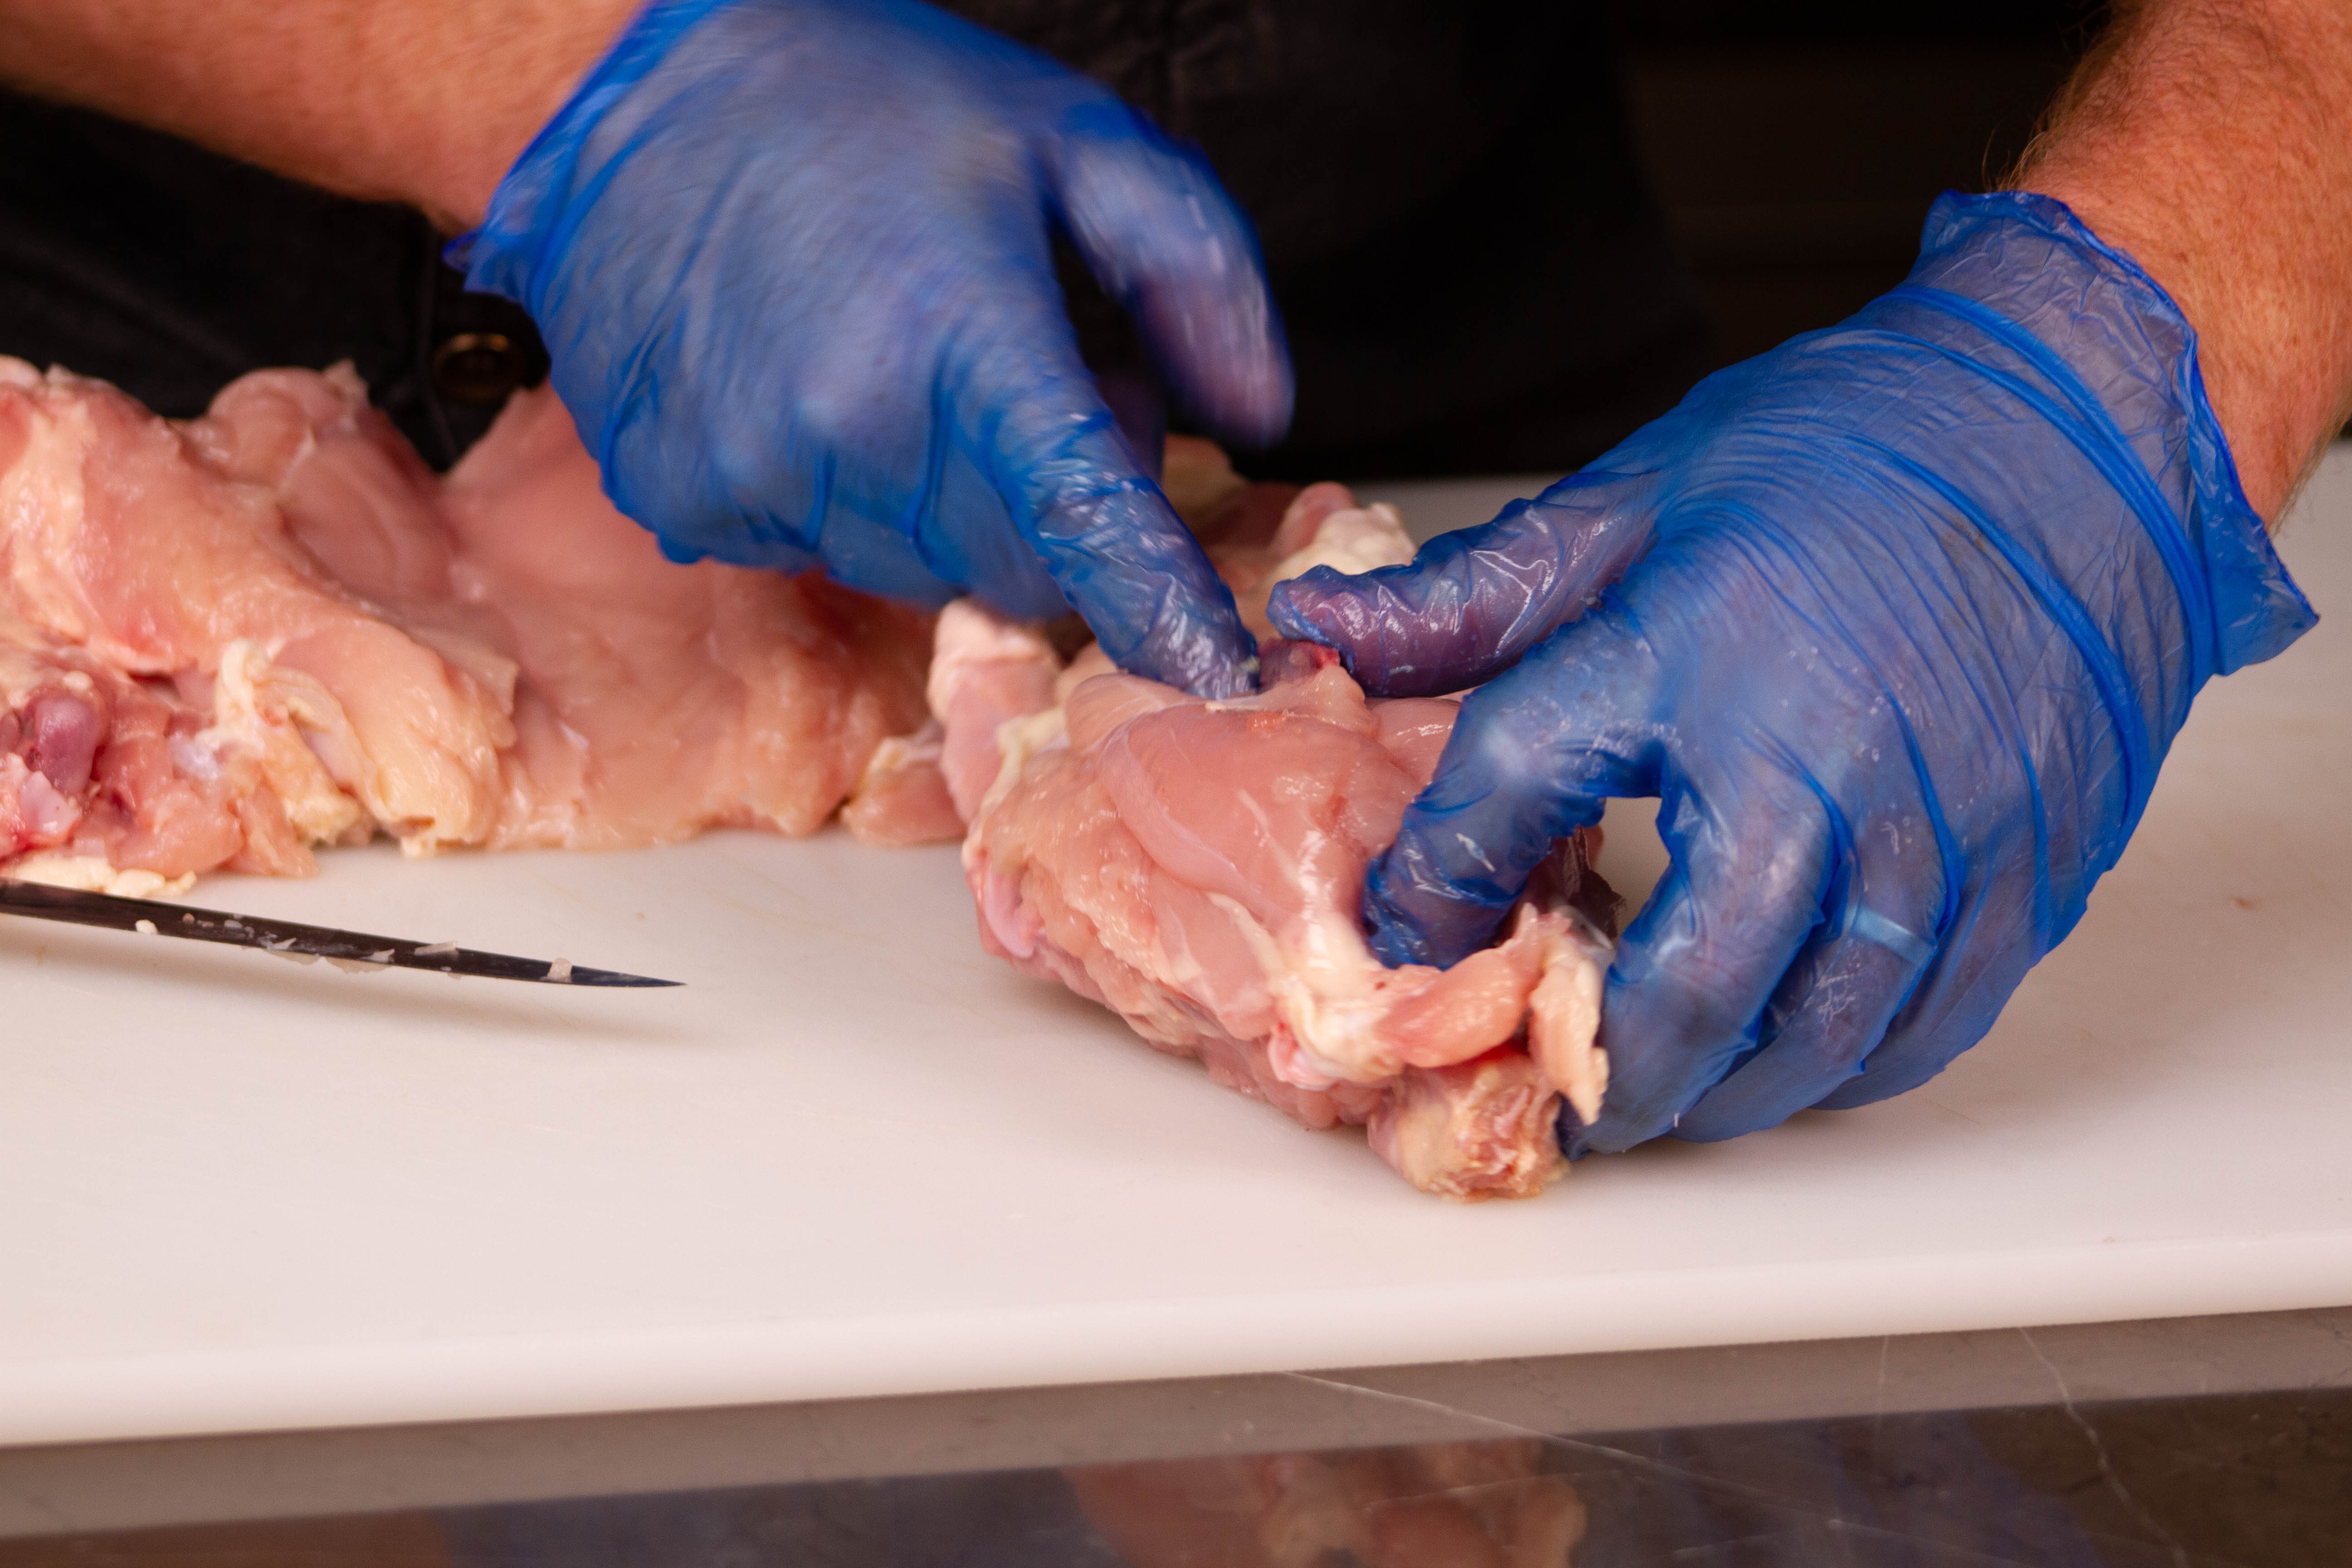
- To disconnect the breasts from the breastbone, run two fingers down the breastbone on either side of it, pulling the breast meat free. Remember that this process is not for the squeamish. Again, the turkey and duck may require some real force to be applied here.
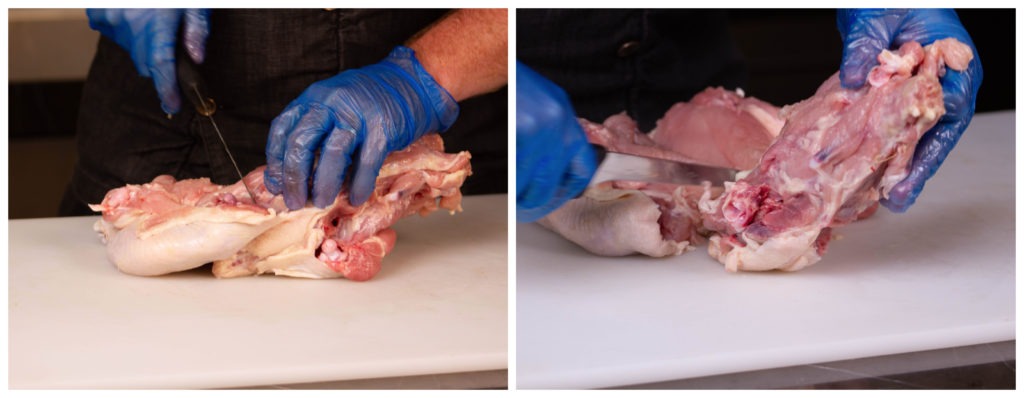
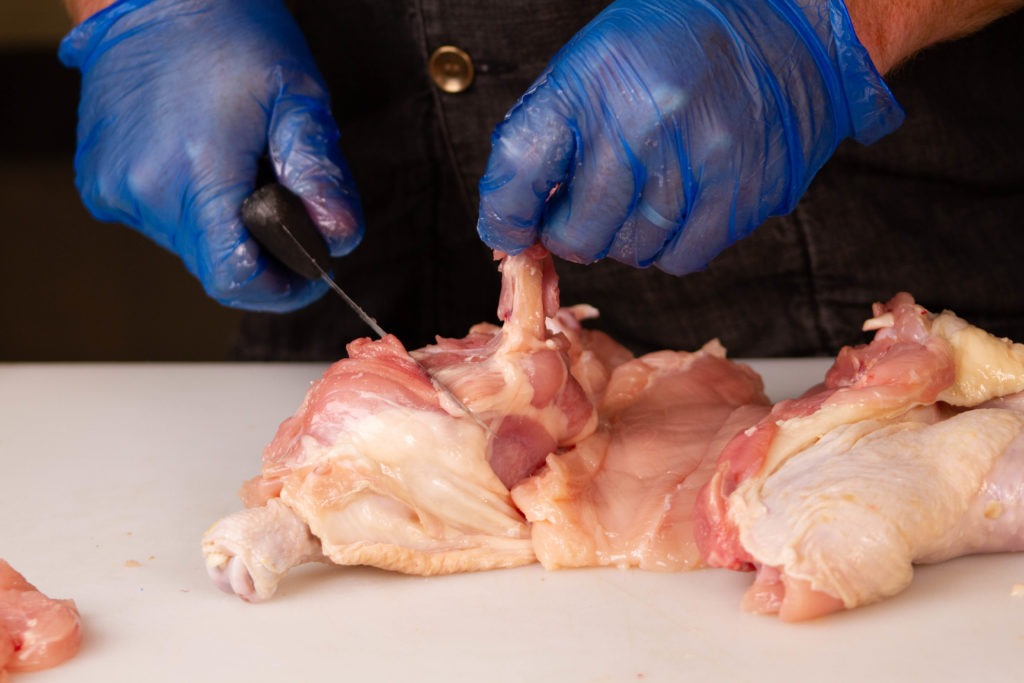
- Cut through the oysters to expose the thigh joints.
- Pop the joints out of their sockets by prying the thigh away from the body.

- Cut the joint free.
- Pull the carcass out.


If you’re working on the turkey, congrats. You’re done. If it’s chicken or duck, read on.
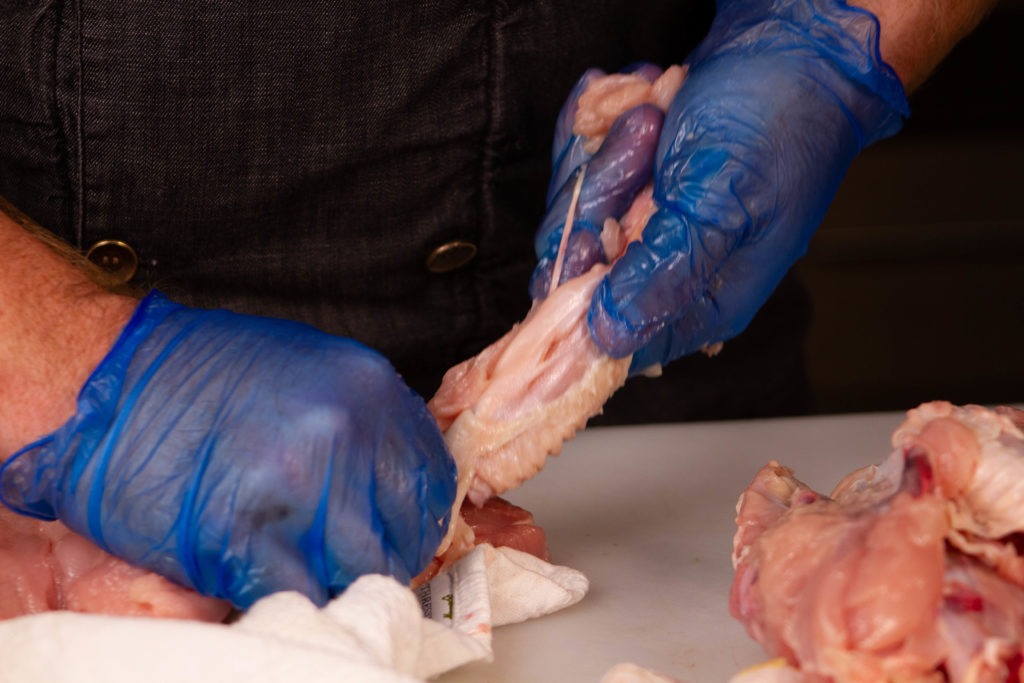
- You can remove the tenderloins from the carcass by running your fingers under them. Cut off the little tendon-y end.

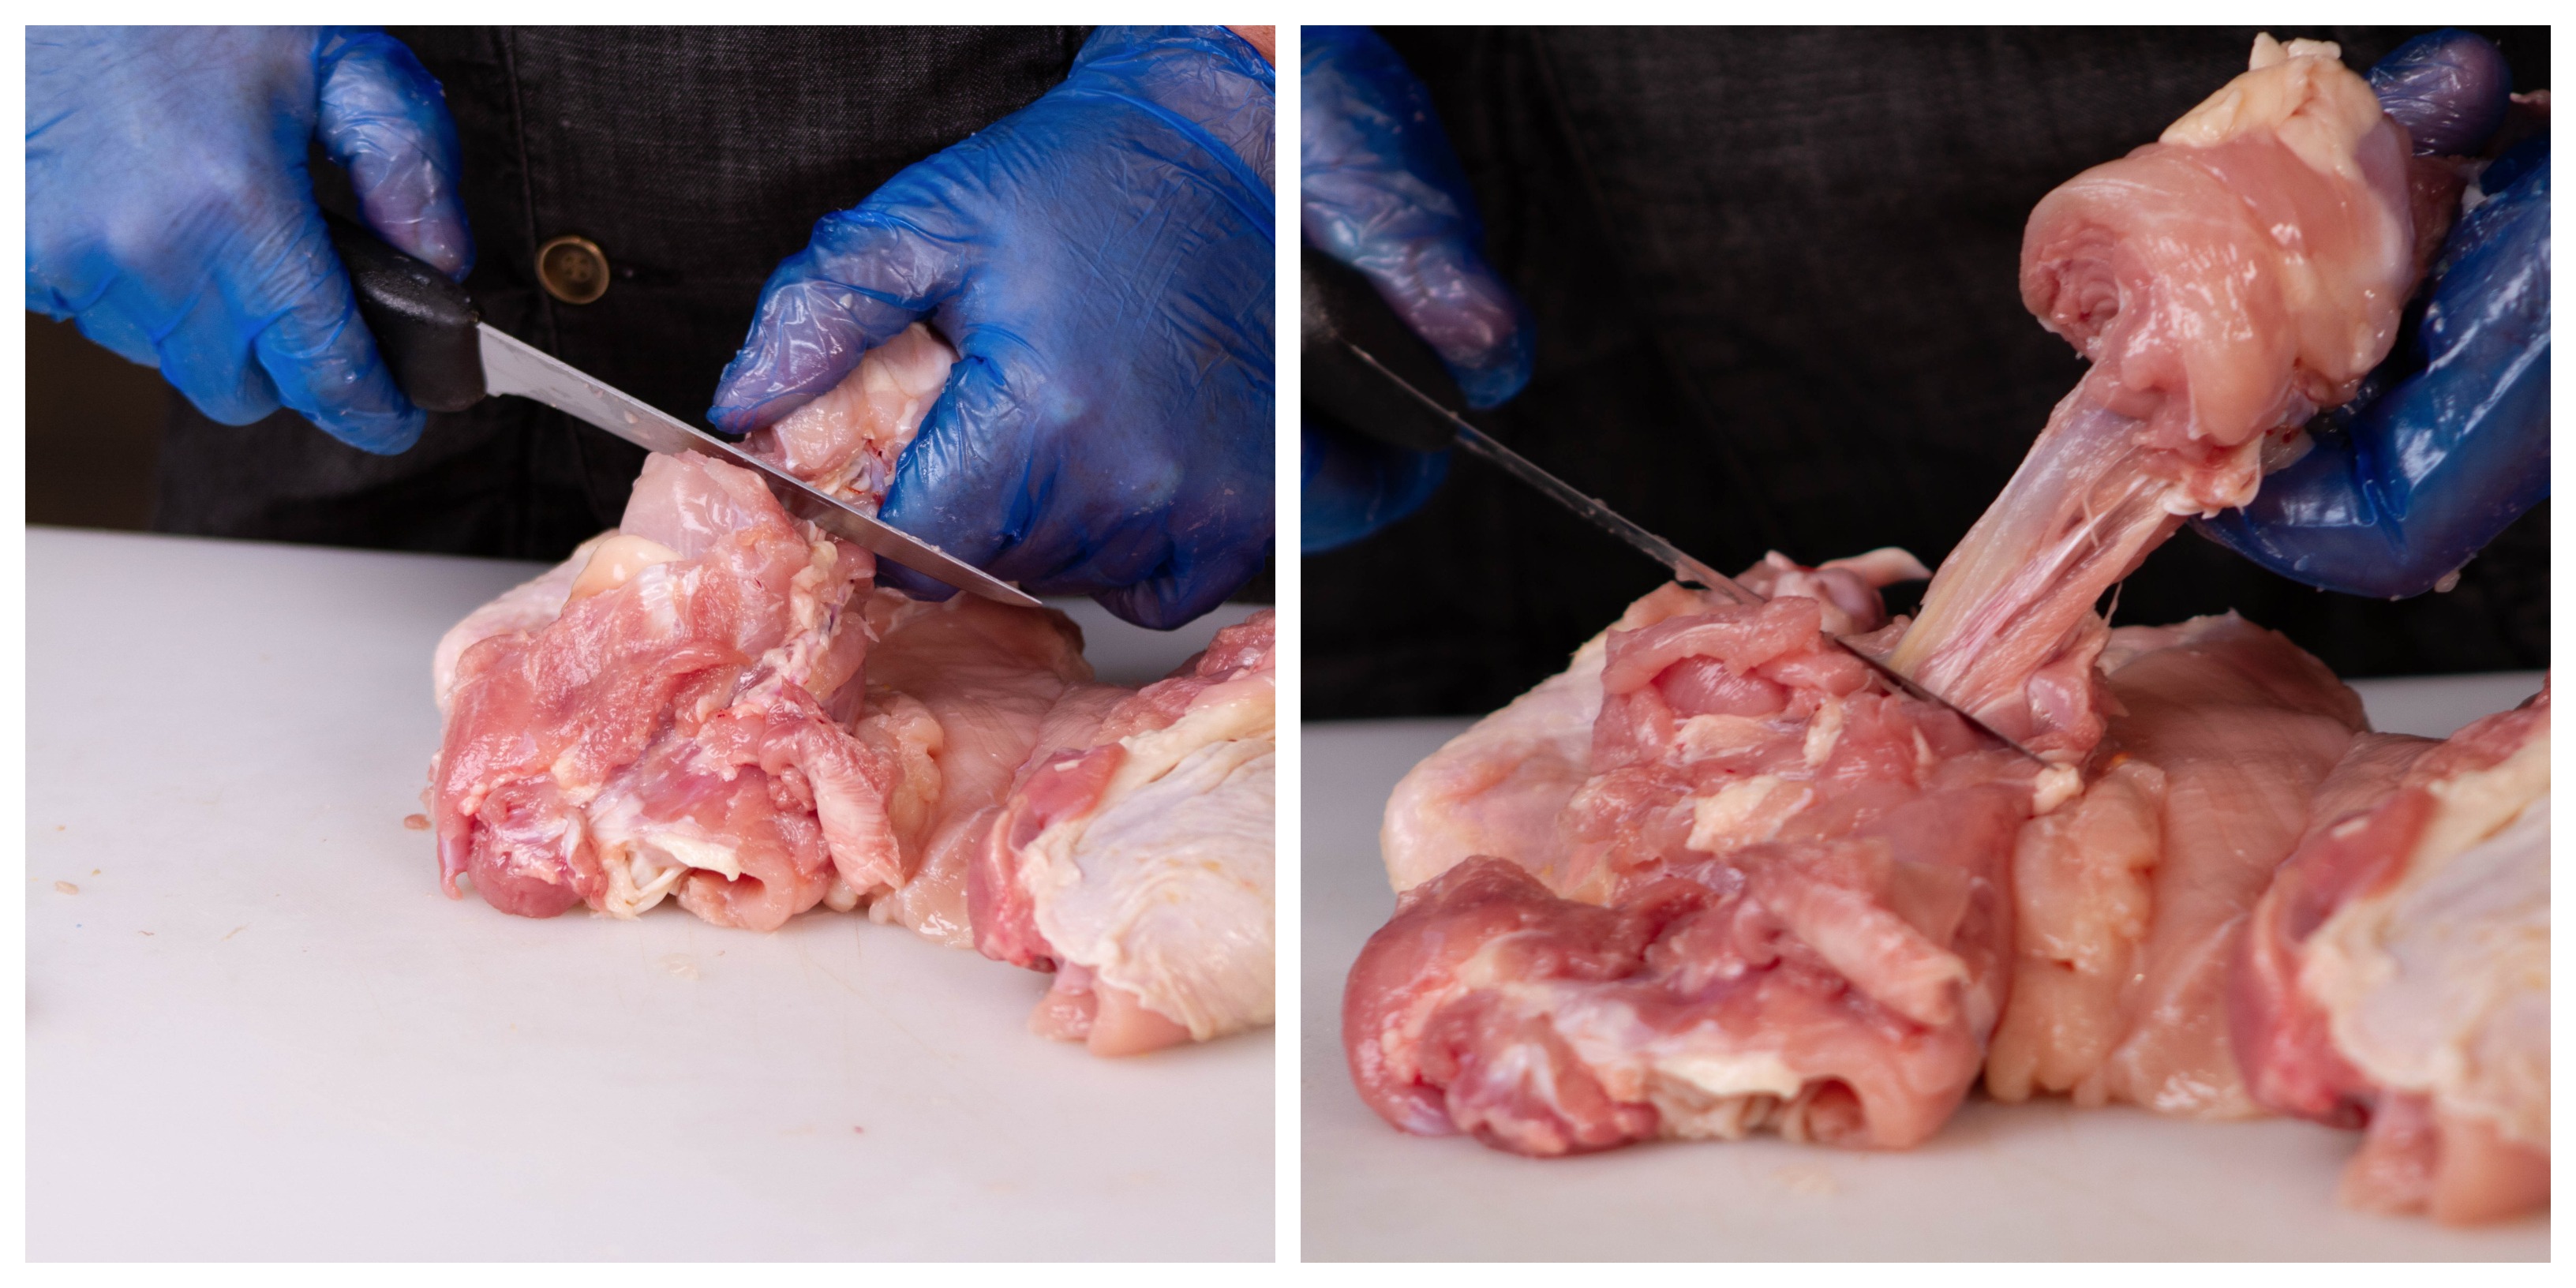
- With the back of a knife, scrape the meat from the thigh bone.
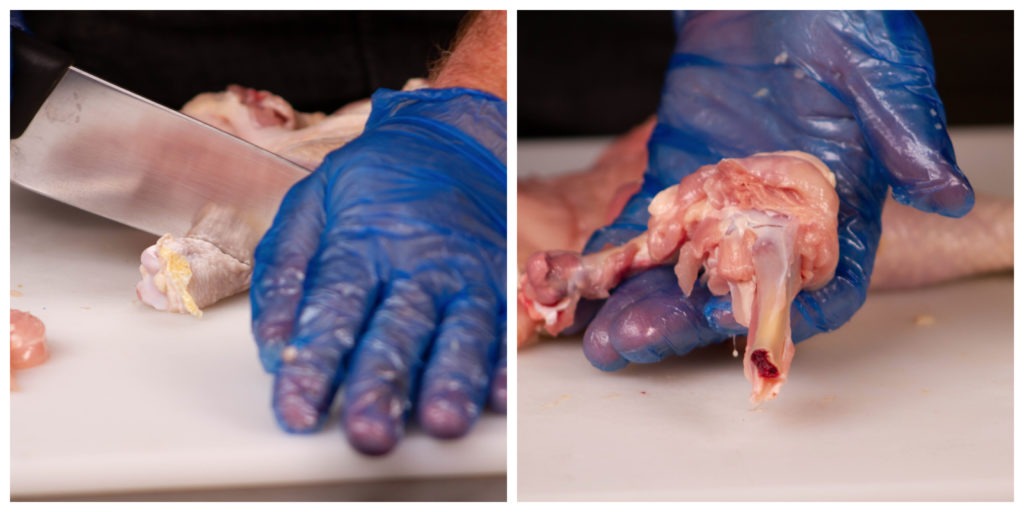
- When you reach the knee, cut the connective tissues around the knee away and continue scraping the meat down the leg bone with the back of the knife.

- Cut the ankle off with the shears or chef’s knife.
- Pull the leg bone free.
- Upend the wing bone and press down on the meat around it. It will (sort of) pop out. I honestly couldn’t get the second section out and cut if off. No shame or judgment.
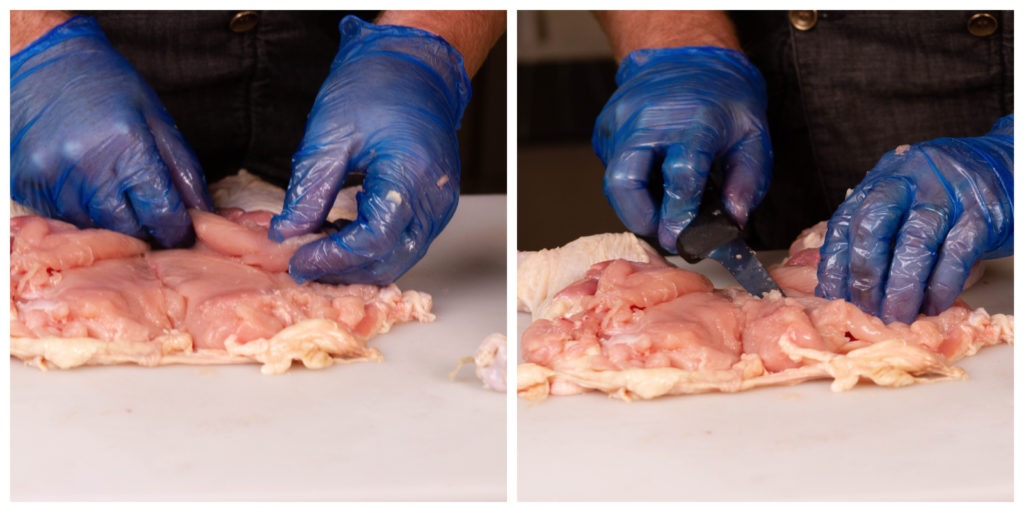
- Reposition the tenderloins in their place on the breasts.
- Butterfly the fattest end of the breast a little to make an even layer as much as you can.


It’s a lot of steps and it’s messy, but the end result is pretty cool.
Ready for the recipe? Let’s go!
Turducken recipe
As developed by J. Kenji López-Alt and explained on SeriousEats.
Ingredients
- 1 Turkey, thawed
- 1 Duck, also thawed
- 1 Chicken, fresh or thawed
- 1 ½ lb sausage (flavor of your choice)
- salt and pepper
Instructions
- Debone all fowl according to steps above.
- Start preheating a pot of water on the stove to 180°F (82°C).
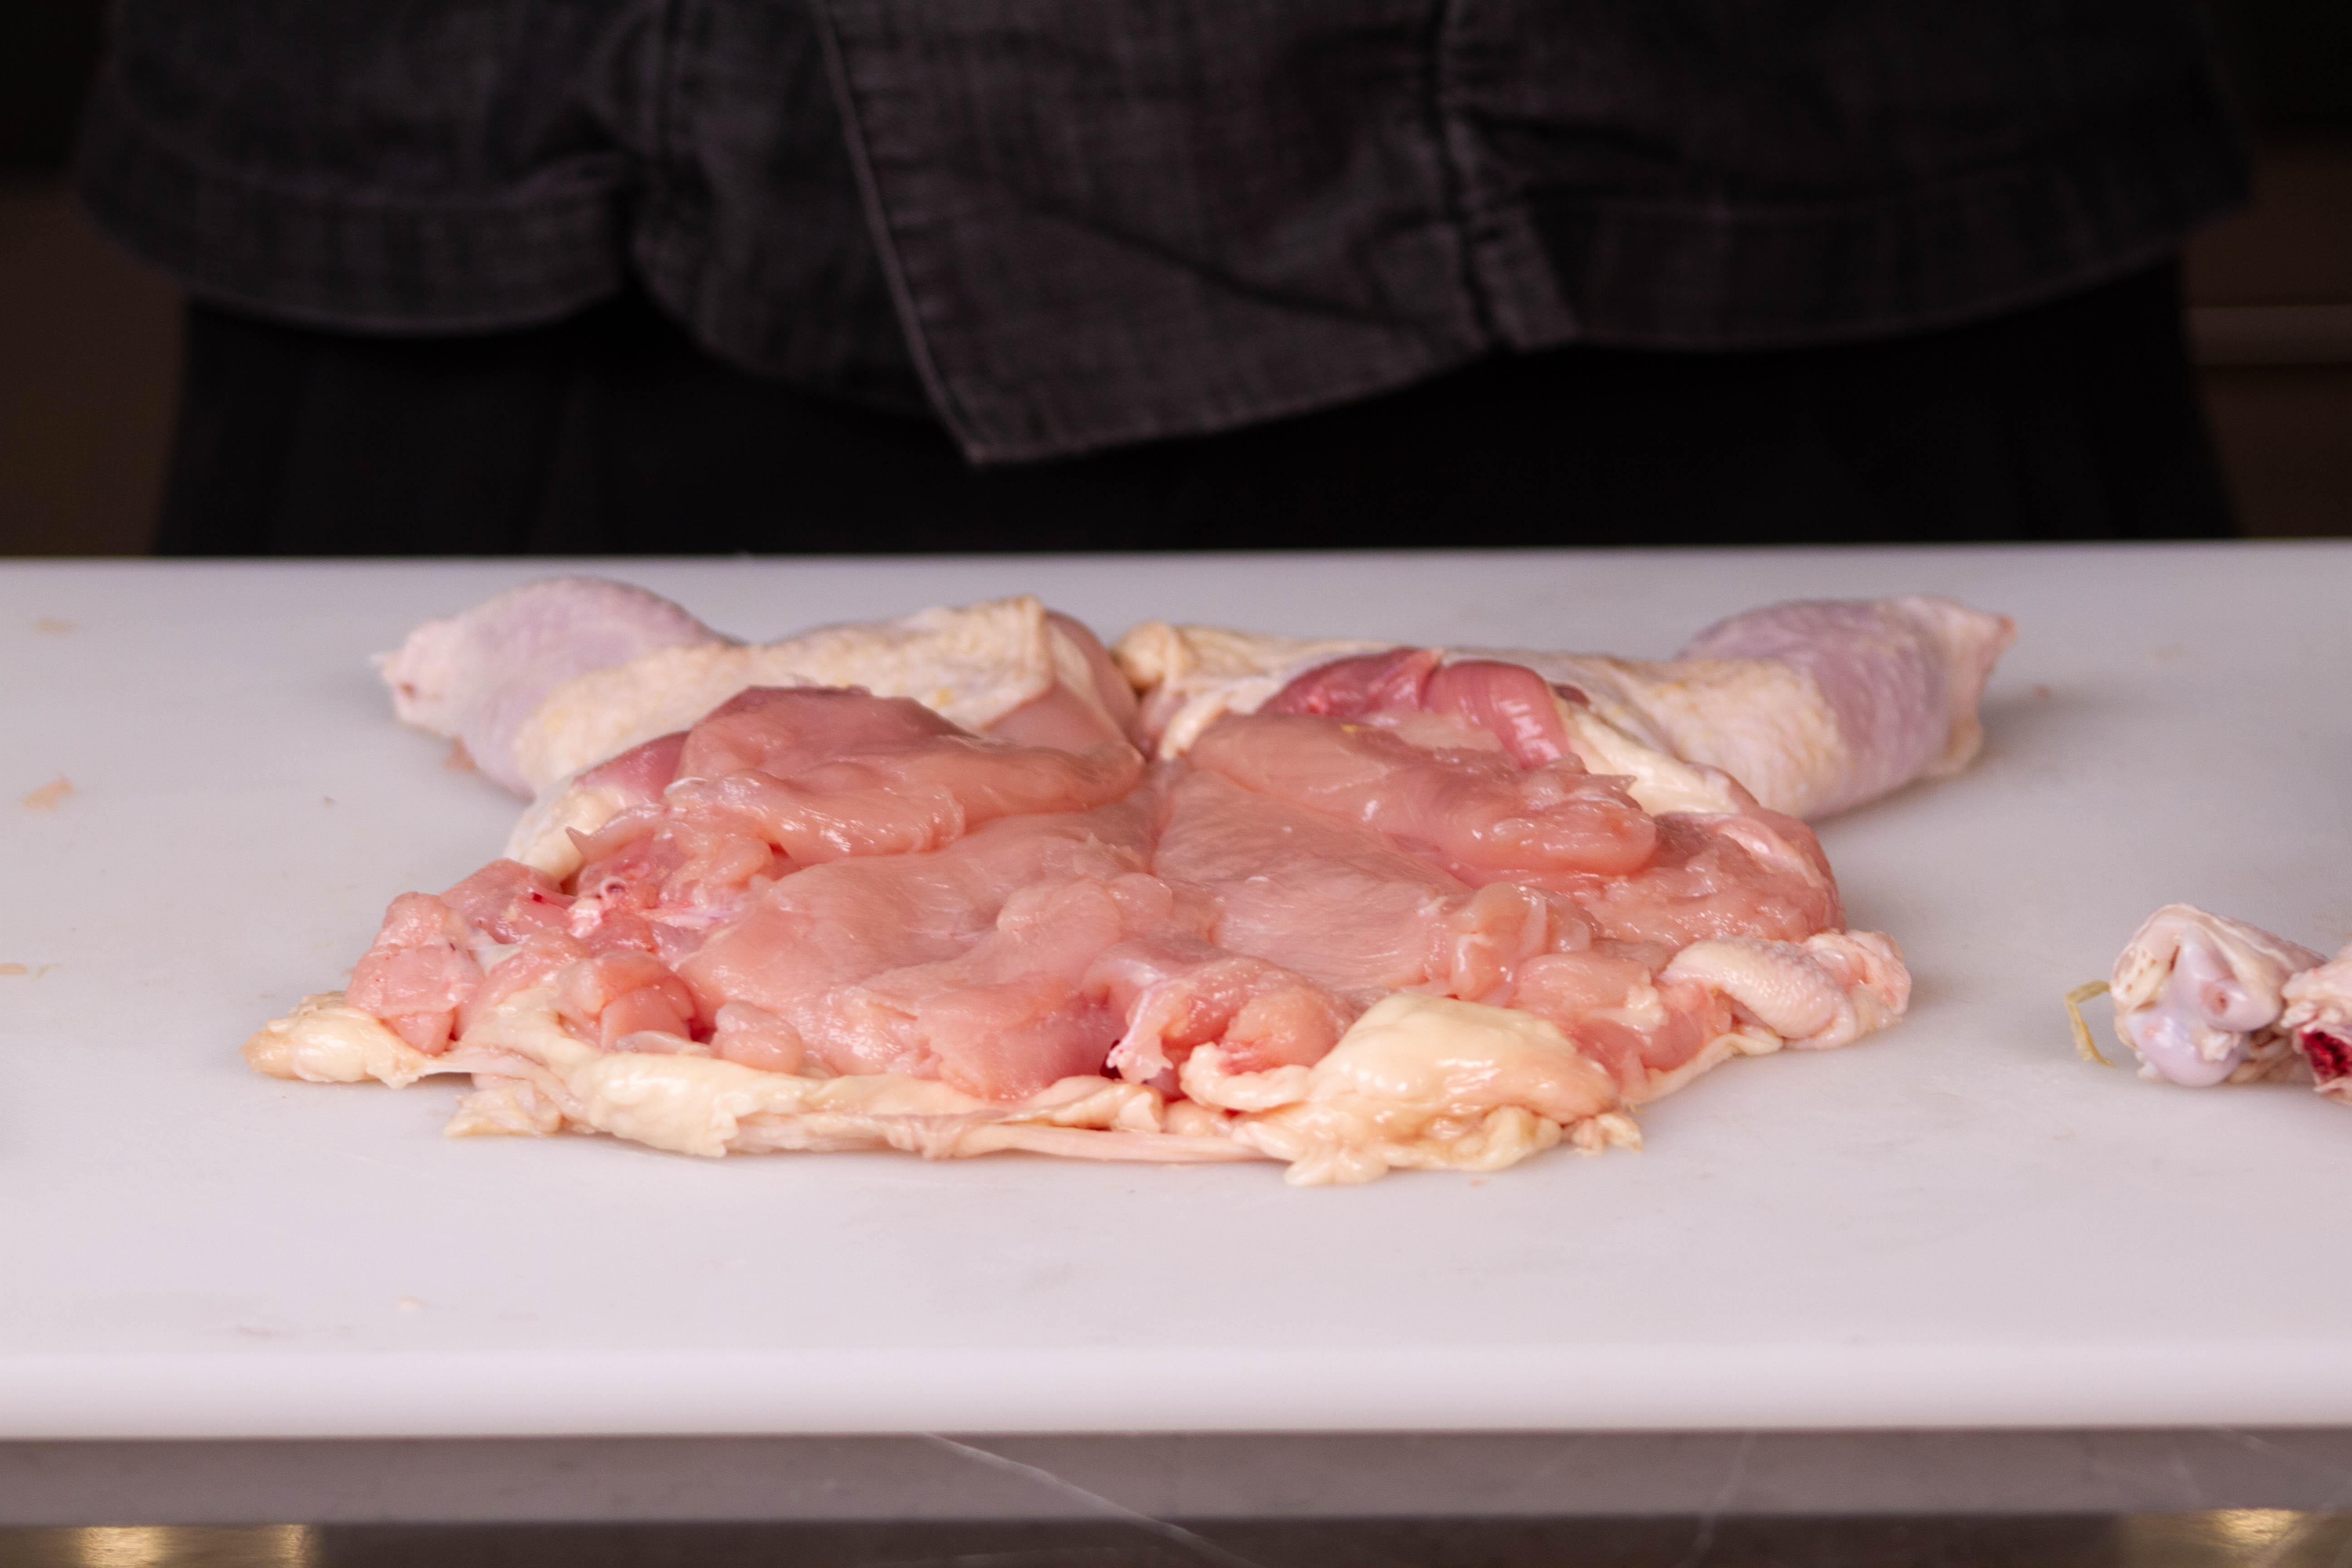
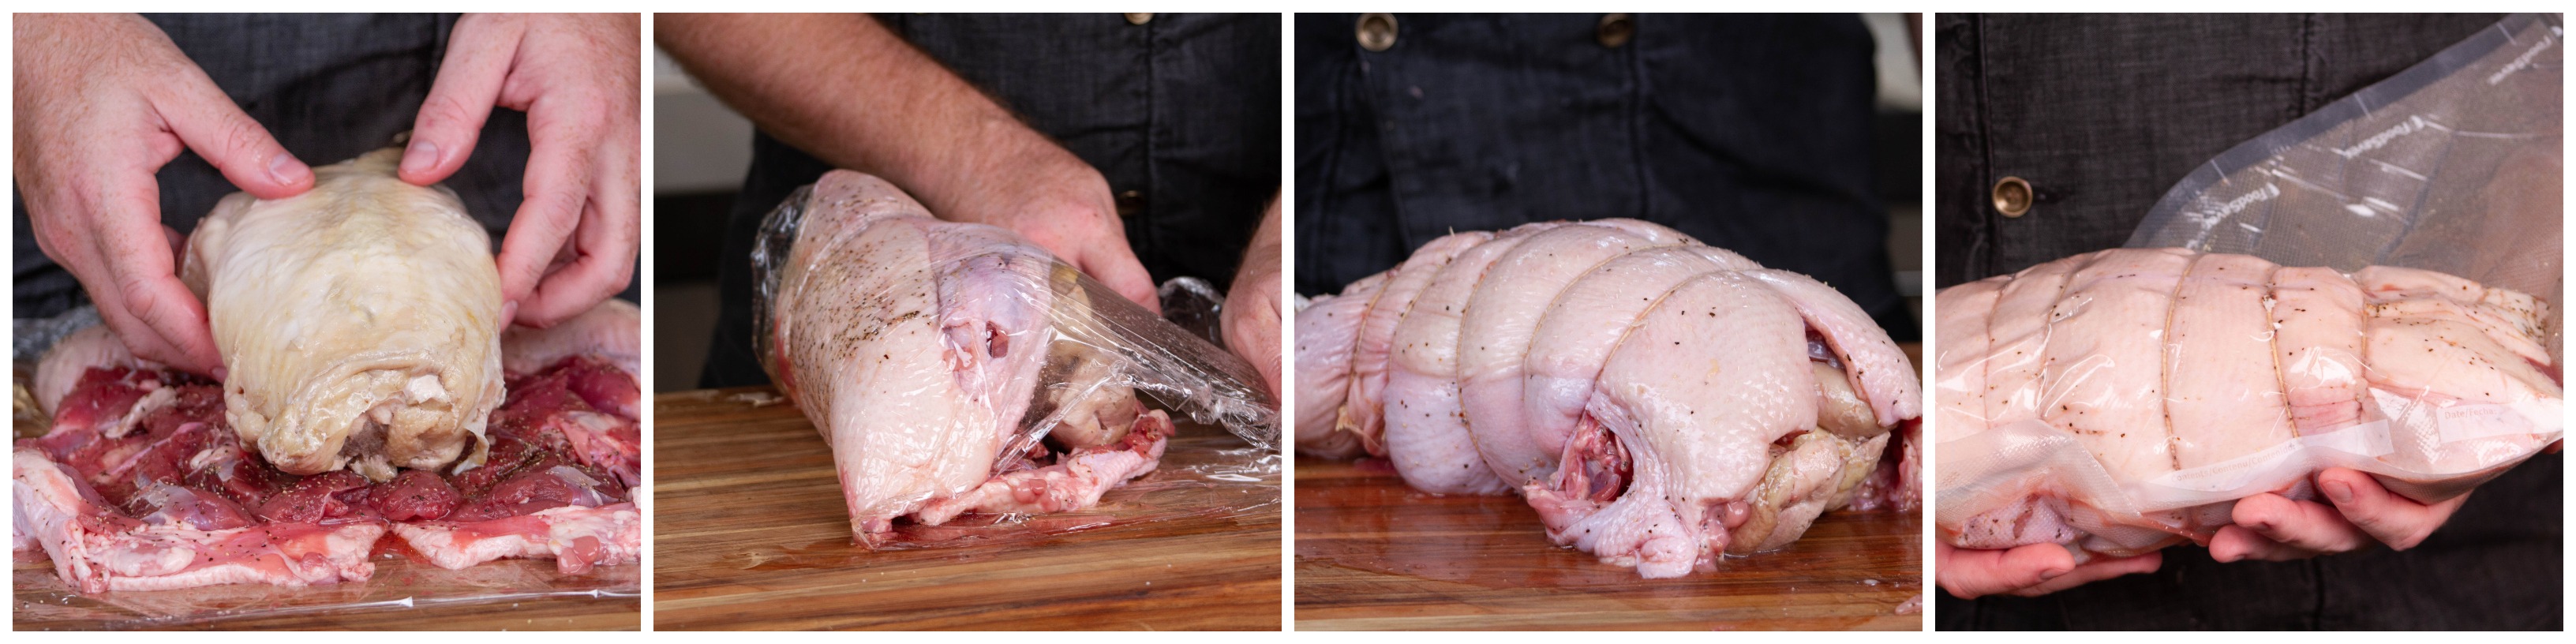
- Lay the chicken on a large sheet of plastic wrap.
- Season the chicken with salt and pepper and cover the breasts with a layer of sausage.
- Using one side of the plastic wrap, pull up one side of the breast up and towards the other side.
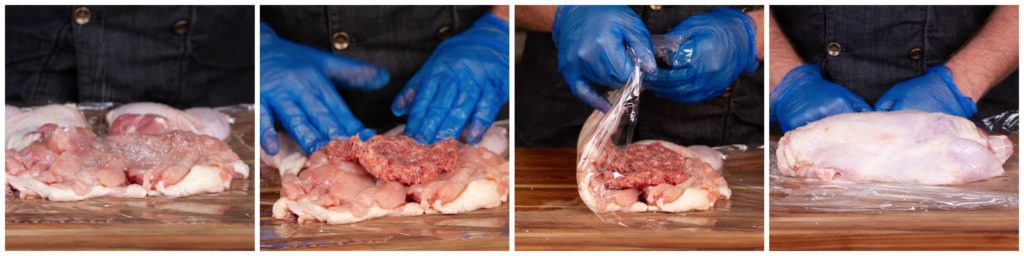
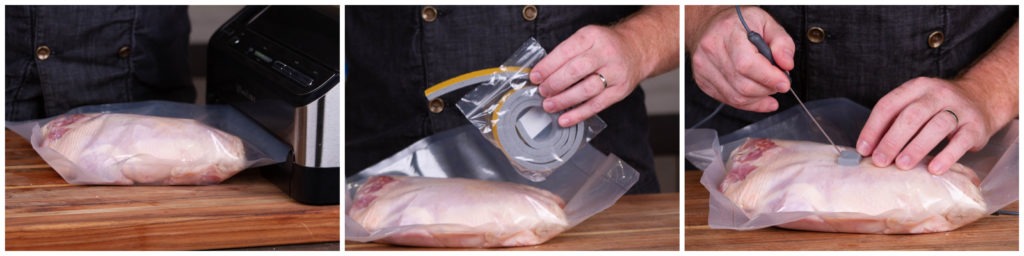
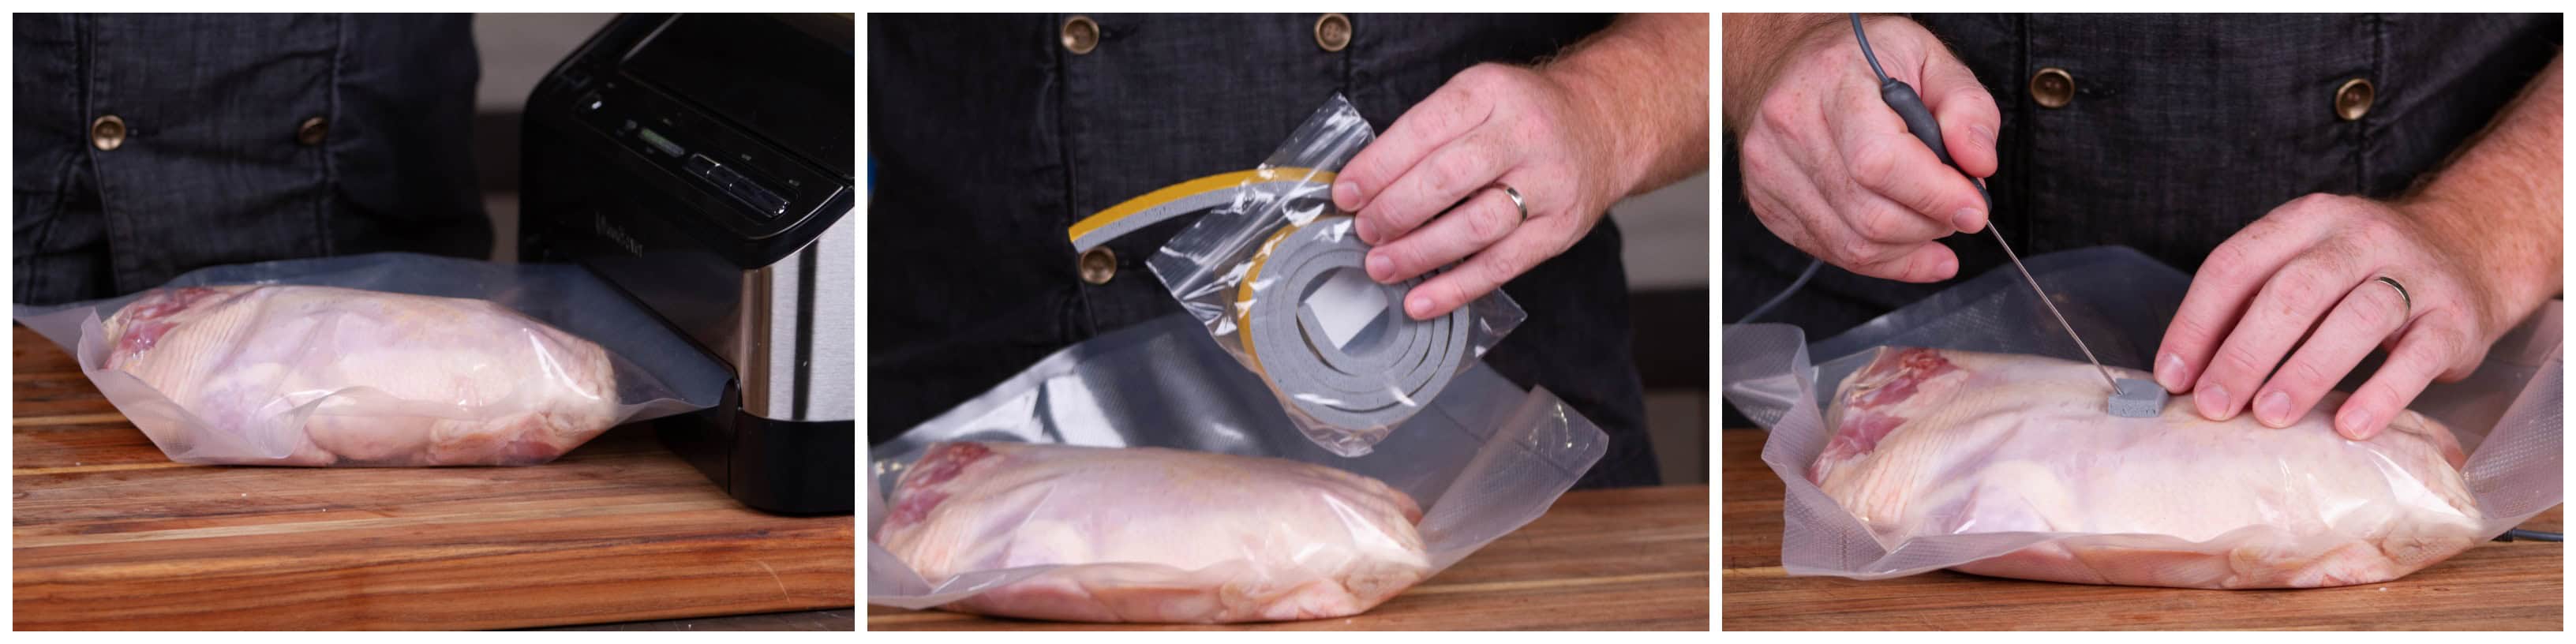
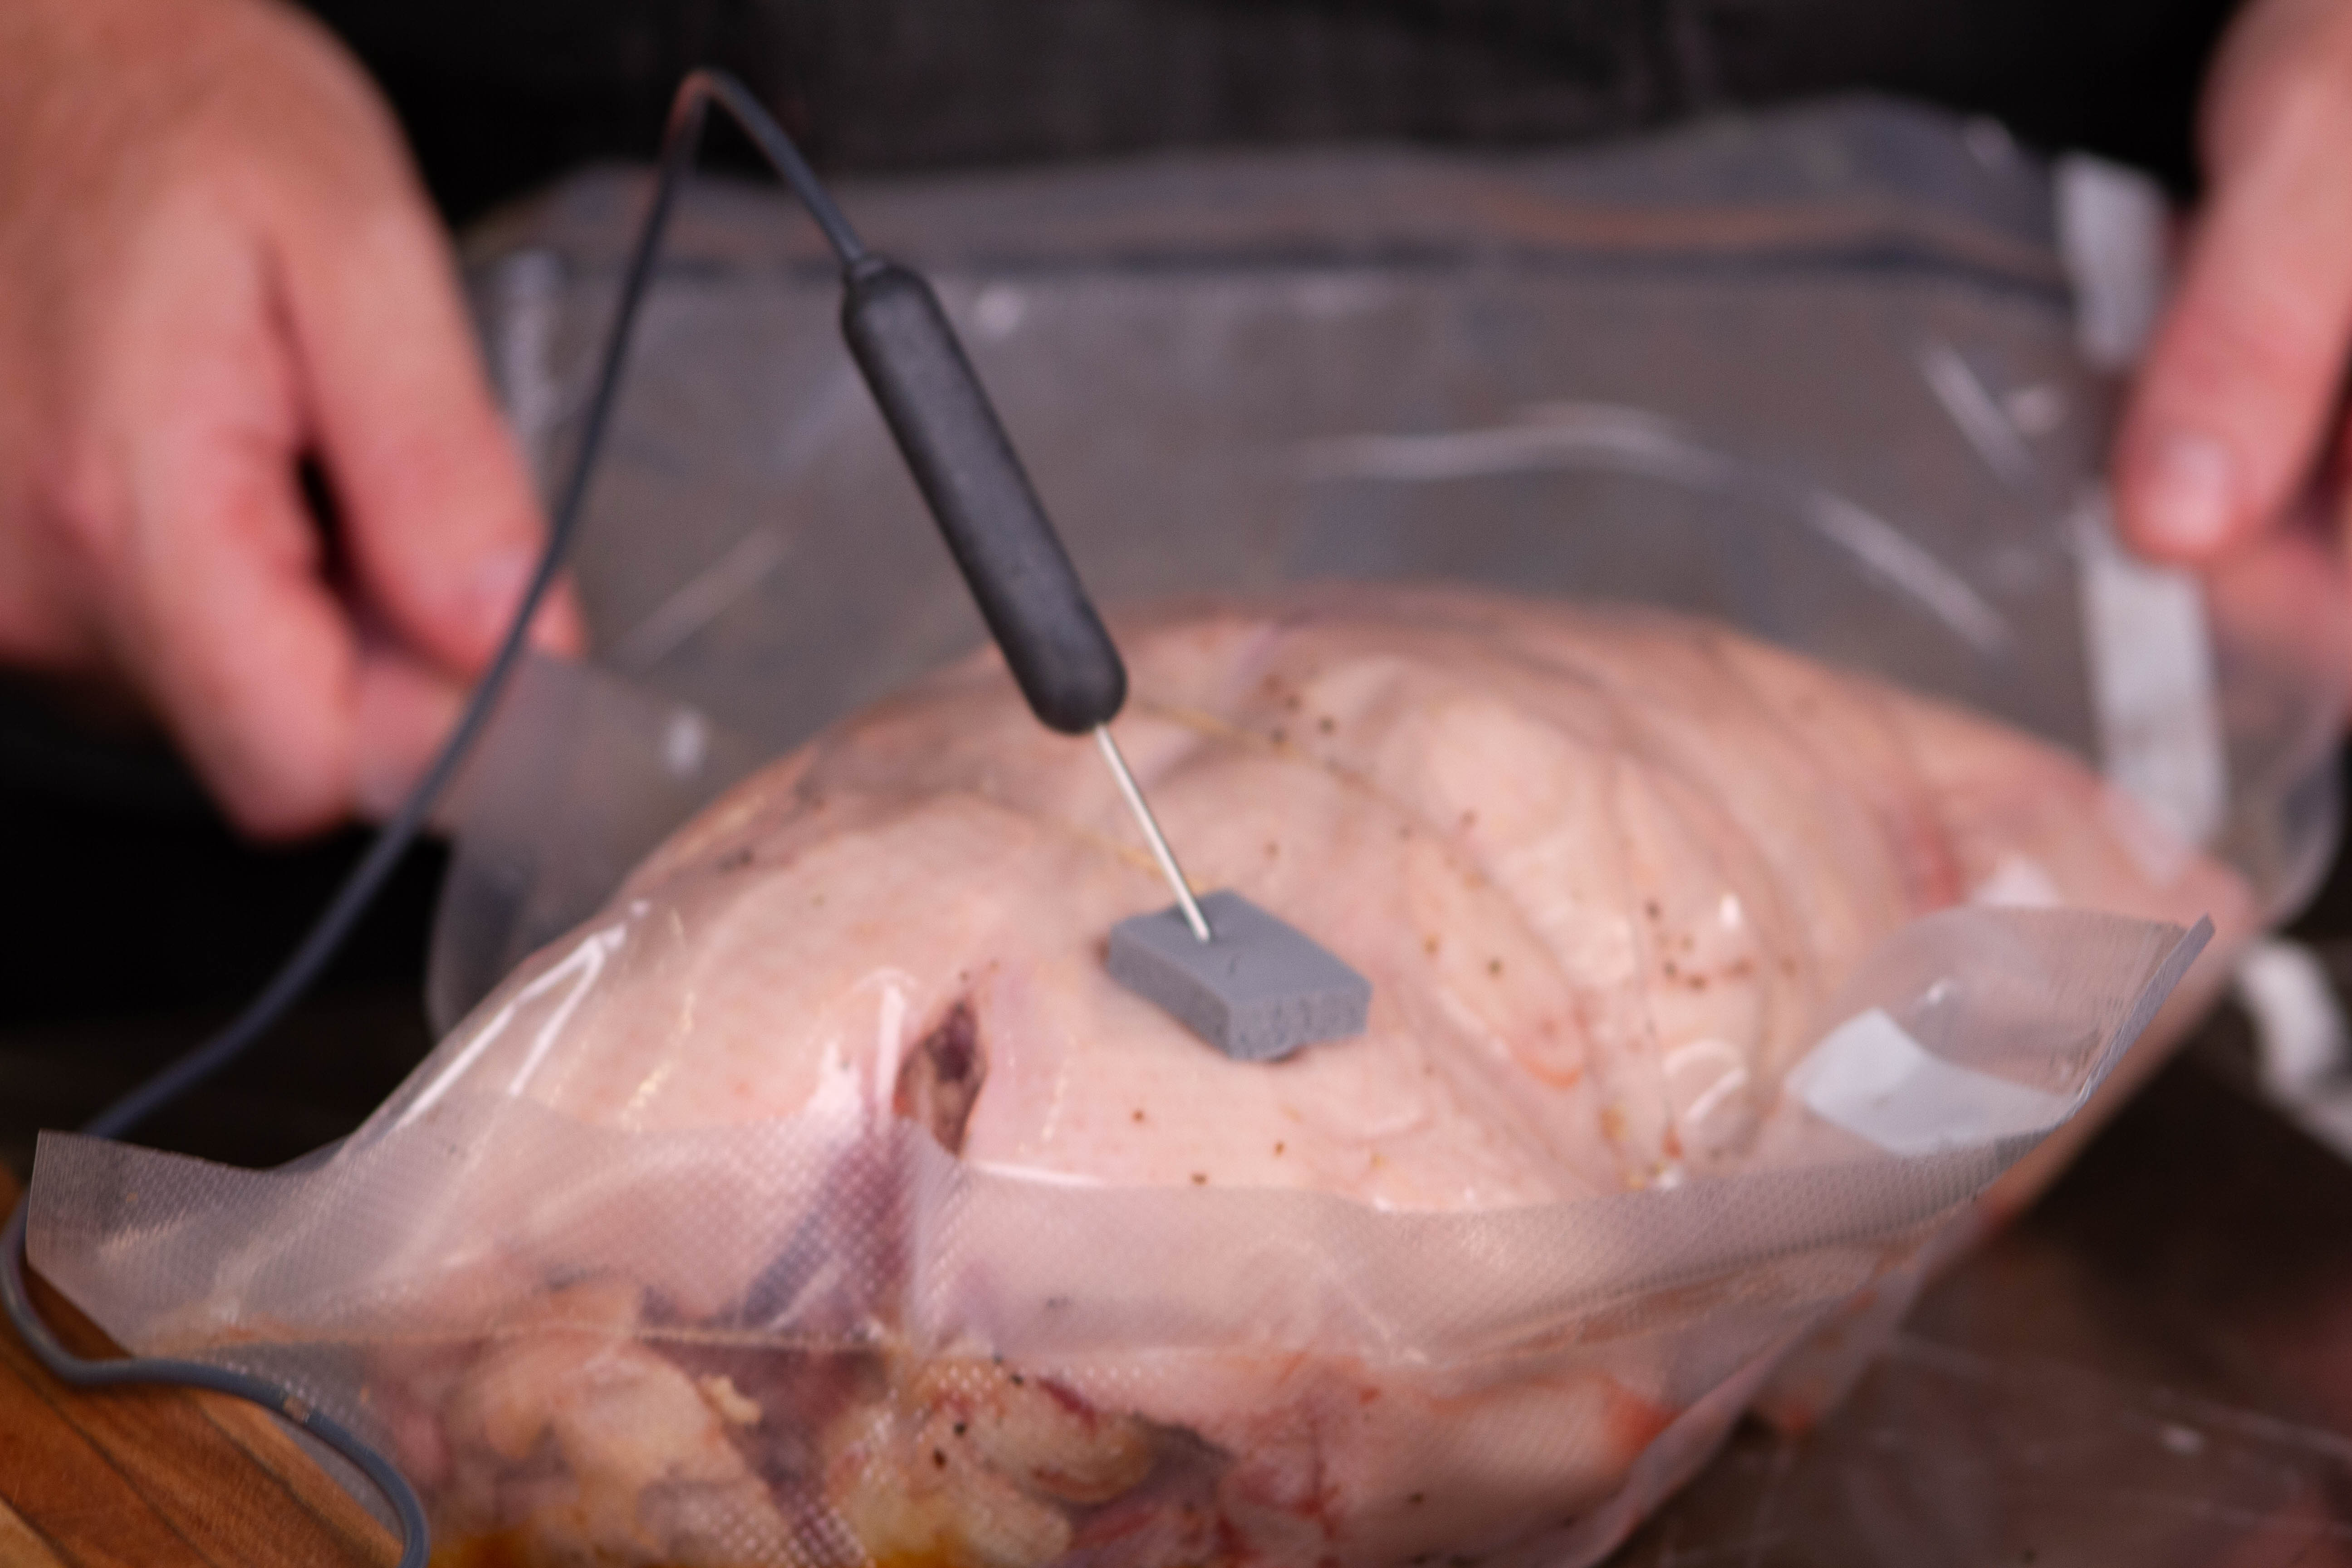
- Vacuum-seal this semi-cylindrical chicken in a heat-safe bag.
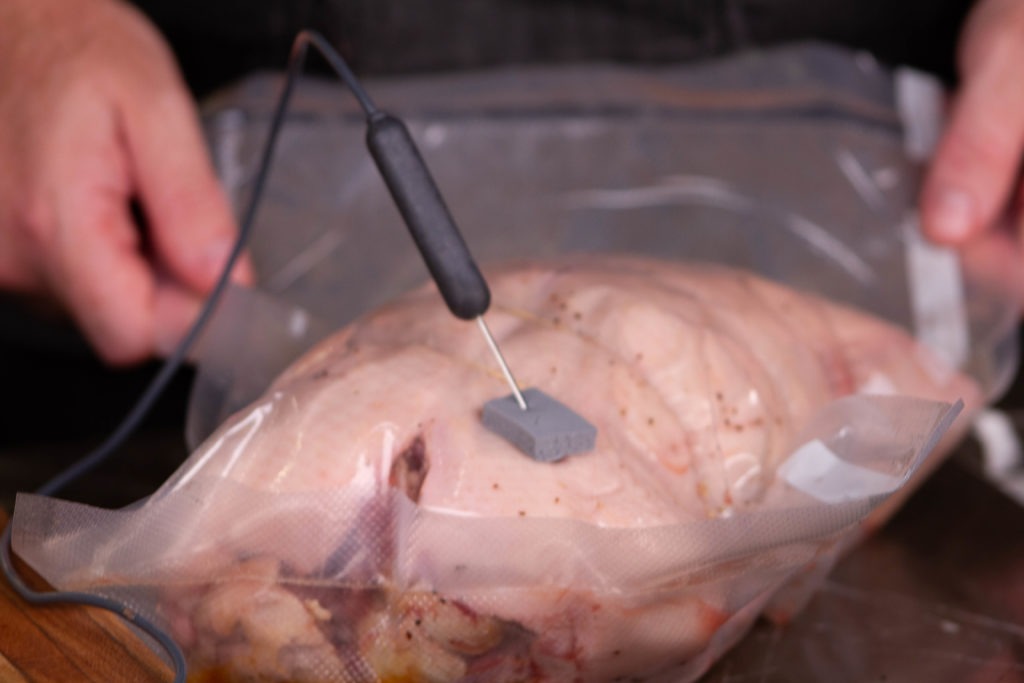
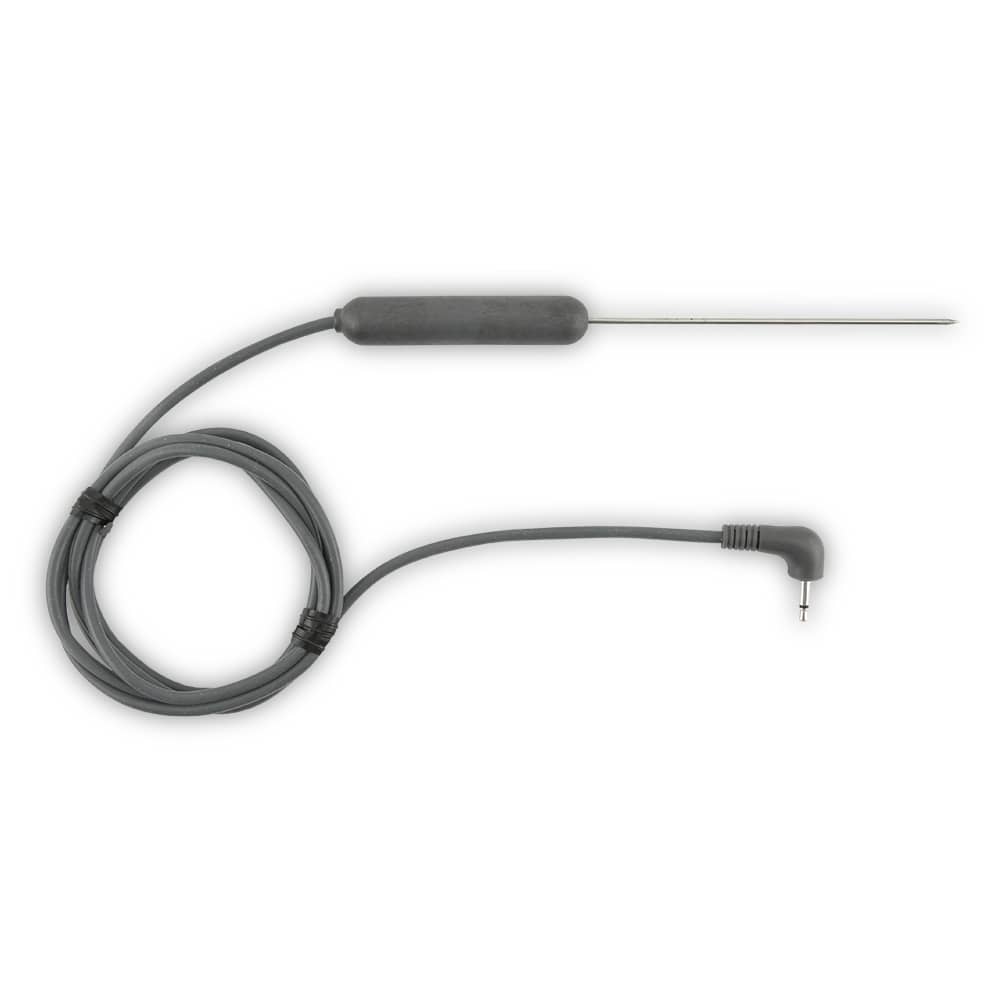
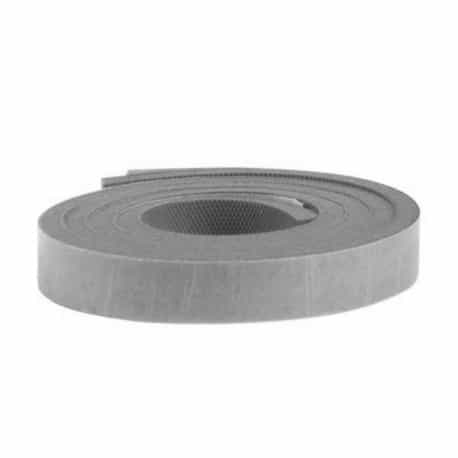
- Using waterproof foam tape and a Pro-Series® Waterproof Needle Probe, probe the center of the sausage-stuffed chicken.
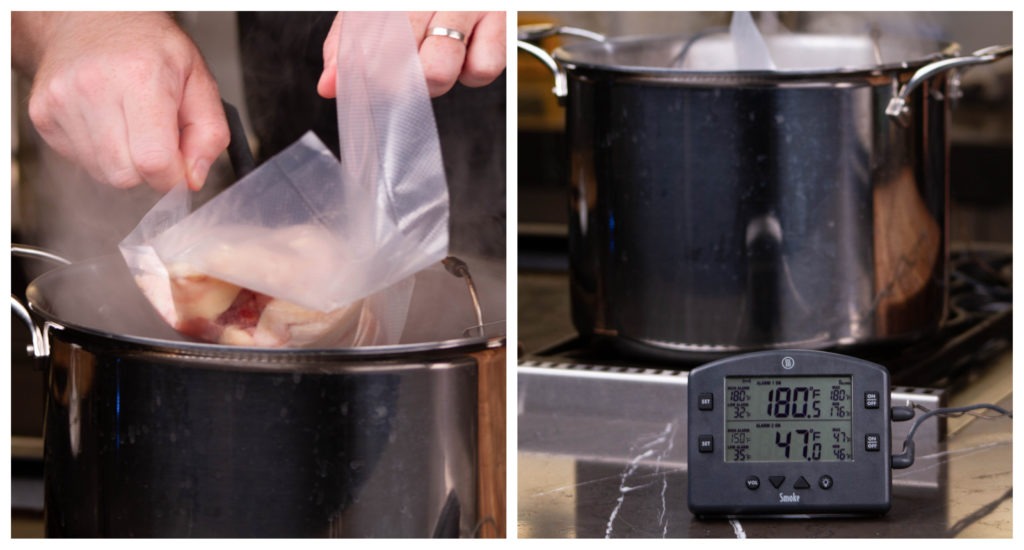
- Put the chicken in the pot and poach it. Set your Smoke™ alarms: the water should have a temperature range of 170–190°F (77–88°C) and the chicken should have a high-alarm of 150°F (66°C).
- When the chicken is done cooking, cut it free from its bag.
- Lay the duck on a sheet of plastic wrap.
- Season the duck with salt and pepper, and place the cooked chicken on it.
- Follow the same wrapping procedure with the plastic wrap for the duck.
- Tie the package closed with butcher twine and vacuum seal it.

- Cook as you did for the chicken, but position the probe in one of the duck legs that has no hot chicken in it.
- Preheat the oven to 425°F (218°C).
- Remove the turkey from the refrigerator and place bags of ice on the exposed breast meat. Allow it to sit on the counter so that the legs warm some while the duck cooks. This will help the leg meat cook better.
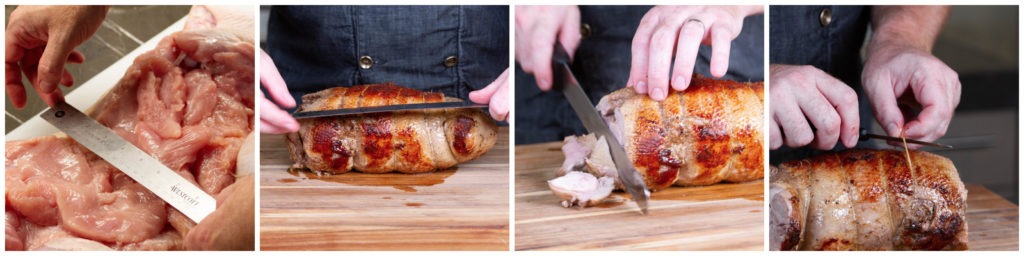
- When the duck alarm sounds, remove the duck from its package and sear in a medium-hot skillet or on a flat-top until well browned and partially rendered.

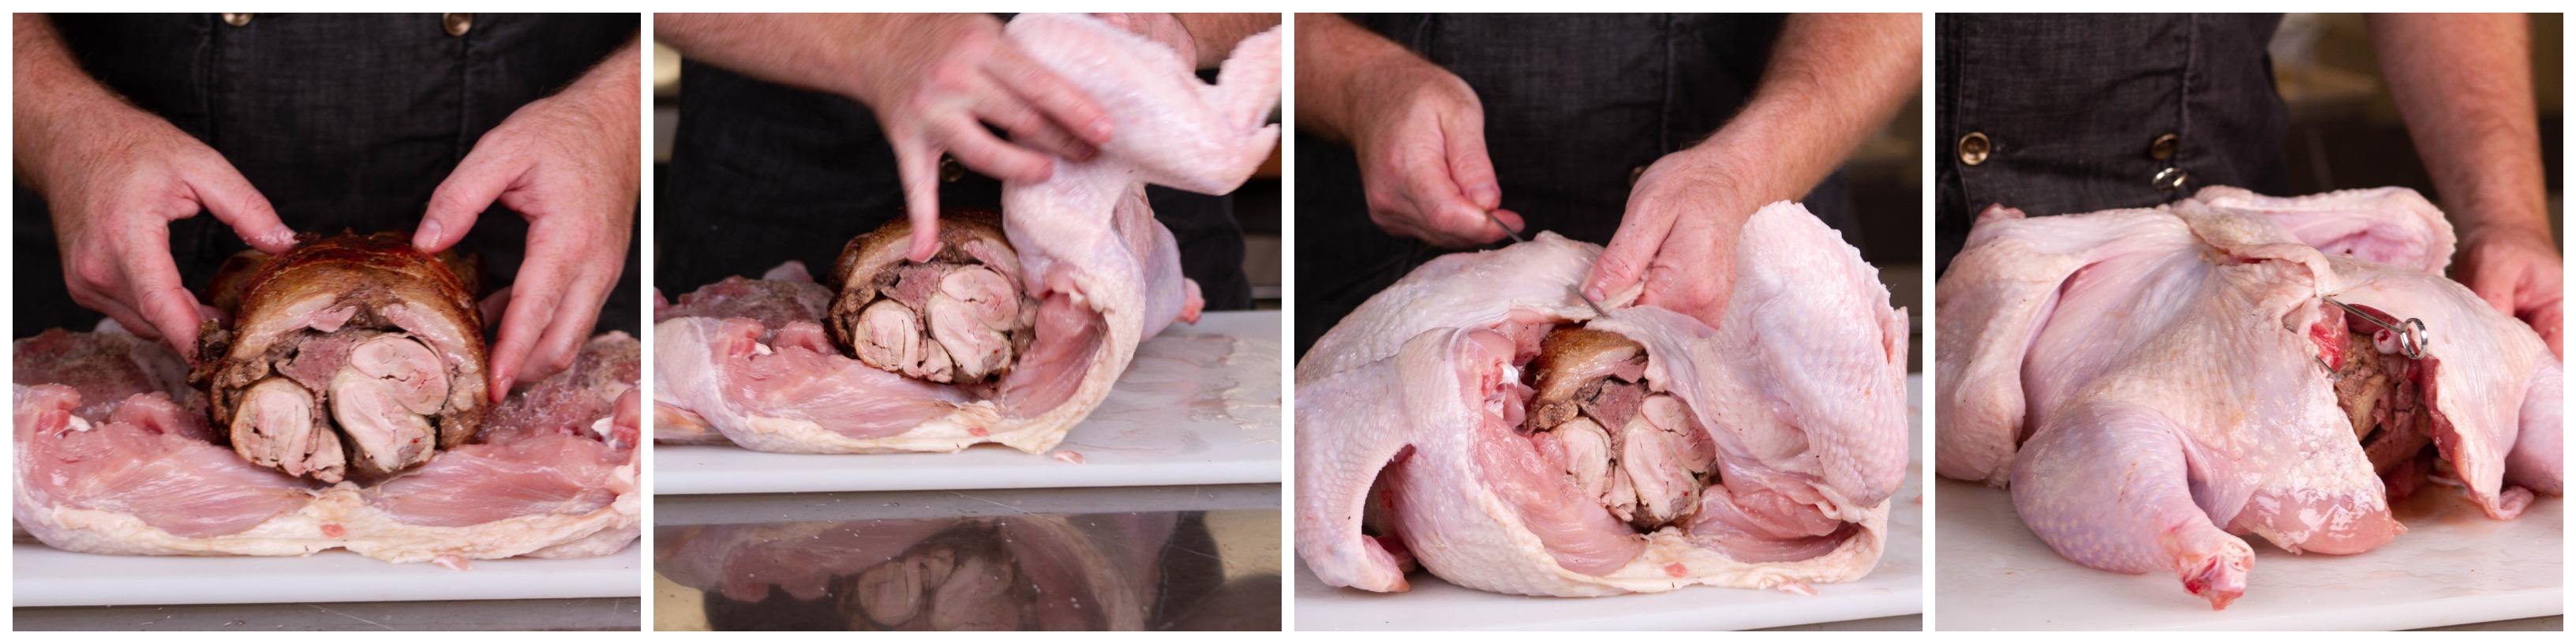
- Measure the length of the breast cavity of the turkey and trim the duck to fit. Remove string from duck.
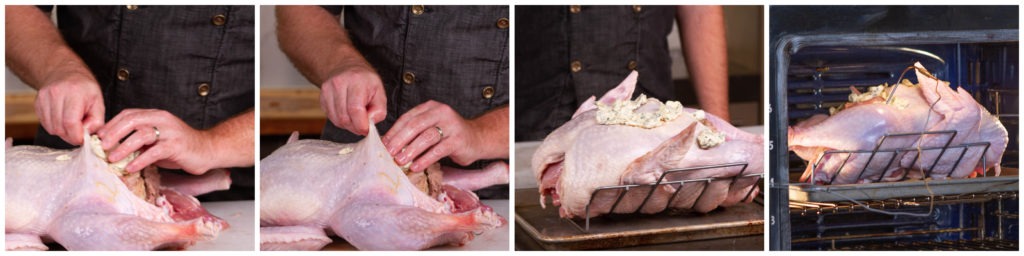
- Wrap the duck in the turkey and secure the bottom of the turkey with skewers.

- Rub butter on and under the skin of the turkey. Place it in a roasting rack to help keep the turkey-like shape.
- Probe it in the breast (high alarm 157°F [69°C]) and the thigh (high alarm 175°F [79°C]) and roast.
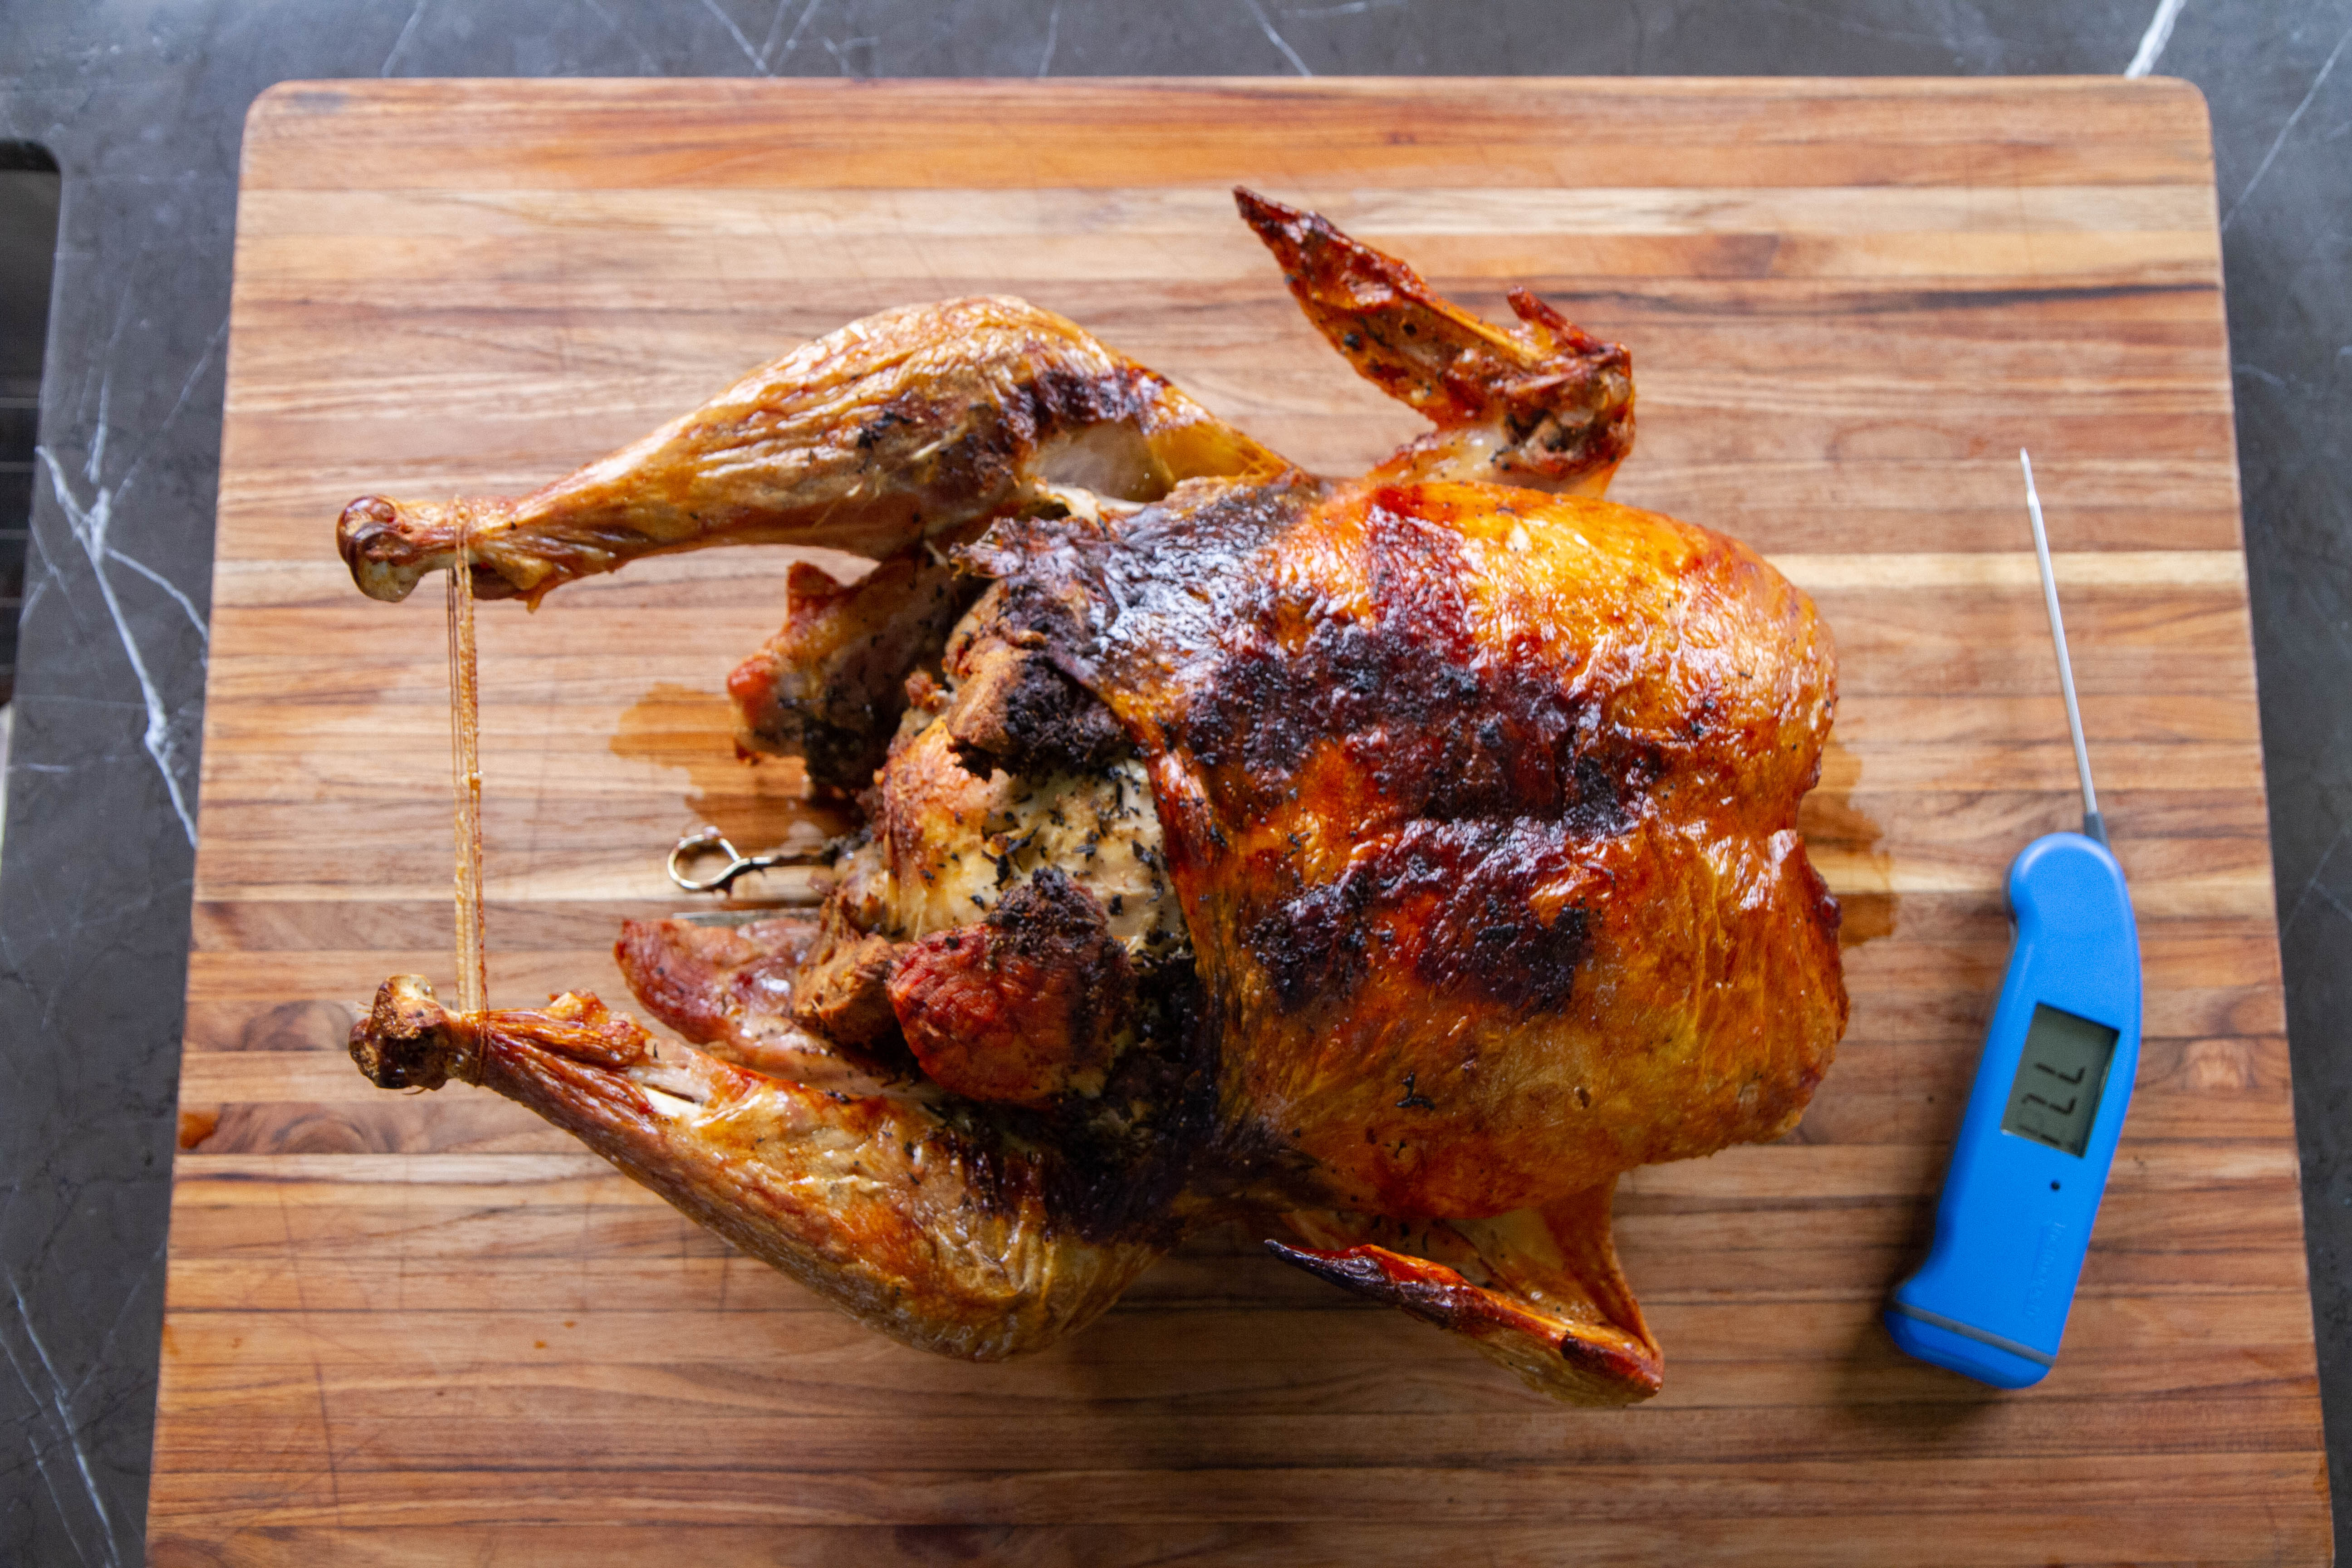
- When the breast alarm sounds, check the temperature with a Thermapen®.

- Let the turducken rest for 10 minutes before cutting down the middle and then slicing into servings.


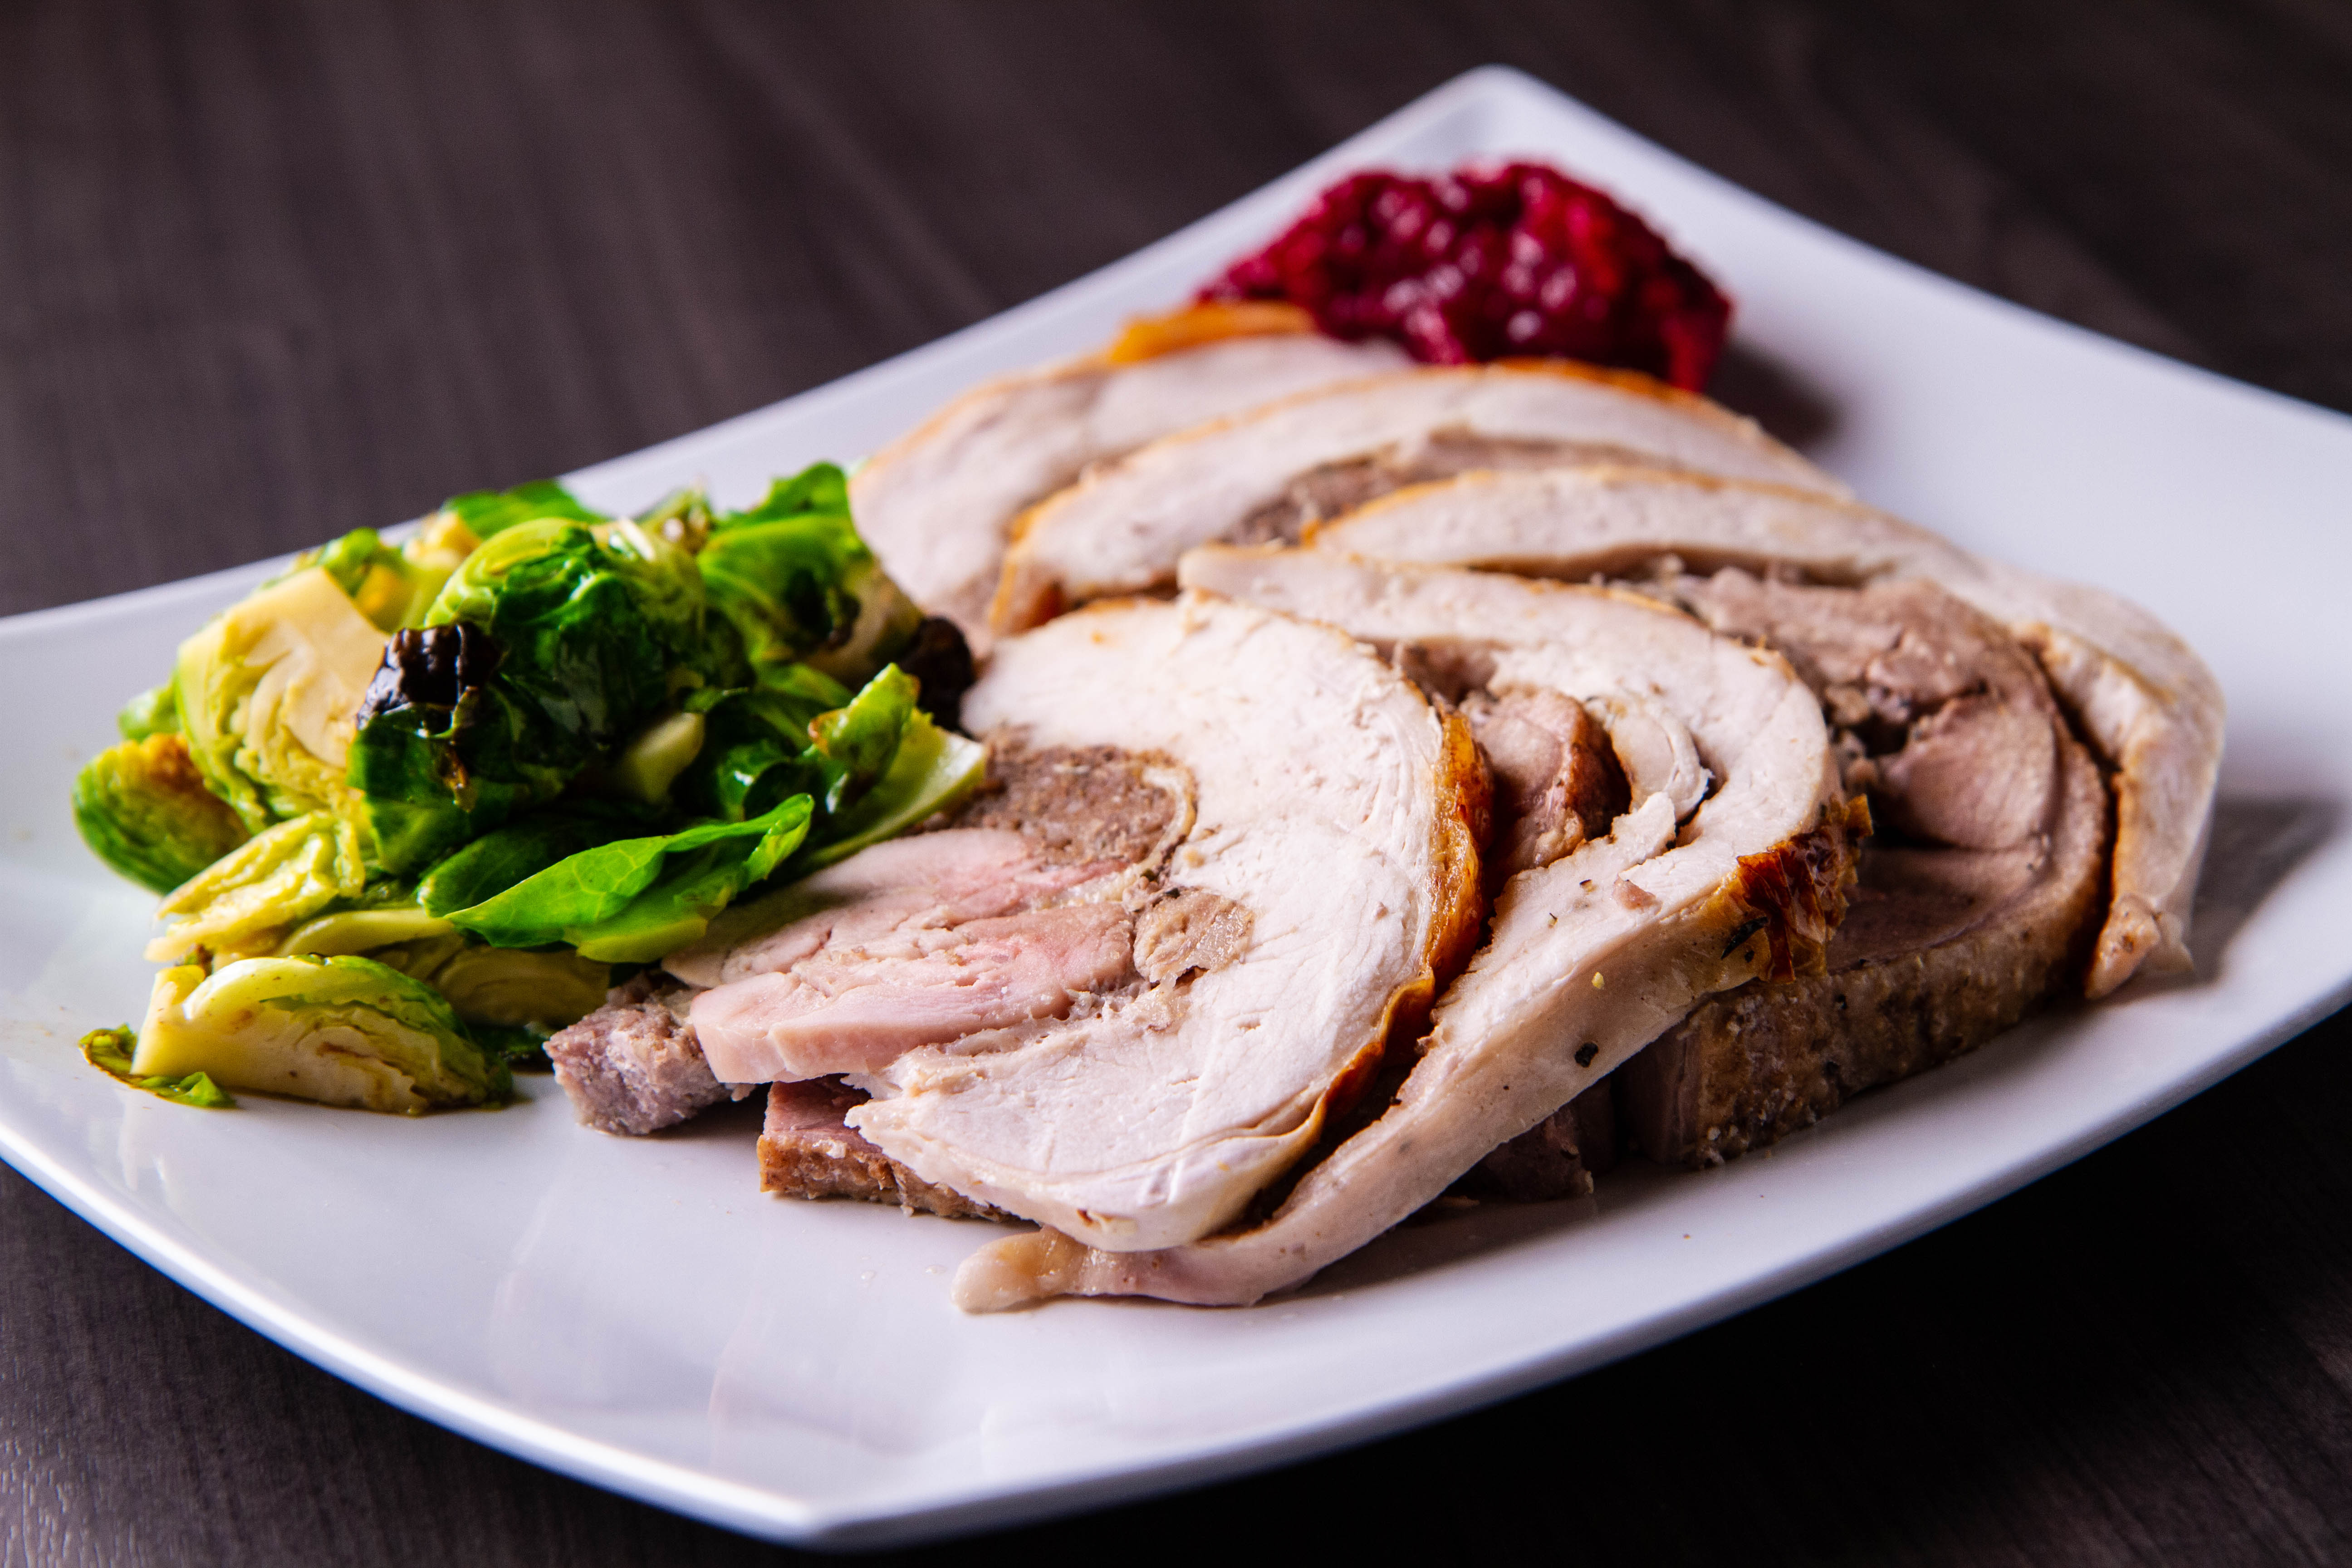
This is not an easy process, but it is an accomplishment! Bringing a boneless, meat-stuffed turkey to the table is a great way to wow your family at Thanksgiving, and since you cooked it with thermal principles in mind and accurate thermometers like the Signals, Smoke and Thermapen, you can know that when they say “wow! This is amazing!” they really mean it! So roll up your sleeves, and cook yourselves a mythical bird this Thanksgiving. It’s turducken time!
Shop now for items used in this post:


John says
So…we’ve gotten a turducken for Christmas dinner. A pre-assembled, boneless turducken, bacon-wrapped, sausage-stuffed, and vacuum-wrapped.
Do you have any recommendations on how to cook this to perfection?
Martin says
John,
The best thing you can do is make sure it’s completely thawed. Though is it “professionally” constructed, this will still present the same thermal challenges: a huge mass of meat that must be cooked through. I’d just follow the directions given with it, but I wouldn’t hope too much for juicy turkey on the outside.