Sheet-pan Baked Chicken Breast Recipe: Temperature, Not Time
Well, it happened. The calendar flipped. The holidays are now history, and with them the season of indulgent eating, entertaining, and sinks full of dishes. It’s January again, time to pare down and get organized. Time to start eating healthier—still delicious but healthier. It’s baked chicken breast time.
If that sounds about right to you, boy do we have the right dinner for your family. There’s a new trend in cooking that has caught our eye—sheet pan meals. There is nothing new about one-pot dinners, but the sheet-pan approach is better for the main reason that the foods are roasted, not simmered together. This is healthier eating. Plus, the roasting caramelizes the vegetables, Maillard-browns the meats, and takes very little time. As an added bonus, sheet pan cooking creates very few dishes! You may not hate doing dishes as much as I do, but simple, efficient, healthy, delicious cooking is just what the doctor ordered for January.
Most sheet-pan recipes, however, fall short in one very important regard: doneness temperatures. Most recipes you will find say something like “cook for 15-20 minutes or until done,” which is really no help at all. So today we’re bringing you a few sources and tips for sheet-pan meals in general, as well as a recipe for baked chicken breasts with actual thermal instructions. Break out your ChefAlarm®, dinner is almost ready.
Contents:
Sheet-pan meal basics
Sheet-pan meals are the new answer to one-pot convenience but with the added health and flavor benefits of roasting. They’re simple: a bed of oil-tossed vegetables and flavorings into which is nestled your protein of choice, usually rubbed or marinated. The whole pan is baked at high heat on a rimmed baking sheet until the vegetables get browned and tasty and the meat succulent and safely cooked. The ease and speed of preparation have made sheet-pan meals popular in an era of people on the go.
That said, just shoving some food on a pan all together and tossing it in the oven isn’t going to give you optimal results. For instance, if you were to cook a piece of chicken with some asparagus you would end up with either overcooked asparagus or undercooked, very unsafe chicken. Yuck and yuck.
For some food combinations, you need to stagger each element’s entry into the oven. There are guides that you can find that give estimates on cooking times for cooking different ingredients so that you can plan how to assemble any meal you like and cook everything just right.
Here are some suggested cook times for today’s baked chicken breast recipe though, as you should know by now, cook times for proteins are always just approximate. We will be cooking our chicken to temperature. The following charts contain information from the New York Times‘ cooking website.
Approximate chicken cooking times for sheet-pan meals:
| Skin-on cut of chicken | Approximate cooking time at 400°F (204°C) | Pull Temp |
| Whole chicken breast, bone-in | 30 – 40 minutes | 157°F (69°C) |
| Whole chicken breast, boneless | 20 – 30 minutes | 157°F (69°C) |
| Whole chicken thighs, bone-in | 30 – 45 minutes | 165°F (74°C) |
| Whole chicken thighs, boneless | 25 – 40 minutes | 165°F (74°C) |
Approximate vegetable cooking times for sheet-pan meals:
| ½-inch chunk vegetables, unless other cut specified | Approximate cooking time at 400°F (204°C) |
| Asparagus, whole | 8 – 15 minutes, depending on thickness |
| Beets | 25 – 40 minutes |
| Broccoli | 10 – 15 minutes |
| Brussels sprouts, halved | 20 – 30 minutes |
| Butternut, or winter, squash | 25 – 40 minutes |
| Cauliflower | 25 – 45 minutes |
| Carrots, cut into ½-inch chunks, left whole or halved lengthwise | 30 – 45 minutes |
| Cherry tomatoes, whole | 25 – 50 minutes for caramelized |
| Chickpeas, canned | 40 – 55 minutes to be crispy |
| Eggplant | 25 – 45 minutes |
| Leek | 20 – 35 minutes |
| Peppers (red, green, orange) | 30 – 45 minutes |
| Potatoes | 25 – 35 minutes |
| Sweet potatoes | 30 – 40 minutes |
| Zucchini or summer squash | 40 – 55 minutes |
As you can see, the cook times can vary widely. A 15-minute window for chicken is fine as a guide for pairing vegetable and chicken cooking times, but it is no good for getting the chicken done properly. The chart is not exact—many of the variances in vegetable times account for differences in taste—but it can help you assemble your meal properly. Cooking boneless thighs and sweet potatoes? You should give the potatoes at least a 5-minute head start in the oven before adding the meat. Roasting broccoli with bone-in breasts? Don’t add it until the meat has been in for about 20 minutes. Again, don’t rely on the times for the doneness of your chicken: rely on the temperature. But the cook time charts make it easy to know when to plop the next ingredient in your meal onto the sheet pan.
Chicken doneness temperatures
A word about the suggested chicken temperatures. You may be looking at the doneness table for the chicken up there and thinking “157°F? Are you crazy?” The common perception is that chicken is only safe if cooked to the USDA-recommended 165°F (74°C), but that is untrue! 165°F (74°C) is the instant kill temperature for Salmonella, but even the USDA publishes charts indicating that the bacteria can also be killed at lower temperatures if exposed to those lower temperatures for longer times. Chicken meat is safe to eat at 157°F (69°C) after 34 seconds! And with the way that carryover cooking works, if you pull your chicken at 157°F (69°C), it will absolutely stay at that temperature for at least 34 seconds. In fact, it will increase in internal temperature for several minutes while it rests.
(For more on those USDA charts, and more info on safe chicken temps and times, look at our post on chicken cooking temperatures.)
If you still feel queasy about just believing that your meat has been at that lower temp for long enough to be safe, we have a simple solution for you. Just leave the probe from your ChefAlarm in the meat, set the timer to count-up mode while it rests, and watch the max-temp function—you’ll see that your meat probably gets up to, and even passes, 165°F (74°C). If not, it will certainly be at 157°F (69°C) or higher for at least 34 seconds.
If you do decide to use thighs and legs for this recipe instead of breasts, then you will want to cook them to a higher temperature, however. As you may have guessed, the extra collagen in dark meat takes a higher temperature to break down. So while they will be safe to eat at 157°F (69°C), they won’t be as enjoyable until they get up to at least 165°F (74°C). For more on poultry meat differences, read up on our discussion of how to cook a turkey.
That’s the basics of all you need to know to bring together a great sheet-pan meal. Temp your meat, stagger the introduction of your veg to the pan if you need to, and for goodness sake remember to line the pan with foil. Dishes, remember?
Notes:
In the recipe below, we add the sprouts and chicken to the pan at the same time. This gives you very tender sprouts. If you like them with more bite, add them after about 10 minutes of cooking the chicken.
Also, this recipe scales up easily. You can fit more chicken pieces on one pan, just give them a little space between each one.
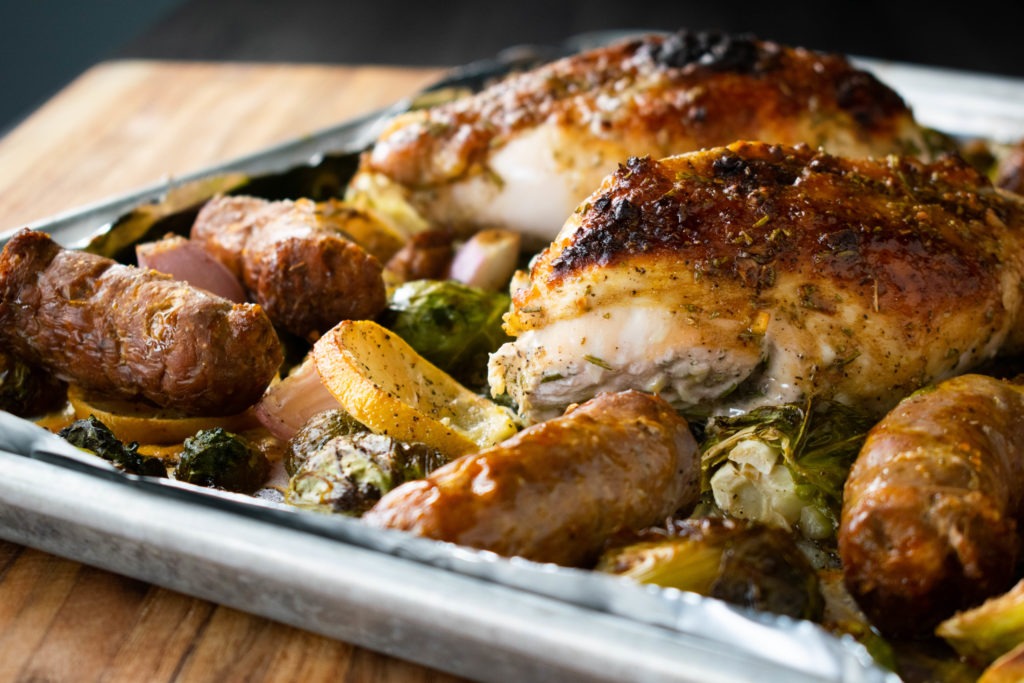
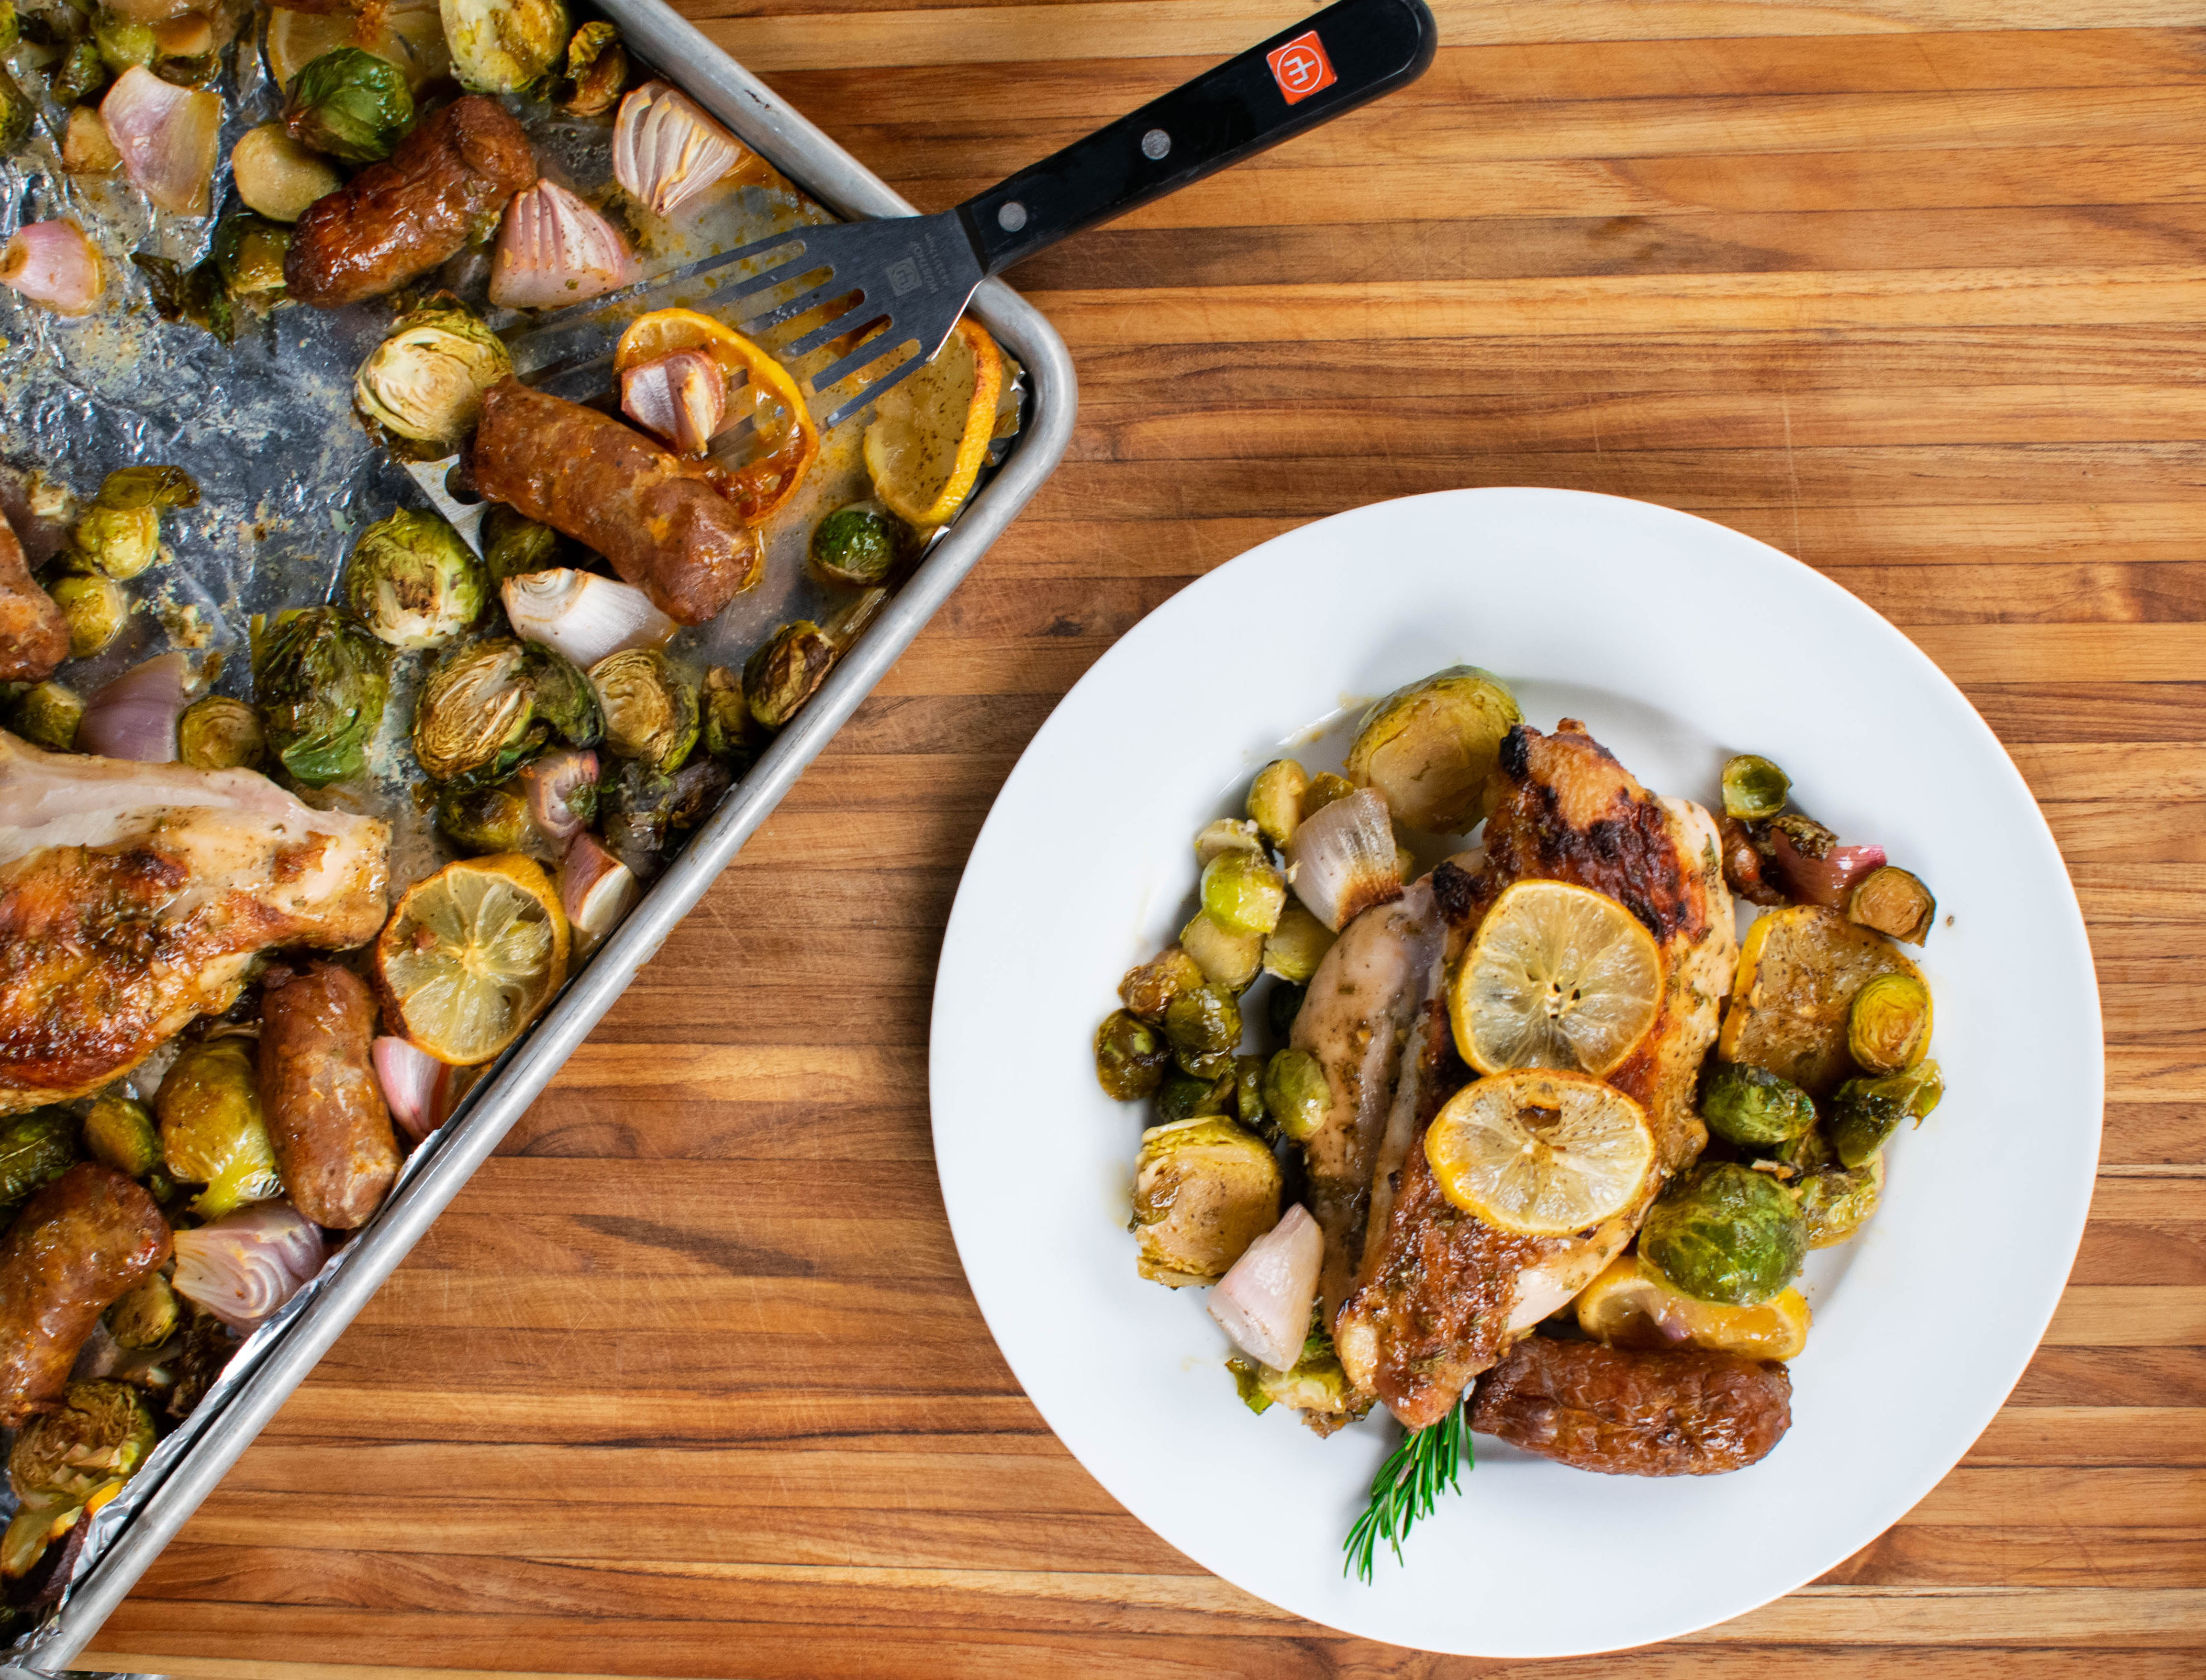
Sheet-pan baked chicken breast recipe with sausages and Brussels sprouts
Based on One-Pan Chicken, Sausage, and Brussels Sprouts Recipe on SeriousEats.com
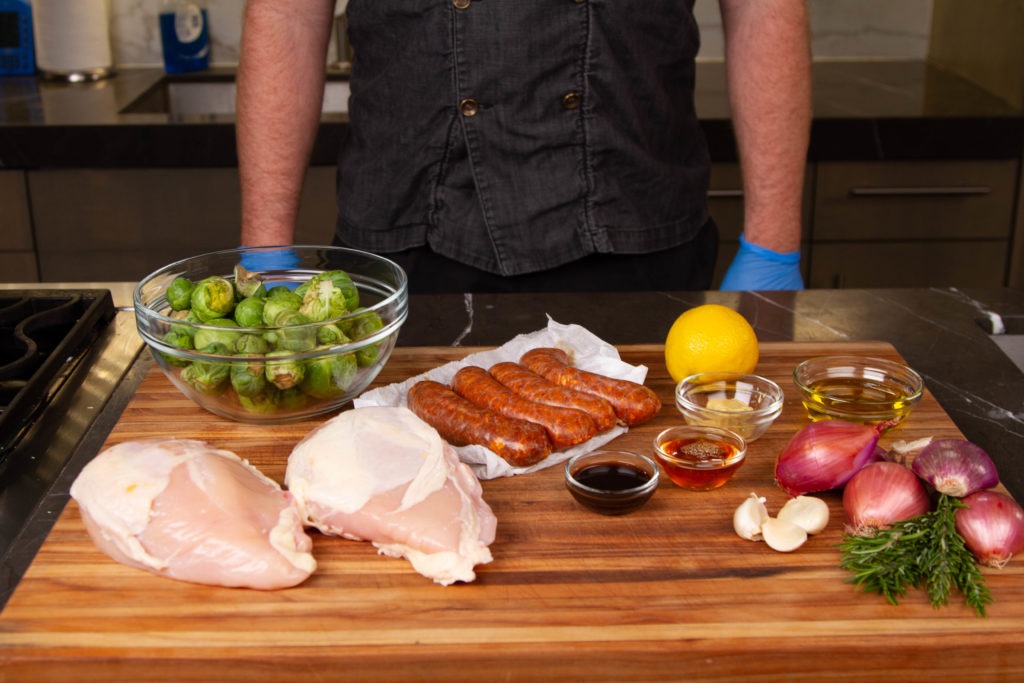
Ingredients
- 1 lb Brussels sprouts
- 5 medium shallots
- 1 lemon
- 3 Tbsp extra-virgin olive oil, divided
- Kosher salt and freshly ground black pepper
- 3 medium cloves garlic, minced or grated
- 1 1/2 Tbsp Dijon mustard
- 1 1/2 Tbsp honey
- 1 Tbsp Worcestershire sauce
- 3 tsp chopped fresh rosemary needles (from about 5 sprigs)
- 2 bone-in, skin-on chicken breasts (or substitute 4 bone-in, skin-on thighs)
- 4 large Italian sausages, hot or sweet, cut into 2-inch lengths

Instructions
- Preheat oven to 400°F
- Trim and halve—or quarter if large—the Brussels sprouts.
- Peel and quarter the shallots.
- Thinly slice the lemon into rounds, discarding any seeds.

- Place the sprouts, shallots, and lemon slices on a rimmed baking sheet that has been covered in a layer of aluminum foil.

- Drizzle on 2 Tbsp of the olive oil and toss to coat.
- Season with salt and pepper.

- Mince or grate the garlic in a small bowl. Add the rosemary.
- Combine the rest of the oil, the mustard, the honey, and the Worcestershire sauce with the rosemary and garlic. Mix to make a runny paste.

- Rub the chicken pieces all over with the paste and nestle them into the Brussels sprouts.
- Insert the probe of your ChefAlarm into the thickest part of the breast. In this case, we’re using the optional Pro-Series® High Temp Straight Penetration Probe.
- Set the high-alarm for 157°F (69°C) and place the sheet tray in the oven.

- After 15 minutes, cut the sausages into 2-inch pieces and place them among the sprouts. Continue cooking.

- When the alarm sounds after 20-30 minutes, verify the temperature of both breasts with a Thermapen.
- You can place the pan right on the table to serve.

Sheet-pan meals are a great way to get a healthy homemade dinner to the table with minimal effort. Guides for timing them properly can help a great deal. Still, there is no substitute for actually monitoring the temperature of the food. Easy meals are great, but easy excellent meals are better. And for the best results, you need to know when your food is done so you can take it out when it is both delicious and safe. That’s the kind of control you get with the ChefAlarm.
Learn more…
To learn more about baked chicken breasts, read our other post!

Shop now for products used in this post:


I do not know how I would have gotten through the holidays without my Themapen and ChefAlarm! Your guidance here is most excellent… sorry, except for one thing… sausages should never be cut or pricked before cooking. I know a LOT of recipes these days call for this but the sausage makers just cringe at this “new” method. It destroys the whole point of making ground meat into sausage. Cut them on a separate plate or board after cooking and the warm meat fat can be easily disposed of… in your recipe it has run out and the vegetables are floating in it. The sausages will not shrink as much and have better flavor too. Parboiling fresh sausages before roasting is a good idea too.
Please do a piece on reverse searing a steak. The Food Lab has a terrific article and it is a great venue for ChefAlarm and Thermapen.
Ellen,
Excellent point about the sausages! As for the steak, we have already published a reverse sear post. Also, another post to check out is our another one that is a sous vide with reverse sear.
Even when I am not in market for new Thermo equipment I always read and enjoy your blogs. This time, I printed your cooking time chart, laminated it, and taped to the inside of a near-by cabinet so I had it handy to check while cooking. It saves me from having to go back to computer and look up times, temps, etc. in the middle of a recipe. Your company has truly revolutionized safe and easy cooking for home cooks.
I do enjoy your excellent temperature devices and now look forward to the blog.
Love to cook but not gifted, the technique commentary including temperature and pictures are reinforcing and motivating. Thanks
Can you suggest a substitute for the Brussels sprouts?
Nestor,
See my response to Diane’s comment.
I use my Smoke most of the time both in the oven and on the Grill or Green Egg.
The Infrared thermometer is invaluable when searing a steak after cooking sous vide.
I also use the Pop when sauteing just about anything on the stove.
And I never miss having a properly cooked meal.
Thank you ThermoWorks for great products !
The cook times for half inch chunk vegetables seem hard to believe or understand 400 F for peppers for 30 -45 minutes and 25-40 for beets
Stuart,
I think that’s going for rather caramelized peppers and beets that are anywhere from just done to nicely crisped.
I find the information, instruction, and recipes provided most useful. I should, however, very much appreciate a ‘print’ function. Of course, I copy and paste, but a ‘print’ option would be most welcome.
Thanks again.
MM-L
MM-L,
There is a small print-friendly button at the very end of the post, after the “products used” section. Thanks for reading!
I usually make a plainer version but steam all……can’t wait to try this. But I have to down size as I only have a Breville 800XL oven..(which I love love love). I will be using my new Thermopen MK4 so I know between the two it should come out fantastic. Aloha AuntieTutu
If we don’t like Brussels Sprouts, what other vegetable(s) would suit this recipe?
Diane,
Carrots would be wonderful, or even a blend of root veggies like turnips and parsnips. Cauliflower wouldn’t be bad, either. Just check those relative cook times!
Excellent information and clearly stated. Won’t scare the amateurs! I give Thermapens as wedding gifts. And I bought the case so I can travel with mine.
Thanks for the good people you hire that are knowledgeable about cooking and communicating.
Ellen,
Thank you so much! I hope you enjoy the recipe. Keep spreading the love!
Awesome recipe, gotta try this.
Thank you for this great sheet pan recipe! I am looking forward to trying it soon. I would love to see the nutritional breakdown for the recipes you publish. It will help those of us who have to watch our diets plan better. Linda
Nice! Just the info I was looking for.
In the instructions I didn’t see the best position for the oven rack. Top, middle, bottom? I’m sure it would make a difference on how it would cook. The dish looks great.
Middle rack for this cook.
Could this be done with cut-up pork, beef or turkey thighs?
Yes! Adjust doneness temps accordingly.