Homemade Kielbasa: Better at Home with Temp Tips
Kielbasa. I mean, do I even need to write an introduction? Do I need to find some central metaphor around which to construct this narrative? What more can be said than “smoked homemade Polish sausage”? But paragraphs need writing, and blog posts need starting so here we go.
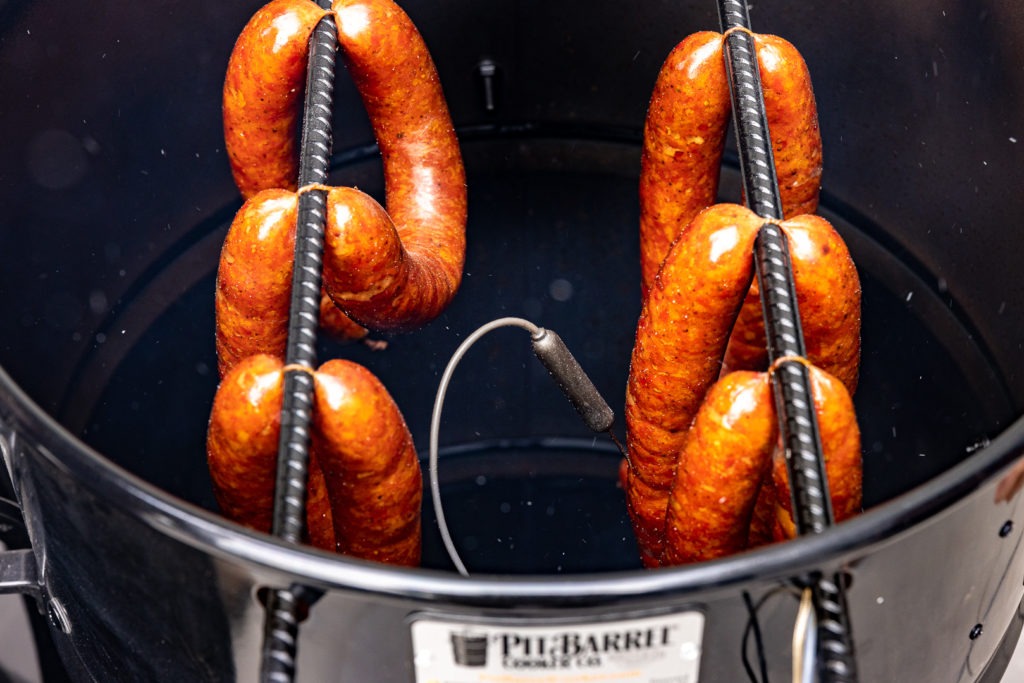
Fresh-ground kielbasa temp: 150°F
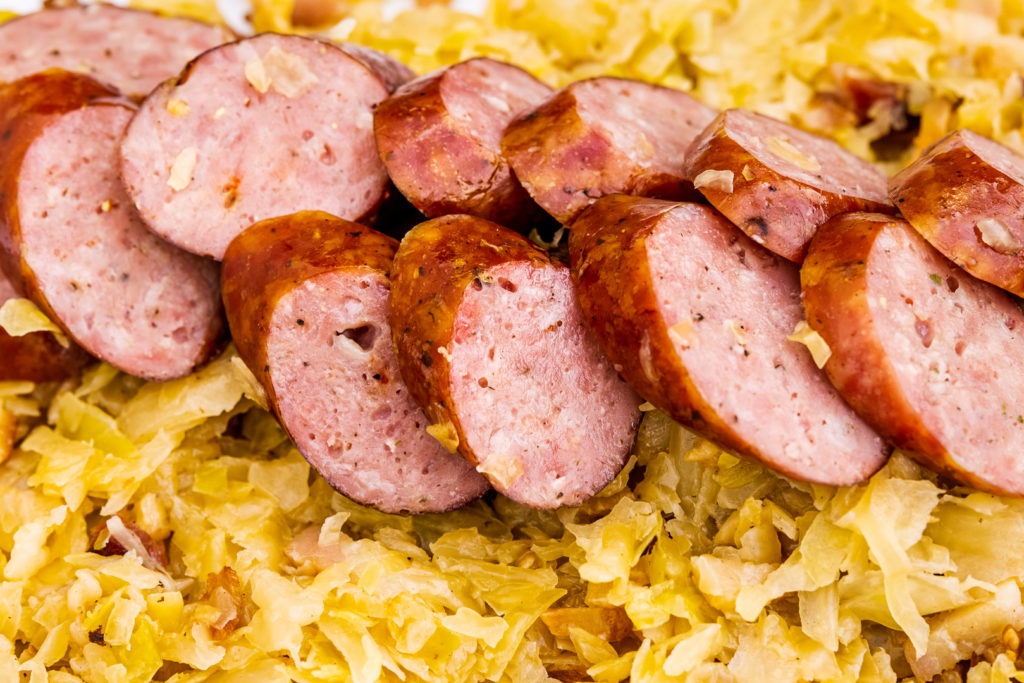
Kielbasa is an essential ingredient in my kitchen. It can be used as a seasoning, sliced and browned before adding to another dish, or griddled up and served as a main next to roasted potatoes and sweet/sour red cabbage. But I have often been stuck with sub-par store-bought over-processed kielbasa. Why do I do that to myself? The homemade article is far better, more subtle, more true-flavored. So we made some, and we think you should too. Use our temperature tips and the family recipe from Ethan Chlebowski, you’ll end up with a sausage that will leave you in a place that needs no words to describe it.
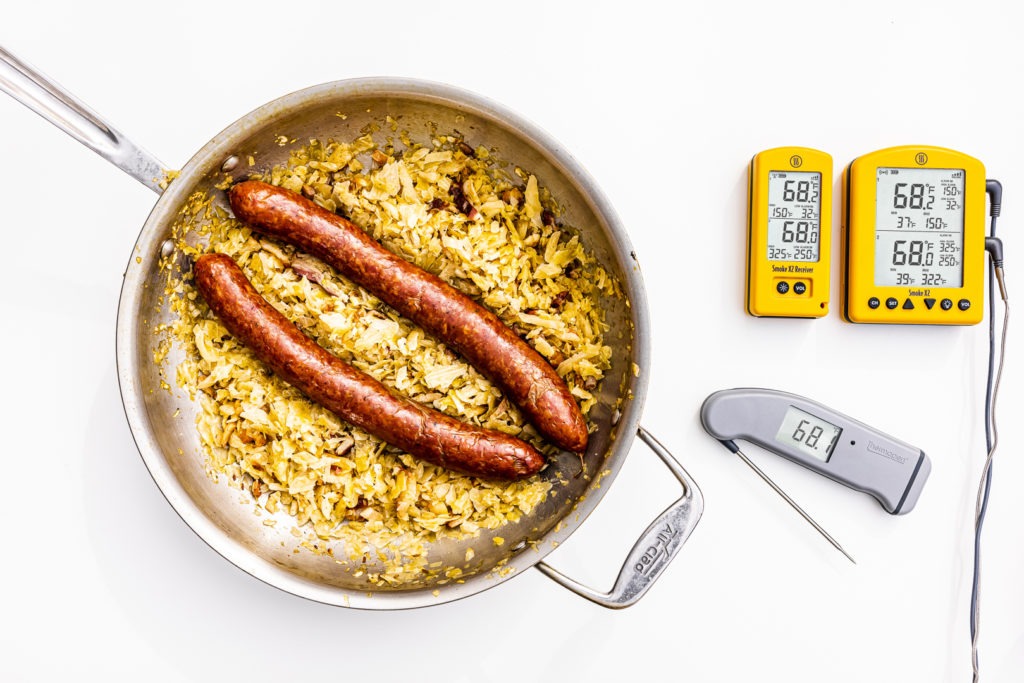
What is kielbasa?
Sometimes I write question headings like that, imagining that you, the readers, might be asking that question. I do not imagine that to be the case here; in fact, I assume you probably know and love kielbasa. But I think there are still some interesting things to be said about it.
It is pretty common in America to use the terms “kielbasa” and “Polish sausage” as synonyms, which is interesting because the word kielbasa is just the Polish word for sausage. If you were to travel to Poland and ask for kielbasa, they’d probably ask you which kind you meant, for, indeed, there are dozens—no, hundreds—of kinds of kielbasa in Poland.
What we, here, refer to as Kielbasa or Polish sausage is most closely related to the wiejska kielbasa, basically translated as “country sausage.” It is the rustic sausage of farmers and villages, often smoked and seasoned mainly with garlic and marjoram. This is the sausage that was brought to our shores by Polish immigrants and took hold even outside the immigrant communities.
It’s delicious. It shines sliced and browned, split down the middle and grilled, used as an ingredient in soups, stews, pots-o’-beans. And of course, it’s amazing simmered/braised in sauerkraut in its own right or as part of the traditional Polish Bigos (hunter’s stew).
Making Polish sausage at home
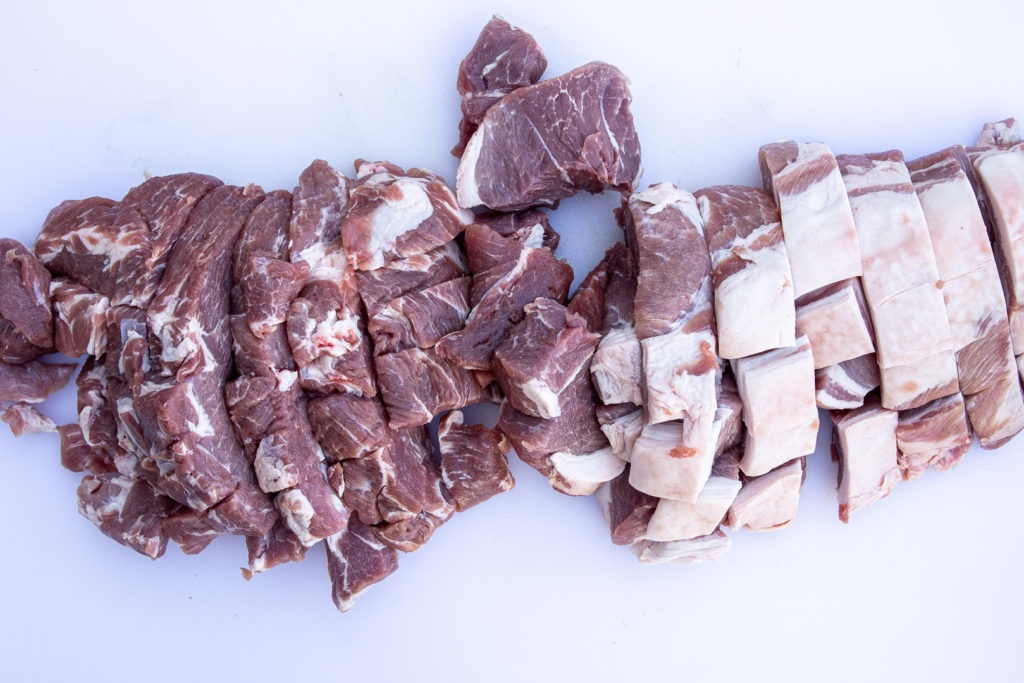
Cut and chill
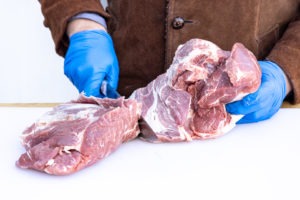
The process for making this “Polish sausage” at home is very similar to any other fresh sausage recipe (like our bratwurst and andouille recipes). First, the meat is cubed and chilled in the freezer so that the fat will cut cleanly. It’s a good idea to also chill your grinding equipment. In our case, we did the whole process outside in 30–33°F weather, which kept the equipment 3 from overheating very nicely.
Measure seasonings
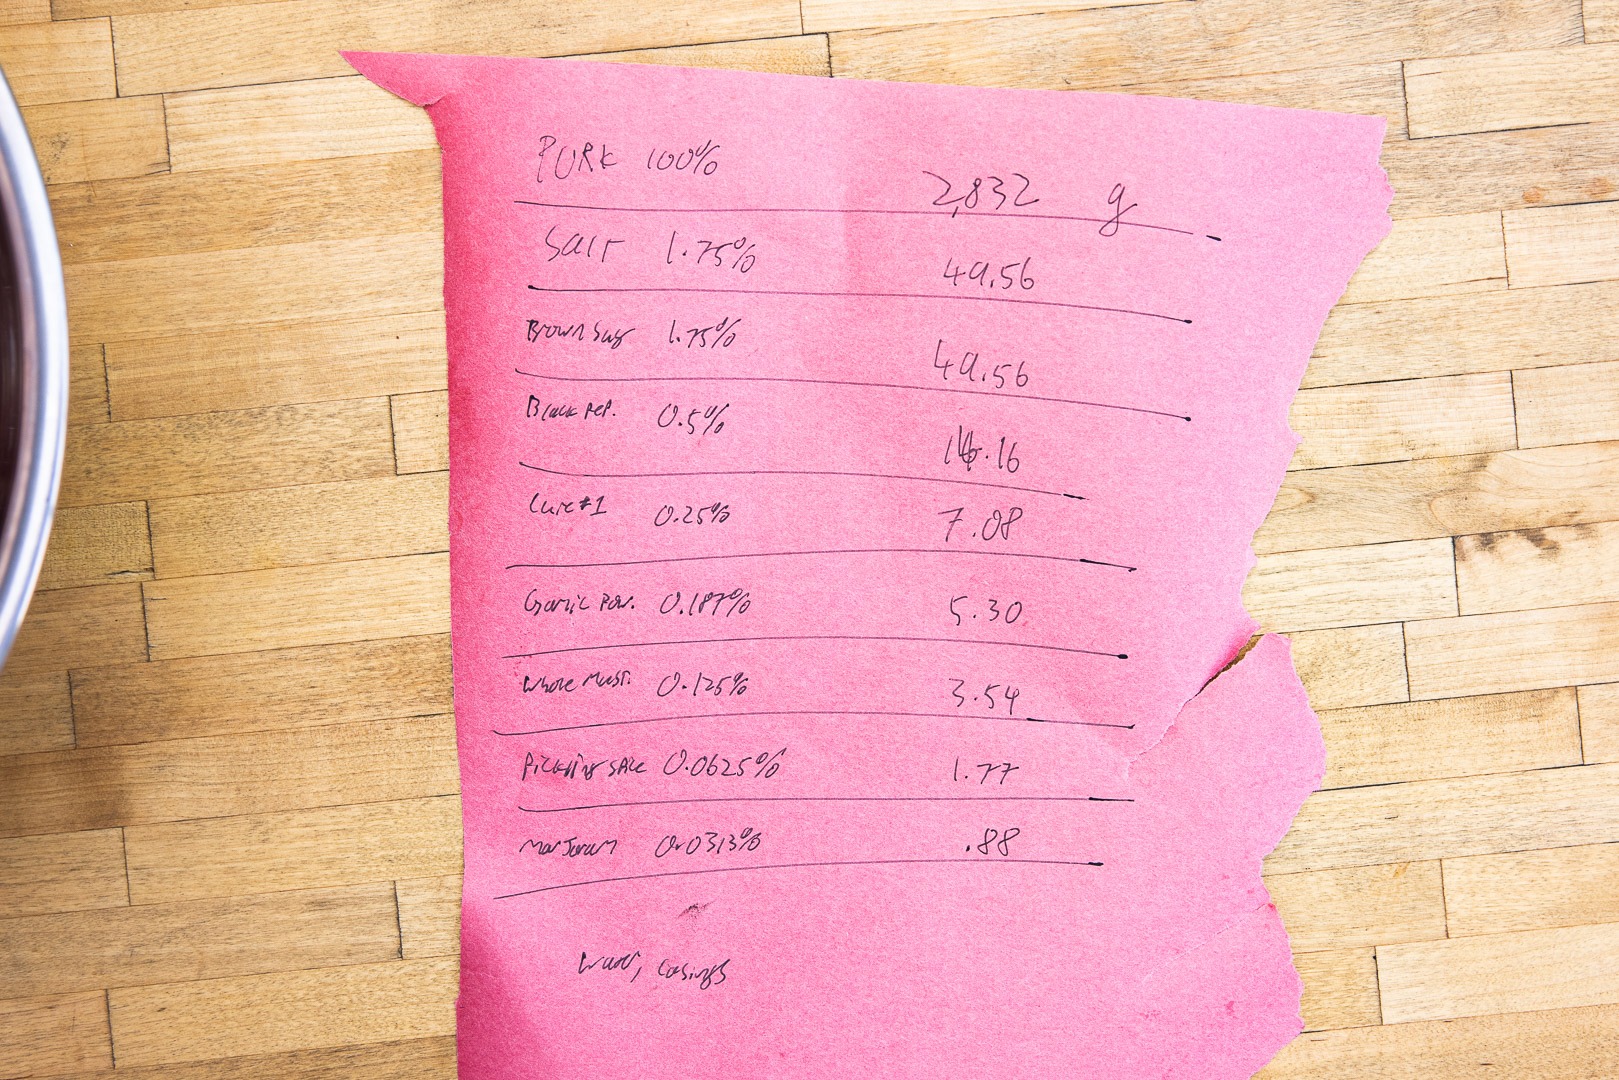
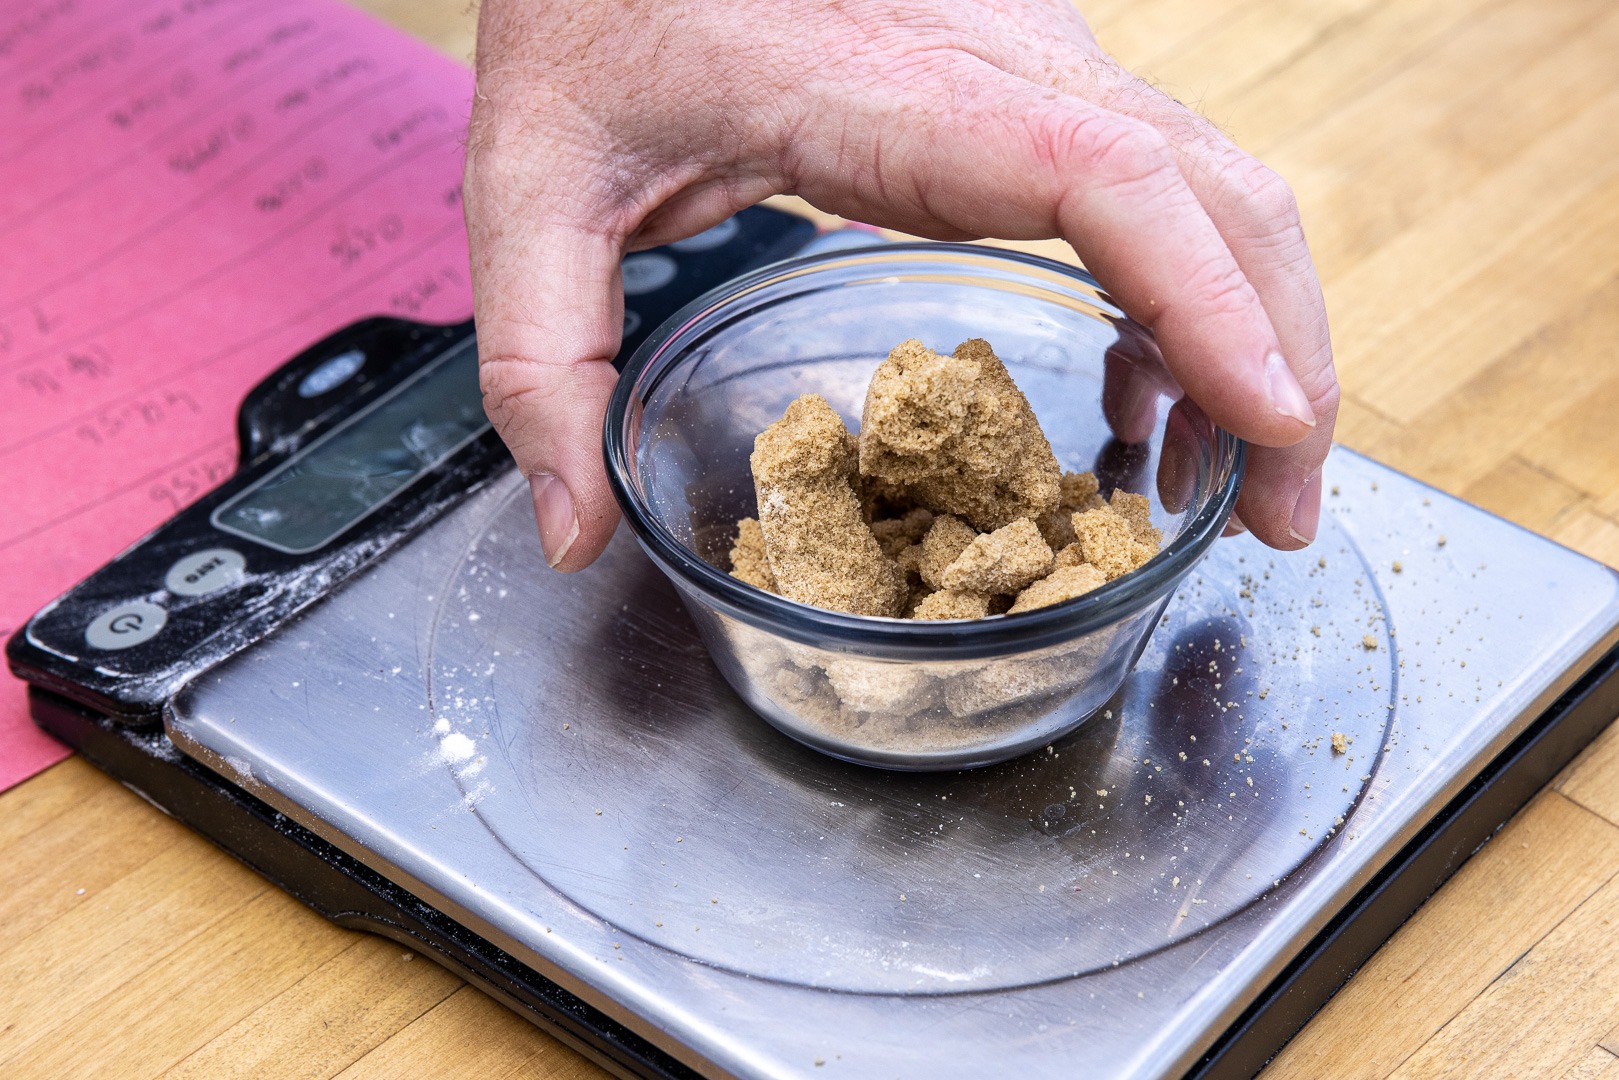
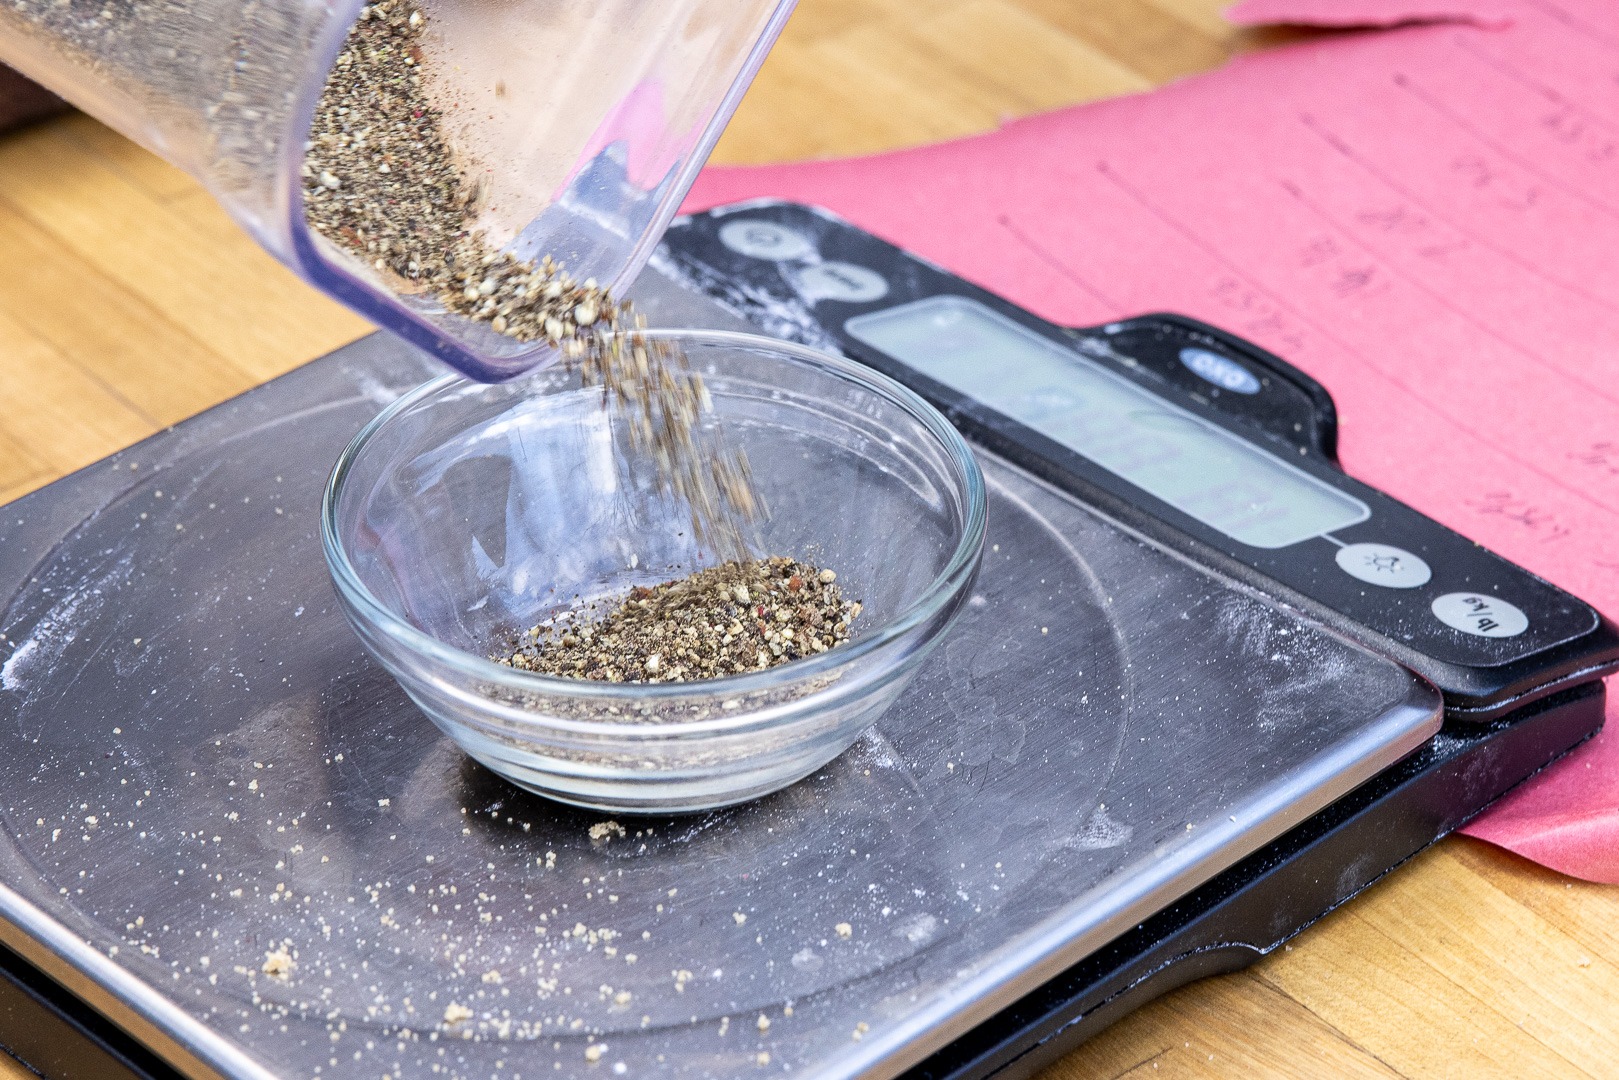
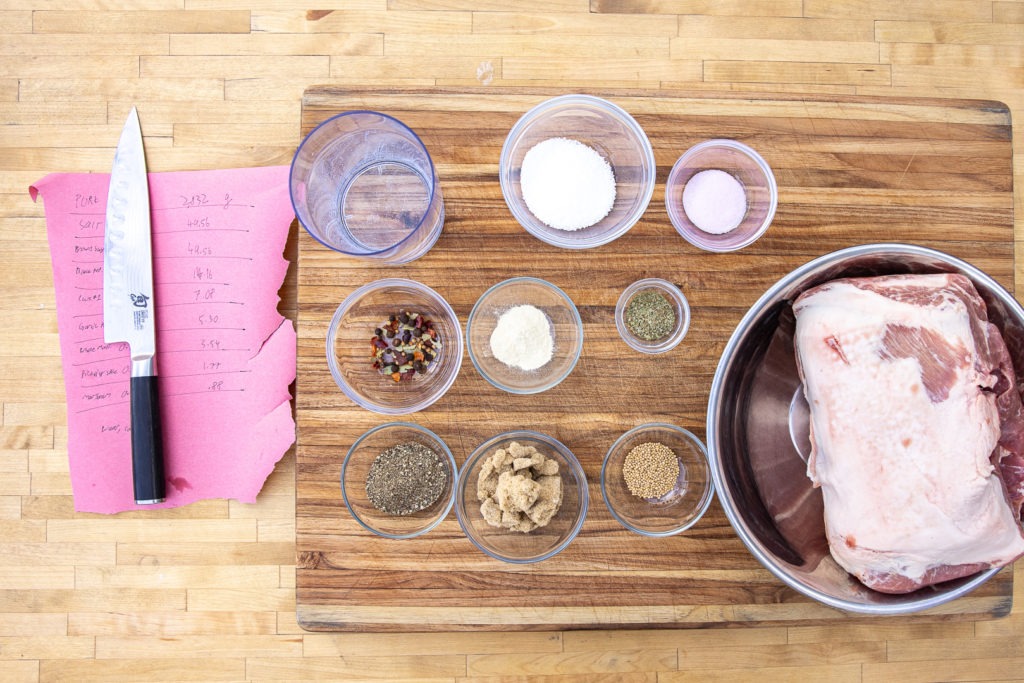
Ok, there is actually another step here, and it’s math. The recipe for this (and many other) sausages is given in percentages. You weigh your meat and multiply by the percentage to find the weight of your other ingredients. For instance, this recipe uses 1.75% salt, so if you have 1,245 grams of meat 4 you’d multiply 1,245 by 0.0175 to get your salt content (divide the percentage by 100, then multiply that number by your meat weight):
1,245 g * 0.0175 = 21.8 g
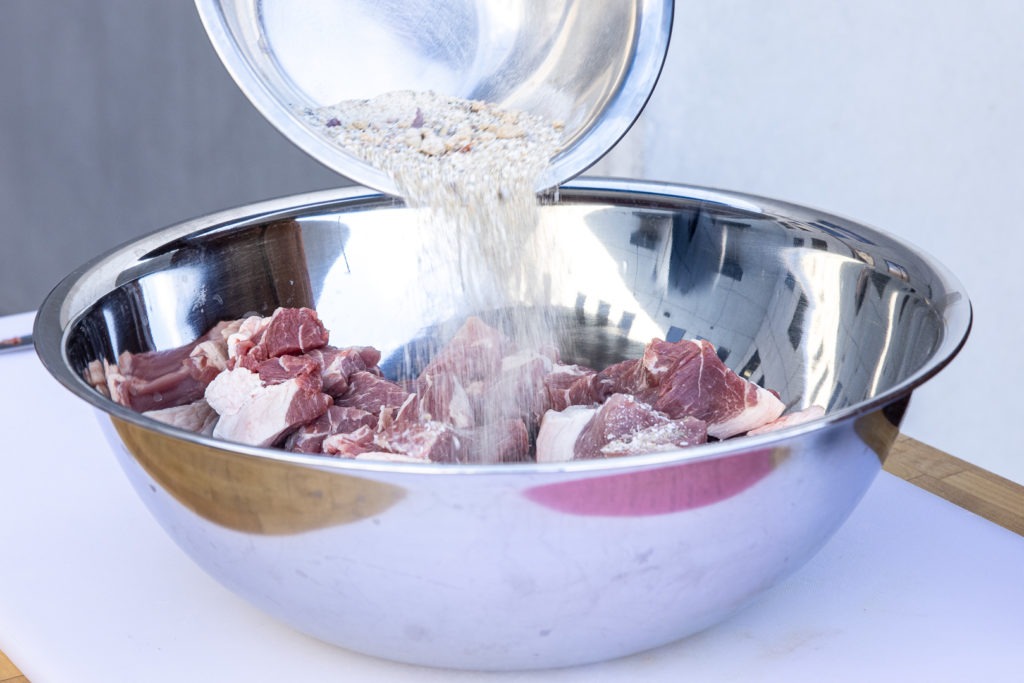
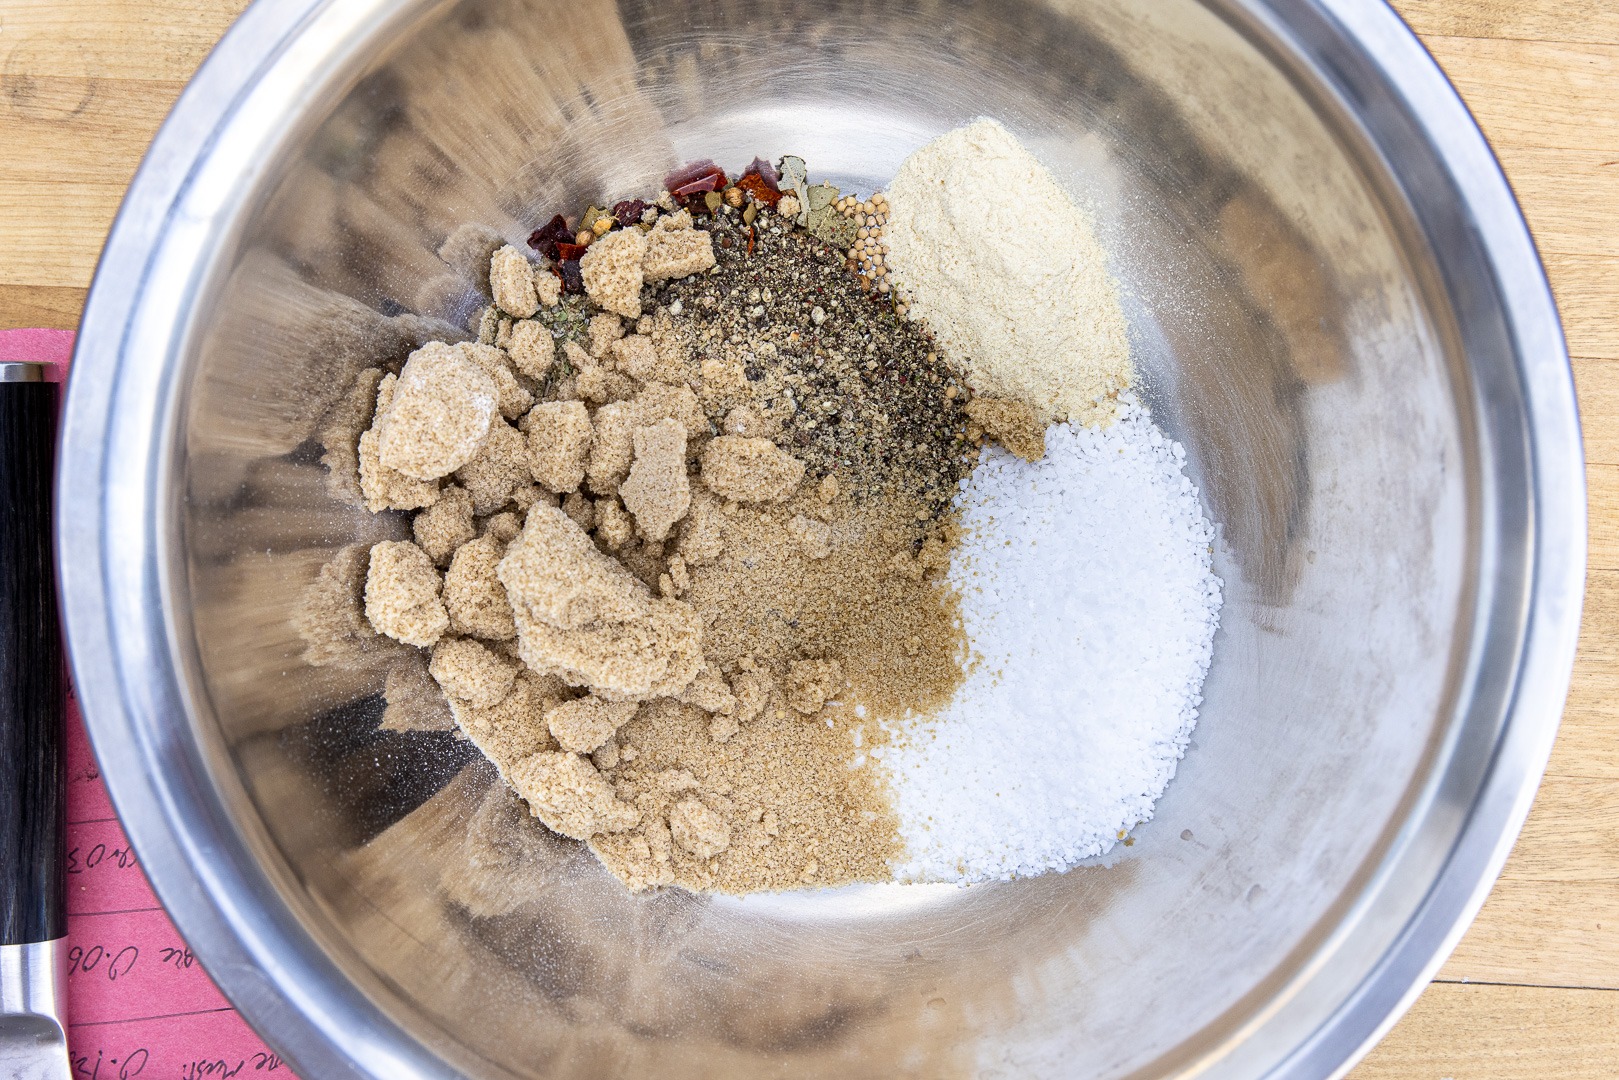
1,245 grams of meat calls for 21.8 grams of salt. I’d go ahead and round that up to 22 grams because 0.2 g of salt isn’t going to matter much and because my scale doesn’t measure tenths of grams. Before you can mix the seasonings with the meat, the seasonings all have to be calculated, weighed, and combined. (Note: the recipe calls for pickling spice. We combined it with a little of the salt in a spice grinder so be sure that none of those potent spices ended up coming through the grinder in still-unpleasant chunks.)
Season and grind
Ready the seasonings, then combine them with the meat. A large bowl is great for doing the kind of tossing and flipping and smooshing you’ll need to do. Make sure everything is well distributed.
Then comes the grinding, of course. If you have a stand-alone grinder, great! If you have an attachment for a stand mixer, wonderful. If you need to pulse the meat in batches in a food processor, well, homemade sausage is worth a lot of work, so go for it. If you have to chop it by hand with cleavers you have my best wishes, but it will work. (Maybe consider using pre-ground pork?) A medium grinding plate is just right for this operation, though a coarser plate would not necessarily be amiss. Grind it all up with the seasonings.
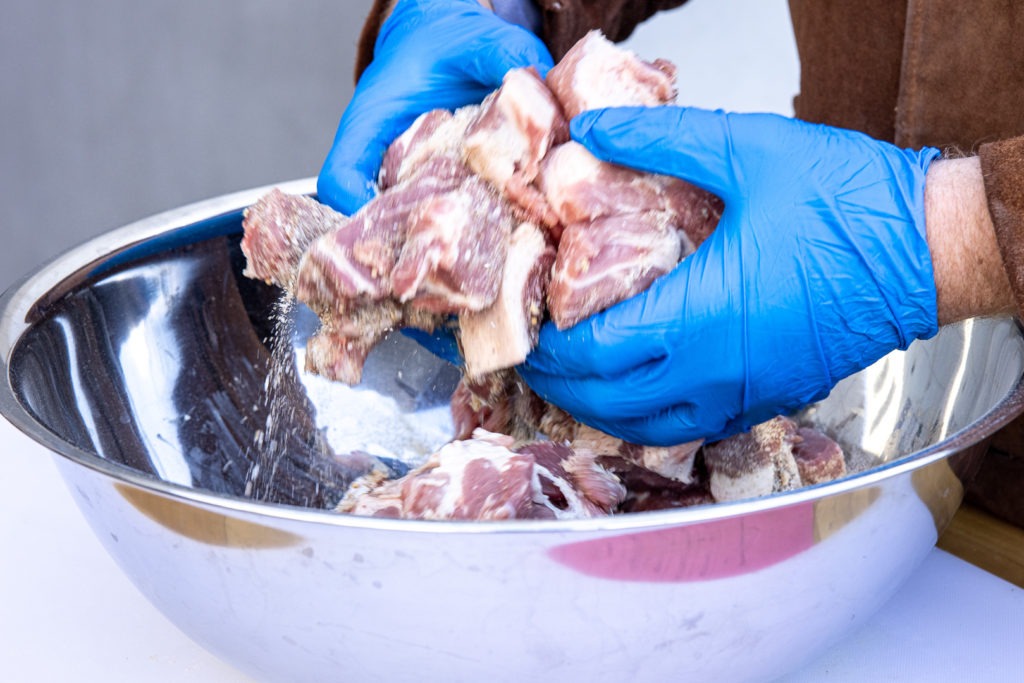
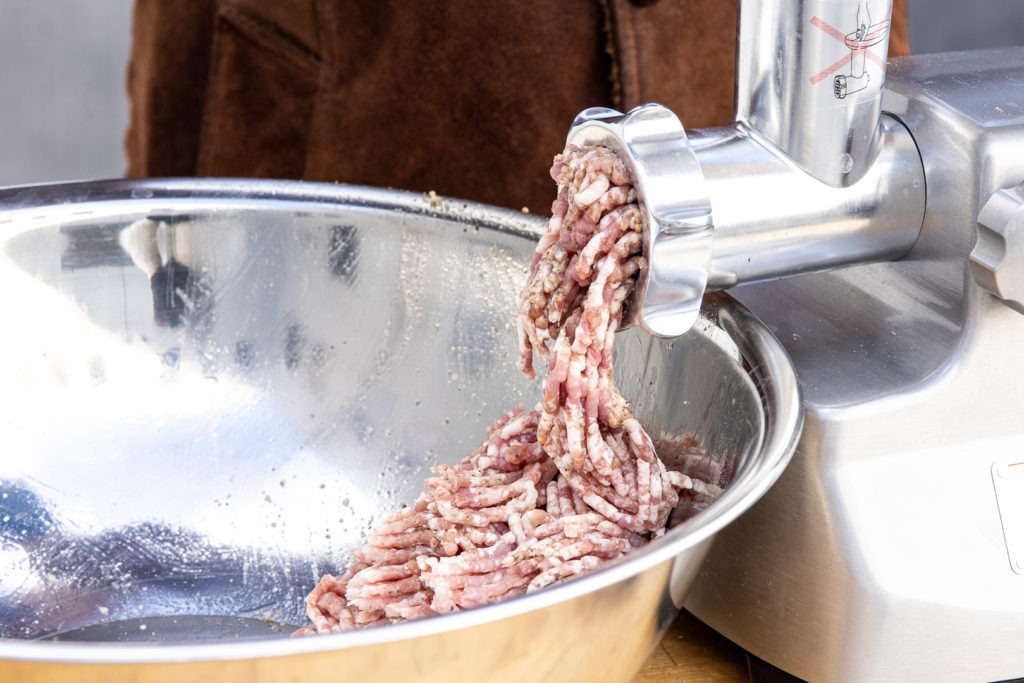
Mix the sausage and stuff
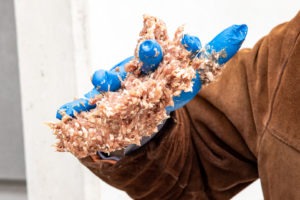
Once ground, the meat must be mixed with some water. The added water will help the flavors distribute more evenly, will help the meat through its myosin formation, and will make the stuffing step easier. For our ~6 lb of meat, we used just over a half-cup of water, but this is more of a by-feel thing. You need enough water to allow the meat to move and to agitate against itself, but you obviously don’t want to make soup. Add some water, mix the meat until it is sticky and fibrous looking. This step of partial emulsification will help the sausage hold together in a more sausage-y consistency and will keep it moist when cooked.
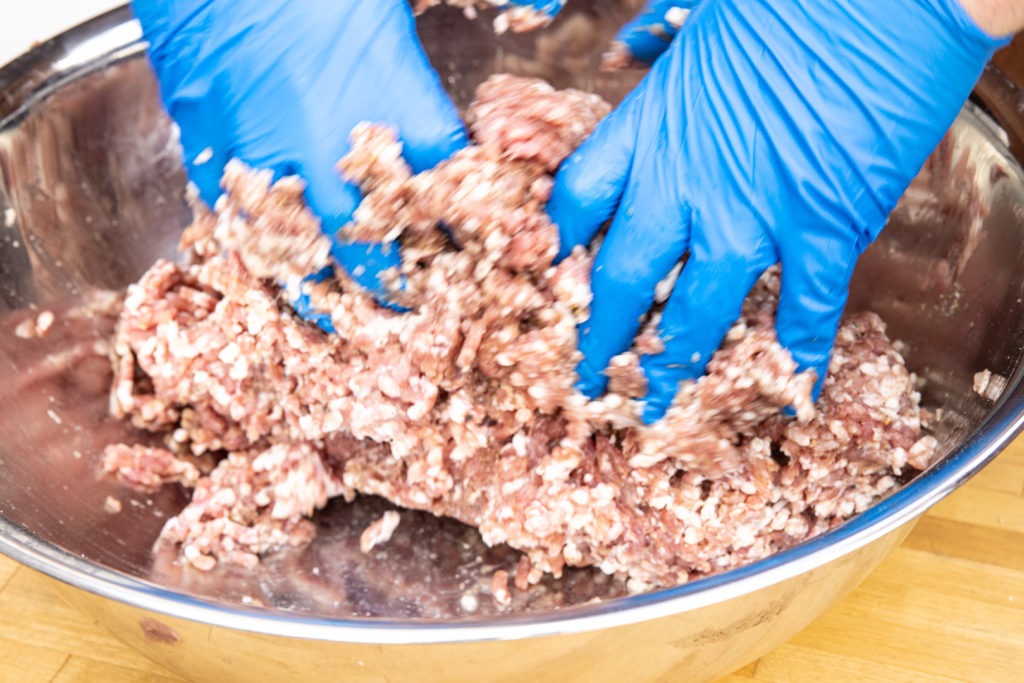
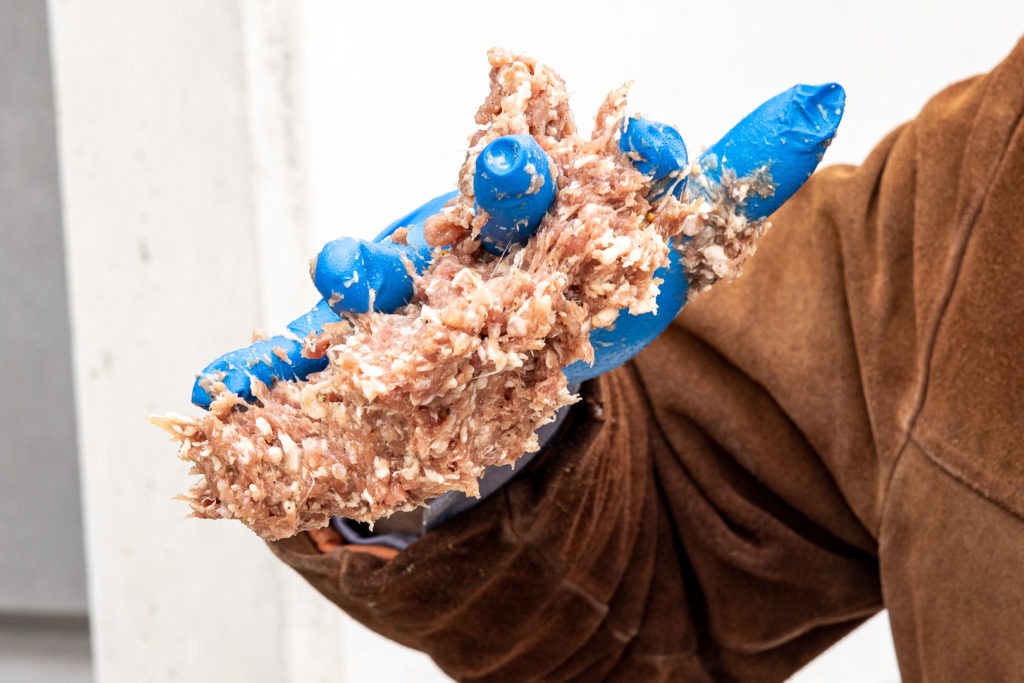
If you’ve kept everything cold, as you should through this process, then mixing by hand will be cold. I had to use some insulating gloves usually reserved for grabbing hot shoulders from the smoker to keep my hand bones from aching, a cheat I recommend to you. Or I guess you could use a stand mixer.
Once the sausage filling is ready, it’s time to stuff. If you’re going to make a lot of sausage in your life, I very much recommend getting a dedicated sausage-stuffer—you can stuff five pounds of sausage in a matter of a minute or so. If otherwise, use the sausage stuffing gear associated with your meat grinder. We used natural hog casings, super traditional, but you can use collagen casings or whatever else you like. Heck, use sheep casing and make extra thin kielbasas if you want. It’ll be fun.
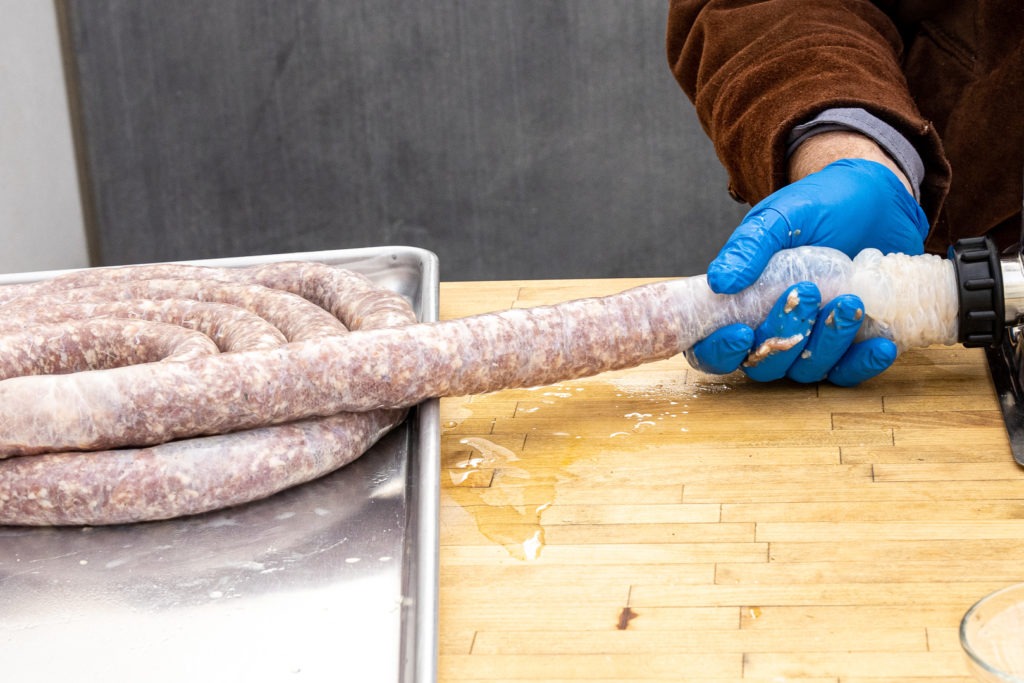
Don’t overfill the casings and try to prevent air bubbles from forming. (If they do form, prick them with a pin or, I don’t know, maybe a Thermapen® probe.) Twist the sausages into about 10-inch lengths and cut the links up into joined pairs.
Drying
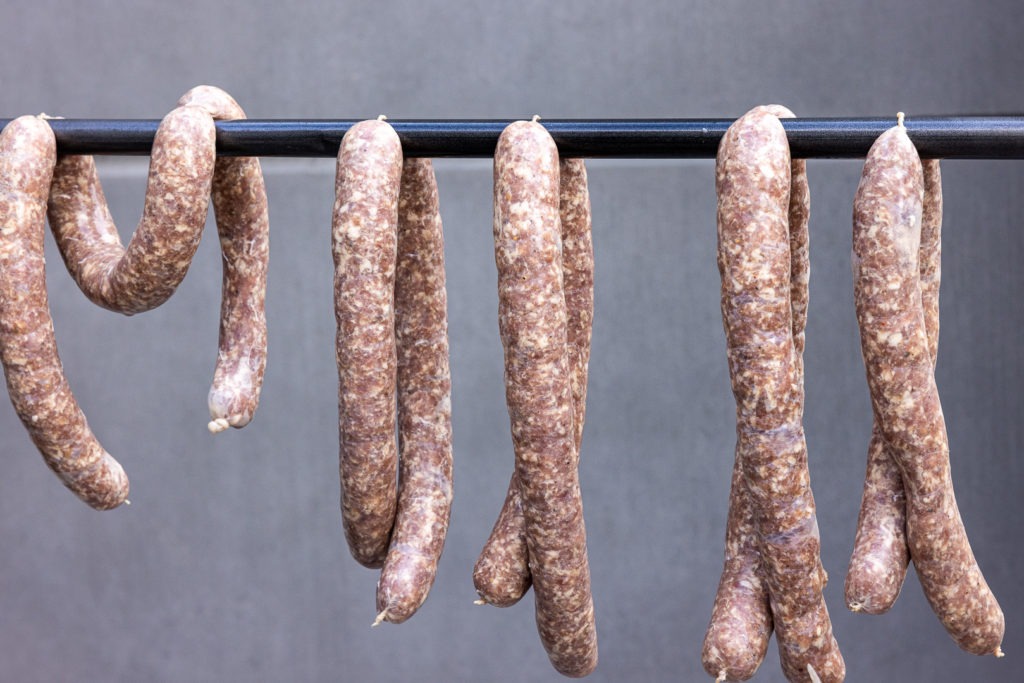
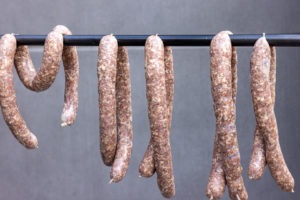
Here’s where the path for kielbasa diverges strongly from, say bratwurst. Before the sausages are smoked, they are hung to dry the exterior. You want the casing, which is probably slippery after stuffing, to become dry to the touch. Use a clean broom handle or another stick-thing suspended over a couple chair backs and hang the sausage pairs over it. If you’re inside, setting up a fan pointed at the sausages to provide circulation is a good idea. We were outside and there was a 32°F (0°C) breeze coming through the ThermoWorks BBQ courtyard, so we didn’t need a fan. Let it dry for about an hour, less if they dry out more quickly.
Smoking homemade kielbasa: the temperatures
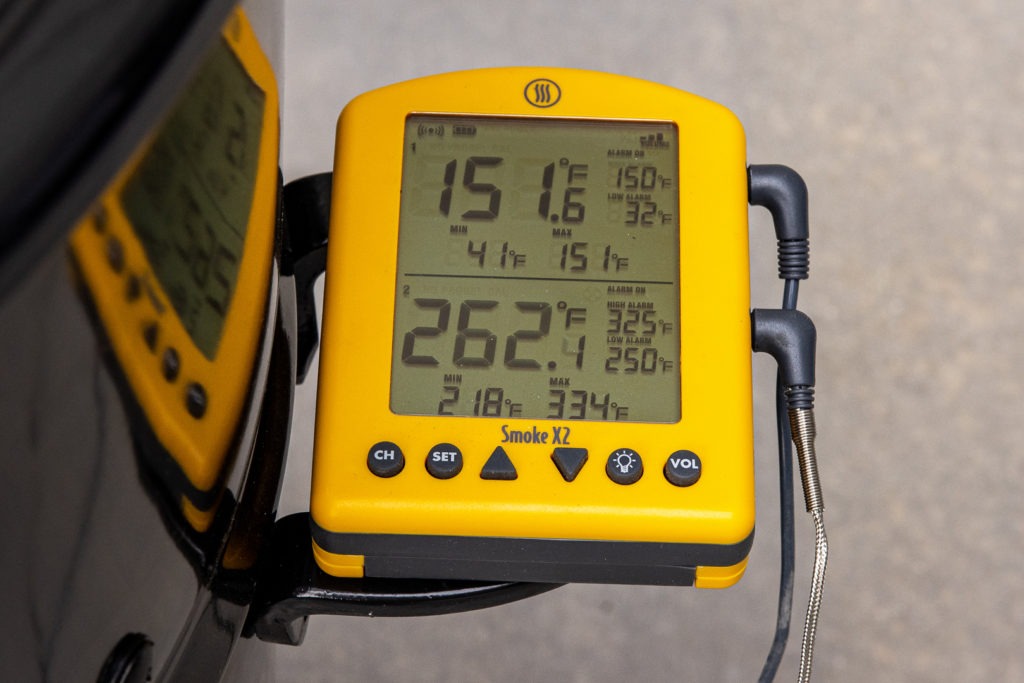
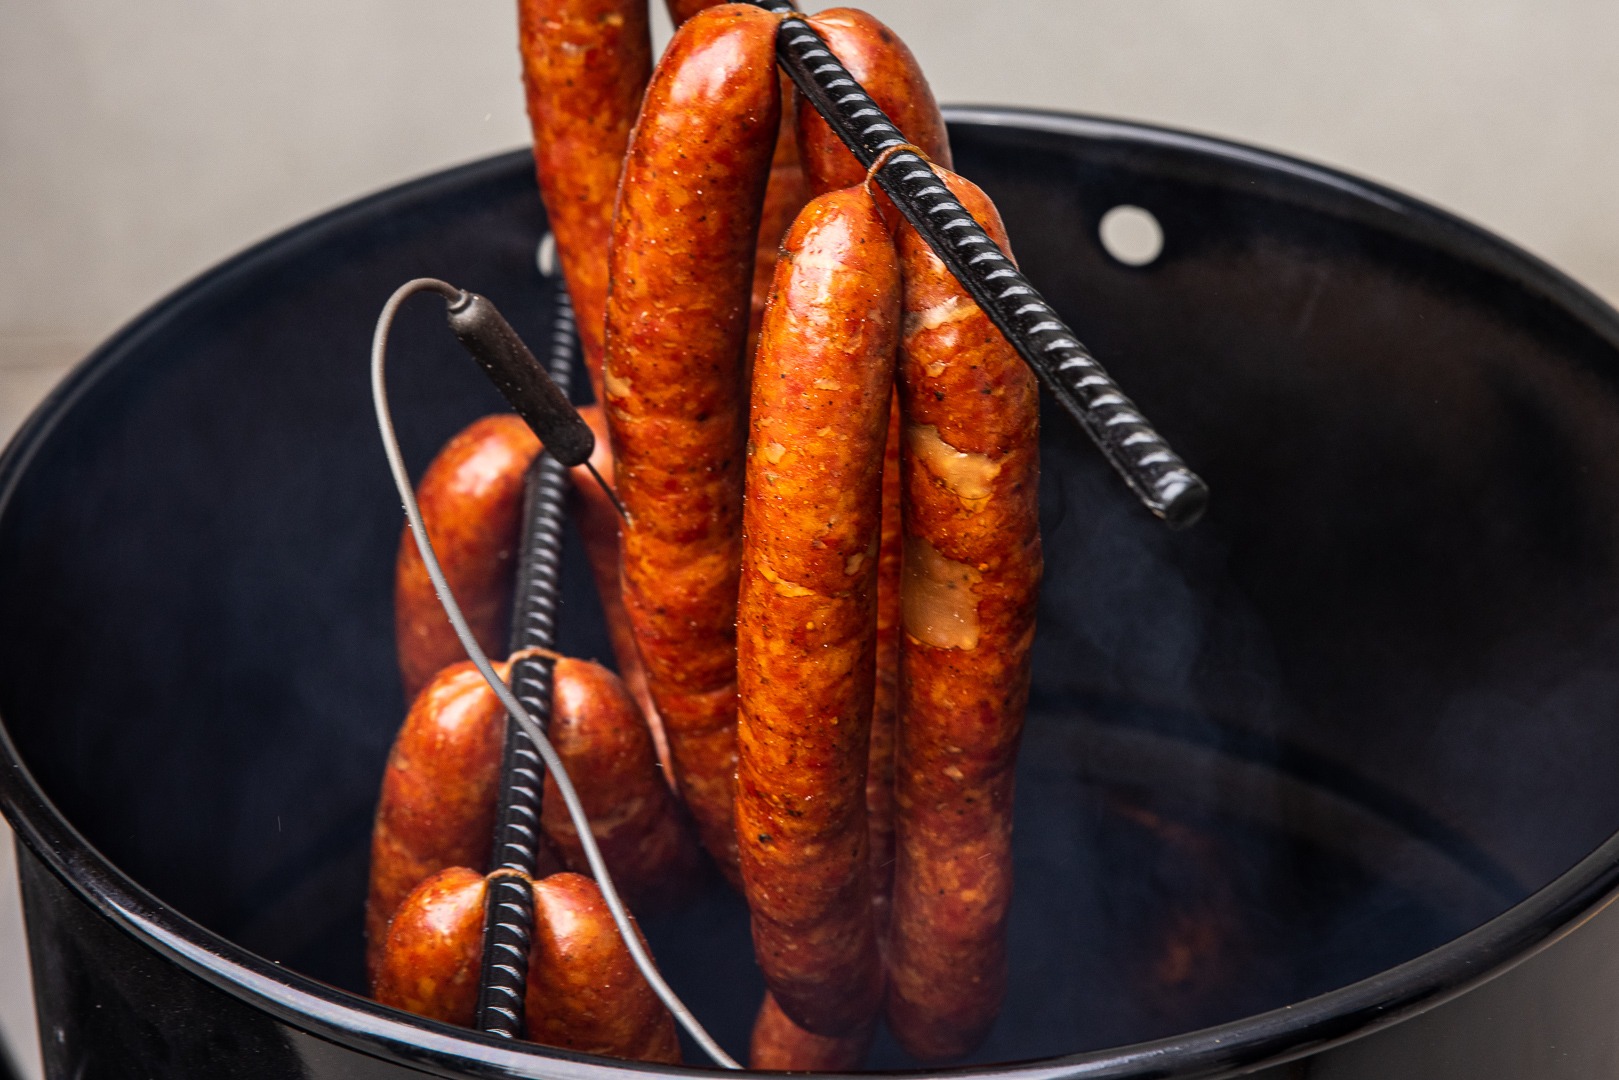
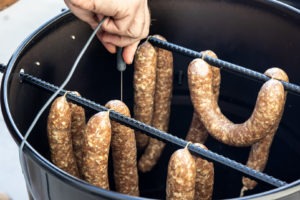
Finally, we come to the actual smoking. Kielbasa needs smoke both for flavor and for color (that beautiful red sheen is due to the curing salt and the smoke interacting with each other). The temperatures here, though, are important. We want to run the smoker at about 250°F (121°C), a temperature you’ll want to monitor with the air probe from your Smoke X2™.
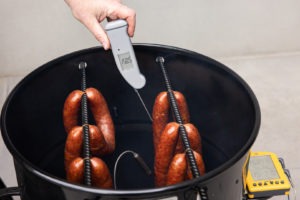
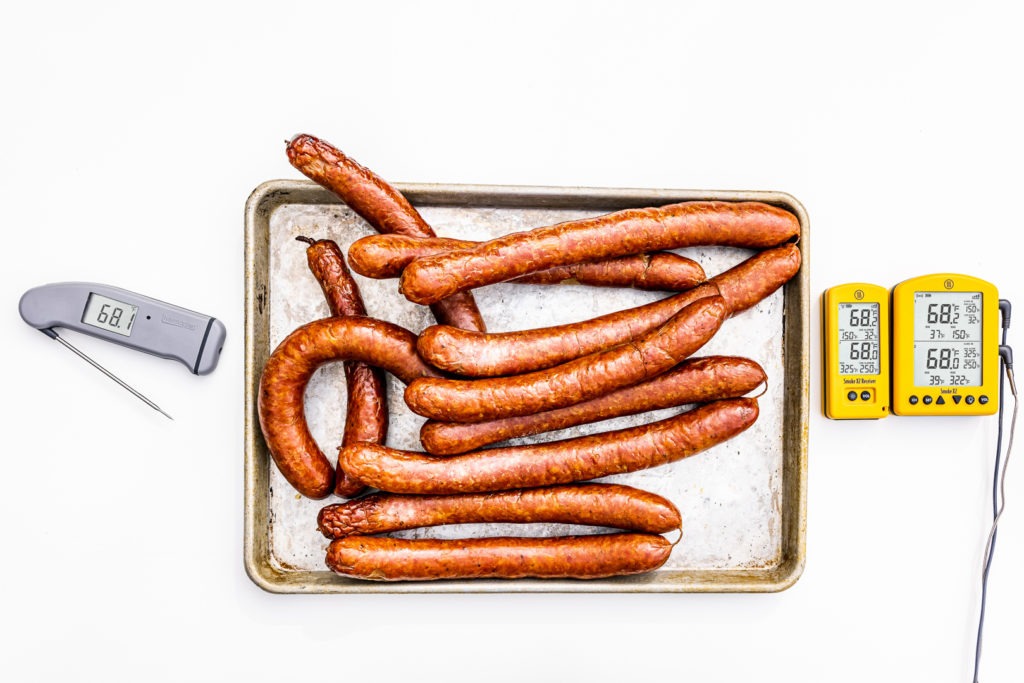
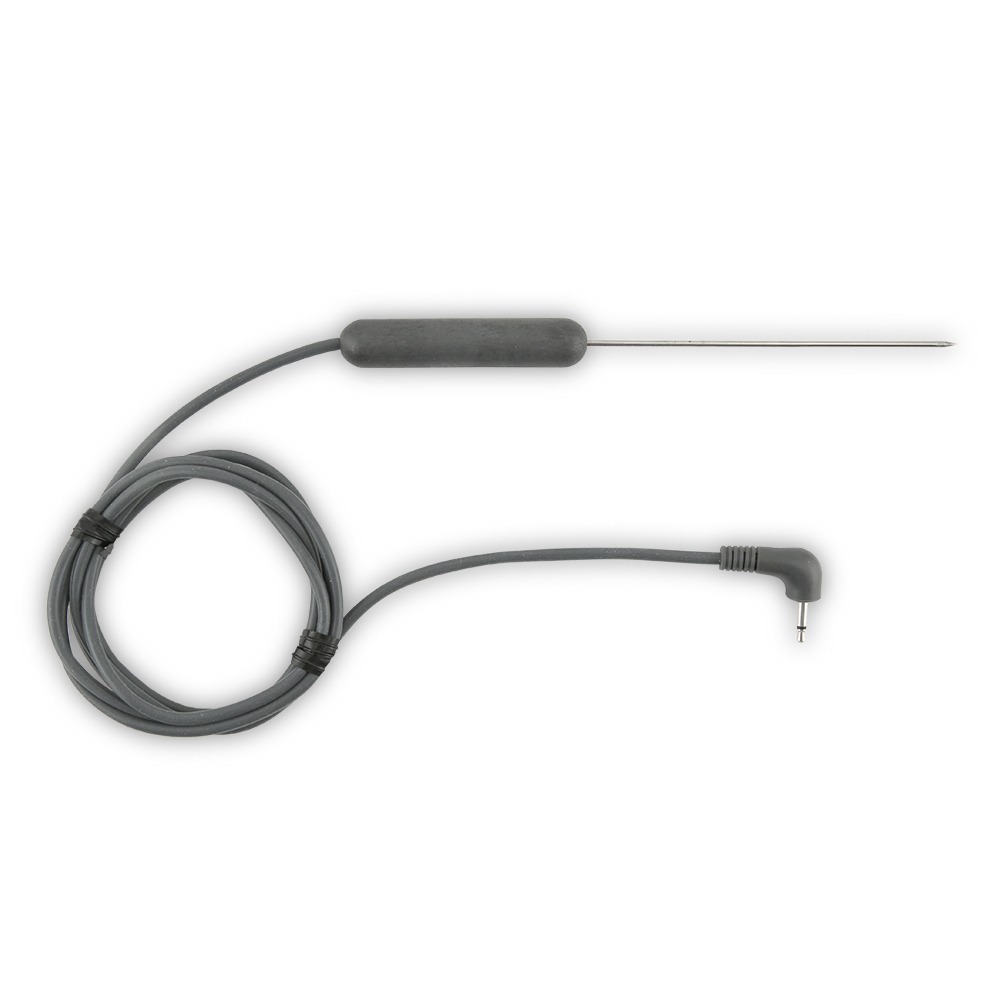
As for the sausages themselves, we find ourselves in an interesting position. Because we ground the meat fresh, we can ignore, to some extent, the rules regarding cooking ground meats which usually have us pushing our grinds to 160°F (71°C). We can bypass that requirement, though, by fresh grinding our meat. Our critical temperature target for these sausages is 150°F (66°C), a temperature we will monitor with the Smoke X2 and the optional Pro-Series® Waterproof Needle Probe. Not leaving anything to chance, we’ll also verify that temperature with a Thermapen®, to make sure we haven’t missed a cooler temperature in the sausage with the leave-in probe. The smoking took us about 45 minutes.
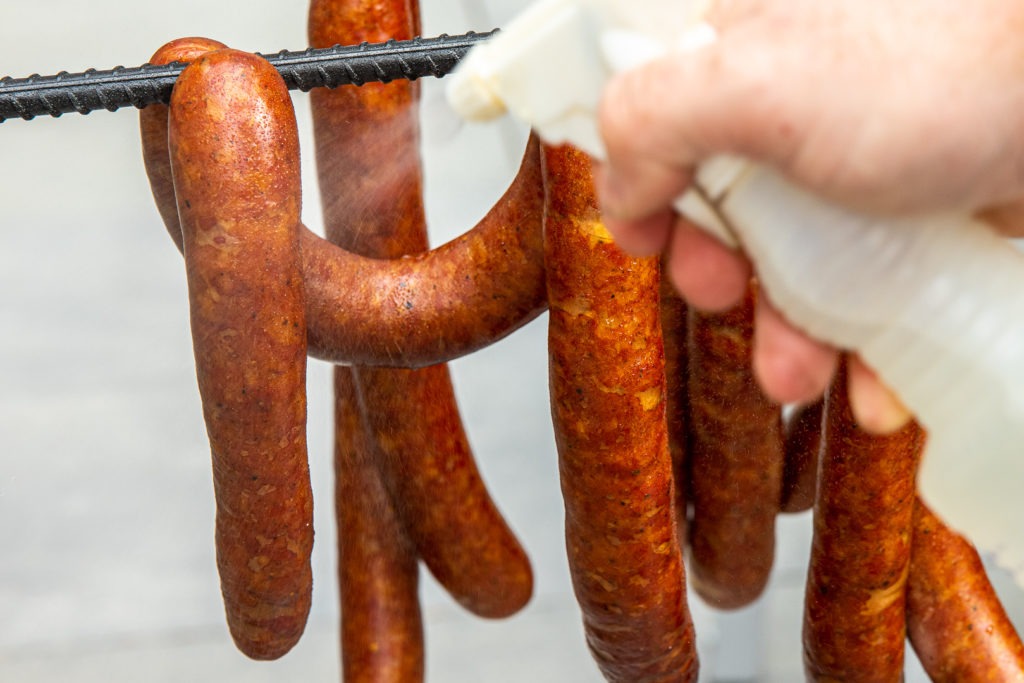
Once the sausages are cooked, pull them from the smoker and give them a spritz with some cool water. This process, called “blooming” the sausage, is supposed to help the color develop, arrest the cooking, and help rehydrate the skin on the sausages. Congrats, you made kielbasa!
Once you’ve made these sausages at home, it’ll be hard to go back to the industrial-grade version from the store. Do yourself a favor and try them served simply on a bed of good sauerkraut, maybe that has been simmered with some bacon (home-cured?) and a splash of white wine. Make a large batch, then vac-pack keep it on-hand in your freezer to pull out a link or two at a time as you need it, and your whole kitchen life will get better. I know sausage making can seem daunting, but it needn’t. With our temperature tips and tools, like the Smoke X2 and the Thermapen, the only thing you have to worry about is a wee little bit of math for your spices. And once you crack the code and discover you can make something you always bought…well, there are hardly words to describe how good that feels.
Homemade Kielbasa
Description
Adapted from the recipe by Ethan Chlebowski.
Ingredients
Here is the recipe in percentage format, with the numbers from our batch in parentheses in grams
- Fatty pork butt (2,832g)
- 1.75% Salt (50g)
- 1.75% Brown Sugar (50g)
- 0.5% Black Pepper (14g)
- 0.25% Cure #1 (7g)
- 0.187% Garlic Powder (5g)
- 0.125% Whole Mustard Seed (4g)
- 0.0625% Pickling Spice (2g)
- 0.0313% Marjoram (1g)
- Water (about 1/2–2/3 C)
- Sausage Casings (about 10 ft)
Instructions
- Chill all your grinding equipment.
- Weigh your pork and multiply its weight by the required percentages in the recipe formula to determine the amount of seasoning needed.
- Cut the pork into about 1″ cubes and chill it well in the freezer. You want it firm, but not frozen.
- Measure out all the seasonings, combine them in a bowl. If your pickling spice is too chunky, you can grind it in a spice grinder.
- Combine the meat cubes with the spices, coating well.
- Grind the spiced meat through a medium grinder plate into a chilled bowl.
- Add some water to the meat (use it to rinse any remaining spices in any bowls). Mix the meat well until it becomes sticky and somewhat fibrous. It will be able to clump to your hand when it’s ready.
- Stuff the sausage into casings using a stuffer press or your grinder equipment. Don’t overfill the casings or they’ll burst when you try to twist them into links.
- Twist the sausages into links about 10″ long.
- Cut the links into pairs and hang the pairs to dry (about 1 hour).
- Preheat your smoker to 250°F (121°C) while the sausages dry. Use the air probe from your Smoke X2 to monitor the heat.
- Move the sausages to the smoker. If you can hang them, do so; if not, lay them on the rack. Insert a leave-in probe into the center of one of the sausages and set the high-temp alarm for 150°F (66°C).
- Smoke the sausages.
- When the alarm sounds, check a few of the kielbasas with your Thermapen Mk4 to be sure they are all done.
- Remove the sausages from heat and spritz them with cool water to bloom them.
- They are now ready to eat, cook as part of a dish, or wrap and freeze.
Shop now for products used in this post:




Would like to try this.
Please use regular, non metric measurements.
I used metric, but the percentages work just the same for imperial measurements! If you have 5 lb, that’s 80 oz, so you can multiply that by the percentages. It will turn out just the same. I hope you like it!
Ray,
Metrics are used in baking a whole lot, so I’ve been trying to come to grips with this method. The easiest way to deal with this here is to get a nice bakers scale that reads both at the same time, and has bakers percentages.
To me, the weight of the meat needed an approximate Imperial weight (5lbs), just so you know how much pork to buy! The hardest part about using Metrics here is that we do not visualize how much of an item when it is given this way. I always take notes so I can remember the approximate volumes.
I use a MyWeigh Meistro scale, not overly expensive, and it even does the percentages like they did.
Almost 95% of the world’s population uses metric, and over 3/4 of all international trade is completed in metric.
Your idea that the imperial system is “regular” is misguided, and the fact that you can’t work out a percentage in a system that uses oz as both a weight and a volumetric measurement points to how flawed that system is. Or perhaps how flawed American public schools are.
I look forward to trying this recipe out as I’ve had a hard time finding one that uses mustard seed.
Thanks thermoworks for putting a percentage and weights in there. I don’t trust any recipe that measures cure in volume instead of weight.
Jay,
I’m a huge fan of the metric system! When I say “regular” I mean “that system which is used by the majority of the readers of this blog, which, according to metrics, mostly reside in the U.S.” Man I wish we’d switch over! Converting teaspoons to ounces is a garbage way of doing things, which is why, for sausage especially, metric is the way to go!
I hope you enjoy the recipe! I found it to be excellent.
You say to heat the smoker up to 250 but show a pit barrel smoker that is not adjustable. I love my PBS but have been hesitant to smoke sausages in it because the temp cannot be adjusted. Is that what you actually used for the kielbasa?
Yes, we used the PBC for this cook. No, it isn’t easily adjustable, but with how cold it was during our cook and the small fire we built inside, we were fortunate to get the e250*F we were looking for. It started out a bit warm (300°F-ish), but soon cooled to the 250*F range.
You don’t mention the coarseness of the grind and the caliber of the pork casings. Can you elaborate? Thank you.
Use standard bat-sized casings, 32-35mm. Medium to medium-fine grind is great for the coarseness. Good question!
What wood do you recommend for smoking?
I’d recommend apple, hickory, oak, or beech.
My grandmother used to work at the Chicago Stockyards, and every Easter she and my Mom would make homemade Polish sausage, just as you’re describing. The rest of the family would help with the smoking, with hickory chips, in 50 gallon drums in our backyard. Reading your article and seeing the pictures really brought back some wonderful memories. And you’re right, there’s nothing like homemade!
Therese,
Thank you for sharing those memories. What a wonderful family tradition.
is the stockyards your reffering to a division of us foods?…..just curious as i work at a stockyards meat plant as a cutter
I’ll have to try this. I’ve made kielbasa, but didn’t smoke it. I smoke my Andouille at 220, not 250, so it takes somewhat longer to get to the end point temp.
Jim,
Smoking the kielbasa at 220°F would be fine, too.
Thanks for the recipe Martin. You’ve reminded me that a trip to the old country is on the list. I still have relatives (distant) there.
I’m a little surprised about the brown sugar. My grandmother made a kielbasa with venison from my Dad’s hunting and pork fat. I don’t recall sugar in hers. But as you mention, there are many sausage recipes in Poland. Have you tried omitting the brown sugar?
Also, what is Cure #1? I’m not familiar with that spice.
Ron,
Indeed, the variations abound! I have not tried it without the sugar, but quite like it with the sugar. The very slight sweetness it gives the sausage balances the whole thing very nicely.
Cure #1 is also called Prague Powder #1, it is a curing salt intended for items that will be cured quickly, not over the course of weeks or months. It is dyed pink so that it will not be confused with regular salt. The sodium nitrite in the cure keeps the meat pink when cooked and also prevents botulinum spores from going to work.
If you needed to do the smoking in batches on the grill based in available space, is there any particular worry about the second batch drying out too much before it is smoked? If so, any approach to avoiding this over drying?
Dan,
No, that shouldn’t be a worry, though I would be sure to move them to the fridge while the previous batches smoke.
When placed in smoker are you using wood for smoke or just the smoker for cooking the sausage?
We used some small hickory chunks for smoke. Apple would be very good, as would oak or, if you can find it, beech.
How long will the kielbasa last in the fridge, so I know how many not to freeze after making them?
It will last a week or so in the fridge, much longer when sealed and frozen.
Excellent! Used ground mustard instead of whole. Otherwise followed recipe exactly. Smoked on a WSM modified with a rod across the top to hang the sausage. Used a signals and billows combo to smoke at 200 for 5 hours using sugar maple.
I would like to ask, after hanging my sausage for a good while over night, my casings are all oily and sweating, how do i combat this and is it still good to use?
Some oil will sweat through, it’s natural and even expected. If you left it hanging overnight in a warm place, I would think twice, but if it’s outside the temperature danger zone, it’s not a problem.
Hi Martin, thanks for the recipe. I never heard of using mustard but will try. The other ingredients are the same from my family recipe. I believe I use 3% salt. I did smoke with pellets in an electric smoker and started with 130 degrees for one hour and increased 20 degrees per hour up to 190 degrees and when the internal temperature reached 165, I was done. It was Traeger brand pellets apple, cherry, and oak blend.