

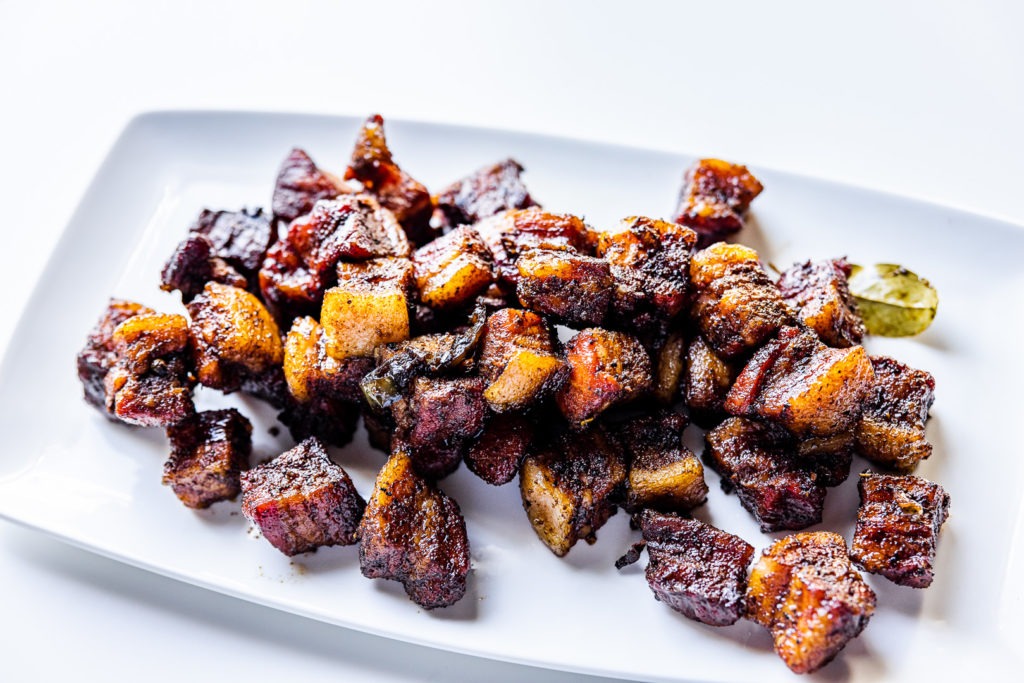
Filipino Adobo-style Pork Belly Burnt Ends: Temperatures and Recipe
There is no end to the ways you can play with the flavor profile of pork belly burnt ends. You can go fiery-spicy, Asian-sticky, classic BBQ, Mexican barbacoa, or you could follow our lead and take a page from the Filipino kitchen playbook and go adobo. Adobo pork belly burnt ends are savory, rich, sweet, and tinged with acid, and they’re going to hit my heavy BBQ rotation this summer.
Here we’ll walk you through the temps, times, tips, and recipe you need to make these absolutely delicious, well-balanced cubes of BBQ glory.
What is Filipino Adobo?
Adobo is a traditional Filipino dish that is usually made by braising meat or vegetables (often chicken) in a combination of soy sauce, vinegar, and sugar, seasoned with bay leaves, black peppercorns, and garlic. The word adobo can be found throughout the world in various places that were touched by Spanish colonialism, where it often refers to a marinated food, but the adobo of the Philippines most likely existed before Spanish influence hit the islands and had the name appended to it by Spanish settlers. It is the de facto national dish of the Philippines, and practically every household has their own particular recipe.
While we were discussing the food of the Philippines one day here, it occurred to us that the flavors and methods for Filipino adobo would fit together smashingly well with pork belly burnt ends. This had to be tried, and we were the ones that had to try it. Boy, are we glad we did.
Making pork belly burnt ends
We’ve done pork belly burnt ends before, (both the Asian sticky variety and the classic BBQ variety), and the process here is basically the same, just with a less sweet, less sticky sauce.
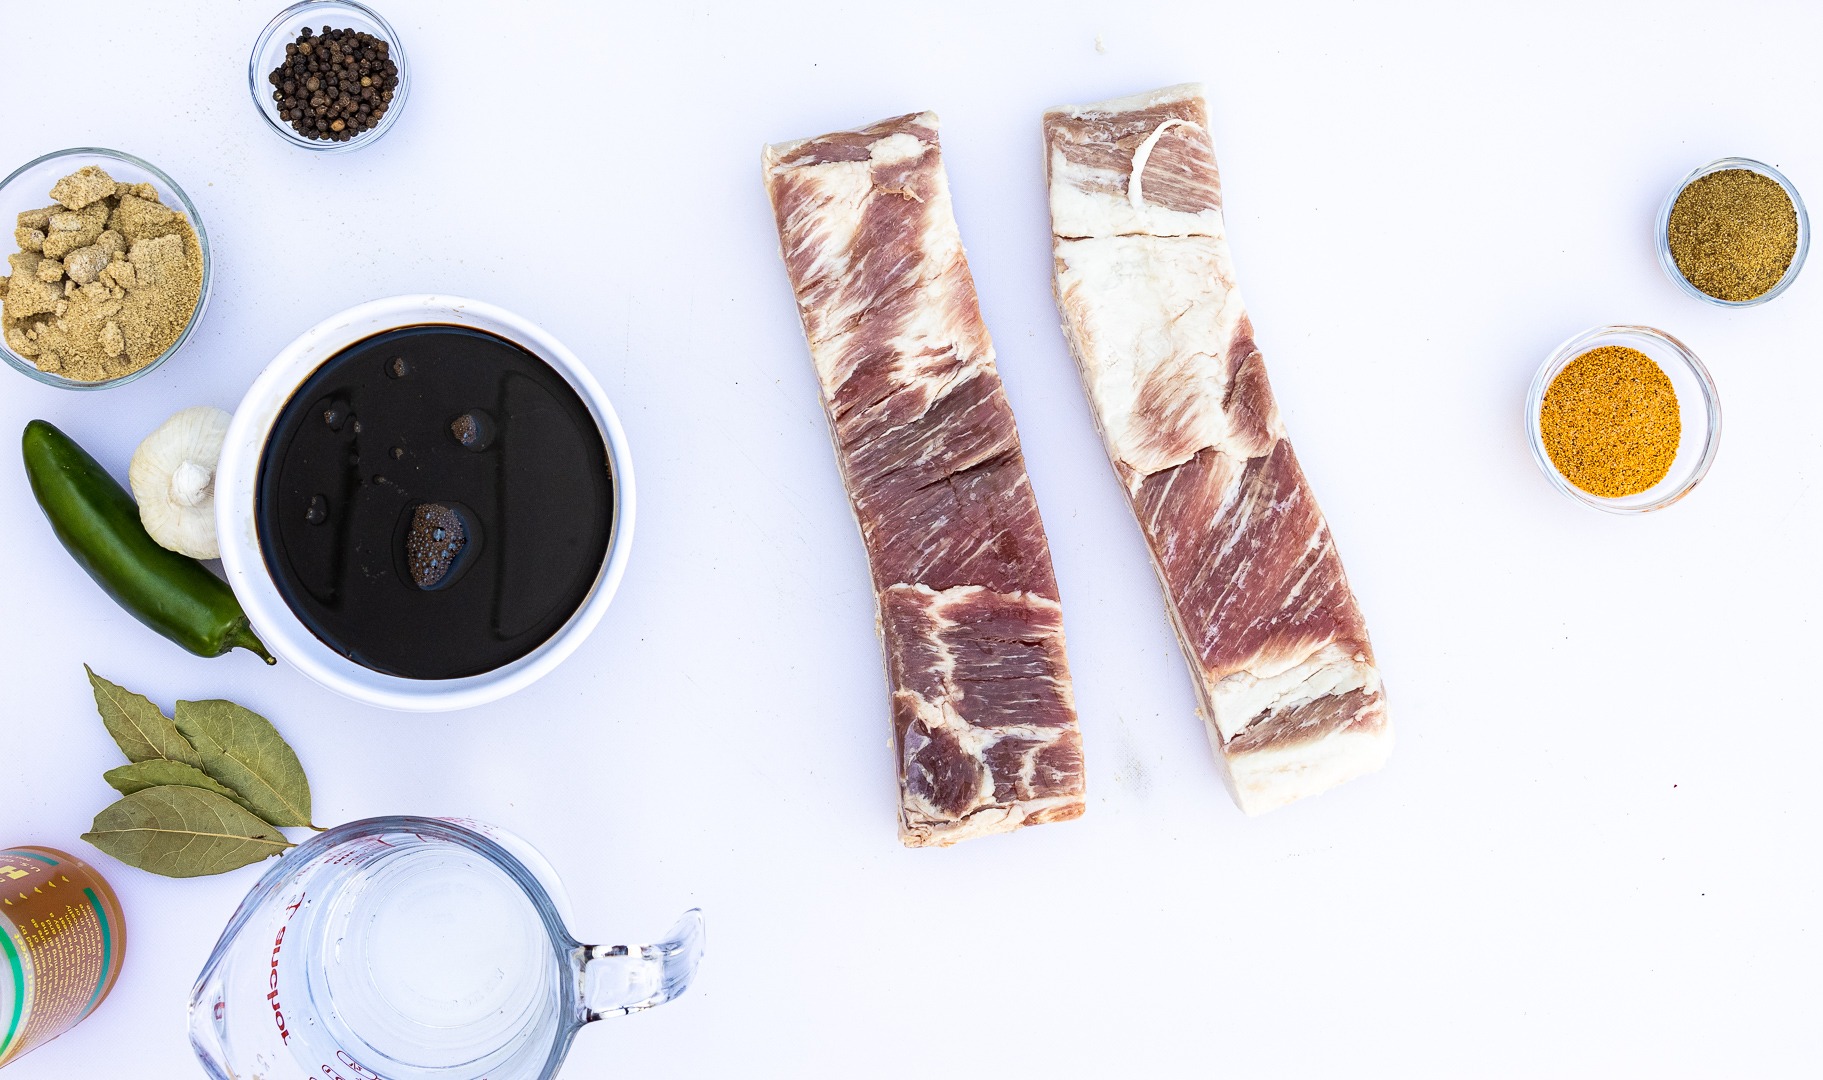
First, the belly is cubed into 1-1.5″ pieces and tossed with BBQ rub. We mostly used a basic savory rub with a dash of something with a little sugar and fruitiness to it, but this is dealer’s choice. Use what you like.


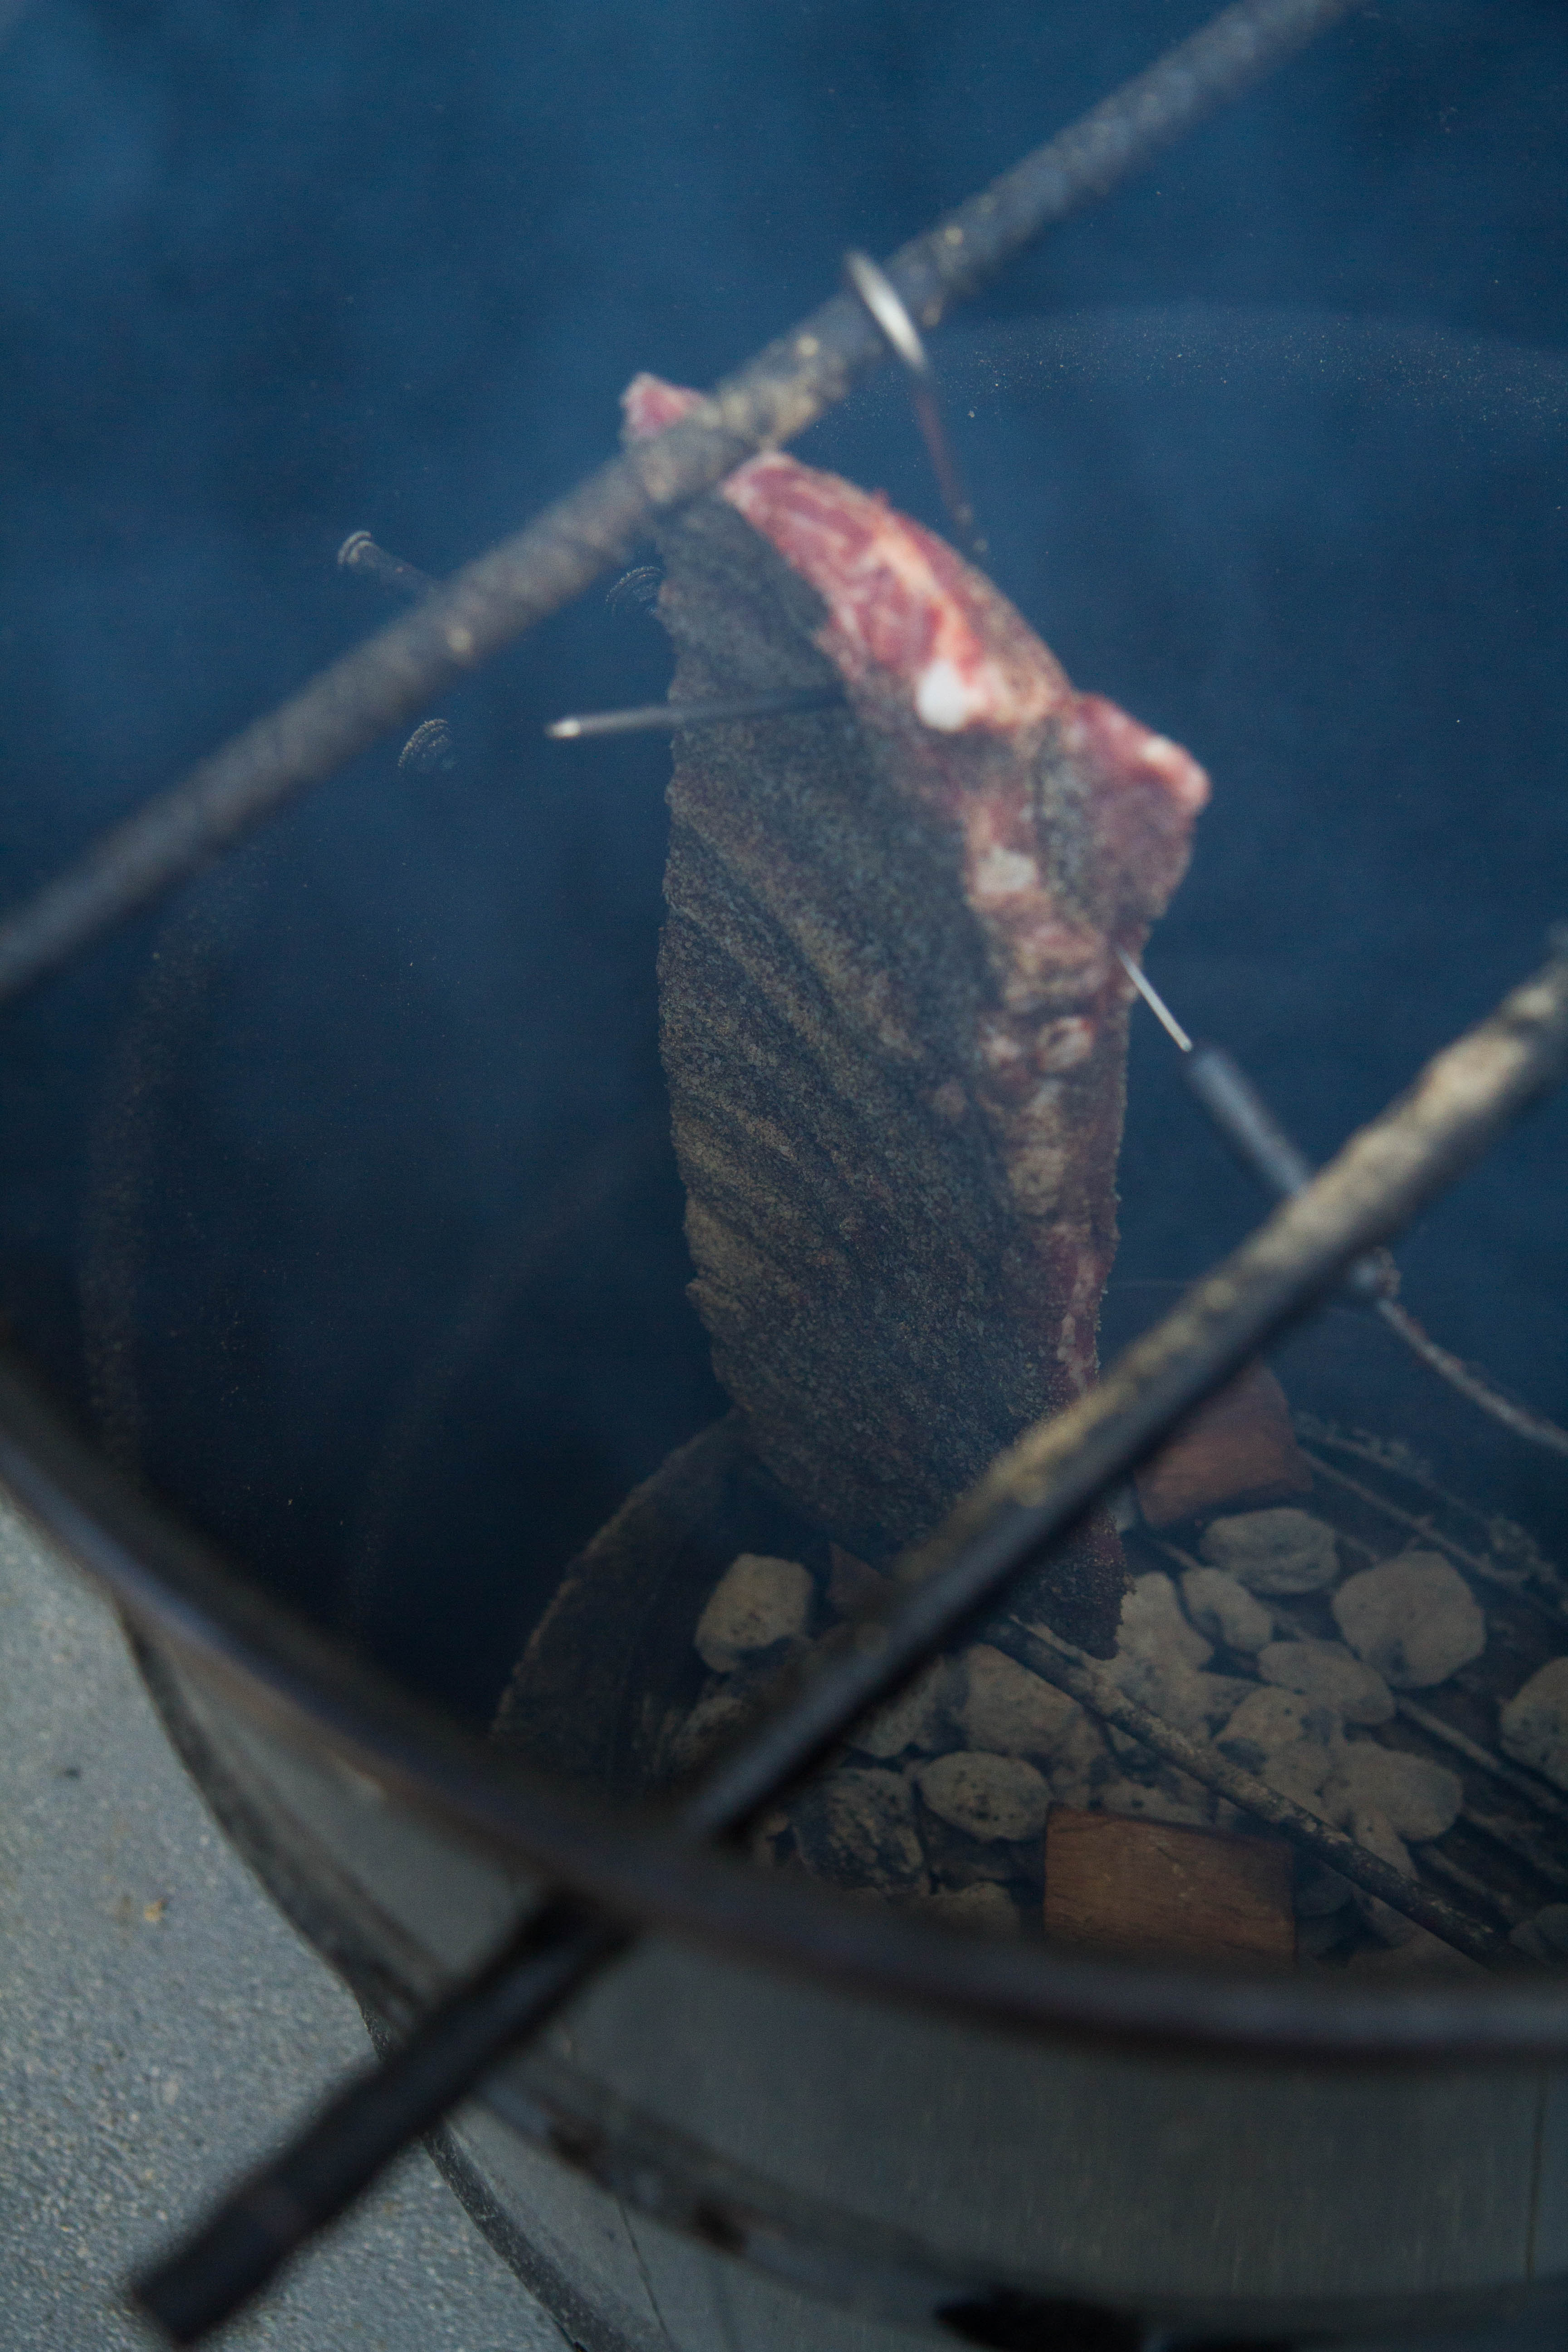
Cook the pork belly on low heat
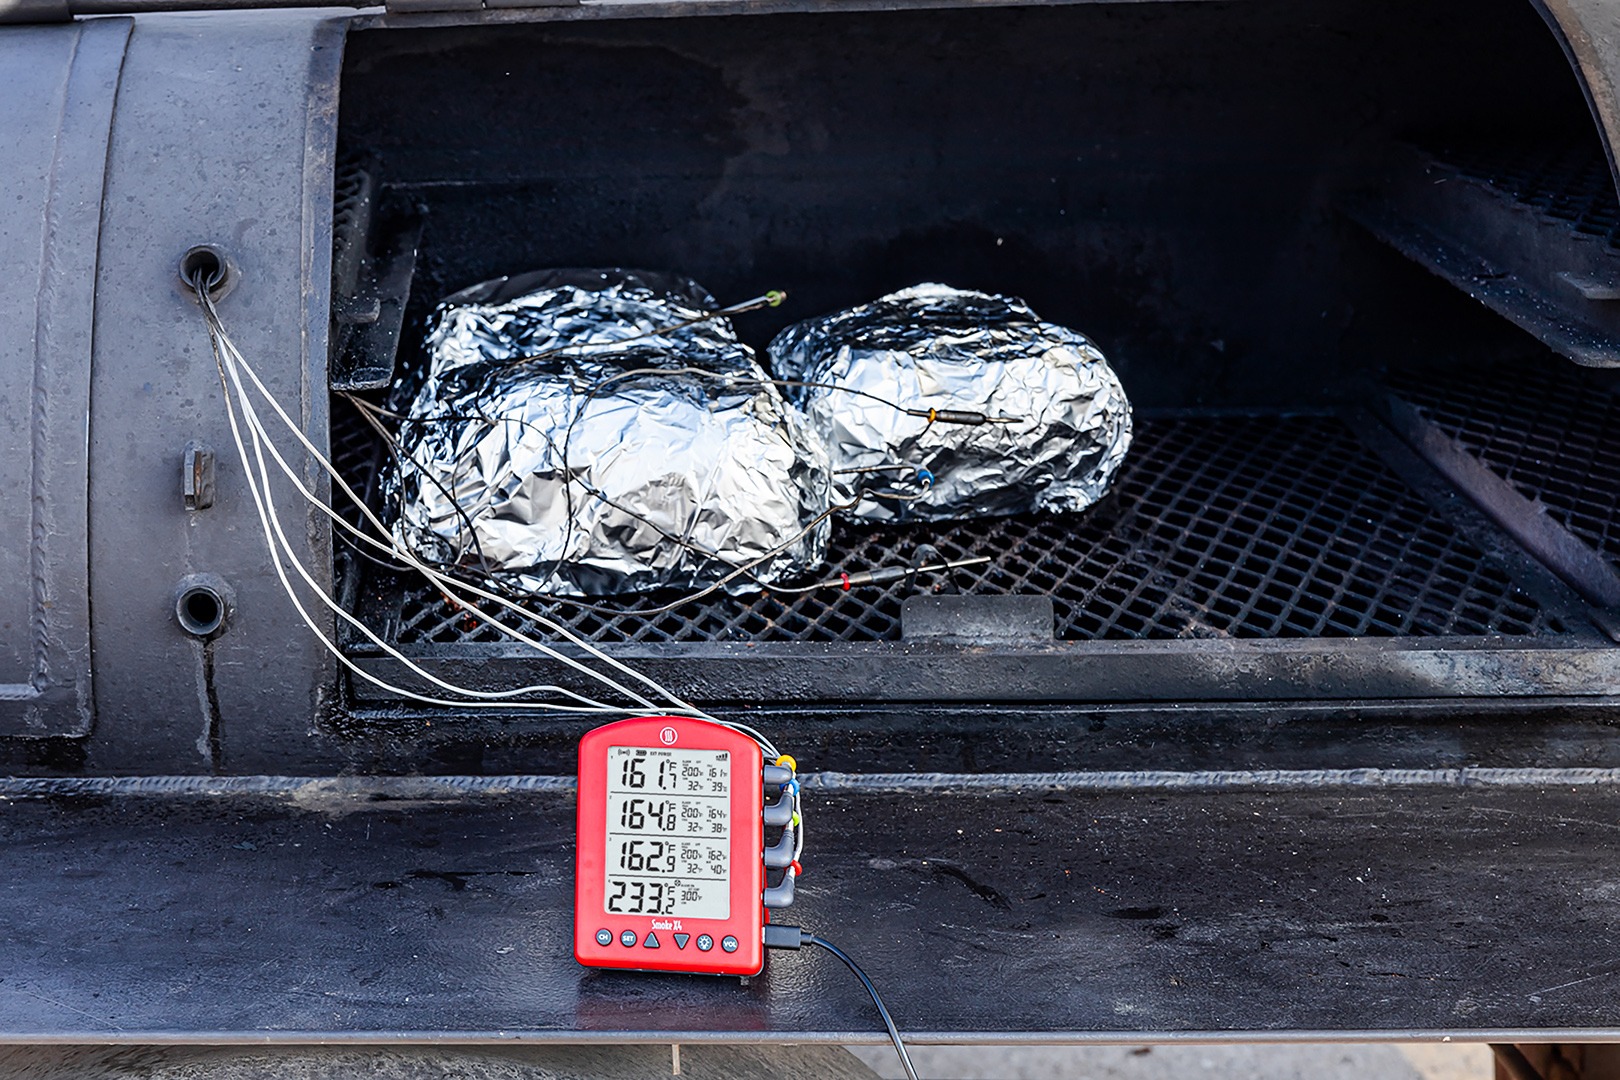
The cubes are then cooked in a 250°F (121°C) smoker for two hours. You can add a smoking wood like apple if you like, but the smoke flavor isn’t the most important part of this dish by any means. We used good lump charcoal with no wood chunks. To keep your smoker running smoothly at 250°F (121°C), it can be helpful to use a BBQ control fan like Billows™. We used one that we paired with Smoke X2™, which has long-range capabilities allowing us to use the receiver to watch the smoker temp even from far inside our building. By the time you’ve smoked the cubes for two hours, they will probably already be past the stall. Ours were getting up near 190°F (88°C).


Braise the pork belly in adobo marinade
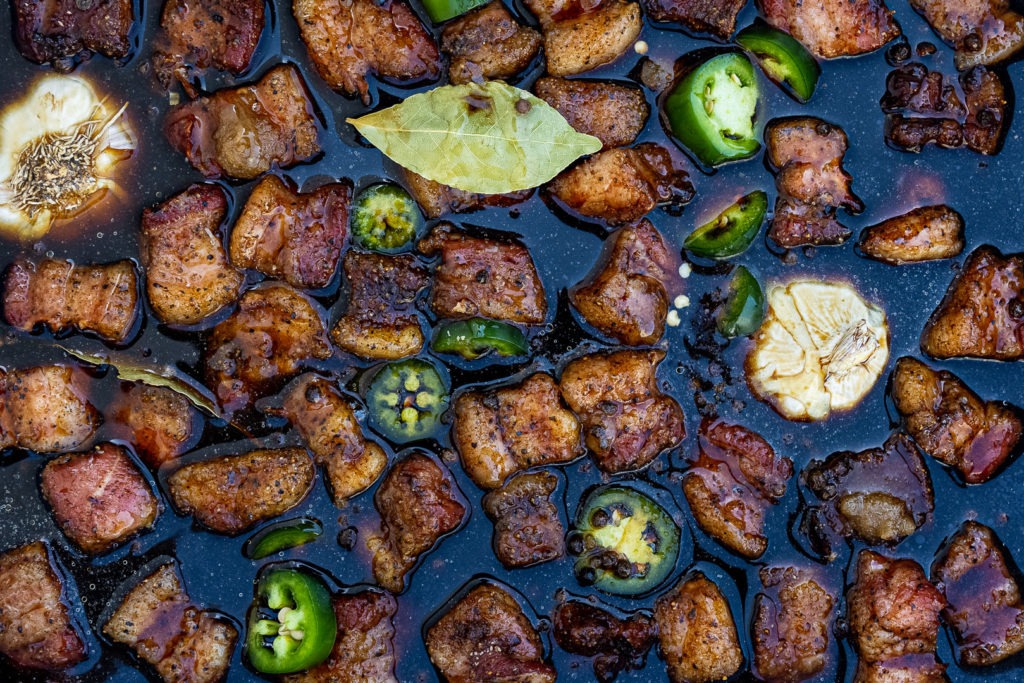
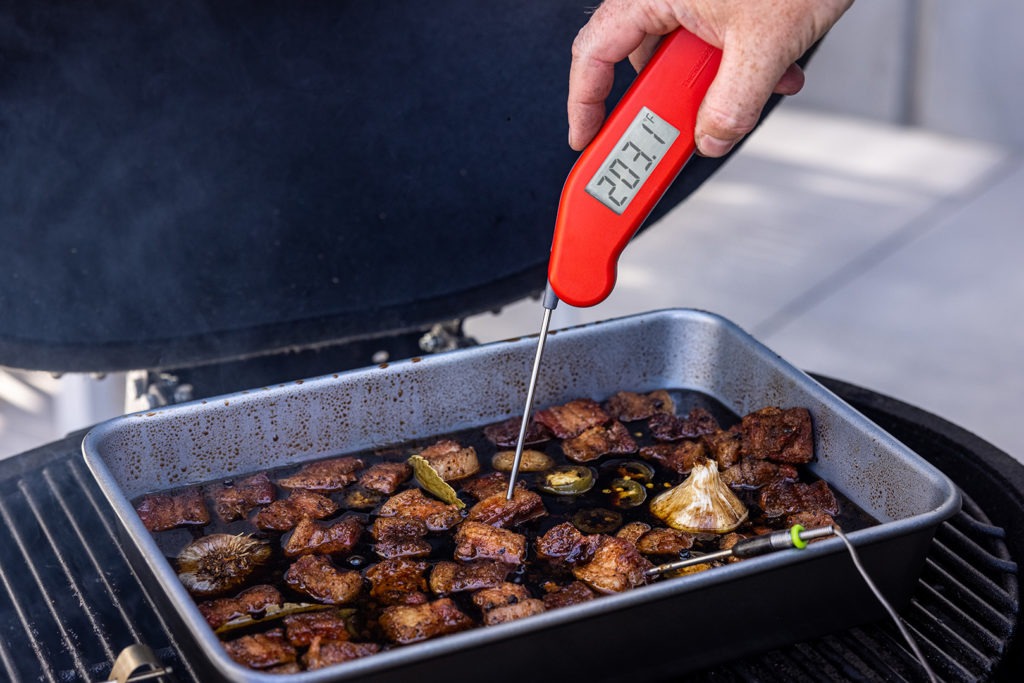
After the initial cooking comes the braising, and this is where the adobo comes in. Equal parts soy sauce and vinegar are added to a pan to which the pork cubes have been removed. (Coconut vinegar is traditional and can be had from many Asian markets, but plain white vinegar will do just fine.) A few bay leaves, some brown sugar and honey, a split head of garlic, a couple teaspoons of whole peppercorns, and, though not terribly traditional, a sliced jalapeño pepper are added, the whole thing is sealed with foil, and it’s put back in the smoker, its temperature now raised to 325°F (163°C). We didn’t pre-heat the braising liquid. You can, and you’ll rocket through the rest of the cook, but even without preheated liquid, we didn’t spend much more than an hour in the braise. As the liquid comes up to temp so will your pork, and you’ll get there soon enough.


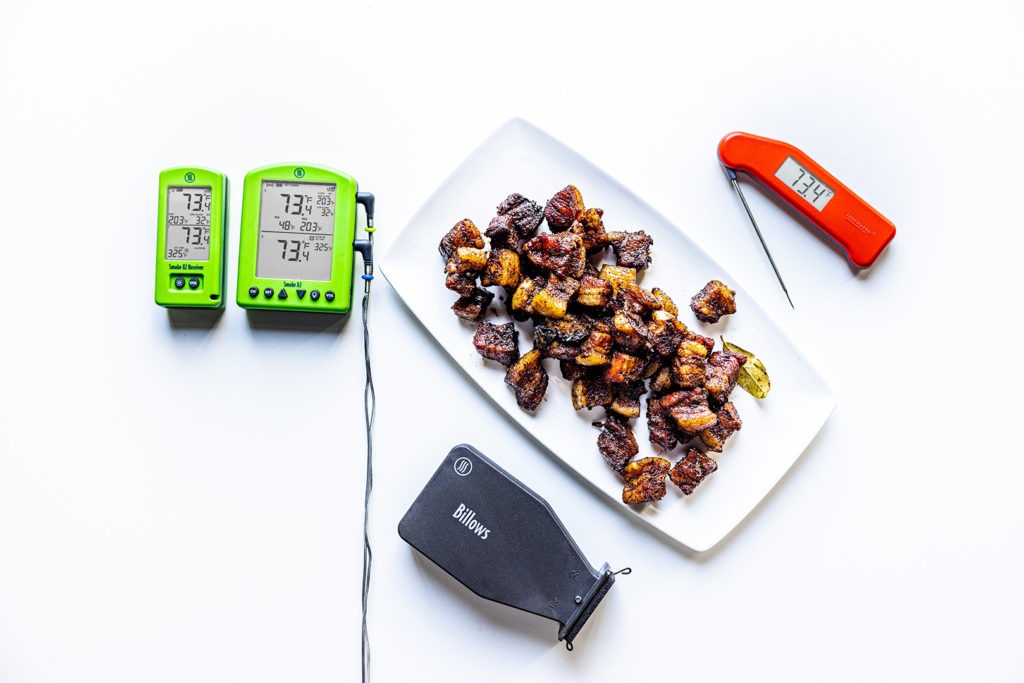
The cubes are braised until the collagen in the pork has finished breaking down, which will happen by about 203°F (95°C). Insert a probe (the optional 2.5″ probe is excellent here) through the foil into one of the larger cubes before you begin the braise and set the high-temp alarm on your Smoke X2 for 203°F (95°C). When it sounds, it’s time to verify the temp in a few more cubes using your Thermapen® and then move forward.
Grill the pork belly burnt ends
If your smoker is your grill, set it up to grill. If you have a grill separate from your smoker, have that ready for direct-heat cooking. Pour the braising liquid off of the belly cubes and put it in a wide pot. Add 1/2–3/4 cups brown sugar and bring it to a boil. Boil to reduce and thicken somewhat, but don’t go all the way until it’s very syrupy: all the salt from the soy sauce will concentrate far too much. Taste it as you go and stop reducing when the salt starts to get strong.


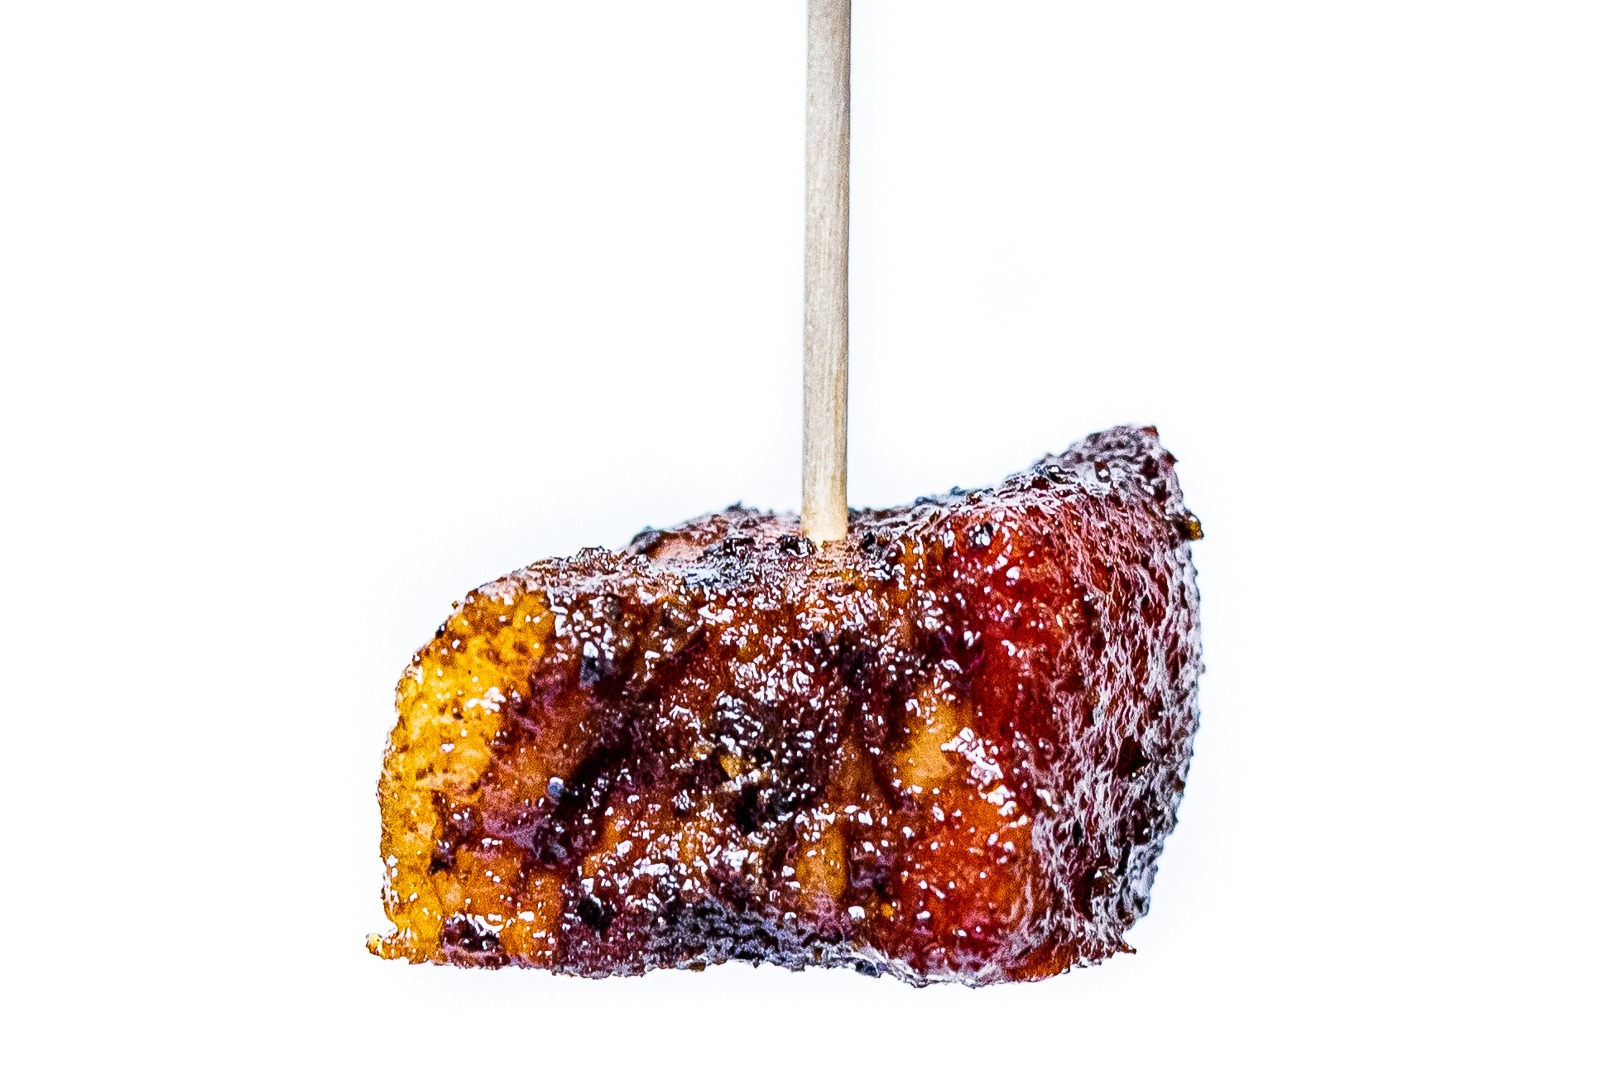
Toss the braised pork cubes in the sauce, then put them on the grill and cook. Turn them every minute or so to keep any side from burning, and baste with more adobo sauce, building up a coating as you cook. You want glazed/lacquered cubes that are just sticky to the touch, so apply more coats of glaze as you see fit. Once they reach the char or glaze level you like, take them off and eat them!
I hope you give this technique a try. The deep flavor of the soy penetrates the meat and the bright acidic buzz keeps it from tasting too heavy. The whole thing is rounded out with a sweetness that is soft pleasant. Yes, the technique is very similar to the other techniques we’ve posted on this blog for pork belly burnt ends, but if we’re being serious here, this will hardly be the last flavor palette we’ll be applying to this method. But in the end, that’s what’s so beautiful about understanding the thermal principles at play in any given cook. Once you know the critical temperatures at play for any recipe—in this case the cook, the braise, and the doneness temps—and you understand how to use the tools—Billows, Smoke X2, Thermapen—you can play with the flavors to create new things as much as you want. Get those temperatures ingrained in your mind and suddenly the pantry and your favorite flavor profiles become elegant, agile tools that you can use to create any version you want. But do try this one. You certainly won’t regret it.
A note on serving
While you can eat these on a sandwich, skewered on toothpicks, or by the handful if no one is watching, it would be quite fitting to give them a bed of rice. And in fact, you could go full-on Filipino fried garlic rice. All fried rices are best made with rice that has had the chance to cool and even stale somewhat (rice from yesterday’s takeout is great), and the same holds true here. Peel and finely chop as much garlic as you can stand, then peel and chop two more cloves. Heat a couple tablespoons of neutral oil over medium flame in a heavy pan or a wok. Add the garlic and stir fry it until it just becomes golden and crisp, then add the rice and stir fry it together. Serve this as a fragrant bed for the adobo bites and you’re well on your way to an amazing dinner.
Print
Filipino Adobo-style Pork Belly Burnt Ends Recipe
Description
Pork belly burnt ends, cooked in the style of Filipino adobo.
Ingredients
- 2 lb skinless pork belly
- 2–4 Tbsp BBQ seasoning of your choice
- 1 1/2 C soy sauce
- 1 1/2 C vinegar (coconut vinegar preferred, but apple or white is fine)
- 1 jalapeño pepper
- 1 head garlic
- 3 bay leaves
- 1 C brown sugar, divided
- 3 Tbsp honey
- 2 tsp black peppercons
Instructions
- Using your Billows and your Smoke X2 to control the temperature, preheat your smoker to 250°F (121°C).
- Cut the pork into 1–1 1/2″ cubes.
- Toss the pork with the BBQ seasoning until evenly coated.
- Arrange the pork cubes on your smoker. Insert a probe into one of the cubes to monitor the temp. (Pork temp is not critical at this point, but you’ll want to know about where you end up.)
- Cook the pork for 2 hours (use a timer to keep track of the time) while keeping the smoker temp at 250°F (121°C).
- Remove the pork cubes to a cake pan or disposable aluminum pan. Add the soy sauce, vinegar, 1/2 C brown sugar, honey, peppercorns, bay leaves, garlic head (sliced equatorially), and the jalapeño (sliced) to the pan. Insert a probe into one of the cubes and cover the whole thing with foil. Set the high-temp alarm on the meat channel for 203°F (95°C)
- Increase your smoker temp to 325°F (163°C) and braise the pork.
- When the alarm sounds, use your Thermapen to verify the temp in a couple more cubes.
- Remove the pan from heat, move the pork to a bowl, and pour the braising liquid into a wide pan.
- Add the remaining half cup of brown sugar to the liquid and bring it to a boil, stirring and cooking, until thickened somewhat. Taste often to make sure you don’t reduce it too much. If you overdo it, add a little water to get the salt right.
- Meanwhile, heat your grill.
- Pour the slightly thickened braising liquid over the pork belly in the bowl and toss to coat.
- Cook the pork on the grill, turning every minute or so to keep from burning. Baste with more adobo liquid to make a slightly sticky glaze.
- Remove the burnt ends from heat and enjoy!
Shop now for products used in this post:


Haven’t tried it yet, but it looks great. You talk about bay leaves in the description, but they are not in the recipe. Should they be?
Good catch! I fixed it.
Thank you so much for having giveaways!
Sounds very good, and not too difficult to make. The only problem, I do not have a smoker, nor a grill. I only have an electric grill. I live in an apartment, and we can’t have a flame.
You can cook and braise it in the oven and then sear them in a cast iron pan, if you like. It’ll still be great!
For folks like us who are very literal when following a recipe, can you please change “1/2 C sugar” in the instructions to “1/2 C brown sugar”? We made that mistake because it didn’t say brown sugar in the instructions. Yes, I am aware that only brown sugar is in the ingredients list, but we did this as a team and it was an easy mistake to make when there were several people working on this at the same time.
Done!
Can dried bay leaves be used interchangeably with fresh bay laurel leaves off a plant? I have a large bay laurel growing in my greenhouse and like to use them whenever possible. Pork belly has become more readily available, and I’d like to try this recipe.
BTW, your Hi-Temp silicone spatulas and related items are fantastic. Their deign and durability is, by far, the best on the market, and the price is a raging bargain. Anyone who misses the present sale is very foolish. I buy them in quantity to use as gifts.
Yes, they can! In fact, it’s all the better with fresh bay, which can be hard to find.
As a Filipino, growing up, my aunt would make adobo this way as a treat for us kids. She’d wrap each cube of a burnt end inside a ball of rice. It is one of my absolute favorite pork things to eat!
Wrapping them in rice sounds amazing!