Building your own sous vide
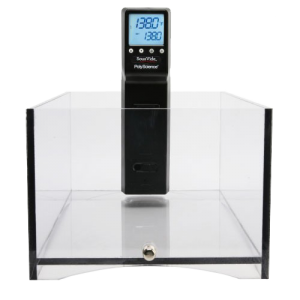 Sous Vide is a re-emerging cooking method that’s making its way into home kitchens. This ultra-low, super-accurate and gentle method of cooking, once reserved for high-end restaurants, is more accessible now than it’s ever been. Thanks, in part, to celebrity chefs and television cooking programming, sous vide has gone from cooking oddity to dinner option. In a previous post (Sous Vide: Lower, sometimes slower cooking) we told you about the benefits of cooking using the sous vide method, which are exact doneness of delicate foods, moist and tender textures, enhanced flavors and perfect, easy-to-repeat results. This time, let’s take a closer look at what it takes to bring the benefits of sous vide into a home kitchen and how you can turn your next meal into a 5-star masterpiece.
 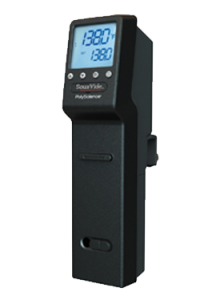 A great sous vide set up starts with a thermal circulator.
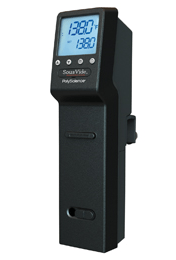
This is the piece of equipment that controls the temperature of the water and increases, or decreases heat as necessary. It also circulates the water (hence the name) to maximum temperature consistency and heat exchange. A professional thermal circulator like the Sous Vide Professional from PolyScience can maintain water temperature within 1/10th of a degree. Thermal circulators differ from crock pots or rice cookers in that they hold temperatures constant and don’t allow for deviation. A crock pot will generally only allow for three settings (low, medium and high) and works like an oven to keep the pot within a broad temperature zone. Also, just like an oven, crock pots will often overshoot the intended temperature setting and allow the temperature to drop to the desired setting. When temperatures dip below the setting, they ramp up again and repeat the cycle until the cook is complete. The home chef who tries to use a crock pot to sous vide a salmon filet will not be able to achieve the pin point accuracy of a thermal circulator. Temperatures have the potential to be overshot by as much as 50°F, which allows overcooking to become a real threat. The placement of the heating elements also presents a problem. Water that is in direct contact with the surface walls, closest to the heat, will be hotter than water closer to the surface and center, and may cause food closest to the heat to develop a crusty outer layer. A proper circulator will ensure that heat is dispersed evenly allowing for a uniform cook throughout.
Another piece of required equipment is a vacuum sealer with FDA approved vacuum bags. Vacuum packaging reduces atmospheric oxygen, limiting the growth of aerobic bacteria or fungi, and prevents the evaporation of volatile components, which is very important when you consider that your proteins are sitting in the temperature danger zone (41°- 135°F) for extended periods. FDA approved bags will ensure that harmful chemicals (found in some unapproved plastics) are not transferred to your food. Zip-Locs and other self-sealing bags are not acceptable replacements for vacuum bags. *It’s important to continue to follow safe food handling guidelines even when food is being vacuum packed. Vacuum sealing food does not make it impervious to bacterial growth; in fact, under certain conditions some bacteria actually thrive in the oxygen-free environment. Protect yourself against food contamination by making sure your food is cold (below 41°F) before sealing it in the bag. Also, store items that are not ready to be cooked (sealed or not) in the refrigerator. Freeze all food that you’re not planning on cooking within 3 days. 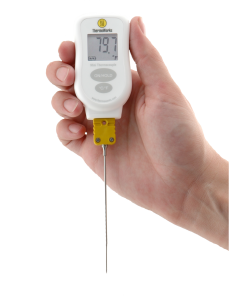 For fine-tune temperature monitoring, we recommend a thermocouple probe that will allow you to follow your main course’s internal temperature throughout the cook. The trick is to find a probe thin enough to maintain the integrity of the delicate proteins and vacuum sealed bag. A Miniature Needle Probe is ideal for this process and will allow you to monitor temperatures in excess of 400°F – not that you’ll ever need to go that high. Foam tape can be used to seal puncture points and will make sure no water gets in or out of the bag. Finally, you’re going to need a pot, or some other container. PolyScience recommends a 5 gallon stainless cooking pot for their Sous Vide Professional, however any container deep enough to accommodate the thermal circulator and your vacuum packs should suffice. Once your thermal circulator, vacuum sealer, FDA approved bags and pot are in place, you can begin experimenting with different flavors and textures. Enjoy salmon cooked to a perfect, “chef-recommended,” 120°F, or bite into a filet devoid of the tell-tale gray band. Using the sous vide cooking method will allow you to experience food in a way usually reserved for 5-star restaurants. Along with their wide array of thermal circulators, insulated cooking tanks and sous vide accessories, PolyScience has several excellent recipes for aspiring chefs. Check out a few of these, or look for future posts where we’ll share our own sous vide favorites.





I think you meant to say less than 41 degrees rather than this when referring to using vacuum packaging bags “Protect yourself against food contamination by making sure your food is cold (>41°F) before sealing it in the bag.