How to Make Homemade Candy Canes: Candy Temperatures for a Holiday Treat
If there is one edible symbol of holiday joy, it has to be the candy cane. They’re festive, joyful, and mintily refreshing amongst all the chocolates and beef roasts of winter. But here’s something you may not have considered: Until the 1920s, candy canes were made exclusively by hand. If not homemade, candy canes were at least hand-made by confectioners, and they were made that way for centuries.
We thought it might be interesting to take a little trip into the culinary past and see what it takes to make these Christmas concoctions the old way. We wouldn’t recommend this as your first foray into candy making, but if you have a little experience with the art, this can be a fun holiday treat that will really impress, if you decide to share it with others. Of course, as with all candy making, temperature plays a huge role in making homemade candy canes. We’ll discuss the temps you need to be aware of, as well as the tools you need to monitor them, so that you can make these old-school candies the old-school way.
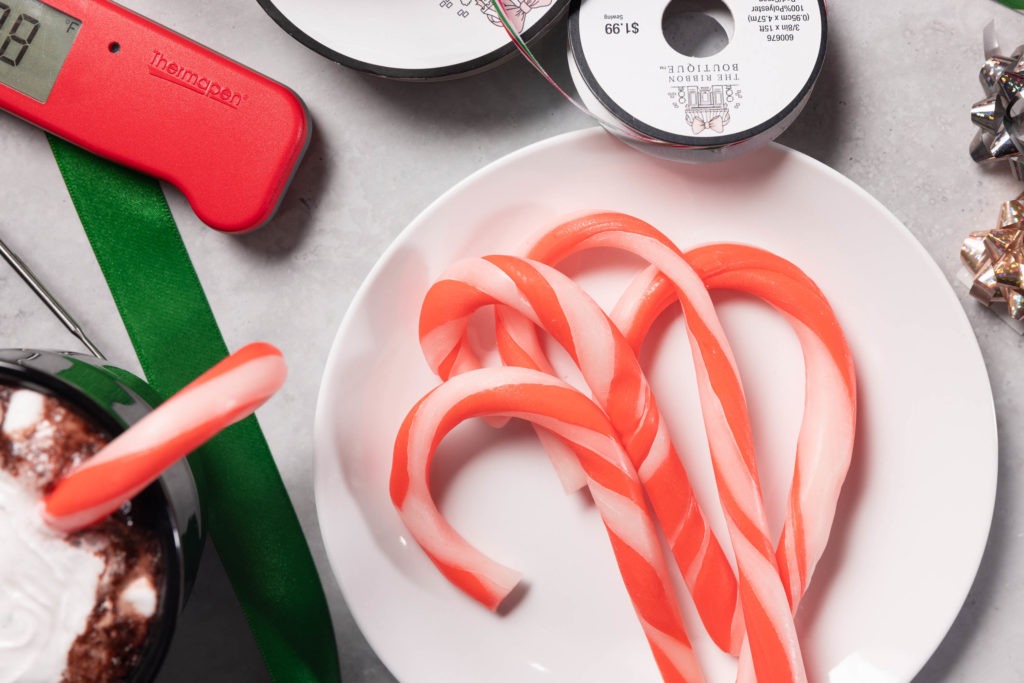
Contents:
- Candy Cane History
- Why you should make candy canes at home
- Homemade candy cane temperatures
- How to shape candy canes
- Candy cane recipe
Candy cane history
Every story about the invention of the candy cane is apocryphal … we have no real, true idea of where it came from. The most common and durable story places their invention in Köln, Germany in roughly the 1670s. A choirmaster is said to have commissioned the canes from a local candy maker in order to quiet fidgety children during the long Christmas liturgy. If that story is true, it is only the shape that was invented at the time, as hard stick candy, imbued with various flavors, was already a common item from confectioners of the time.
Whatever the origin, candy canes came into in wide circulation. They were all made roughly the same way for hundreds of years: sugar syrup, boiled to the correct stage and flavored, would be pulled on a taffy hook or candy puller to give it sheen and mix it with air. Some of the same syrup, colored red, would be shaped into rods and placed on the outside of the white candy. This would then be pulled, twisted, cut, and shaped, the whole mass being kept warm and pliable in front of a low fire or a batch warmer.
In 1921, however, all of that changed, when the Bunte Bros. of Chicago filed a patent for a candy-cane-making machine. Formerly a niche product, made by skilled craftspeople in candy shops, candy canes soon became the ubiquitous sugar-symbol of Christmas. The rest, as they say, is history.2 Candy canes took over, and no one has looked back.
Why you should make homemade candy canes
With the ready availability and low cost of candy canes, not to mention their across-the-board level of standardized quality, one might ask why they ought to make their own candy canes. To this, we can give but one answer, in a paraphrase of the explorer George Mallory: because they are there.
Readers of this blog know that we like a challenge, and we feel that readers of this blog also enjoy a challenge. The Web is full of easy-this and quick-cook that, but we’re not afraid to chop some onions, butcher some meat, cook something for 16 hours, or just generally take the long way ’round. If you vibe with that ethos, then making candy canes from scratch is a fun, educational, exciting (if not somewhat frustrating) project that could easily become a holiday tradition.
Plus, there’s always the customization factor. In this recipe, we use peppermint oil with a little vanilla extract. But what if you want a different flavor? What if you want candy canes that taste like root beer? Like bergamot? Like rose water? Do it!
Homemade candy cane temperatures
Candy canes need to be crunchy, hard, brittle. We need them to shatter in our mouths, not gum up our teeth, and that means we need to cook them to high soft crack stage or even low hard crack stage. Take it from us—only undercook these canes if you want to pull out your own fillings. We’re aiming for a (non-altitude adjusted) syrup temp of 285–300°F (141–149°C). To adjust for elevation, remember to subtract 1°F (0.6°C) for every 500ft above sea level you’re cooking at.
Why the range, and not a single temperature? Skill. Frankly, the lower temperature on that scale is easier to work at, and you can certainly get a passably-textured candy cane from it. The higher end, in the hard-crack stage, is a little more difficult to handle but results in a candy cane that is closer to those you buy at the store. If you’re new to sugar pulling, and intend to make candy canes a habit, maybe do a practice batch at 285°F (141°C), then work your way up to 300°F (149°C).
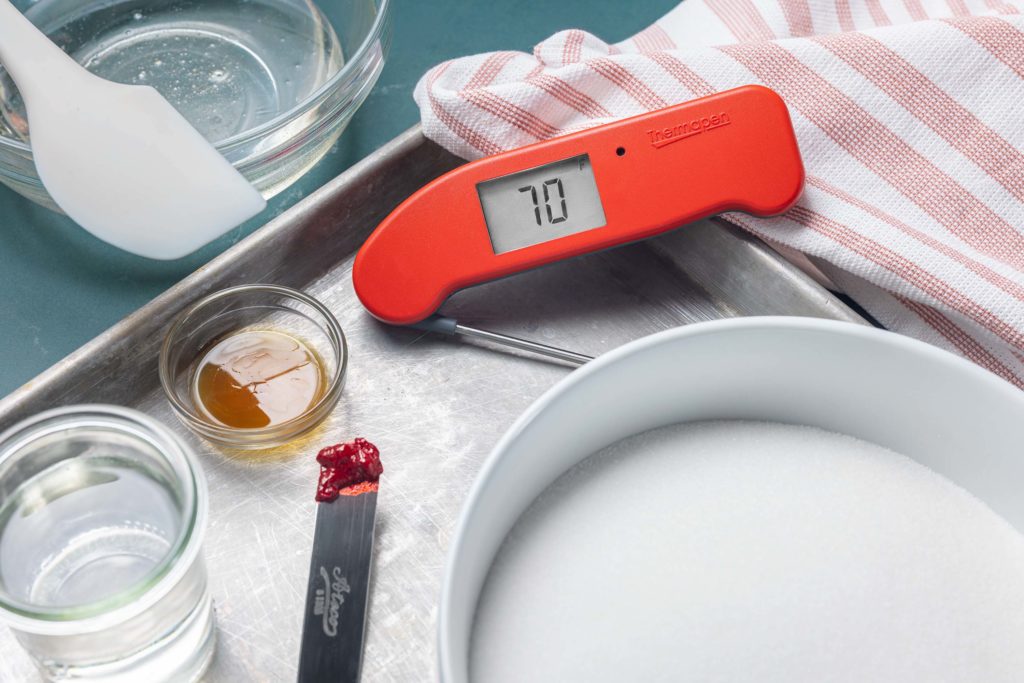
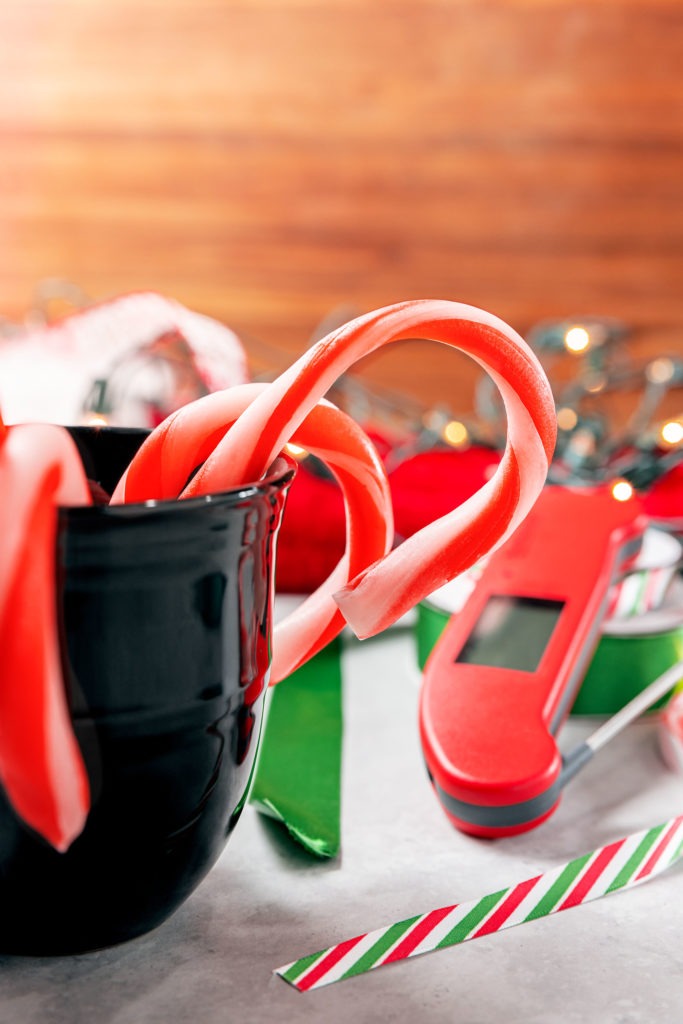
Whatever the pull temp you choose for your candy, it’s important that you get it out of the pot right when you get there! Using a fast, accurate thermometer is essential for candy making like this. Thermapen® ONE is accurate to 0.5°F (0.3°C) and gives full readings in one second, making it the fastest and most accurate thermometer for candy making. Use your Thermapen ONE to check the temperature of the syrup regularly as it boils, wiping it off with a damp towel kept by the stove after every measurement.
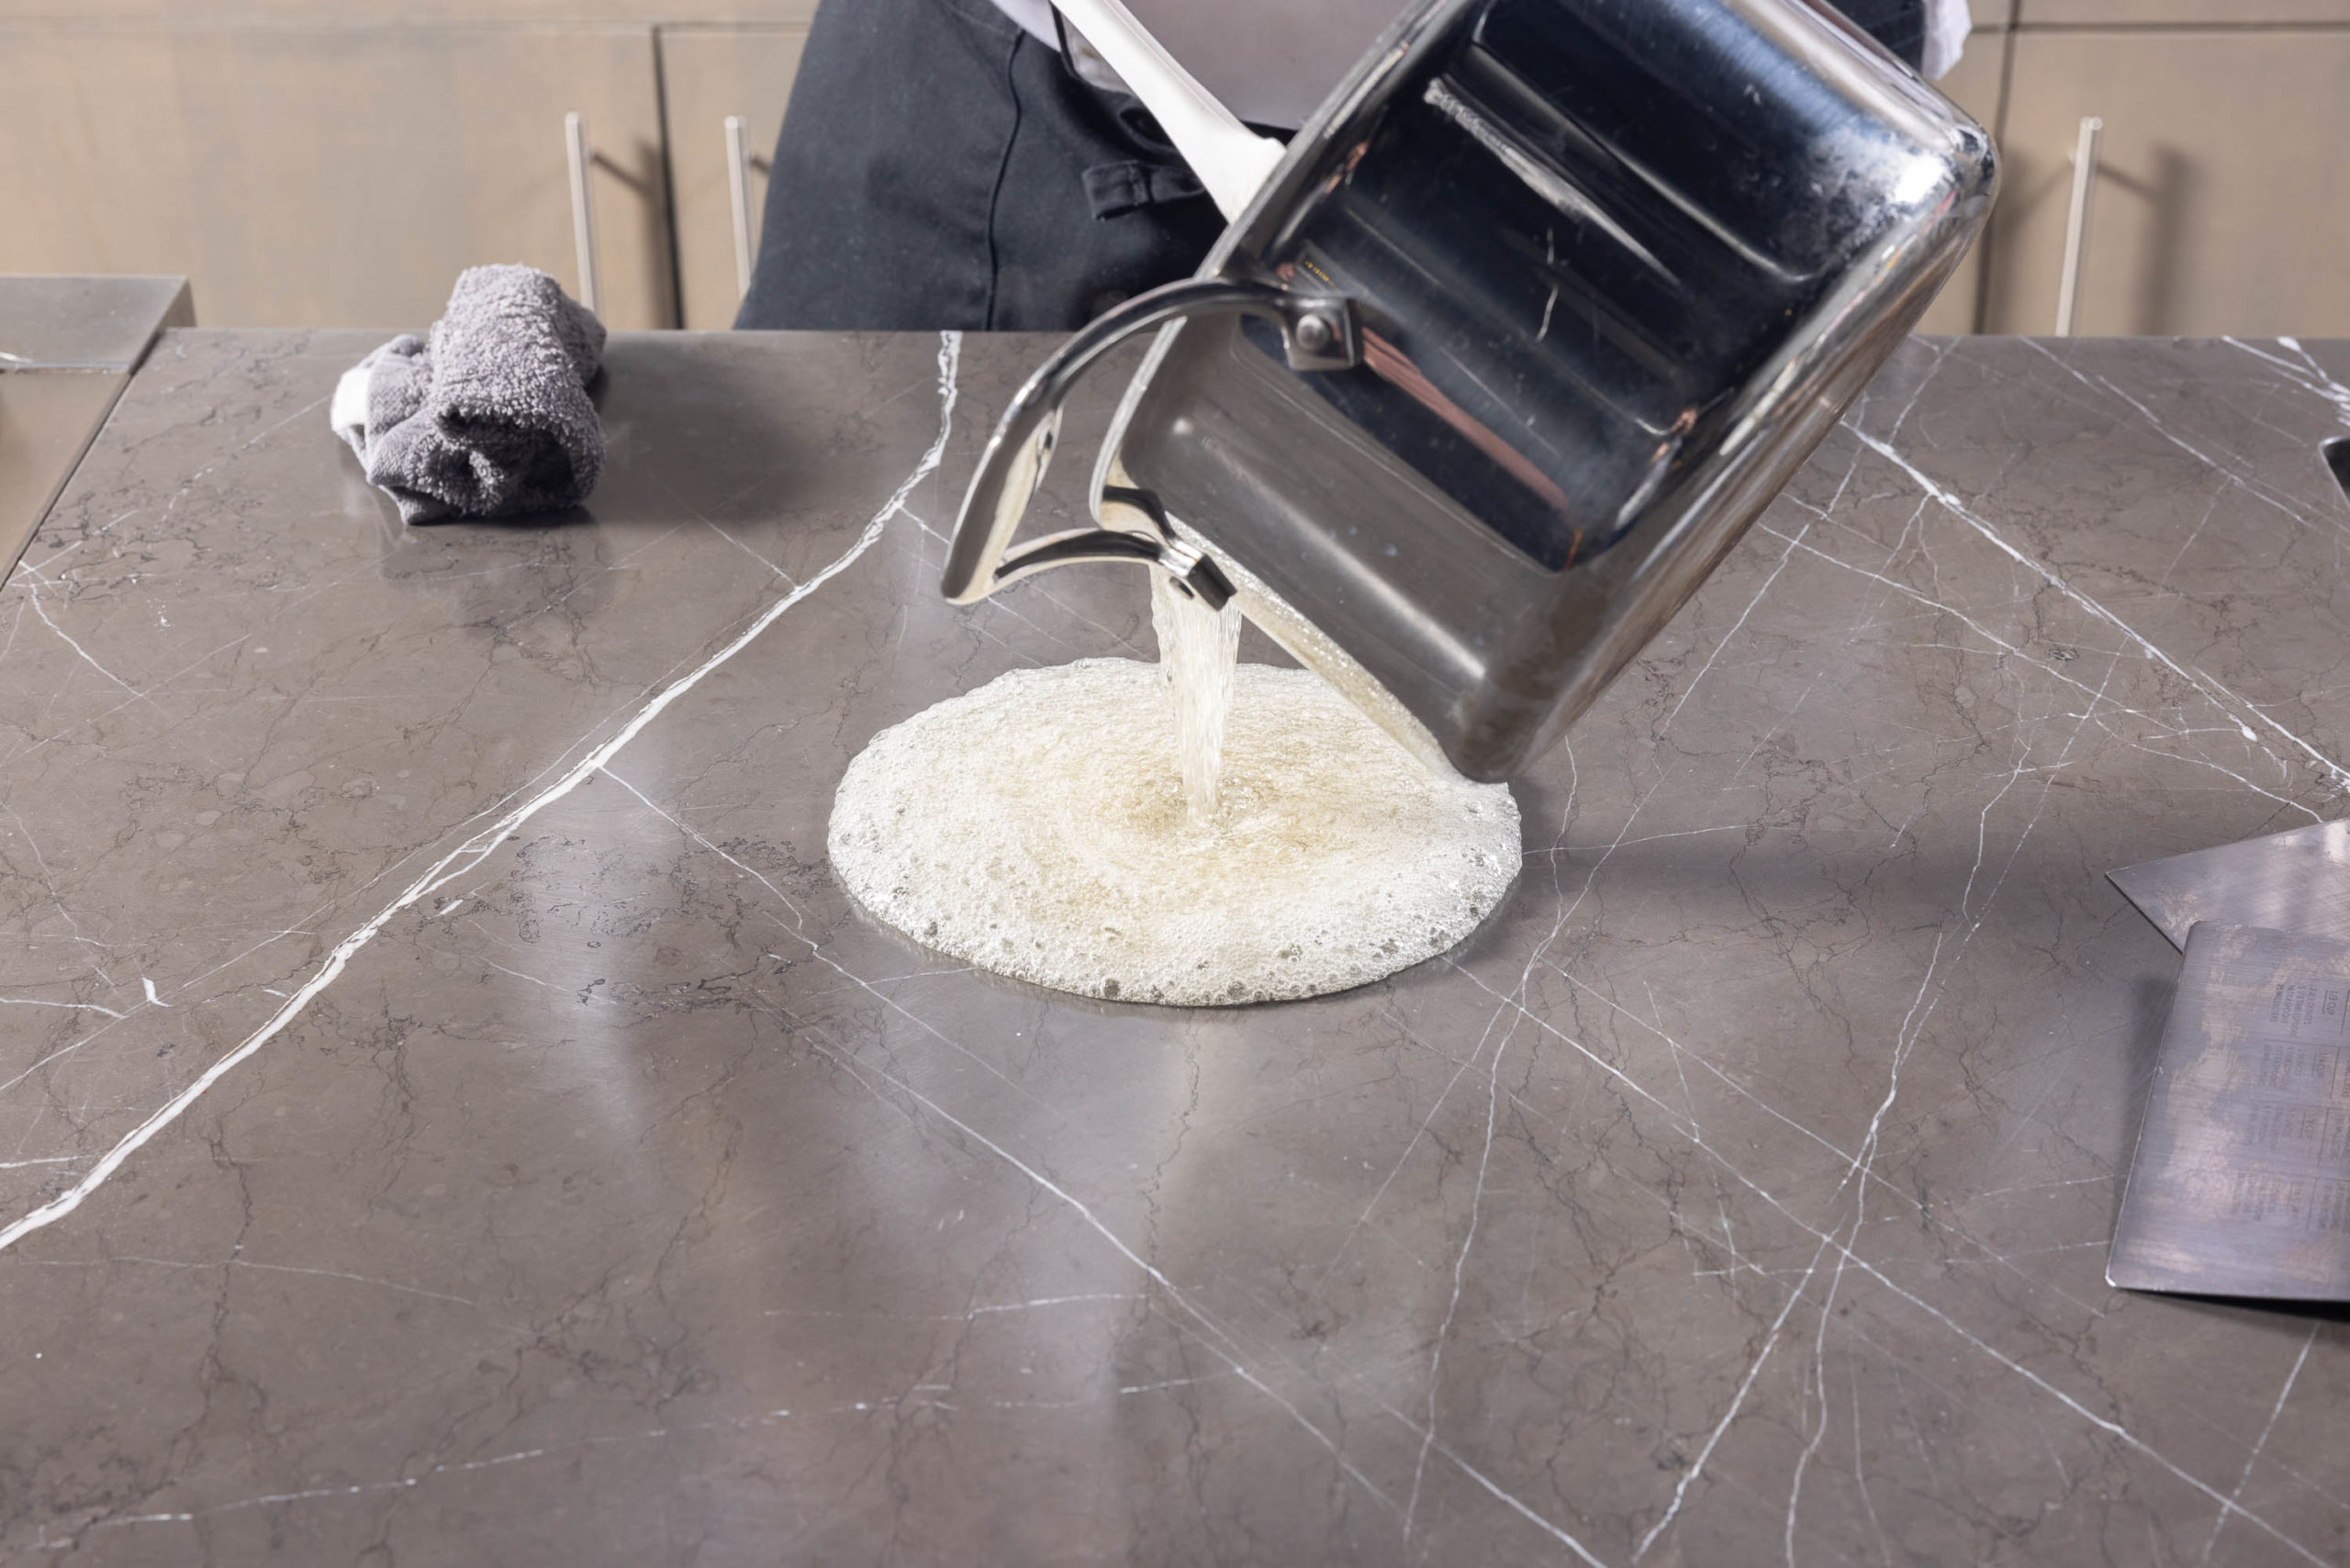
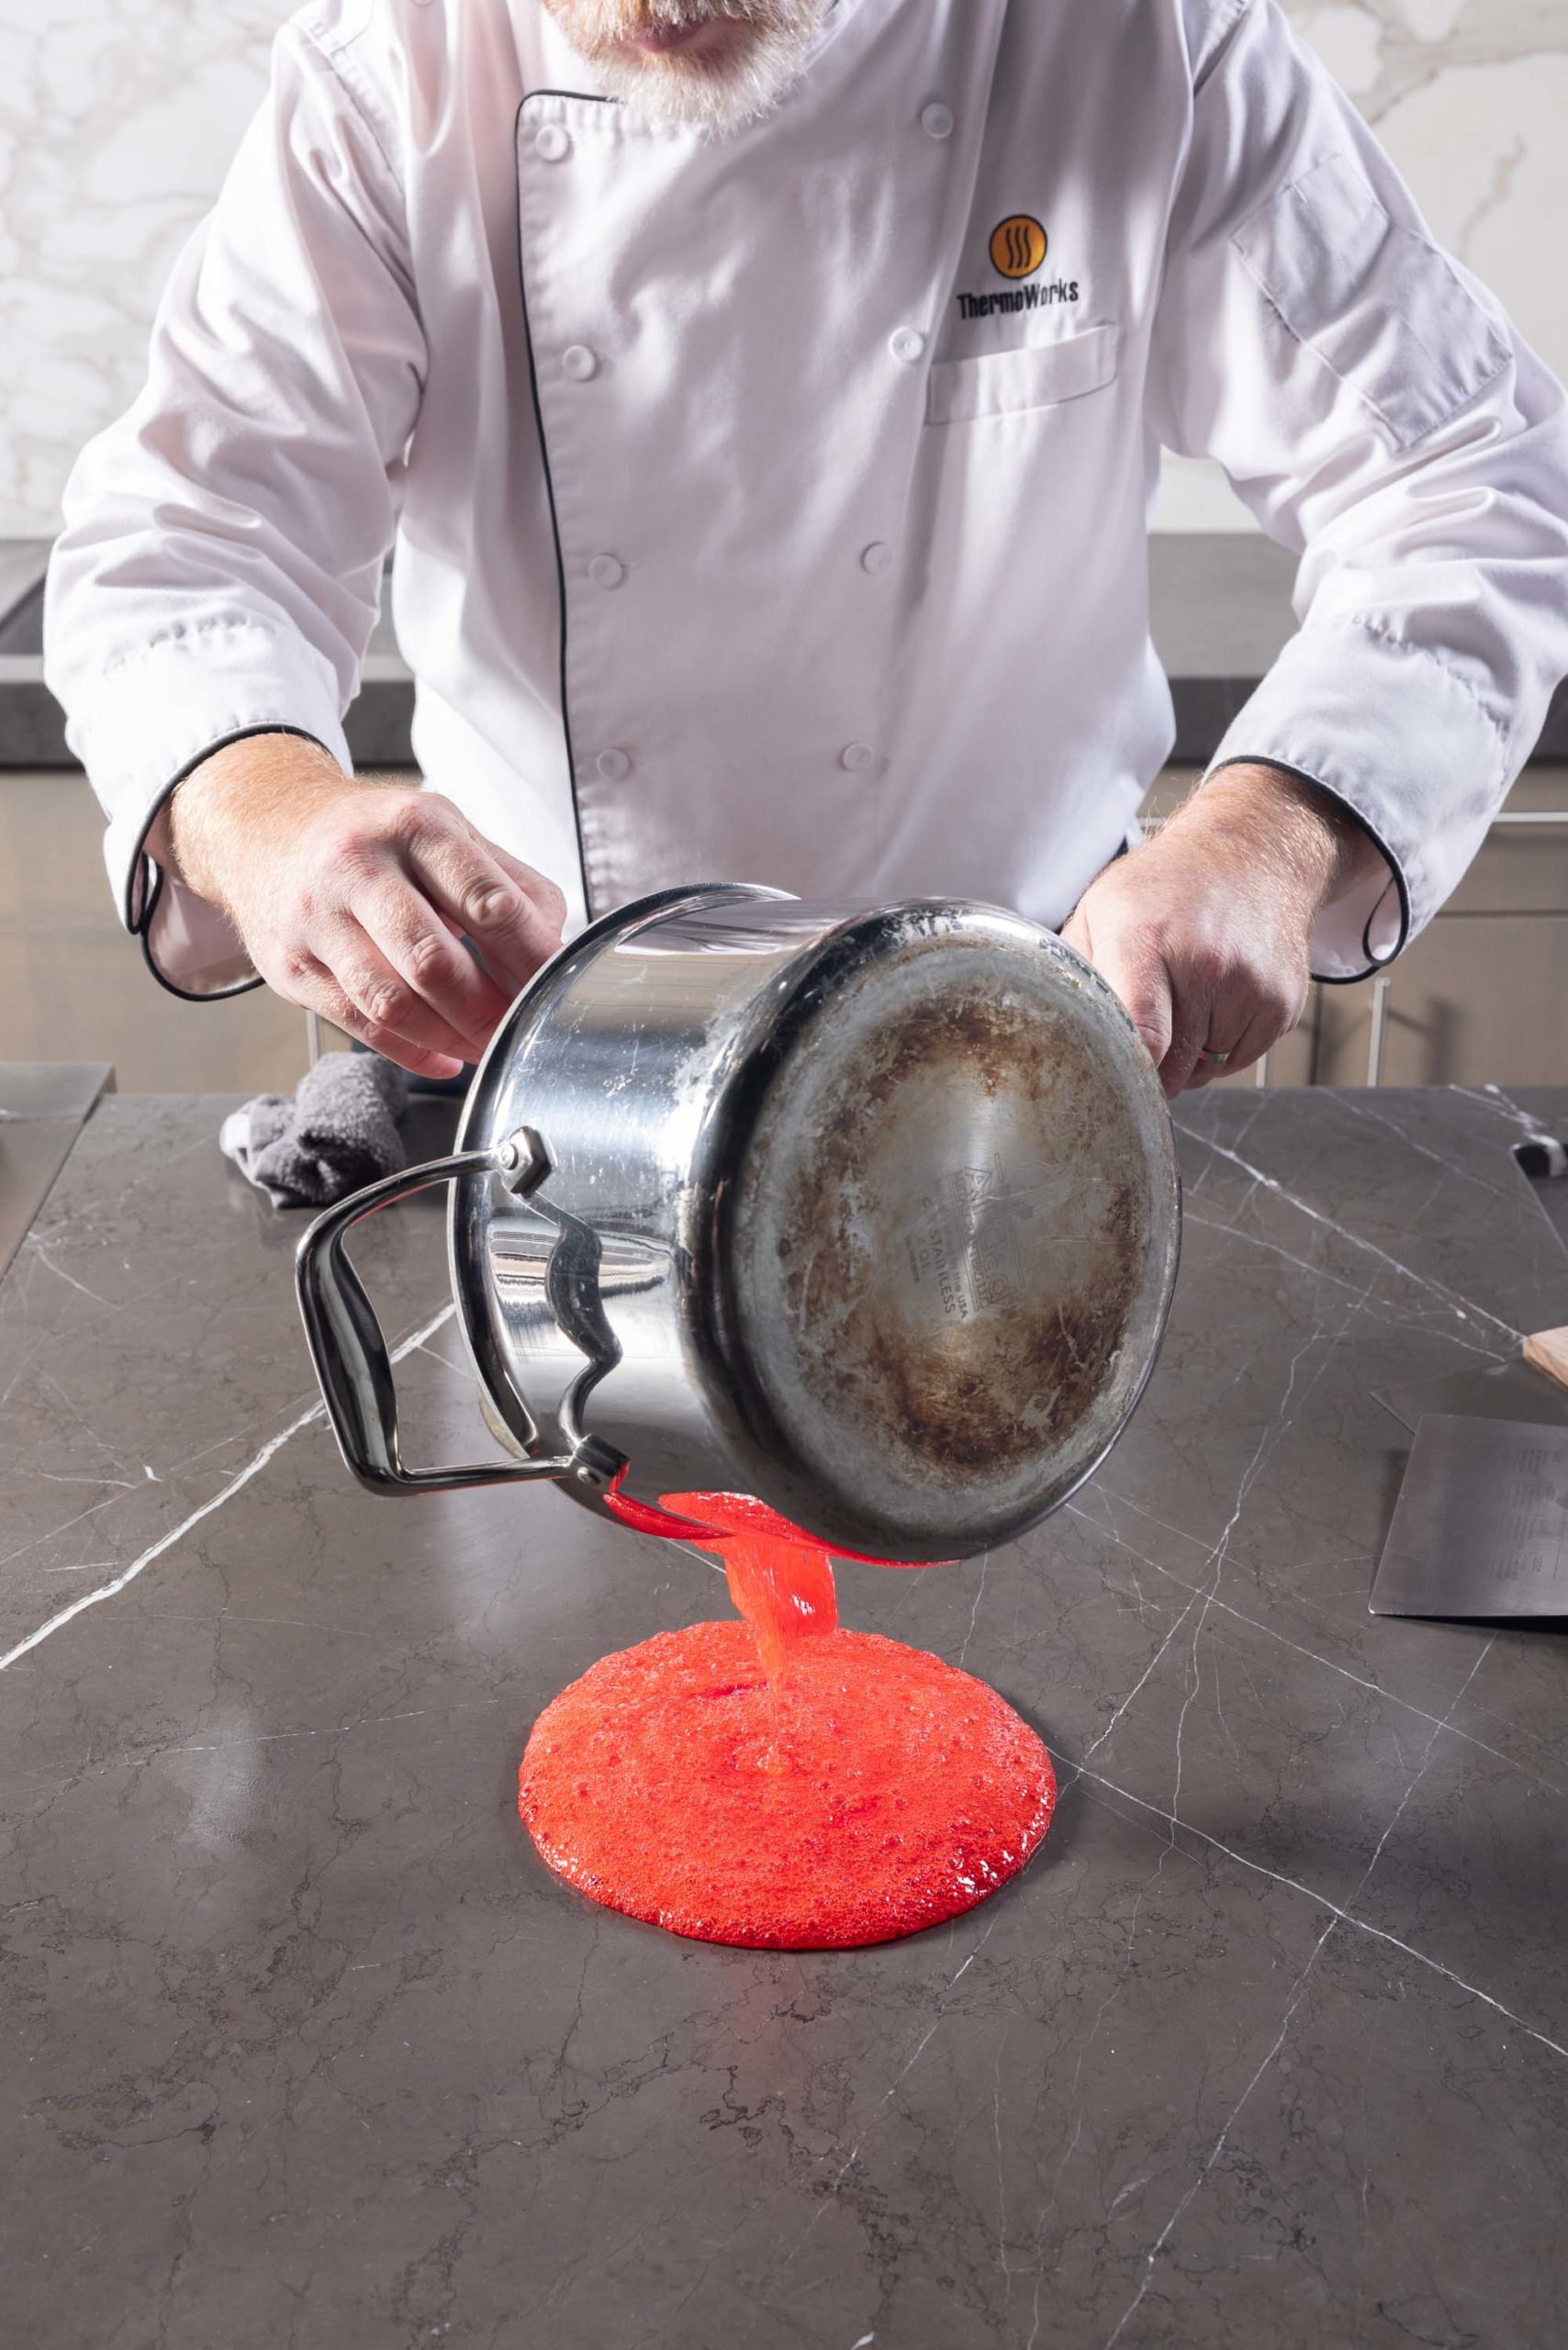
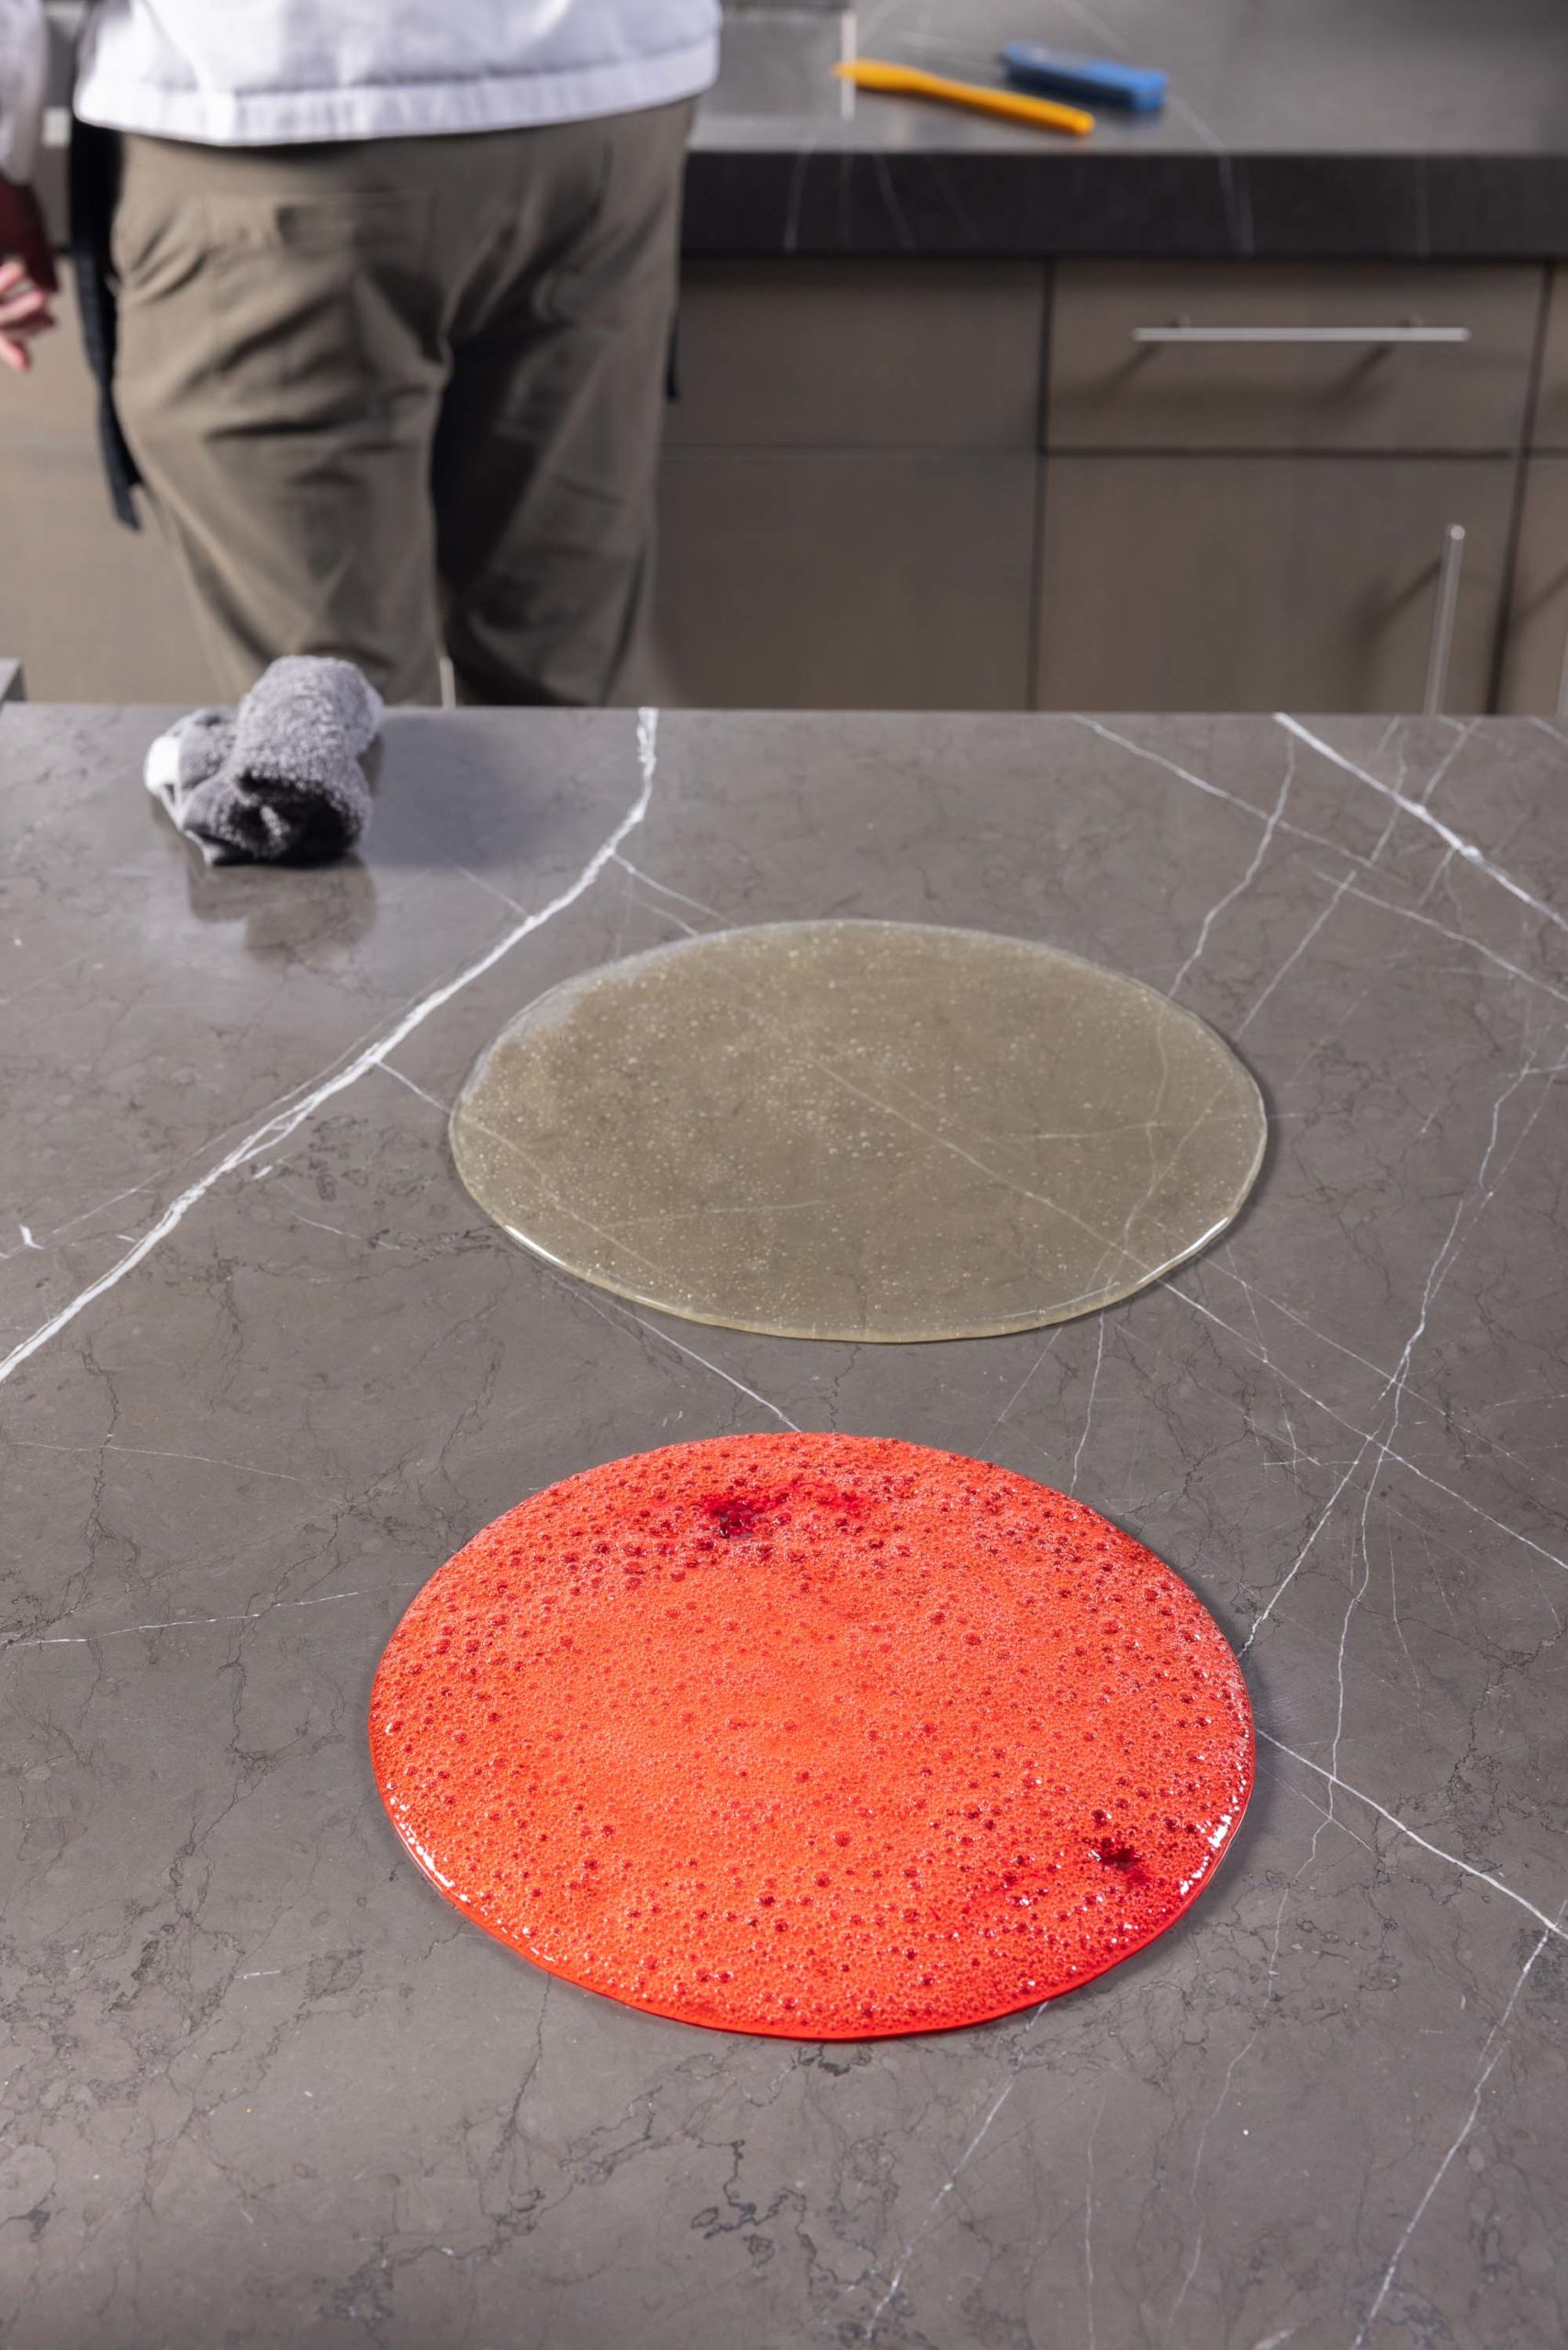
As soon as you reach your target temperature, quench the bottom of the pan in a little room-temperature water. Then pour the syrup out onto a very lightly-oiled countertop. Pour 2/3 of it first, then color the last third in the pot and pour it into its own puddle. Use a silicone spatula to get all the syrup out of the pot as quickly as you can!
How to shape homemade candy canes
To keep the cane pliable, you should have your oven set to about 170°F (77°C), or as low as it will go if it won’t go that low. You will be keeping the candy in the oven as you work on individual pieces.
Pull the sugar
Before you can form your sugar into canes, it needs to be pulled. Repeated stretching and folding aerates the candy and changes its internal structure so that it becomes shiny and pearlescent. The aeration also changes the texture of the candy. Have you ever noticed the differences between a sucker and a candy cane? Those differences come from the pulling.
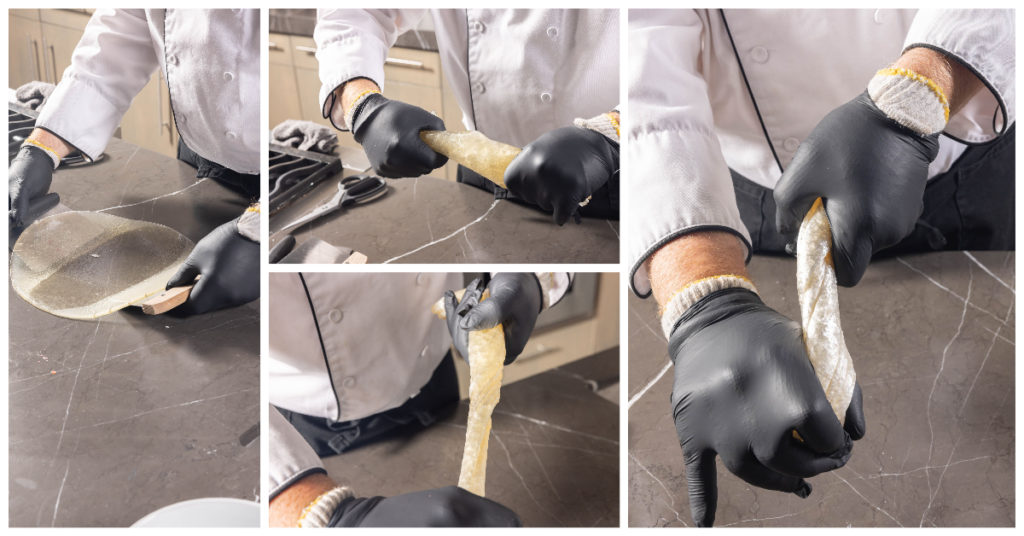
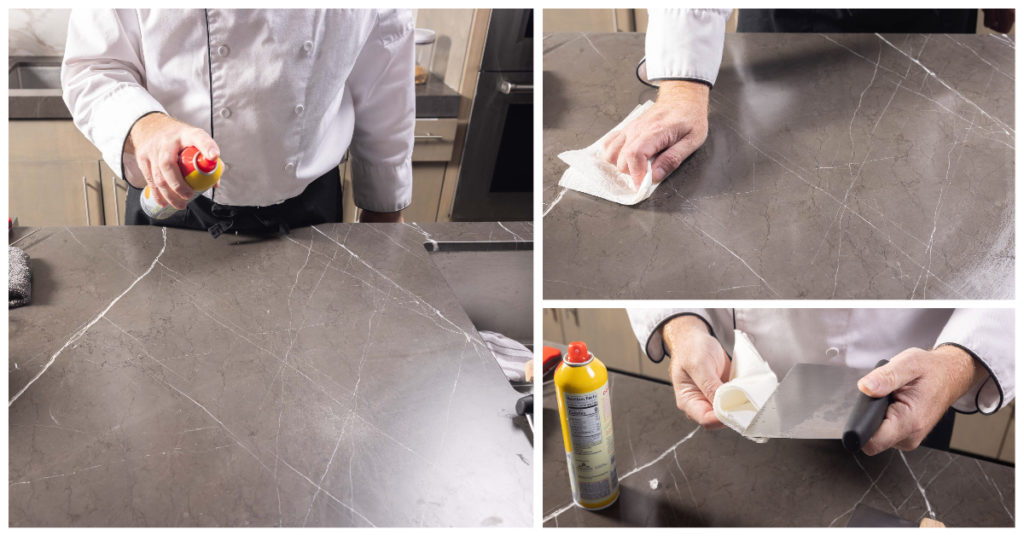
First, put on some heat-proof gloves (cheap cotton gloves will work fine) under a pair of vinyl/latex/nitrile kitchen gloves. Use two bench scrapers that are very lightly oiled (spray them with a little nonstick cooking spray, then wipe it off with a paper towel) to knead and fold the large puddle of syrup until it cools just enough to handle without oozing through you hands. Pick it up and fold it over on itself, then stretch it and fold it again. Repeat the folding and pulling about 15–20 times, or until it becomes very difficult to pull. The candy should be shimmery and white. Put it on a lightly oiled cooking sheet in the oven. Also pull the red candy, but less so. It can look glassier than the white candy.
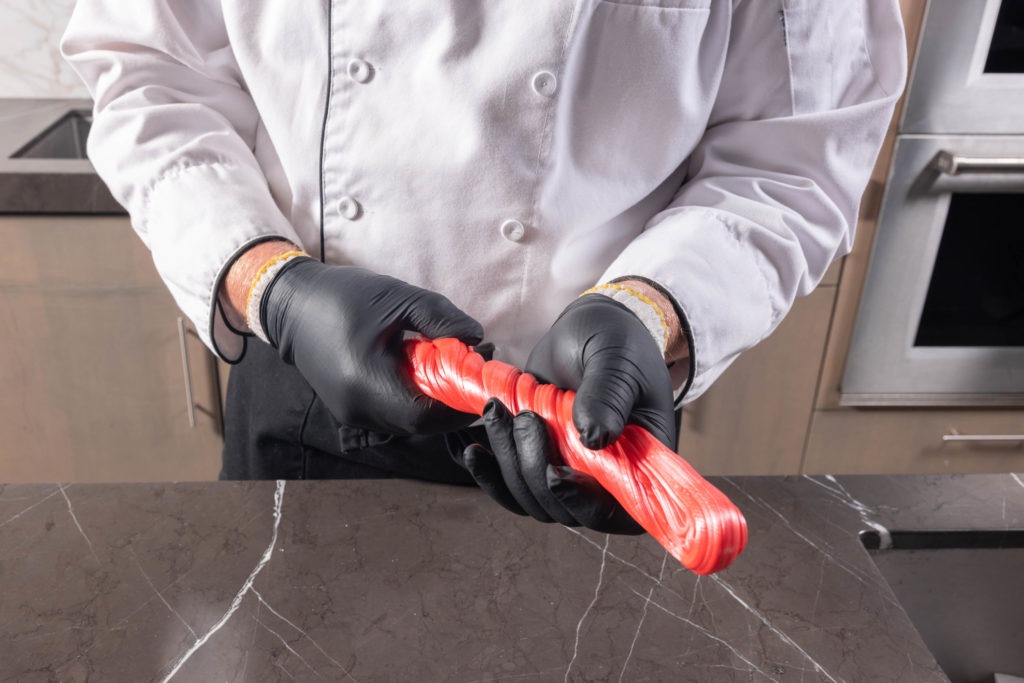
Form the large mass
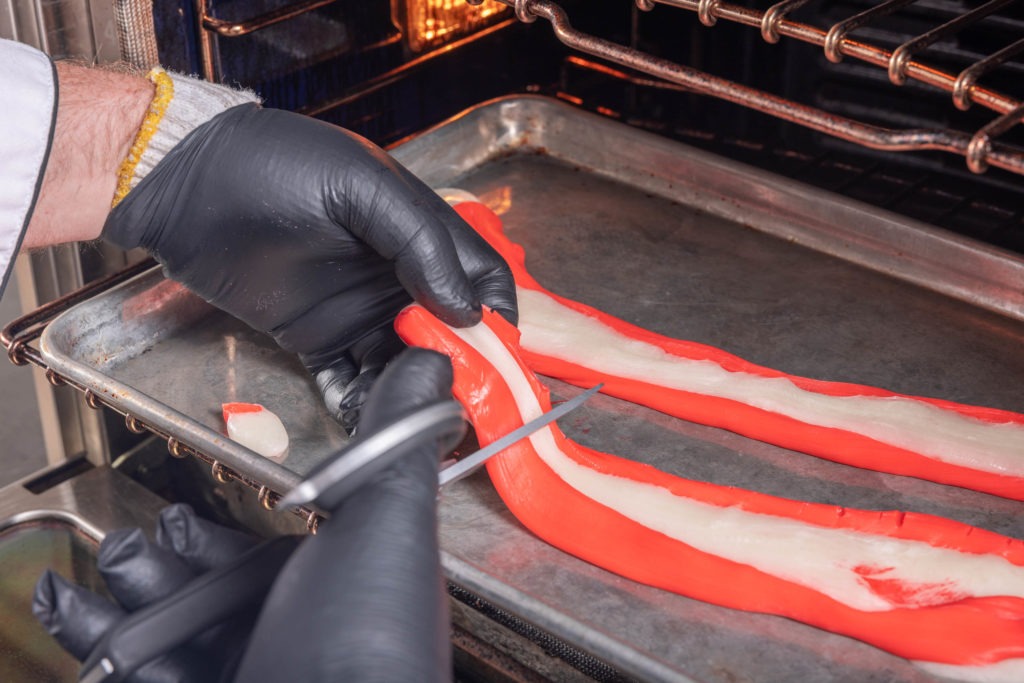
Use kitchen shears to cut the red mass in half. Place both halves in the oven on the baking sheet. Remove the white mass from the oven and roll it between your hands (using the countertop if necessary) into a log about 14–18 inches long. Work quickly; it will want to set up! Place the log back in the oven, and roll each piece of red candy to a corresponding length of rope. Remove the white candy from the oven and press the two red stripes of candy into its sides. This is the mass from which you will make your canes.
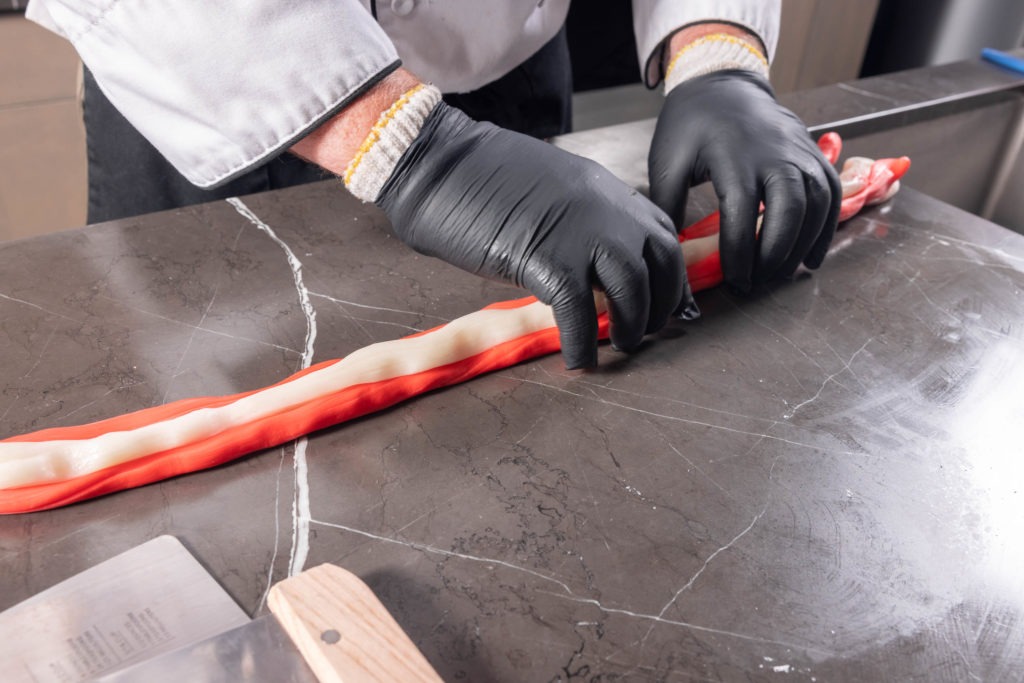
Cut and shape the canes
Replace the candy log in the oven. Use kitchen shears to cut off a piece of the log about 2″ in length. working quickly, roll the log between your hands, exerting tension from the center of the piece toward the edges by spreading your fingers as you roll. If you need to trim the cane, use your kitchen shears. (On many of our canes, the red sugar didn’t stretch as well as the white sugar, so we trimmed the excess white.)
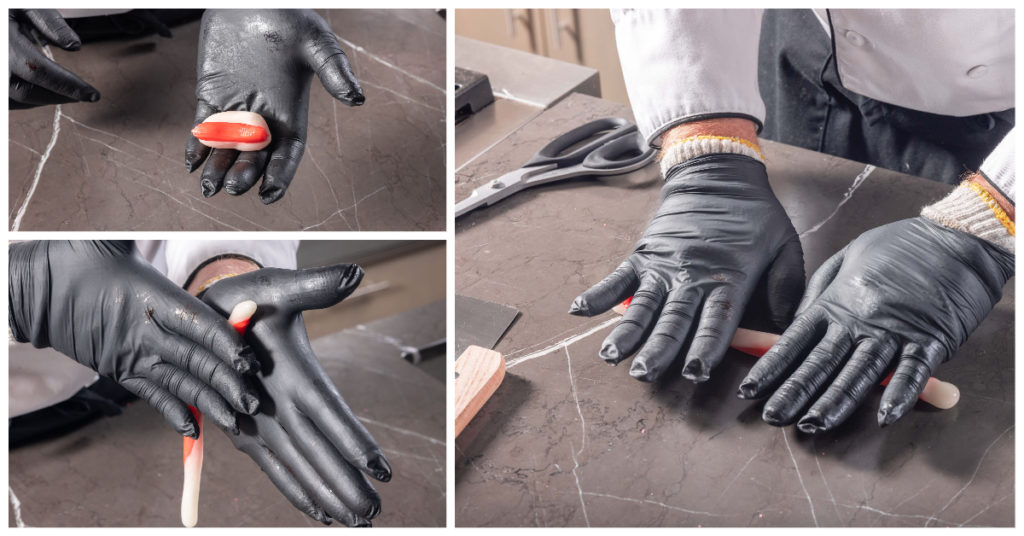
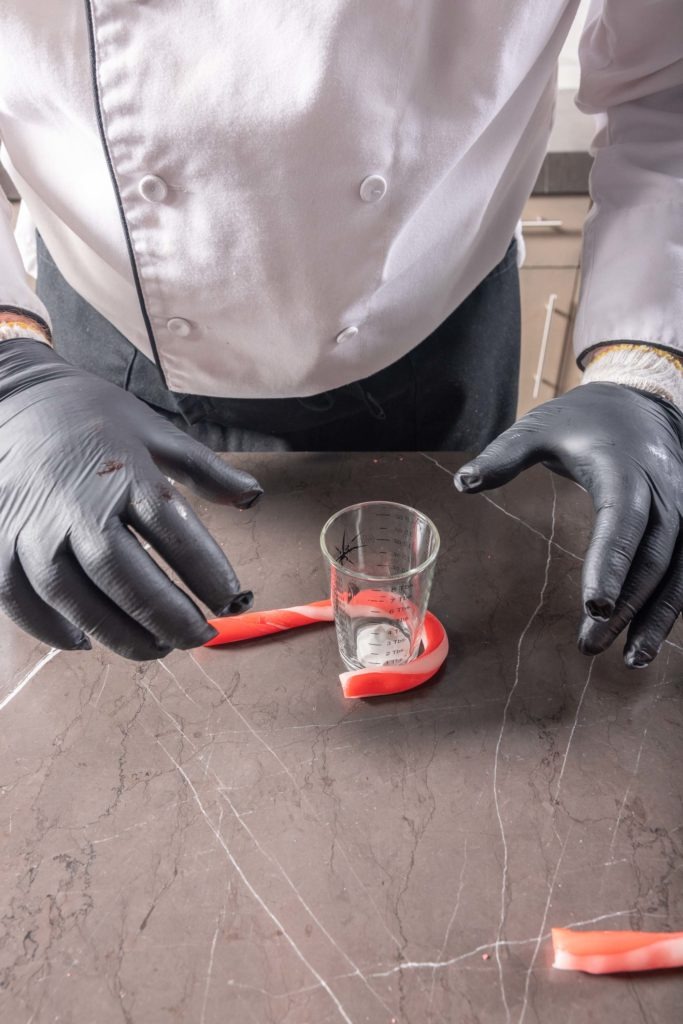
When the piece is as thin as you’d like it, gently twist it in sections to achieve the spiraling stripe. Use a small circular object—a fat dowel or the base of a shot glass—to wrap the candy around and form the hook of the cane. Set the cane aside to finish cooling, cut another piece from the log in the oven, and continue, one cane at a time, until you’ve used up the whole log. Any misfits or broken canes can be put aside to crush into peppermint candy pieces for decorating cookies and cakes or for sprinkling in cocoa.
Store the canes in an airtight container away from humidity.
Pass these delicious canes out to unsuspecting friends and neighbors and watch their disbelief when you tell them you made them from scratch! Will they be better than factory candy canes? Well, that depends. It depends on how good you are at sugar pulling, for one! But it also depends on the value you place on the experience of making, on the aesthetics of the process, and on the novelty and uniqueness that comes from making something by hand instead of depending on mass production. We all thought they were delicious! Give them a try. Follow the critical temperatures, use your Thermapen ONE, write down your results, and iterate from there. You may find a new favorite holiday tradition!
Print
Homemade Candy Canes Recipe
Description
Homemade candy canes!
Ingredients
- 3 1/2 C granulated sugar
- 1 C corn syrup
- Pinch salt
- 1/2 C water
- 1/2 tsp vanilla extract
- 1/2 tsp peppermint oil or 1 1/2 tsp peppermint extract (adjust according to your flavor preference)
- 1/2 tsp red gel food coloring (more or less depending on your color preference)
- Nonstick cooking spray or other oil for surfaces
Instructions
- Preheat your oven to 170°F (77°C). Very lightly oil a baking sheet, the countertop, and two bench scrapers by spraying them lightly and wiping the oil off with a paper towel.
- Have a bowl of room-temp water ready in which you can quench the bottom of the pan when you remove it from heat.
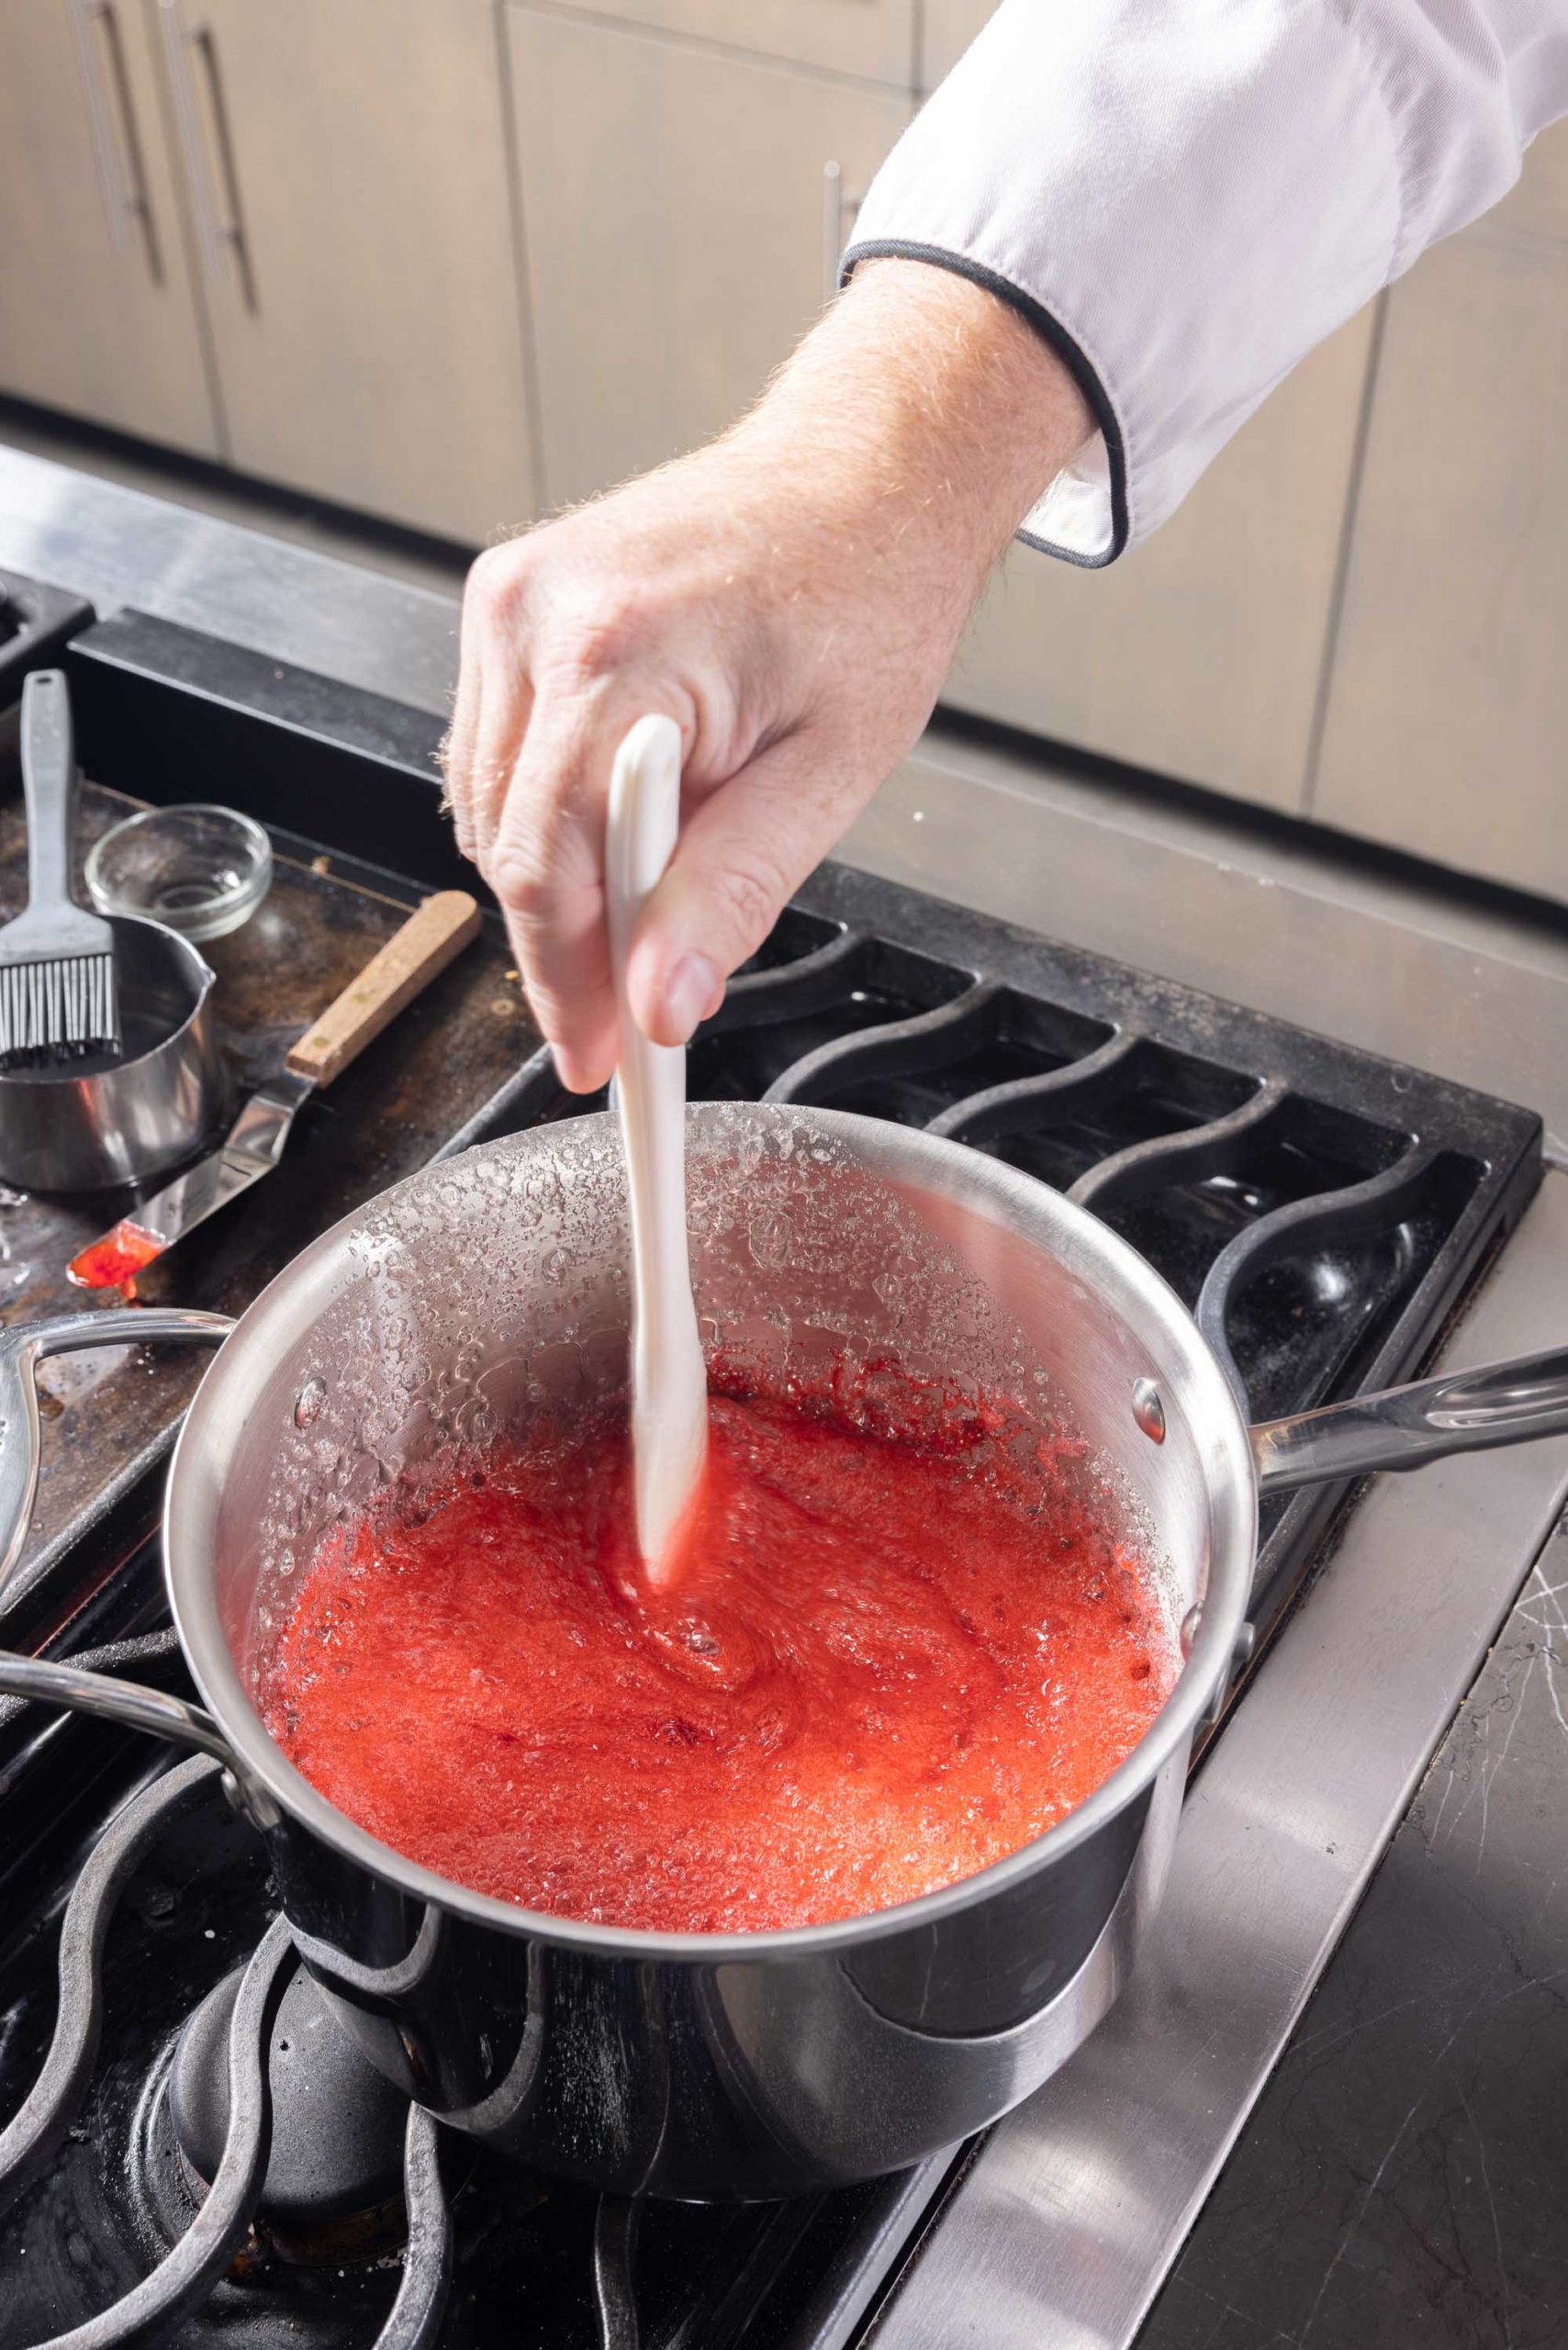
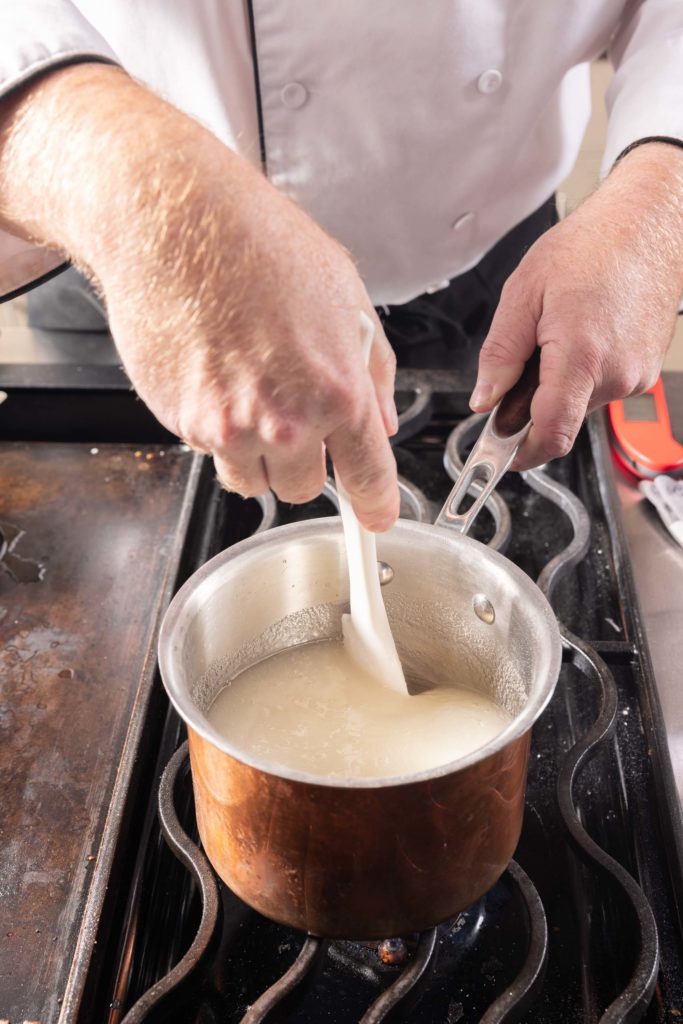
- Put the sugar, syrup, water, and salt in a large saucepan with a heavy bottom and bring to a boil, stirring just until the sugars dissolve. Wash the sides of the pot with a pastry brush and some water.
- Boil the syrup, checking the temperature often with your Thermapen ONE. Wipe the probe clean after each use with a damp cloth.
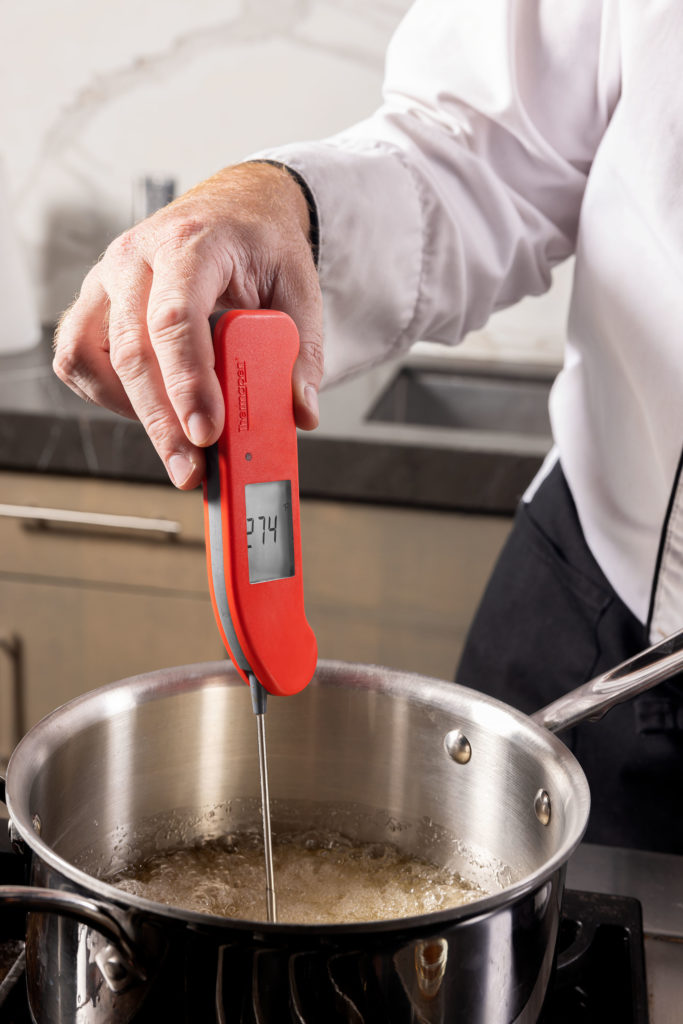
- When the syrup reaches 285°F (141°C) (adjusted for elevation), add the vanilla and peppermint flavoring and stir it in quickly.
- Quickly remove the pan from heat and quench the bottom of it in the bowl of room-temp water. Wipe off the water from the bottom of the pan.
- Pour 2/3 of the syrup onto the countertop.
- Stir the food coloring into the syrup left in the pan. Work quickly. If it is not perfectly incorporated, don’t worry. Pour this out onto the counter as well.
- Use the oiled bench scrapers to fold and knead one of the pools of sugar until it can be handled without oozing too much.
- Using hands shielded in cotton gloves and kitchen gloves, pull and fold and pull and fold the candy. For the white candy, make sure it is shimmery and pearlescent. Leave the red candy a little more glassy looking.
- As you finish pulling each piece, place it on the baking sheet in the warm oven.
- Roll the white candy into a log 12–18″ long. Divide the red candy in half and form each half into a snake that is the same length as the white log.
- Press the red candy snakes into the sides of the white log. Place the whole thing in the oven on the sheet. It may slacken if your oven is on the warm side. Don’t worry unless it completely melts.
- Use kitchen shears to cut off chunks of candy that are about 2″ long.
- Roll the small logs between your hands, spreading your fingers as you do so to lengthen the piece until it reaches your desired thickness.
- Gently twist the candy, then roll it between your hands again to smooth it.
- Form the crook by wrapping one end of the candy around something of appropriate radius—the base of a shot glass, a milk cap, or whatever you like. Adjust the overall candy shape and set it aside to cool.
- Cut off another piece of candy and repeat.
- if the candy in the oven gets too soft, remove the pan from the oven for a few minutes, or prop the door of the oven open.
- Work until you have made all of the candy into canes.
- Serve, store, or use to decorate your tree!
Shop now for products used in this post:



Was harder to do than I expected. I had the stove heated up and was going good and about have way through it the Red Candy got hard and started to crack. The red candy I had not stretched so the white was fine. I would cut off a chunk and make candy canes but for some reason the red just got hard half way through the process. Oven was at 175F and Candy was heated to around 290Cish. Give or take a few degrees.
It is not and easy thing to make! It took me 4 tries before I got the technique down.
Can a non-stick coating affect temperature when making candy?
No, the temperature will still be the temperature. Non-stick coatings are thermally insignificant when it comes to the heat response of your pot or pan. Go ahead and use a nonstick if that’s what you have.