Sous Vide Steak with a Chill and a Sear
Once confined to the kitchens of modernist restaurants, sous vide circulators have lately become increasingly popular among regular home cooks. Small, powerful circulators like the ChefSteps Joule make water-bath cooking accessible and easy.
In particular, cooking a steak sous vide is an easy, sure-fire way to get your steak cooked to just the right temperature. But knowing when your sous vide is done can be confusing: you don’t want to pull it out early, and you also don’t want to wait around three hours while your steak takes a long bath! If you want to prepare it as soon as it reaches the perfect temperature, you need something to monitor the internal temperature of your steak. And as with any good steak, you want a browned, savory crust that you just can’t get by cooking sous vide alone. So how can you get a steak that you know is done to the degree of sous vide perfection and has a browned, meaty crust all at the same time?
Easy! Use a thermometer and do a chill-based reverse sear. Read on for an explanation of the how’s and why’s of this method, along with a recipe for a simple side of honey glazed carrots.
Do I need a thermometer for sous vide cooking?
I can hear the skeptics now: “sous vide is temperature controlled! My Joule/other sous vide cooker keeps track of the temp for me!” And they are right, the circulator does keep the temperature of the water in the right place—but the cooker does not measure the internal temperature of the meat to tell if it has reached its thermal destination. By using a leave-in probe, like the DOT®, you can know the moment when your steak reaches medium-rare perfection—or medium or what ever doneness you prefer.
What about vacuum sealing?
To be technically accurate, sous vide means “under vacuum,” and the characteristic means of cooking sous vide is to vacuum seal your food before sending it swimming. But here’s the thing: that’s not, strictly speaking, necessary.
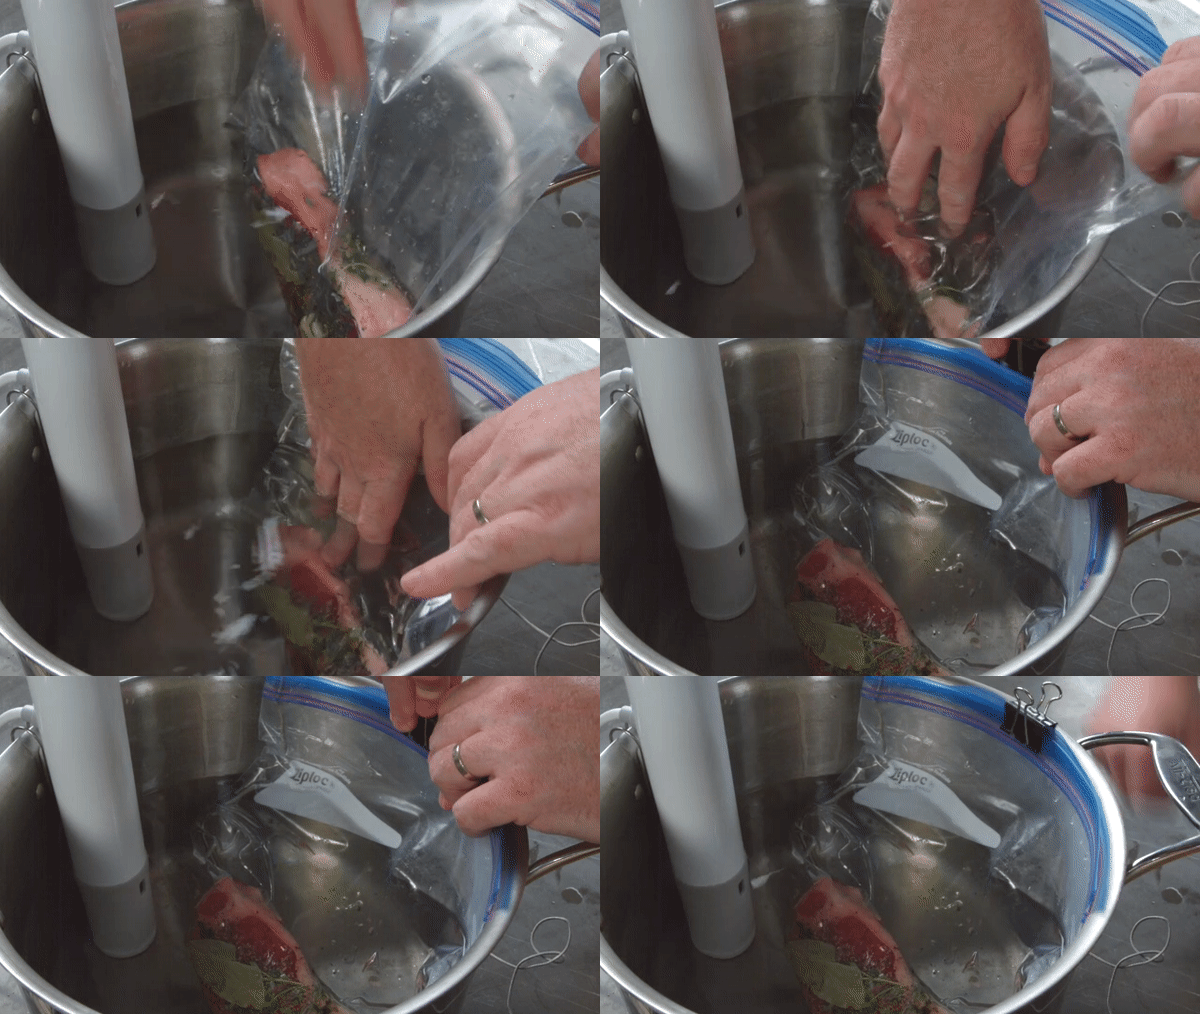
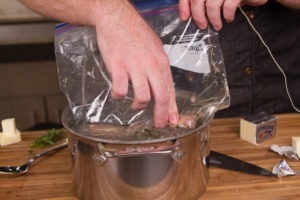
We have found that a zip-closure freezer bag works just as well for home applications as vacuum sealing. The purpose of vacuum sealing is to increase the contact, and therefore the conduction, between your food and the water. To achieve the same kind of contact, put your food in a zipper bag and submerge it partially in the water. The water presses all the air up and out of the bag. Then you can simply clip the bag to the side of your water bath, to prevent it from swirling around and taking on water. When you do this, you may need to press out a few bubbles from the bag, but the results are excellent.
Note that there is a slight but real danger to vacuum sealing, as well: botulism. That’s right, the spores and bacteria of Clostridium botulinum do best in anaerobic—or oxygen-free— environments. Vacuum sealing food and then heating it in a bath of 135°F (57°C) water will eventually destroy bacteria like Salmonella, but C. botulinum doesn’t start to go inactive until 176°F (80°C). In fact, the spores of that particular type of bacteria are not destroyed by normal pasteurization. They are actually activated by it. And
when the hot food begins to cool and gets below 130°F/54°C, spores can germinate and grow out. Cooling from 135°F/57°C to 41°F/5°C in 6 hours (FDA Food Code cooling) assures that there is no spore germination. –Immersed: the Definitive Guide to Sous Vide Cooking, by Phillip Preston, pg 118
So without sounding a false alarm, let’s say that not sealing your food in a vacuum sealed bag before cooking can be a pretty good idea, unless you are going to be very careful about cooling time and temperatures, too.
Use a thermometer in either case
Whether you decide to vacuum seal your food or not, it is always best to use a thermometer. If you are vacuum sealing your food, you can use our Pro-Series® Waterproof Needle Probe, which can be fully submerged in the water bath without difficulty. You will also want to use some foam sealing tape, like our Sous Vide Foam Tape, on the site of the needle’s penetration to maintain the water-tight seal of your precious package.
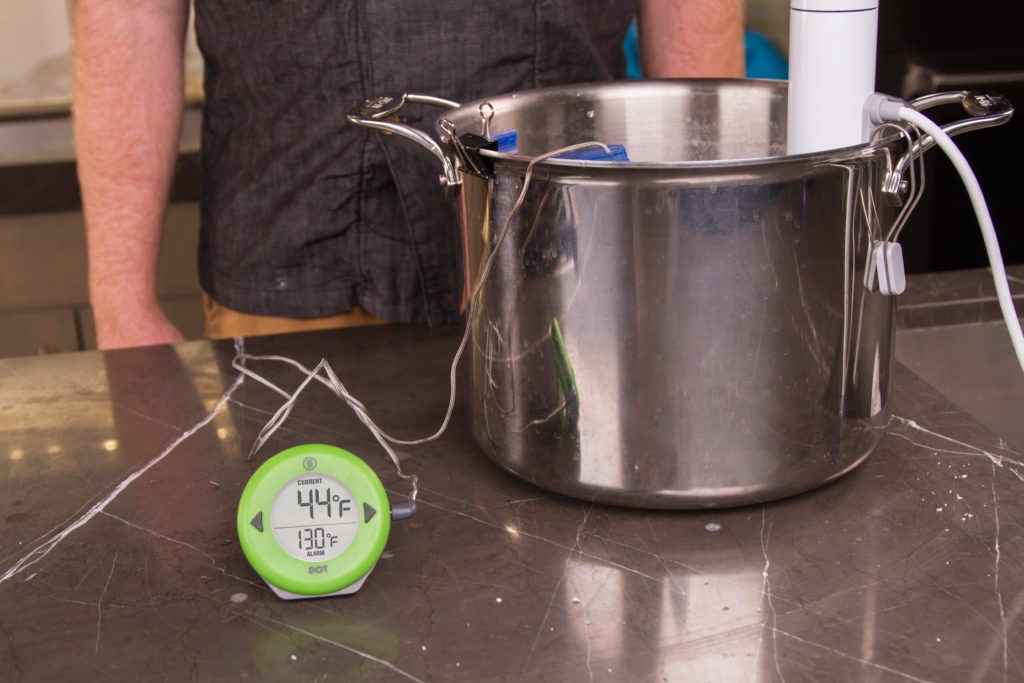
If you choose to use the zipper bag method, as long as there isn’t a lot of liquid in the bag with your meat, you can just use the regular probe included with your DOT or any other Pro Series probe. Just place the probe in the thickest part of the meat, and run the cord up out the top of the bag. The water will seal the bag around the cord and the probe. You don’t even need to zip the top, as long as you clip the top to the edge of your vessel. The air will not go down into the bag to insulate your food, but will be kept out by water pressure.
What is a chill-based reverse sear?
Chill-based reverse sear is when the meat is taken from the sous vide bath and chilled—still in its cooking bag—in an ice bath. By shocking the meat in an ice bath, we cool the exterior and a thin gradient of the interior so that when we perform the sear, we don’t risk overcooking the precisely-temped steak. A grey ring on our steak is not what we are looking for, but is more likely if we take the steak from the hot water straight to the hot pan. The brief chilling interval gives us thermal space for the sear without endangering our sous vide doneness.
Proper setup for sous vide bath
Because of the nature of thermodynamics, if you want your steak to reach any given temp, let’s say 135°F (57°C), you shouldn’t set your cooker to that temperature. If you do, you will hover 1-2° below your target, possibly for hours. To get it to the desired temp, you need the water to be just slightly hotter. This is another reason a thermometer is a good idea in sous vide cooking! I wanted a 130°F (54°C) steak, so I set my Joule to 132°F (56°C), but I set my DOT to 130°F (54°C). This extra thermal reservoir in the water allows your food to make the jump to your target temp without waiting extra time.
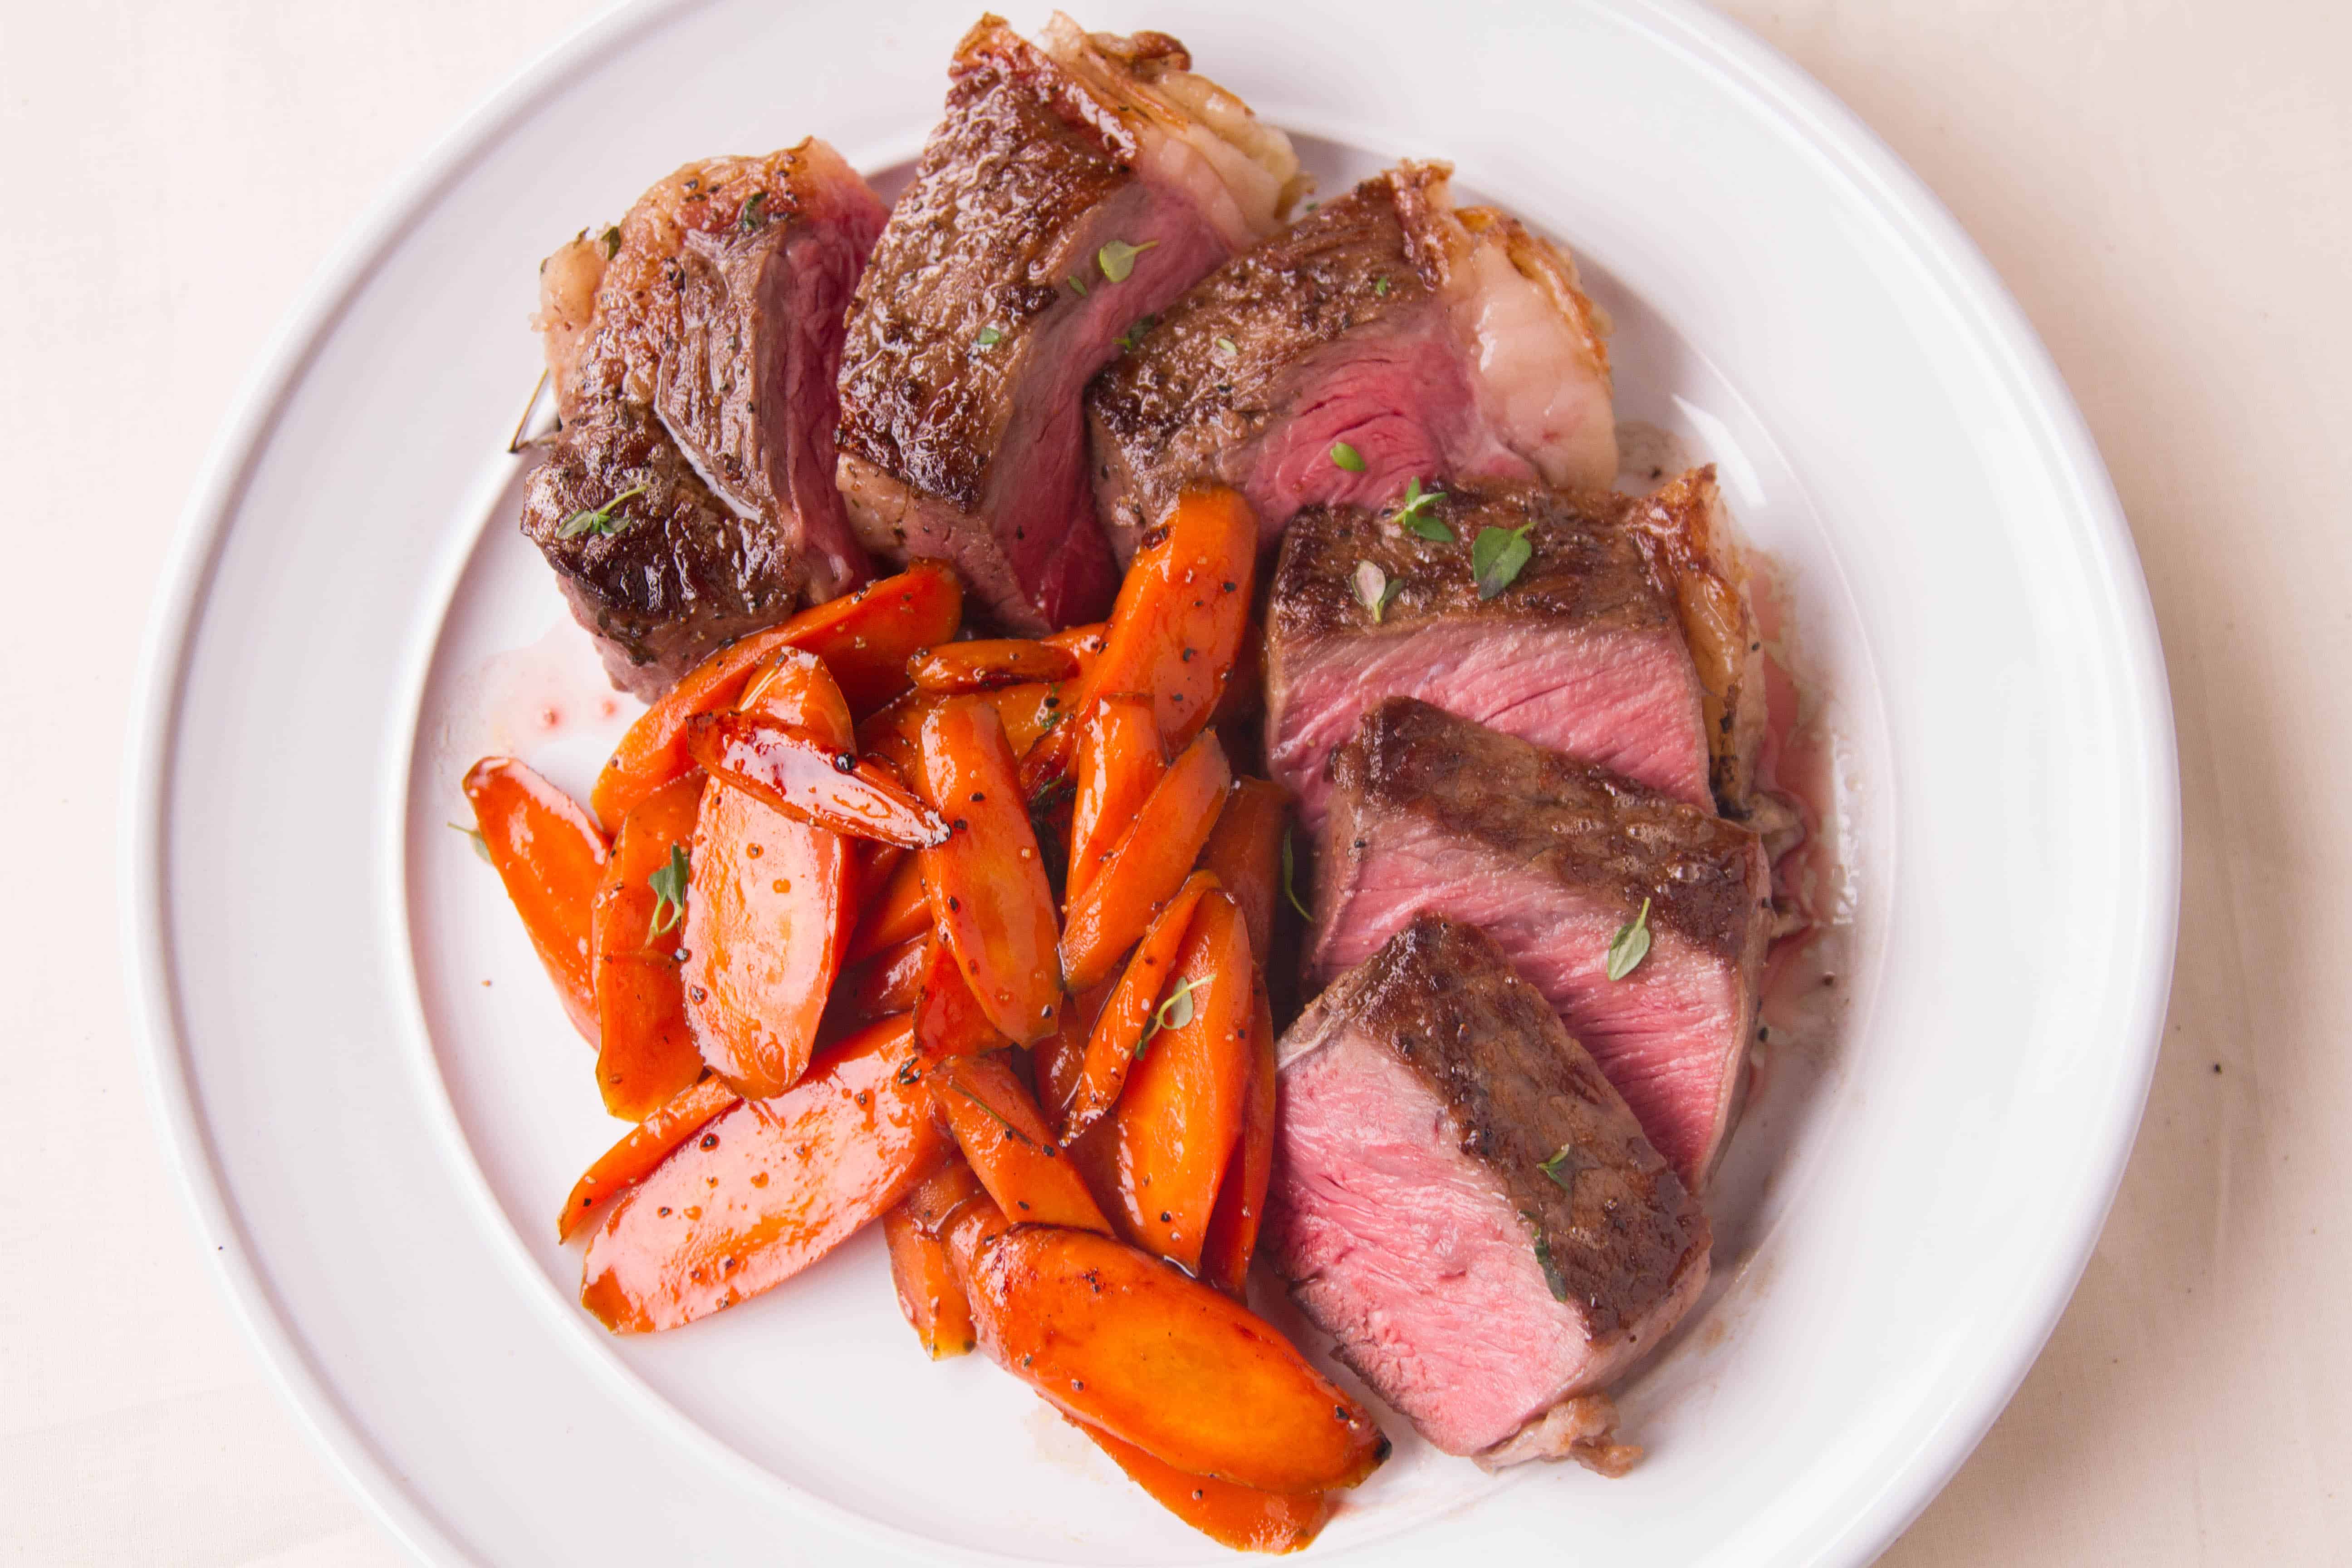
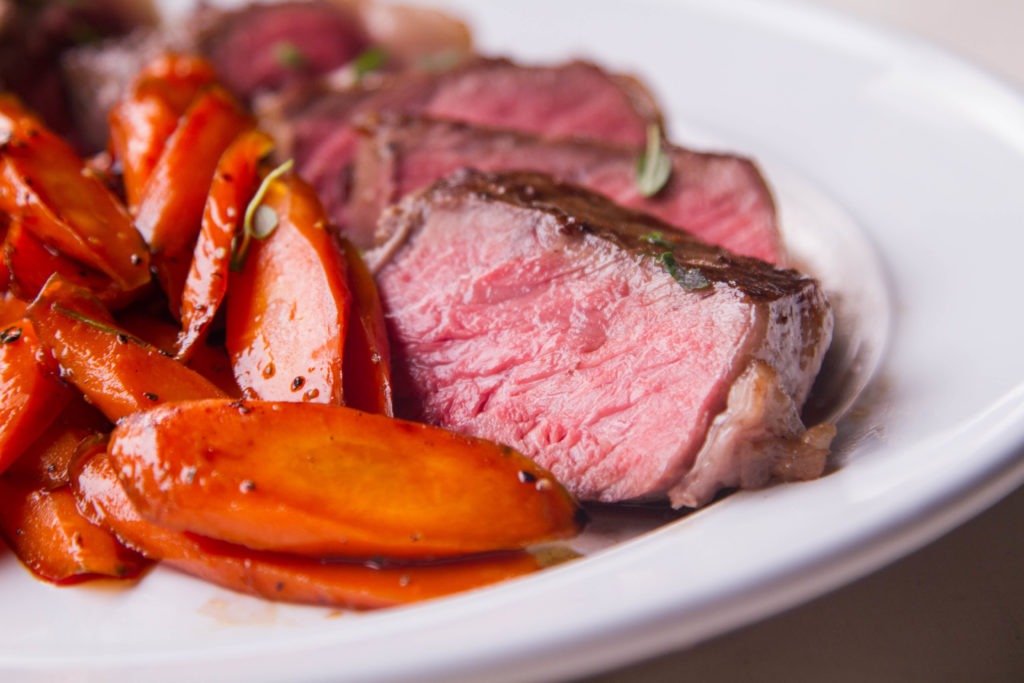
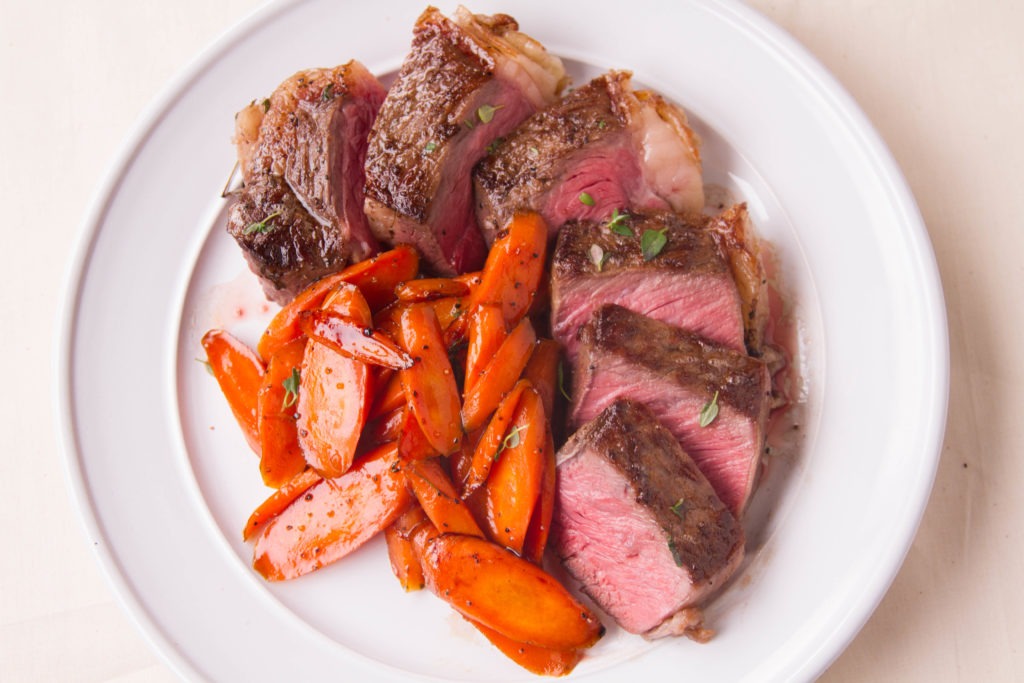
Sous vide steak with garlic honey glazed carrots
Sous vide steak recipe
Based on Sous Vide Steak, by ChefSteps
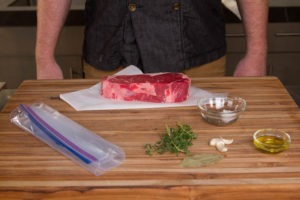
Ingredients
- 1 steak, about 1” thick, choose your favorite cut
- 1 Tbsp olive oil
- Salt
- Black pepper
- 1 bay leaf
- 2 small garlic cloves, crushed
- Fresh thyme, or other seasonings and herbs you like
- 1 gallon-size freezer bag
Instructions
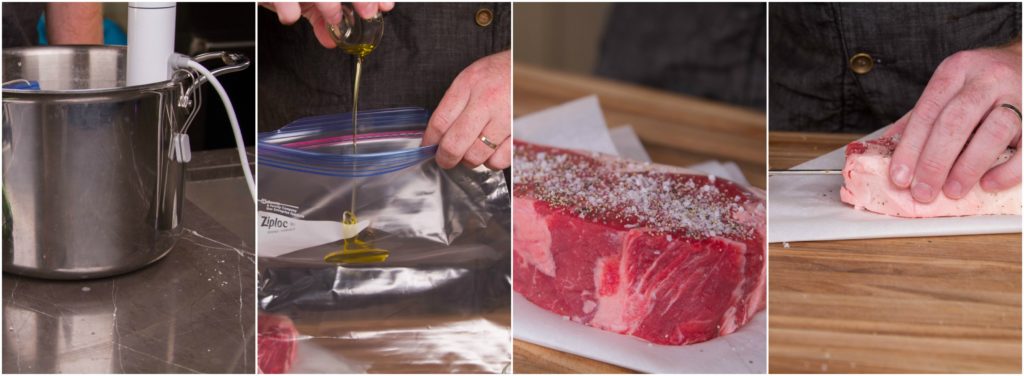
- Start your water bath with hot water from your tap. Set your sous vide cooker temperature 2 degrees higher than your target meat doneness temp.
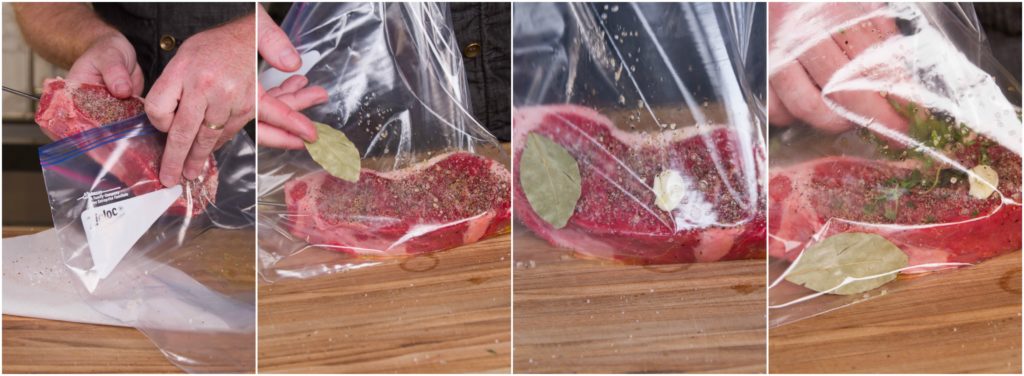
- Add the oil to the bag.
- Liberally salt and pepper the steak.
- Insert your thermometer probe until the tip rests in the center of the meat.
- Place steak in bag.
- Add bay leaf, garlic, and thyme, distributing the flavors over both sides of the steak.
- When your water bath has come to temp, carefully lower your steak in its bag into the water, pressing on the bag to further expel air from it. A wooden spoon can be useful for this if the water is too hot for you.
- Clip the bag to the edge of the pot, and set your DOT to your desired temperature. Allow the steak to cook.
- As the meat nears its target temperature, prepare an ice bath of equal parts ice and water.
- Then, when your steak has 2-3° left to cook, preheat a cast iron skillet over medium-high heat. Aim for a temperature of about 450°F (232°C)—we checked it with our Hi Temp Industrial IR w/Circle Laser.
- When your DOT alarm sounds, remove your steak bag from the cooker and plunge it into the ice bath. Let it sit for 1-2 minutes to allow the exterior to cool.
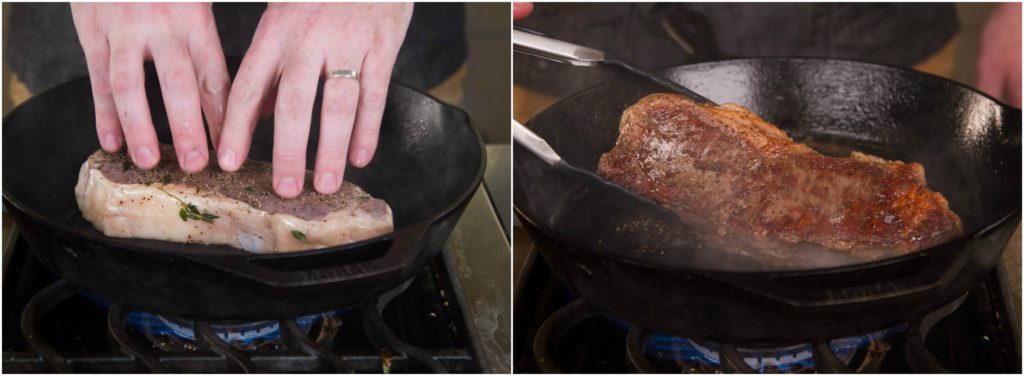
- As you remove the steak from the bag, pick off any whole herbs that may cling to the surface, and put it into the hot skillet. Increase heat to high.
- Let the steak sear for 2 minutes, or until a good chocolate brown is achieved. Flip the steak and sear another 2 minutes. If you are preparing multiple steaks, do not crowd the pan! Base how many steaks you sear at a time on the size of your pan and the size of your steaks.
- When a good crust has formed on both sides, remove your steak from the pan and let your steak rest for 5 minutes.
- While your steak rests, cook the carrots, using the same pan. This will give your carrots a meatier, more savory flavor.
Honey glazed carrots recipe
Ingredients
(yields enough for sides for two steaks)
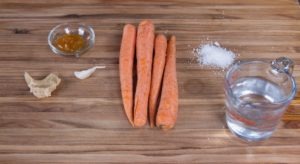
- 4-6 carrots, peeled
- ¾ C water
- 1 Tbsp honey
- 1 clove garlic, crushed
- 1½ Tbsp oil or butter
- ½ tsp kosher salt
- black pepper to taste
- Pinch chopped fresh thyme (optional)
Instructions
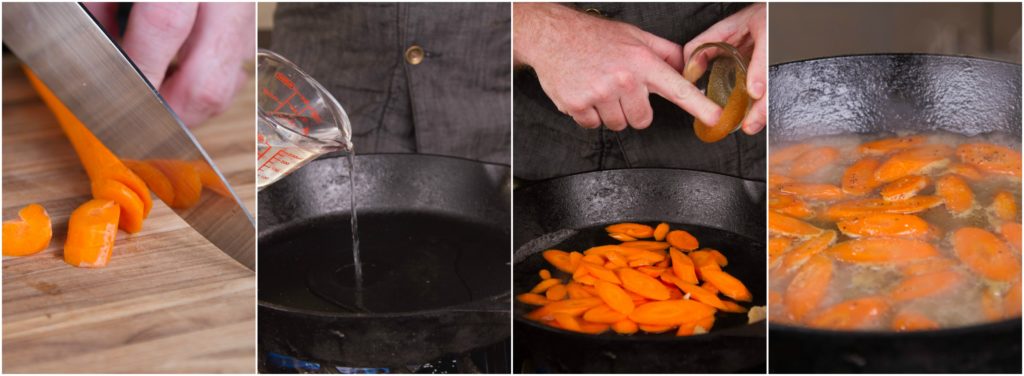
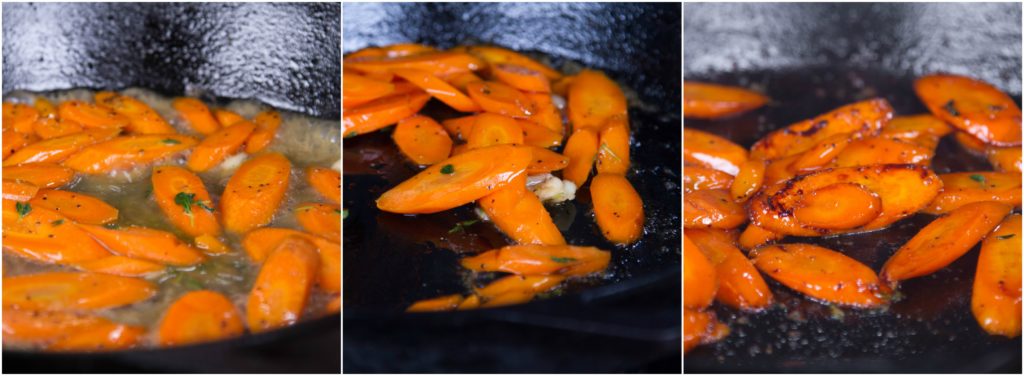
- Slice the carrots into 1/8” coins on the bias—slanted. (Cutting them like this gives you more surface area for flavor development and makes you look cheffy-er.)
- Place all ingredients in a cast iron skillet or heavy-bottomed sauté pan. Bring to a boil over high heat.
- Reduce heat to a high simmer and cook the water out. The carrots will tenderize the perfect amount.
- When the water has all cooked out, allow the honey and carrots to start to caramelize in the hot pan.
- When they appear glazed and are browned on the edges and faces some, kill the heat and move the carrots to a dish for serving.
- If you want to cook more carrots than this recipe, do so in batches that can fit most of the carrots in one layer on the bottom of the pan. Each batch should only take about 5 minutes.
We always say that thermal knowledge gives you control in the kitchen, and this steak is one more data point in favor of that hypothesis. By monitoring the internal temperature of your steak with your DOT you can be sure that your food is cooked, without waiting longer than necessary. By using the ice bath, you can build up a thermal barrier that will prevent your steak from greying. And by searing quickly above 400°F (204°C), you will get that delicious Maillard crust. So buy some steaks, and sous vide with the confidence that you’re about to cook them to total perfection.
Products Used:


Nice, I hope to get a Sous Vide device soon. It looks like you have the DOT set for 130 for the meat temp in the water bath. With four minutes total Sear, did that not shoot the temp up too high or were you going for a higher medium temp vs medium rare? Curious to see what the temp would have been with a Thermapen after the five minute rest is complete.
Robert,
Good observation! That normally would jump the temp, and that’s why we do the dunk in the ice bath before we sear. By rapidly cooling the exterior of the steak, we provide thermal space for searing the surfaces without cooking the center. In the pictures you can see there is almost no grey ring around the edge of the meat, indicating that the quick chill was successful in keeping our doneness in the right zone.
When you get a sous vide cooker, let us know what you try and how it goes for you! It’s a super fun way to cook.
Happy cooking!
I have cooked many steaks this way. The more expensive the steak, the more likely I am to use the sous vide method in order to ensure that the steak is optimally cooked to perfection. If I worked everyday in a fancy steak house, I could do this by eye, touch, and experience. But I don’t, so I use the best technology I can get, which includes Thermoworks products.
I have a fancy Rothfield and Stone sous vide bath into which I put my seasoned, FoodSaver bagged, vacuumed sealed steaks. Generally, I shoot for 125°F for the bath as we like our steaks on the rare side. I leave the steak(s) in for about two to three hours, long enough to reach thermal equilibrium, so I do not have to worry about using foam tape and measuring internal temperatures. I do use my Thermopen to check the water bath temperature occasionally.
I cool the steaks for a few minutes at room temperature still vacuumed sealed. This allows the thermal window to form for the searing.
Generally, I find that there is a fair amount of liquid given off from the steak in the sous vide bath, which I am careful to save for immediate use. I pat the steak dry and then sear on all sides including the edges (by holding it with tongs), until a good crust is formed. This will raise the internal temperature of the steak towards optimal temperature of about 130-135°F.
Since the steak was sous vide cooked, there is no need to let the steak rest to redistribute the internal temperature gradient.
The juices from the sous vide bag can be added to the skillet to deglaze the pan frond formed in the sear along with other ingredients (butter, wine, etc.) and reduced to form a pan sauce.
Botulism is not a big concern in this process for I season my steak well with salt before vacuum sealing, which tends to sterilize the surface of the meat where such organisms are most likely to be found.
Works for me and I produce a perfect steak every time.
Wow. This completely misses the point of sous vide, where the goal is most definitely NOT to take your food…especially meat…out the moment it reaches the target temperature.
WuzYoung,
I think I see where you’re coming from on this. In the restaurant business, in particular, it’s great to be able to hold things at an exact and constant temperature for a long time. This allows for speed and exactness of service.
Sous vide is also great for deep penetration and retention of flavors and for tenderizing meats over a long period of time.
But in this case, we need no tenderizing with a good cut of beef. Were we cooking beef cheeks, we would want to, in essence, braise them sous vide. But a tender steak is ready to go as soon as it is warm enough. No less an authority than Nathan Myhrvold gives a similar strategy to this one in his Modernist Cuisine. In Vol 3, pg 97 his recipe for Rib Eye with Cherry Mustard Marmelade and Porcini says “cook [the steak] sous vide in 54°C/129°F bath to core temperature of 53°C/127°F, about 1 1/4h. Sear surfaces with blowtorch.”
So if we need to tenderize, then we should cook long, but for already-tender cuts like a filet or ribeye, taking it out when temp is achieved is a great idea.
Happy cooking!
As someone on Facebook said, “If ever something completely missed the point of sous vide, this would be it.”. He’s right. You don’t need a thermometer to tell you when your food has come to temp, you can do the thermodynamics or just look it up in a table. And the food isn’t cooked when it comes to temp, it still needs to cook for the correct length of time. This shows an absurd ignorance of sous vide techniques. Claiming that you need a probe thermometer is an outright lie, and it’s sad to see Thermoworks promoting this.
Kiran,
Please see my response to WuzYoung, but I will also explain myself here.
You are correct that tables can be a great way to cook sous vide, but tables are often exact and cuts of meat are not. Different muscle densities and fat contents change the cooking time in ways that tables do not predict. Yes, those variances may be small, but a thermometer’s accuracy is ultimately greater than a table’s.
Nathan Myhrvold, the champion of all things Sous Vide, gives instructions (Vol 3. pg 97 of Modernist Cuisine) for cooking steak sous vide wherein he says to cook steak to a given internal core temp. Yes, there are things that you cook sous vide for hours and hours to tenderize them and allow for enzymatic reactions, etc., but a tender cut of meat like a steak is not one of them. There are more examples of experts cooking this way, too.
Myhrvold also says in his chapter on sous vide technique to “Put the food in the bath, and cook either for a predetermined time (using tables or a recipe) [and here I gladly concede your point] or until a probe thermometer shows that the deepest part of the food has reached the target temperature.” (Vol. 2 pg 246)
Philip Preston, head of PlyScience, says in his book on sous vide, Immersed, to cook a NY strip the same way: “Once a core temperature of 137°F/58.3°C had been reached, remove the bag from the bath.” He also says that “A temperature probe takes any guesswork out of sous vide cooking.”
One of the beautiful things about sous vide is that you don’t have to take the meat out as soon as it’s done because you don’t risk overcooking. But that doesn’t mean that all sous vide projects must take a very long time.
I hope this helps to explain our position on this particular cook, and I wish you happy cooking!
Martin, your instructions didn’t mention drying the surface of the steak prior to searing it in the pan. I have always found that to be necessary in developing a great brown crust in the the two minutes per side. BTW, where can I get a ruler like the one you used to measure your 1 inch thick steak shown in the photos? My 1 inch thick steaks are about half that thickness, a tool like that would help tremendously when talking to my butcher.
Peter,
Patting the steak off is a great idea, and will give you a sear faster and better. Go for it!
The ruler you are looking for is the one at my local meat counter, where I asked of 1″ steaks and was given something a little larger! I think my butcher stole part of your butcher’s ruler. But in all honesty, going into the shop with a ruler in hand is a great way to make sure you get the thickness you want. They might not be happy, but you’ll get the steak you seek.
So what brand is the sous vide cooker you used?
Paul,
We used a Joule for this cook, and I really like it.
Love your posts!!! Thank you very much.
Do you have any reliable source of info to cook in combi-ovens?
Seems I can’t hit the right spot.
Christian,
I’m afraid I don’t. I’d start with manufacturer’s guides, but combi-ovens vary pretty widely. For steak, I’d avoid the steam settings, though!