How to Grind Your Own Hamburger Meat
Every year, the 4th of July marks the peak of the summer grilling season, and what’s better to feed your hungry family at an Independence Day picnic than some rich, juicy burgers! One under-used juicy burger tip is actually to grind your own hamburger meat. Grinding your own burgers allows you to lower the final doneness temperatures of your patties for more meaty flavor and juicy texture. Keep reading to learn why, and follow our step-by-step instructions and thermal tips to get the most out of each beefy bite this holiday.
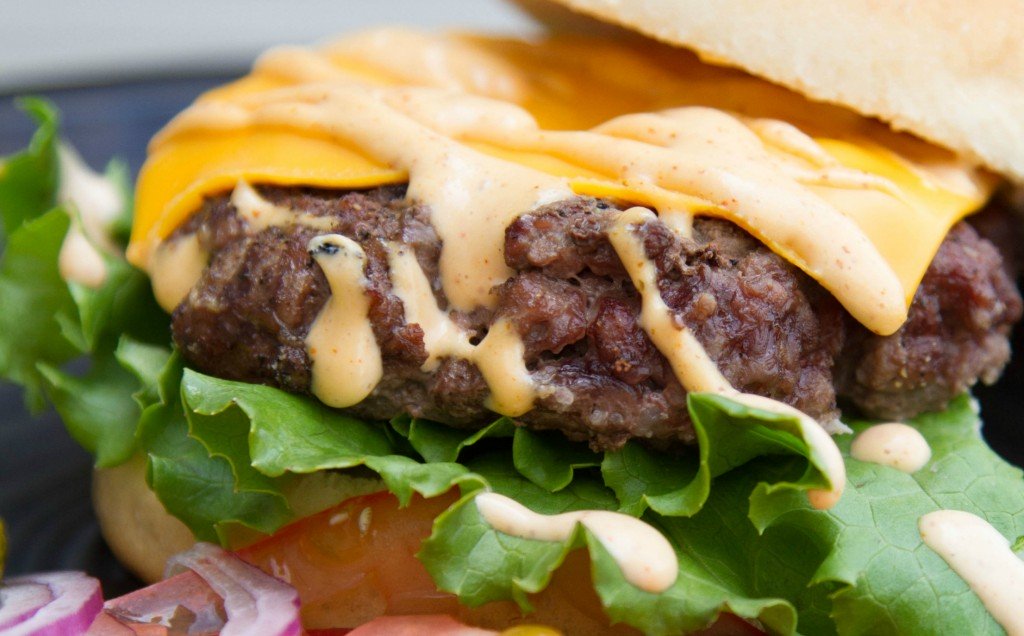
 Keys to the Best Grilled Burgers
There are 4 major characteristics to a memorable hamburger:
- Flavor: Full, rich, beefy flavor.
- Brown Crust: Crisp, flavor-packed exterior (thanks to the Maillard Reaction).
- Juicy: Meat so moist it’s practically dripping with every bite.
- Tender: Texture that is never tough, and can be chewed easily.
Every aspect of the cook starting with the meat you choose, how it’s handled, and the high heat of the grill all play a role in the quality of the final product. And here’s how…
Grinding Your Own Burgers
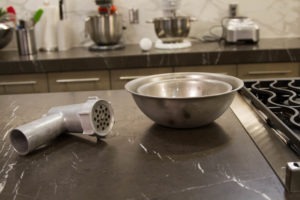
Food Safety
Harmful bacteria only exist on the exterior of whole muscle meat. Once meat is ground, all of the bacteria on the surface is combined with every bit of protein—contaminating all of it. With commercially processed ground beef the meat comes not only from several different cuts, but from hundreds—possibly even thousands—of animals. Because of this, the chances of bacterial contamination are high, and the meat must be cooked to 160°F (71°C) to be safe to eat. But the meat has the best texture and flavor when it’s in the range of 130-140°F (54-60°C). Grinding your own burgers greatly reduces its level of possible bacterial contamination. For more detail on how to safely cook your burgers, check out our post, Moist and Flavorful Burgers That are Also Safe to Eat. For food safety, care must be taken to keep the meat at 40°F (4°C) or below while being processed. If the equipment or meat get too warm, return them to the freezer for 10-15 minutes.
How to Grind Hamburger 3 Ways:
1.Meat Grinder
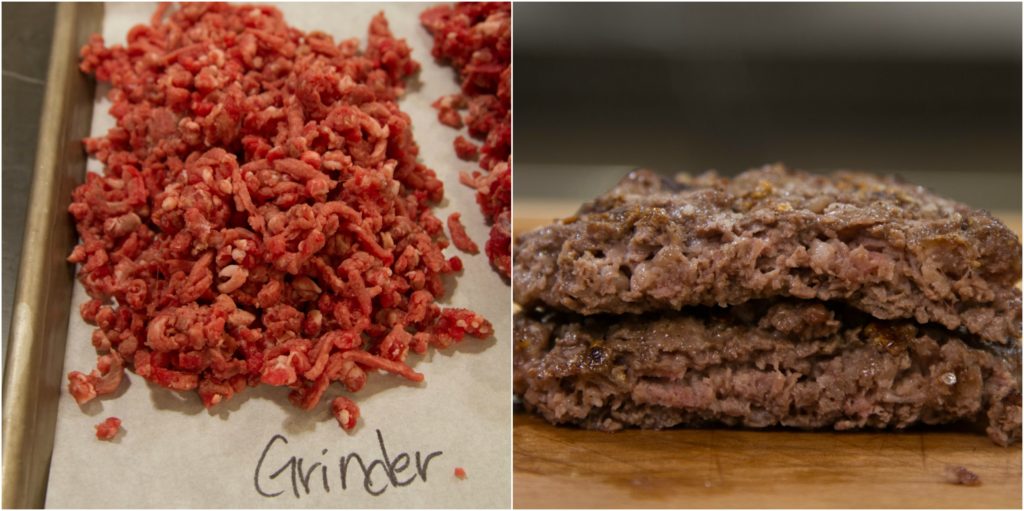
This is a great all-around method for grinding any type of meat. The texture is loose with plenty of nooks and crannies for collecting juices. Be sure the grinder blade is very sharp. A dull blade won’t cut cleanly through all of the tissue, smearing the meat instead.
2. Food Processor
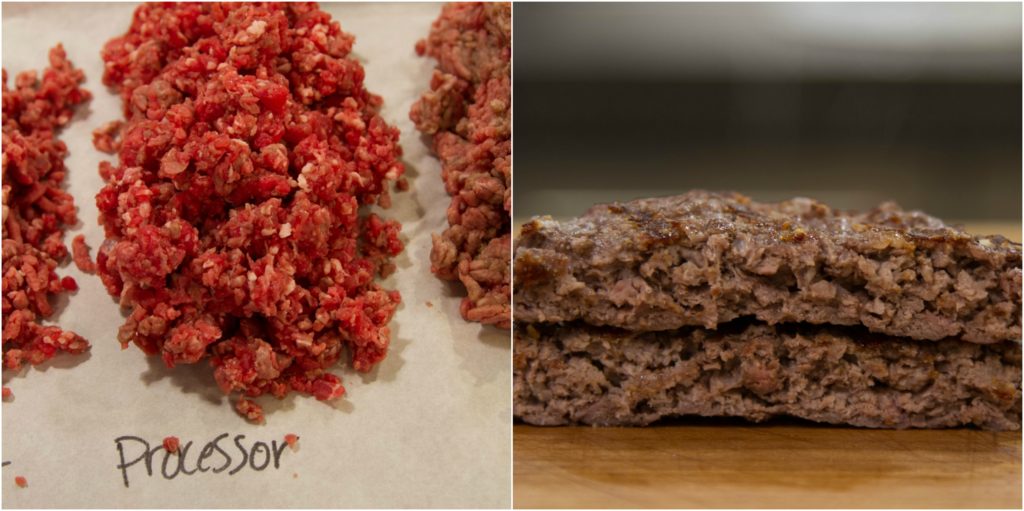
Grinding meat with this method is good if you don’t have a meat grinder. The processor blade must be very sharp to cleanly cut the meat rather than smearing it—even if the meat is partially frozen. Do not overcrowd the bowl of the processor. Pulse the meat until you reach the desired texture. To achieve the clean-cut chunks you’re after, work in small batches. Even with a blade that isn’t perfectly sharp, grinding meat with a food processor is far better than store-bought ground beef.
3. Chop by Hand
Another great method of prepping meat for burgers is to chop it by hand. We didn’t test this method, but it’s Kenji’s favorite if you have enough time. Freeze the meat just as you would when grinding or processing, and chop into small bits with a meat cleaver, sharp chef’s or santoku knife. It’s nearly impossible to smear the meat, and the connective tissue will be very cleanly cut.
Keep It Cold!
Regardless of the grinding method you use, one principle is absolutely key: Keep the meat and all equipment cold! Room temperature meat will smear the fat and connective tissue rather than cutting it. The goal is to have separate and identifiable small chunks of meat and fat, not a smeared paste. Freeze all equipment (Meat grinder attachment parts, food processor bowl, blade, and lid—do not freeze any electrical equipment. Parts only.) for 1-2 hours prior to grinding (professionals who regularly grind meat store the equipment in the freezer).
To prep the meat, cut into 1-2 inch chunks, place in a single layer on a parchment-lined sheet pan, and freeze for 15-20 minutes prior to grinding. The cold meat will be very firm and cut cleanly during grinding. Pull the meat from the freezer after all of the equipment is ready to go. The meat should go straight from the freezer to the grinder or food processor. Both the meat and equipment shouldn’t rise above 40°F (4°C) during the grinding process. If you’re grinding a large quantity of meat, periodically place equipment back in the freezer to keep it cold, and only pull out small quantities of meat from the freezer at a time.
Weaigh the Meat
For the most uniform hamburger patties, weigh the meat on a digital scale before shaping. To arrive at a finished weight of about 4 ounces we scaled each portion to 5 ounces, taking into account moisture loss during the cook.
Shaping Burger Patties: Pack Loosely
Packing the meat loosely leaves pockets of space where the burger can hold onto its juices and rendered fat, and the jagged edges of a loose burger expose more surface area to create more crisp, brown crust on the exterior—yum! When ground meat is packed too tightly, the patty will become dense with little to no pockets for collecting juices, and the connective tissues will bond together like velcro, yielding a tough and chewy burger rather than a tender one. The web of connective tissues will also cause the burger to shrink during the cook as they tighten.
Salting
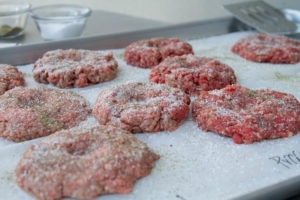
High Heat
Cooking over high heat is essential to developing the flavorful dark brown outer crust of a burger. In Master of the Grill, the cooks at America’s Test Kitchen define grilling as a quick-cooking method at temperatures ranging from 400-600°F (204-316°C). As the Maillard Reaction rapidly goes into action at 350°F (177°C), this is an excellent cooking method to obtain a flavor crust on meat. Burgers are thin enough that quick, high heat works very well to arrive at the desired pull temperature in one step on the grill without overcooking.
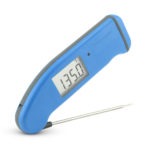
Use a Thermapen®!
The Grind Your Own Burger Recipe
Ingredients
Keep it Simple! We didn’t want to add any ingredients that would overpower the flavor of the meat.
- 10 oz. beef chuck
- 10 oz. beef sirloin
- Salt and Pepper to taste
Method
Freeze all meat grinding equipment for 1-2 hours. Dice meat into 1 to 1-1/2″ cubes and freeze until firm—15-20 minutes.
- Assemble grinding or processing equipment, and grind meat.
- Preheat gas or charcoal grill to high heat. Keep gas grill covered until ready to cook, or keep the charcoal grill covered with the vent open until ready to cook. To be sure you start off with searing high heat, check the surface temperature of the grill with an infrared thermometer with a wide enough thermal range for high cooking temperatures like the Industrial IR Gun.
- Scale freshly ground meat into 5oz. portions and form into loosely-packed patties.
Dimple the patties: Making a slight indentation in the center of each patty before grilling will keep the burger from developing a domed shape. The connective tissue in the meat shrinks and tightens at temperatures above 140°F (60°C). The meat touching the high heat of the grill will contract while cooking, and the dimple will help it to maintain a uniform shape. It really works!
- Clean and oil cooking grate. Season patties liberally with salt and pepper, place on the grill, and allow burgers to cook undisturbed until they are well-browned on the first side (2-3 minutes).
- Flip burgers (season the other side with salt and pepper) and continue to cook until the burgers register 120-125°F (49-52°C) for medium rare or 130-135°F (54-57°C) for medium. If grilling burgers with pre-ground meat, cook them to an internal temperature of 160°F (71°C).
- Note! For anotehr great way to cook the burgers, takea look at our post on perfectly grilled burgers. You can use either method!
How to Temp a Burger
The best practice when spot-checking the internal temperature of steaks and chops is to hold the meat with tongs in one hand, and with the other hand inserting the thermometer probe into the center of the meat from the side to its thickest part. Burger patties are more delicate than whole-muscle steaks and may fall apart when lifted from the grill with tongs. Insert the Thermapen probe into the center of the burger from the top into the thickest part of the meat, being sure the probe isn’t sensing the bottom outer edge of the burger. Pull back a bit to be sure you’re reading the lowest temperature.
- As with other cooked meats, there will be a degree of carryover cooking after removing the burgers from the grill. Allow the burgers to rest for about 5 minutes to maximize the meat’s juiciness. While resting, the internal temperature will rise by about 3-5°F for a final medium rare temperature of 125-130°F (52-54°C), or 135-140°F (57-60°C) for medium. Serve with your favorite accompaniments and enjoy!
Our Results
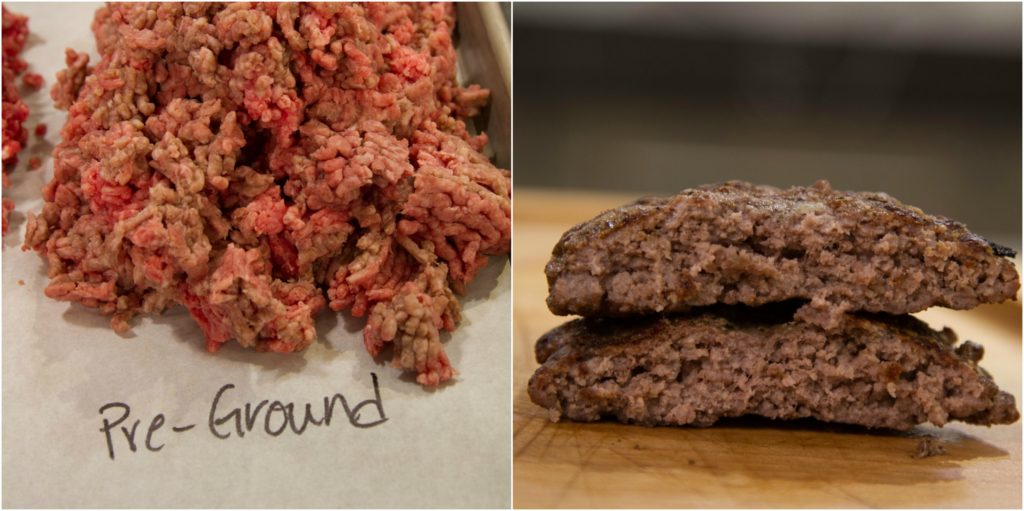
We used a combination of beef chuck and sirloin, ground it with a meat grinder and food processor, and compared those burgers side-by-side with others made from pre-ground beef.
Store-Bought Ground Beef
- Our hamburger made from pre-ground beef shrunk during the cook, and was dense and chewy. The flavor was a bit flat rather than rich and full. The overall texture of the meat didn’t allow the burger to trap in moisture, and the exterior had good color, but didn’t have the uneven, jagged texture we were looking for in a memorable burger.
Meat Grinder
- This burger had rich, beefy flavor with a tender and juicy texture. The outside crust was crisp and craggy with great browning and flavor from the Maillard Reaction. An overall excellent burger! The meat grinder method is definitely a winner.
Food Processor
- The blade on our food processor happens to be nearly brand new and very sharp, and we felt like the cuts were more clean than they were with the meat grinder. The burgers had the same rich flavor, a craggy, crisp crust, and the texture was just a bit more tender than with the meat grinder burger. Using a food processor is a great option if you don’t have a meat grinder and it worked very well for us, but it’s easy to see that even with firm, partially-frozen meat, a dull blade would smear the fat with the meat, and the connective tissue may not be cut well enough to make the final burger tender. But again, leaps and bounds better than store-bought ground beef!
By following best practices for how to grind your own hamburger, salting at the right time, and grilling with high heat to the correct internal temperature as confirmed with a Thermapen, you’ll be sure to grill up memorable burgers all season long!
Products Used:

Resources:
Great Backyard Burgers, Master of The Grill, America’s Test Kitchen
The Burger Lab: What’s the Best Way to Grind Beef?, Serious Eats
Thick and Juicy Home-Ground Grilled Cheeseburgers, Serious Eats


 Keys to the Best Grilled Burgers




I’ve also read that before grinding you can sear the outside of the beef to kill surface bacteria. I guess the process would be to sear, partially freeze, and grind. I personally haven’t done this yet.
Donney,
Yes! You can sear or quickly blanch the meat to sanitize the exterior of the meat. Check out our post, Moist and Flavorful Burgers That Are Also Safe to Eat referenced here. Give it a try and let us know how it goes!
Thanks,
-Kim
I’ve seared an entire roast
Then cut into pieces and then froze before grinding
This means you can eat a medium rare burger 🍔
Other Safety Tips:
Before you freeze and cut up the meat for the grinder – Dip the entire whole steak (or cut you are using) into a large pot of boiling water for 15-30 seconds to kill any outside bacteria. Let it cool and then put into the freezer as instructed. The outside will turn grey of course, but after grinding it will look exactly like any raw meat
If you then keep all the grinding tools, containers, surfaces and your hands clean – you can feel safe in cooking the burgers as rare as you like.
Tip two:
Always make sure the meat you buy has NOT BEEN MECHANICALLY TENDERIZED since the needles used in the process will push any outside bacteria into the center of the meat. ASK THE BUTCHER!
Now relax and enjoy those medium-rare, totally juicy, flavorful burgers.
Joel,
Thank you for your thoughtful comment! You clearly have some good cooking experience. Check out our post, Moist and Flavorful Burgers That Are Also Safe to Eat that’s referenced here. As you mentioned, with a little extra effort you can safely cook burgers are rare as you would like–and they’ll probably be some of the tastiest you’ve ever had!
Thanks,
-Kim
Most household grinders come with 2-3 grinder plates, (the round disk with the holes in it). Nowhere in the article does it mention what size plate to use, 1/8″-1/4″-3/8″, or even if it matters. Does anybody have any recommendations?
Randall,
Great question! We used a 3/8″ grinder plate. The 1/4″ and 3/8″ are your best bet for burgers–1/8″ is appropriate for a finer grind when making sausage.
Thanks!
-Kim
I like 140 degree burgers so I sous vide to that temperature (long enough to kill any bacteria as suggested in “Moist and Flavourful Burgers That are also Safe to Eat”) and then finish on the BBQ. Works great because I can make as many burgers as needed (plus a couple extra of course) and it only takes a couple of minutes to finish them off.
Charlie,
We’re huge fans of sous vide cooking–it’s such a great method to ensure perfect doneness every time. Finishing on the smoker would be great! Thanks for your comment.
-Kim