Temperature Tips to Picture Perfect Pies
There isn’t any argument over whether pie made from scratch is preferable to a store-bought pie, but there are myriad troubles that can befall the holiday pie-making process. The bottom crust of the pie is soggy, it shrinks in the oven, the crust melts over the sides of the pan when it’s baking, it’s tough, or it falls apart when you try and lift a slice out of the pan. Pumpkin pies can wind up cracked if overcooked, too loose in the middle if undercooked, and sometimes pecan pie filling is so overcooked it’s like taffy. Temperature control is crucial when making pie crust or filling, and you’re about to figure it all out.
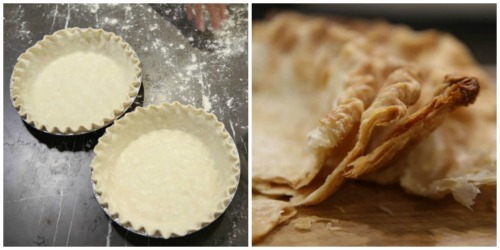
Making the Pie Crust
• Two Cardinal Rules of Pie Dough: When it comes to making pie dough, there are two critical things to remember: 1) Keep the butter cold and solid, and 2) Keep the gluten development to an absolute minimum. The butter must be kept in a cold, solid state at all times, until the moment your pie goes into the oven. These little chunks of cold butter will immediately melt when placed in the hot oven, creating small pockets of steam. All the pockets of steam riddled throughout the dough created during baking are what will develop layers in the crust, making it flaky. Too much gluten development will result in a pie dough that shrinks, or is tough rather then tender. Handle the dough as little as possible (chilling it every step of the way), and only add as much water as is completely necessary. (*All recipes used are listed at the end of this article)
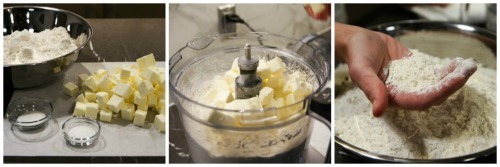
• Cut the butter into the flour: Start out with cold butter (35-40ºF [2-4ºC]) cut into 1/2-1 inch (2.5 cm) chunks, and cut the butter into the flour in a food processor. Incorporating the butter by hand increases the butter’s temperature because of your body temperature, and because it will take longer—more time for everything to sit at room temperature; and you run the risk of creating a paste with the butter and flour—not good. You just want little chunks of butter. Add the dry ingredients to the bowl of the processor and pulse to incorporate. Add the butter and pulse until the butter chunks are lima bean to pea-sized, as pictured below.
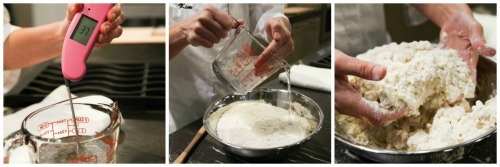
• Don’t add too much water, and add the water cold. The optimal temperature for the water is 40ºF (4ºC), or just below (Use a Thermapen® to keep an eye on the water temp). Add ice to the water to bring the temperature down if you need to. Gluten is activated by three things: moisture, mixing/kneading, and warm temperatures. You need water to hold the dough together, but too much will activate too much gluten in the flour, making the dough tough. It’s best to add the cold water a little bit at a time.
• Incorporate the water by hand. A food processor works perfectly to cut the butter into the flour, but you’ve already achieved the perfect size of butter chunks, and if you also process the water, the butter will be worked down to smaller-sized bits. The additional agitation in the food processor can also develop the gluten too much. With incorporating the water, the goal is to only hydrate the flour enough so the dough holds together. Tossing the mixture by hand will get the job done well.
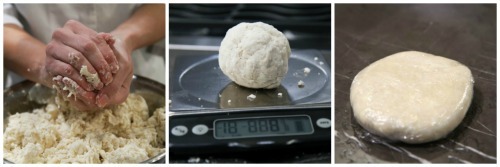
• How much water? To test if you’ve added enough liquid, take a handful and pack it together like you would a snowball—do not knead. If it holds together, and breaks when pulled apart and looks craggy, you’re done. If it doesn’t hold together you need more water, and if it holds together and stretches when you pull it apart too much water has been added. Too much water will cause your dough to shrink during baking. So add the water a little bit at a time—you can always add more, but you can’t take it out!
• Scaling: Once the dough is ready, scale into 8-9 oz. (227-255 gram) portions (for a 9 inch [23 cm] pie shell) and pack into balls. Wrap the balls in plastic wrap and flatten into round discs. This will expedite the rolling process since you’ll start out with the shape needed. Be sure to push the dough into all corners of the plastic without any cracks. If there are cracks on the edges you will have cracks in the dough as it’s rolling out.
• Chill it: Refrigerate the dough discs for at least two hours, but overnight is best. Refrigerating the dough allows the gluten to relax (so the dough is tender and won’t shrink in the oven), the starches to fully hydrate (this will make rolling out much easier), and firm up the butter. You can freeze the dough discs and keep them for up to a month, then refrigerate the discs overnight to gradually bring their temperature up.
Keeping the dough cold is described as The Dance of the Chill by Sebastian Rouex of Thomas Keller‘s Bouchon Bakery, in his book Bouchon Bakery. In his book Sebastian says,
“Sometimes a dough that has been chilled in the refrigerator may be too firm and cold to roll out with ease. So, you pound the dough with a rolling pin to flatten it somewhat and warm it to a temperature where it can be rolled out. If it is difficult to roll or begins to crack, it’s too cold and should rest at room temperature a bit longer. (You may wonder why it was refrigerated in the first place, if it now needs to warm up, but the chilling is essential to relax the dough.)”
Getting pie dough to the right consistency really can be a dance, and becomes easier to perceive with experience.
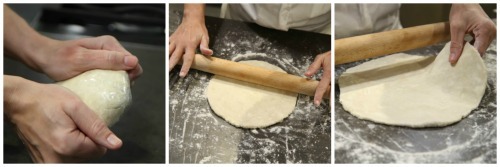
• Roll out the dough. Remove the dough discs from the fridge and let them sit at room temperature until their consistency is starting to become malleable (about 10 minutes), but still cold. If you roll it out too cold the dough will crack because the butter is too firm. Dust your work surface very lightly with flour (too much flour will make your crust tough), and roll only in the center of the dough circle, then turn the dough a quarter turn, roll in the center, give it a quarter turn and roll, etc. Giving quarter turns as you roll serves two purposes: 1) The dough will never stick to the work surface because you’ll know the moment it starts to so you can dust the surface with more flour, and 2) Turning as you roll will keep the dough in its round shape. During rolling, the butter chunks flatten out into sheets, making the dough look beautifully marbled. Continue rolling until it’s just larger than the size of your pan.
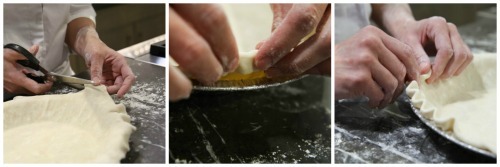
• Transfer the dough to the pie pan. Carefully roll the dough over your rolling pin, or fold it in half, and gently lay it across the pie pan. Lightly drape the dough into the edges of the pan being careful not to stretch the dough (stretching the dough can result in the dough shrinking during baking), and press it into the corners. Trim the dough so that it overhangs the edge of the pan by about an inch. Fold it under to meet the of the pan, and flute as desired.
• Chill it Again: Refrigerate for about 20 minutes, or freeze for later use. Remember to keep the dough cold. Again, the chilling is to relax the gluten and firm up the butter. If storing for later use, after the shell is frozen, cover well with plastic wrap and store in the freezer for a couple of weeks to make your life easier when you’re ready for pie baking.
Pumpkin and Pecan Pie Dilemmas: Pies with wet fillings are often notorious for having crusts with “soggy bottoms”. To avoid this, bake the pie shell before filling it to crisp it first, then add your filling and bake at a lower temperature until it’s set. Cue, “blind baking”.
Blind Baking

Blind Baking: Baking a pie shell without filling. After your shaped pie shell has rested sufficiently under refrigeration until it’s firm, follow these steps:
1. Line the firm shell with aluminum foil
2. Fill with pie weights or dry beans. The weight in the pie shell will force the sides of the pie shell to stay in place rather than falling and shrinking.
3. Bake at 425ºF (218ºC) for 10 minutes (remember to test your oven’s accuracy for best baking results.)
4. Remove the beans by lifting the foil out of the pie shell, then return it to the oven and bake until the bottom crust is crisp—5-10 minutes.
Cool it: Let the pie shell cool completely, then proceed with your pie recipe.
Finishing the Pie
Custard Pies: A custard is a mixture that is cooked (either stirred on the stovetop, or baked in the oven), and its structure is set by the coagulation of egg protein. Examples are cheesecake, creme brûlée, and some pies including pumpkin and pecan. Trouble comes with knowing when to pull custards from the oven. You can over-bake them causing cracks in a pumpkin pie, or a pecan pie that’s tough and sticks to your teeth, and under-baking will result in a loose filling that won’t give you clean-cut slices.
Protein Coagulation: Egg protein begins coagulating at 140ºF (60ºC), and becomes completely firm around 175ºF (79ºC). The best way to be sure your custard pies will have the perfect texture is to take the internal temperature. Testing the doneness of a steak by comparing it to the firmness of the palm of your hand is guesswork at best, as is tapping the side of your pie pan to see what state of “jiggle” the custard is at.
• Prepare the Filling: Pecan and pumpkin pie fillings are gloriously easy to make. Just scale all ingredients into bowl, whisk or blend in a food processor, and you’re ready to go. Follow the directions in the recipe, and fill your blind-baked shell. Most custard pies have a high start oven temperature to help set the bottom crust, but you’ve already done that with blind baking. Set your oven to the lower temperature, usually 300-325ºF (149-163ºC), and bake until the custard is set.
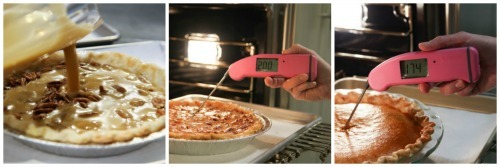
• Pull Temperature: The target pull temperature for pumpkin pie is 175ºF (79ºC), while pecan pie’s pull temperature is 200ºF (93ºC). A pull temperature of 175ºF (79ºC) makes sense, but why 200ºF (93ºC) for the pecan pie? The high ratio of sugar in pecan pie custard delays protein coagulation. This sugar-packed pie filling needs to be cooked to a higher internal temperature to set properly.
• Spot Check: Start checking the internal temperature of your pies with a Thermapen a few minutes before it’s supposed to be ready so you’re sure to hit your target. Custard pies will be a bit jiggly in the center when pulled from the oven; but the egg protein will firm up as it cools.
It’s amazing how much temperature affects pies with every step in the process. These professional tips will give you tender and flaky pie crusts, and perfectly set custard fillings. Be sure to keep your Thermapen in the kitchen Thanksgiving Day!
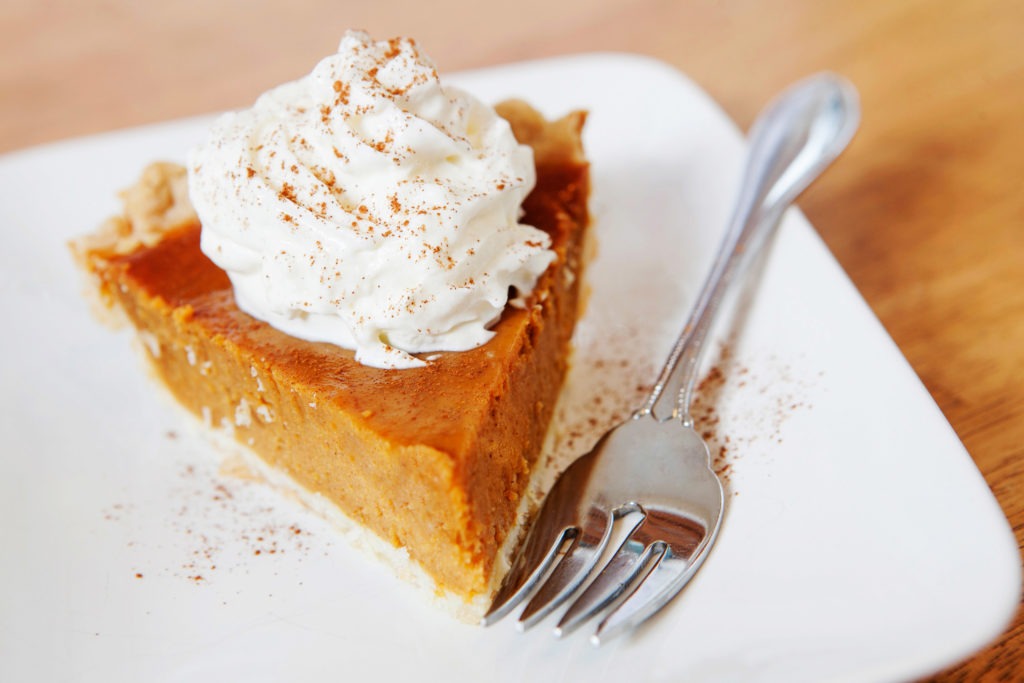
Recipes used:


Thanks for the information. This is great advice! I will definitely come back here when I start making my own pies.
This is such perfect knowledge for the person that wants to understand how a recipe should be applied and the resultant bliss that will follow:)
I have a “book” of “life’s knowledge” that is given to my daughter as it evolves. This is a wonderful addition, Thank you.
William,
So glad to hear you enjoyed the post. I hope you had a great holiday!
-Kim
Alexis,
So glad you enjoyed the article, and we hope you had a wonderful holiday!
-Kim
Thank you! I have been searching for the “pull temp” for a pumpkin pie for years.
Linda,
I’m so glad we were able to help! Happy pie baking 🙂
-Kim
Any adjustments for high altitude? I made a pecan pie at 10,000 in the Rocky Mountains and it turned into a rocky brick.
Kirk,
Yes! High altitude does change up your doneness temperatures. Stay subscribed to emails–we have a post all about high altitude and its affect on cooking in the works.
Thanks!
Kim
I’ve been using Thermapens for years, and now I’m so glad to have all this information as to when to pull cheesecake and custard pies. Since I’ve been using your products, I’ve become super sensitive to temperatures of all ingredients since I have the instruments to measure them accurately. Thanks!