Tri-Tip Steak Glory: Grilled or Roasted
Labor Day Weekend is traditionally the last true summer weekend for gathering the family around the grill. That, and the launch of our sparkling new Thermapen® Mk4, inspired us to new heights with this under-appreciated cut of beautiful beefiness.
Origin of the Cut: You’ve likely heard of tri-tip before, but what is it? Beef tri-tip is a cut of meat from the bottom of the sirloin primal cut that has only been on the US market since the early 1950s. It was first introduced in Oakland, California by Otto Schaefer. By the late 1950s, it had become a local specialty in Santa Maria, California. It’s classically prepared rubbed with salt, pepper, fresh garlic, and grilled to medium-rare doneness. Fresh salsa and beans are classic accompaniments for this cut. Other non-traditional preparation methods sometimes used are roasted, rotisserie, smoked, and braised. Tri-tip is commonly used for fajitas, beef stroganoff, and can be used in place of flank steak.
This cut can be difficult to find the farther east you travel, but your butcher should be able to special order it for you, and he may even know it by a different name.
A Tri-tip by Any Other Name…
We found this great list of other titles the tri-tip sometimes goes by at thetritipguy.com:
-
- The California cut
-
- Bottom sirloin tip
-
- Triangle cut
-
- Bottom sirloin primal cut
-
- Santa Maria cut
-
- Newport steak
- Bottom sirloin butt (but it’s NOT called a rump roast – totally different!)
And if you’re traveling worldwide:
-
- Aiguillette baronne (France)
-
- Rabillo de cadera (Spain)
-
- Punta de Solomo (Central American countries)
-
- Punta de picaña (Argentina)
- Picaña (Mexico)
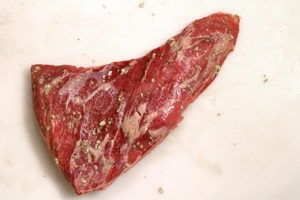
On average, a tri-tip weighs about 2-2.5 pounds; and as you can see in the image to the left, this cut is shaped a bit like a boomerang. Because of this odd shape it lends itself well to satisfying the varying tastes of a crowd, because the finished product will have different degrees of doneness throughout. The thinner areas near the tips will be more well done, while the thickest area at the center will be beautifully medium rare.
The protein strands in this cut are larger than in tender, lean meat (like something cut from the tenderloin). Thinner, more densely packed protein strands hold moisture better than the tri-tip will. So, after the meat has cooked, and even after it rests, be prepared for a fair amount of juices to be lost when carving this particular cut of beef.
Now for our test kitchen experiment: Interesting discoveries were made!
Two Cooking Methods: We tested two different cooking methods for this post—grilled and oven-roasted. The first method (grilling) is primarily a direct-heat method (conduction), and the other (oven roasting) primarily an open-air heat method (convection). To be precise, in an oven, the heat transfer begins in the air surrounding the meat, but once the surface is heated, the meat begins transferring heat energy in the protein fibers through conduction. Also, anytime electric current is used in a heat source, it puts out radiant heat. So more is going on than meets the eye. But for the purposes of our testing, we’ll call it conduction vs. convection.
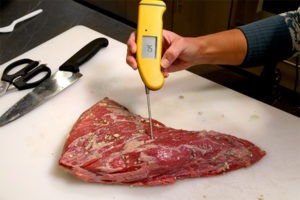
Probe Placement: We used a ChefAlarm probe thermometer to track the internal temperature with both tri-tips. Proper placement is crucial with tri-tips because of its odd shape. You want to be sure to measure the thickest spot in the cut with your ChefAlarm probe, but that can be tricky to find. Spot testing with a Thermapen helps to give you the exact location of the lowest temperature in the meat, and that’s where the probe needs to be placed. Even if you’ve let your meat rest at room temperature, there may be a cold spot lurking, and the Thermapen will find it quickly.
Grilling Methodology: We brought our grilled cut to room temperature before cooking, as is so often recommended. It took over two hours for the meat to come to 70º-75ºF.
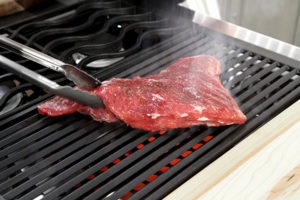
The tri-tip pictured to the left is prepared simply with olive oil and a light dusting of salt and pepper before grilling. No more, no less. In traditional Santa Maria fashion, you can also rub the meat with fresh garlic. The grill was at high heat for 5 minutes before placing the meat on it. It was grilled for about 8 minutes on each side and reached 120ºF after 17 total minutes of cooking.
While grilling we monitored the change in temperature throughout the cook using a Thermapen. Not only can you check for temperature gradients; but it’s also a good indicator in finding hot spots on your grill. These spot temperature checks can help guide where to adjust the meat’s position on the grill.
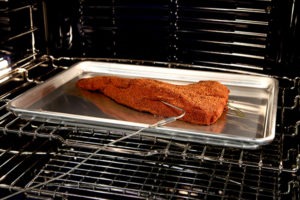
Oven-Roasting Methodology: The oven-roasted tri-tip was given a generous coating of a fajita dry rub we made from a recipe at simpledailyrecipes.com, and taken directly from the refrigerator (at 38ºF) to the oven preheated to 450ºF. It only took about 25 minutes for this tri-tip to reach 130ºF
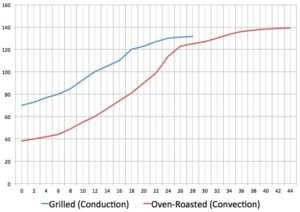
The Comparison: During cooking, the grilled cut increased in temperature at a rate of 2.94ºF per minute; and the oven-roasted tri-tip at a rate of 3.4ºF per minute. After they had each been removed from their heat source the cooking process predictably decreased. The grilled steak reached its peak temperature in four minutes at a rate of .17ºF per minute, while the oven-roasted cut took twenty minutes to reach its peak temperature for a rate of 1.1ºF per minute. Even though the oven-roasted cut was started thirty two degrees lower than the grilled one, it had the fastest rate of temperature increase!
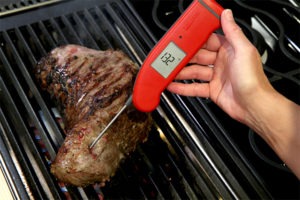
Temperature Gradients: Testing areas of the meat closer to
the exterior with a Thermapen, we were able to see that the temperature had as much as a fifteen-degree temperature increase toward the edges of the meat. These variations in temperature are due to gradients, or the effect of heat traveling from the highest temperature area to the lowest. By the end of the rest, the edges of the meat will be medium or medium well while the thickest area is medium rare.
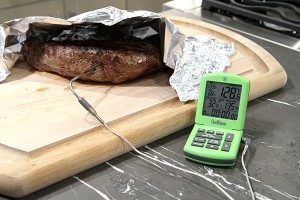
Resting/Carryover Cooking: Each was pulled at 120ºF, tented with aluminum foil, and allowed to rest before their preparation was completed. We carefully monitored the change in temperature using a ChefAlarm probe thermometer. (Remember that the probe must be placed in the thickest part of the meat.) One of the ChefAlarm’s great features is that it automatically records the max and min temperatures; so you’ll know the peak temperature your meat reaches during the rest.
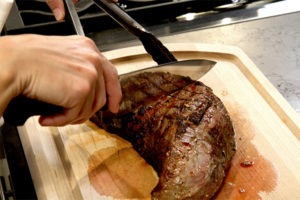
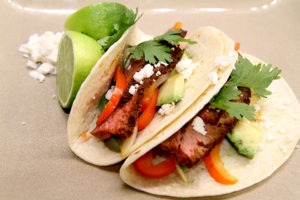
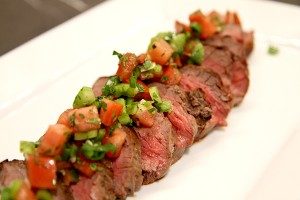
Slicing: After resting, cut in half crosswise, then slice into thin strips against the grain for the most tender mouthfeel. The grilled meat was plated with the Santa Maria salsa as pictured at the top of the post, and these are our fajitas made with the dry-rubbed, oven-roasted cut. The grilled was more tender, but lost far more liquid when cut than the oven-roasted cut. Why the difference? It’s simple: Proteins shrink less and expel less moisture and fat when cooked at more moderate temperatures than with high, direct heat.
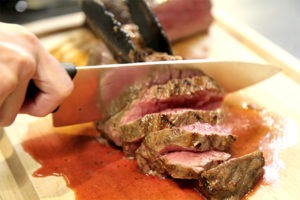
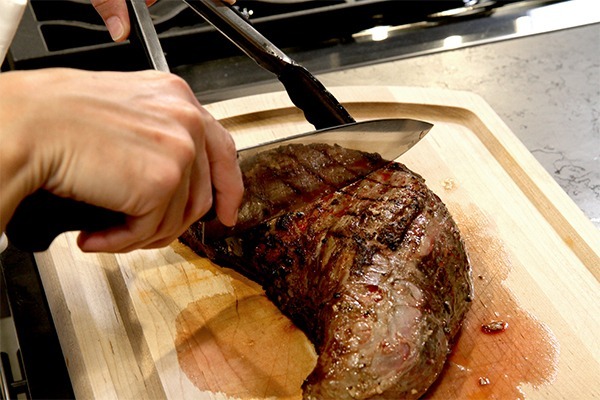
About slicing into your tri-tip, Meathead from AmazingRibs.com recommends using a carving board that has deep valleys cut into it or else the juices will run away from you. We found this to be very true. Even after resting there was a large amount of juice that ran out.
The Takeaway: Your chosen cooking method affects the resting time and the peak temperature rise in carryover cooking. We found during the rest the slower cooking method (roasting) had a slower rise in
temperature and reached a higher peak temperature than our grilled meat–even though it was started at a lower temperature! Knowing this helps in predicting the proper pull temperature to achieve the desired result.
Fast, accurate temperature tracking is the sure-fire way to know what’s going on inside meat during cooking; and tracking multiple temperatures was critical with this cut. If the cold spots weren’t located correctly, we would have pulled them too soon and ended up with under-cooked meat. ChefAlarm helps us to track the change in temperature, records the max and min, and alerts the user when the desired temperature is reached. The speed and accuracy of the Thermapen were necessary to help us with proper probe placement, and to test the temperature gradients through the entire tri-tip.



great site but you should have a print it for receipe
Any difference in flavor? Did you miss the maillard effect with the roasted tri tip?
Great article. Just what I needed. Preparing tri tip for 50 Football players.