Thermal Tips: Smoking Brisket
Anytime is a good time for tender, juicy, smoky brisket. We have the thermal tips you need to get it right. So grab a “full-packer” from your butcher, and get smoking!
Brisket is a rite of passage for anyone with a smoker. It’s the ultimate challenge: taking what is arguably the toughest piece of meat in the whole cow, and through the art and craft of low-and-slow smoking, turning it into pure meat candy—that smoky, peppery, caramelized exterior with tender, flavorful, juicy beef inside that is one of the pinnacles of the barbecue experience.
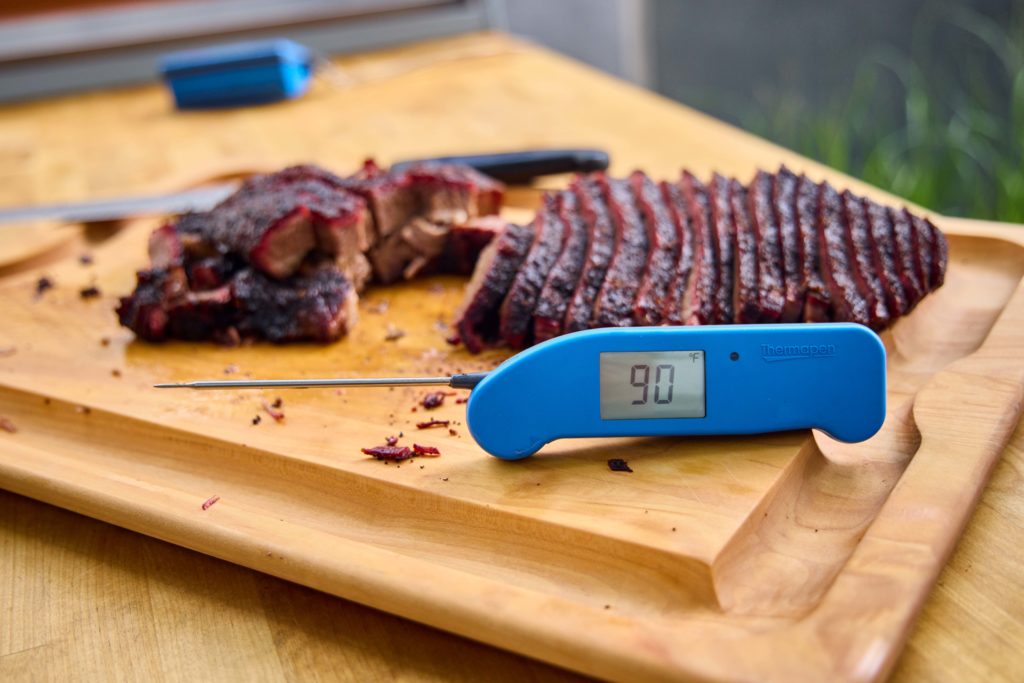
Brisket, the Miracle Meat!
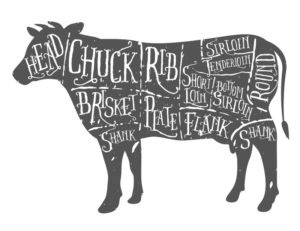
Dr. Jeff Savell of Camp Brisket at Texas A&M calls brisket a bona fide miracle:
We did a study of the tenderness of forty major muscles of the cow when cooked in the same manner, over direct heat like a steak and the brisket was thirty-ninth in tenderness. But the fact that in Texas barbecue, you’re taking one of the worst pieces of the animal and converting it into one of the best is a miracle itself.
Dr. Jeff Savell as quoted in Franklin Barbecue
We have the critical thermal tips necessary to help you succeed in every brisket cook, and we have the tools to help you follow those tips.
Basics for tender, juicy brisket
In order to perform that miracle properly we have to do more than just chuck our meat into a hot smoker. Care must be taken to creat the kind of environment where brisket can thrive.
➤ Low and Slow
Brisket requires both a low and steady pit temperature—some pitmasters start with their pits as high as 275°F (135°C) but we used a slightly lower and slower pit temp that gave us more control in our smaller smoker: 250°F (121°C). Brisket is a tough cut because it comes from the part of the cow just above the legs. The muscles in brisket get used heavily during the life of the cow and develop a great deal of connective tissue, mostly collagen.
The low and slow cooking method literally unwinds the strands of collagen over time, turning them into single-strand proteins called “gelatin” that, far from being tough, can hold up to 10 times their weight in water. But collagen needs time to unwind.
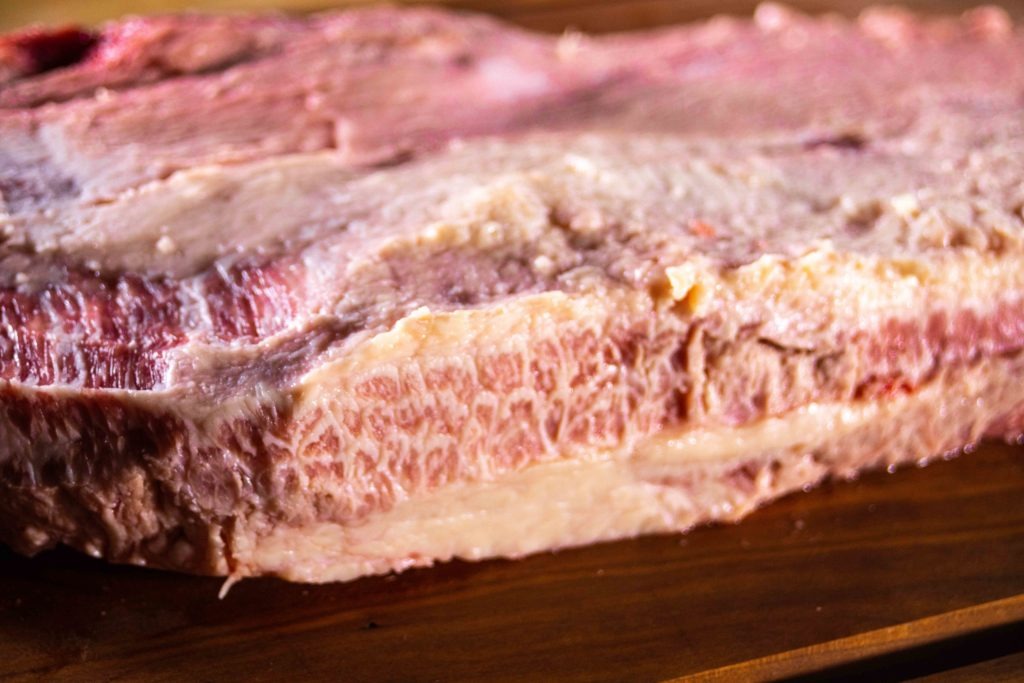
➤ Keep the Cooker Humid
During the first stage of our cook, we’ll use a pan full of water to keep the smoking environment humid as we bring the brisket up to 150°F (66°C). The humid environment is necessary to slow down moisture evaporation, collagen breakdown, and fat rendering, so that all those processes can occur simultaneously.
Cooking brisket in a moist atmosphere also preserves tackiness on the surface of the meat, which is necessary for the best smoke penetration.
The Wrap Method
➤ The Texas Crutch
Texas barbecue expert Aaron Franklin, founder of Austin’s world-famous Franklin BBQ, is a bona fide BBQ phenomenon who has personally cooked literally thousands of briskets. To get both the tender, moist mouth feel of the brisket meat AND a healthy caramelized crust, Aaron recommends a two-stage smoking technique sometimes called the “Texas Crutch.”
The phrase “Texas Crutch” really refers to wrapping your briskets in foil, but many pitmasters use unlined butcher paper both to hold in the moisture during the second half of the cook AND to allow the crust to breathe and not get soggy like foil-lined briskets are prone to do.
About halfway through the cook (when the internal temperature reaches about 150°F [66°C]), we’ll actually remove the brisket from the pit and wrap it in peach paper. At this point, the water in our pan may have largely evaporated and the paper wrapping will help the brisket retain moisture over the second half of our cook without compromising the crust.
NOTE: The crutch is optional. It is widely accepted, it is traditional, and it makes great brisket, but you can also cook a great brisket naked the whole time, especially if it is a smaller (10–12 lb.) brisket.
Brisket, Step by Step
The Prep
Briskets are sold either as a “full packer” with both the “flat” muscle and the “point” muscle still attached, or you can buy just the “flat” sold separately. Here we are smoking a full packer.
Whichever cut you choose, be sure to drain the fluids from the bag before removing your brisket. Then pat both sides of the brisket dry with a paper towel and, if necessary, chill your brisket in the fridge for a few hours. Chilled, dry, firm fat is much easier and safer to cut than soft or slippery fat.
1. To Trim or Not to Trim?
Brisket has a thick layer of fat, or “fat cap,” on one side. Low and slow cooking allows the fat to slowly render, adding flavor and helping to keep the meat moist, but depending upon the leanness of the cut, not all of the fat will render.
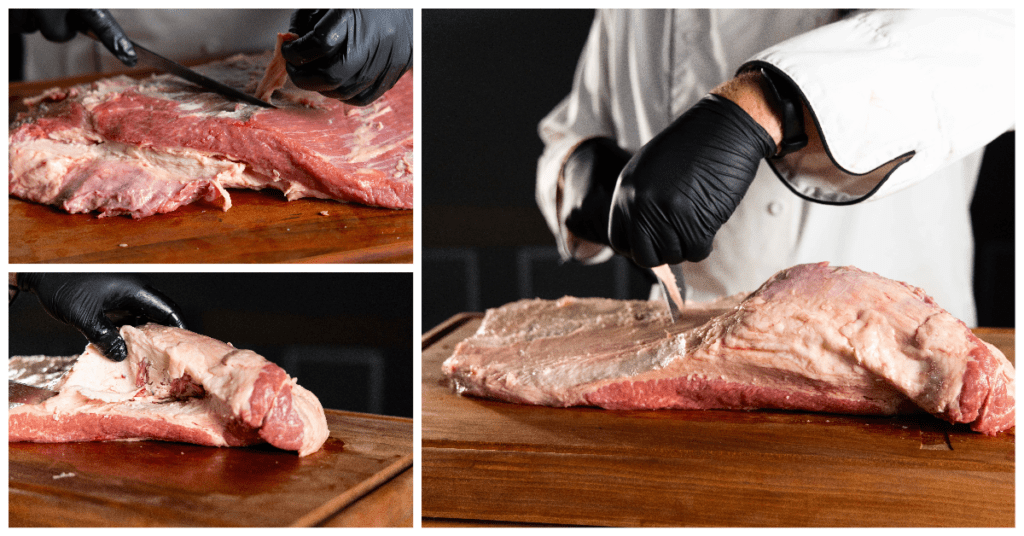
Typically you’ll want to trim the fat cap to a uniform thickness about 1/4″ thick. Also, remove any large “nodules” or chunks of fat, and remove as much of the silverskin as you can as it will not break down during the cook. (Silverskin is the thin membrane covering the exposed side of the brisket, opposite the fatty side. Silverskin will not break down during cooking.
2. Dry Rub
A traditional brisket rub is a simple 1:1 ratio of kosher salt and ground black pepper. To coat a full-packer brisket use about 3/4 to 1 cup of the rub. No intense spices are added to allow the flavors developed in the meat through the smoking process to take center stage.
The goal of any rub is to complement a nice piece of meat, not to obscure a crappy piece of meat.
Aaron Franklin, Franklin Barbecue
Apply the rub to the brisket and allow it to rest at room temperature for about an hour. The rub will draw out some protein-laden moisture from the meat, helping to create a good, strong bark when cooked.
3. Fire Up Your Smoker
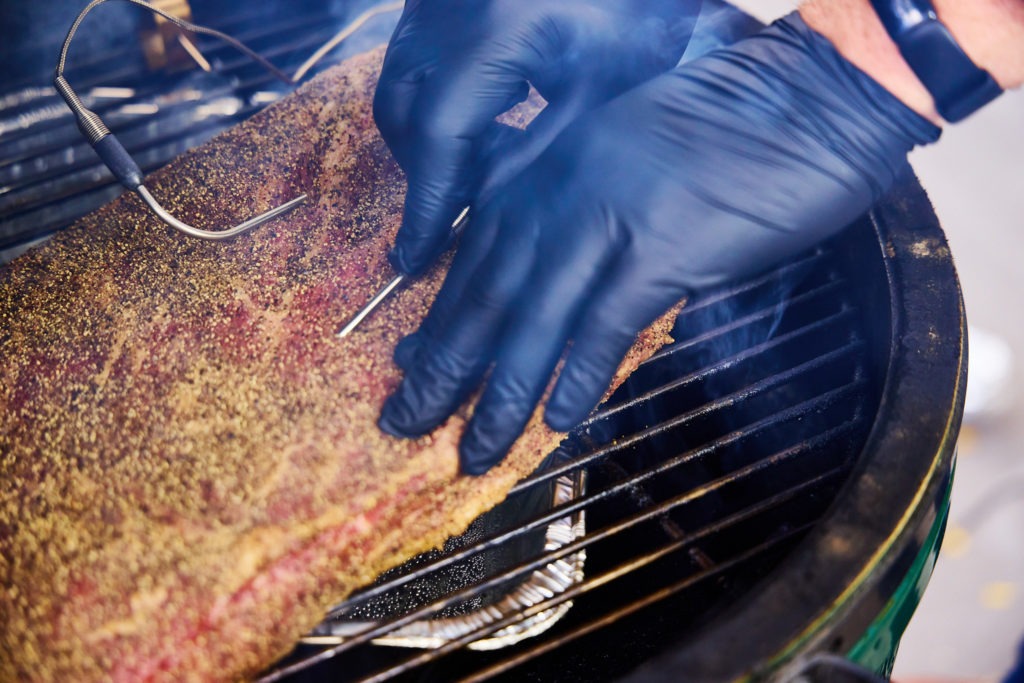
Start the fire and add your preferred wood chunks to preheat to your smoker. Franklin BBQ recommends chunks of oak for a mellow, smoky flavor that “lets the meat take center stage.” Cured oak, in particular, tends to burn cleanly and consistently over time. Don’t forget to place an aluminum pan of water beneath the cooking grate.
The Cook
1. Place Brisket in the Smoker
Lay the brisket onto the grill grate. Brisket experts debate whether it is better to place it fat side up or fat side down. Aaron Franklin places his briskets fat side up because his cooker has more top heat than bottom heat. We placed our brisket fat side down, however, to shield the meat from the higher radiant bottom heat in our smoker and to make sure the fat rendered before the leaner side was overcooked.
Using a probe thermometer to monitor your cook allows you to know how your brisket is doing without opening the lid to spot-check, thereby releasing smoke and losing heat. Maintain a clean fire for the duration of the cook.
2. Place the Probes
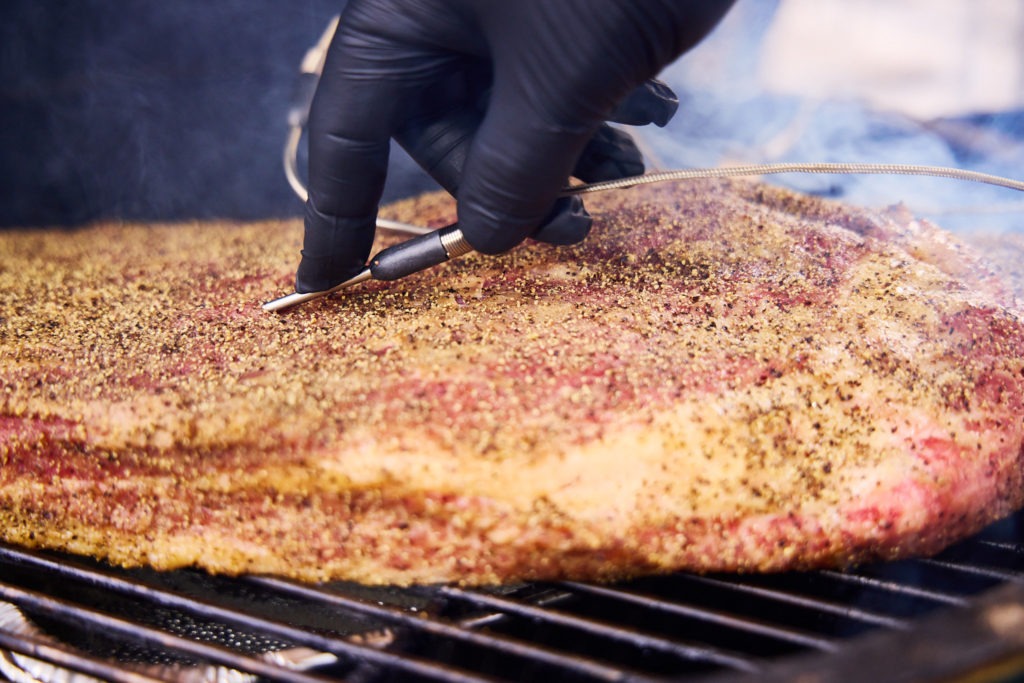
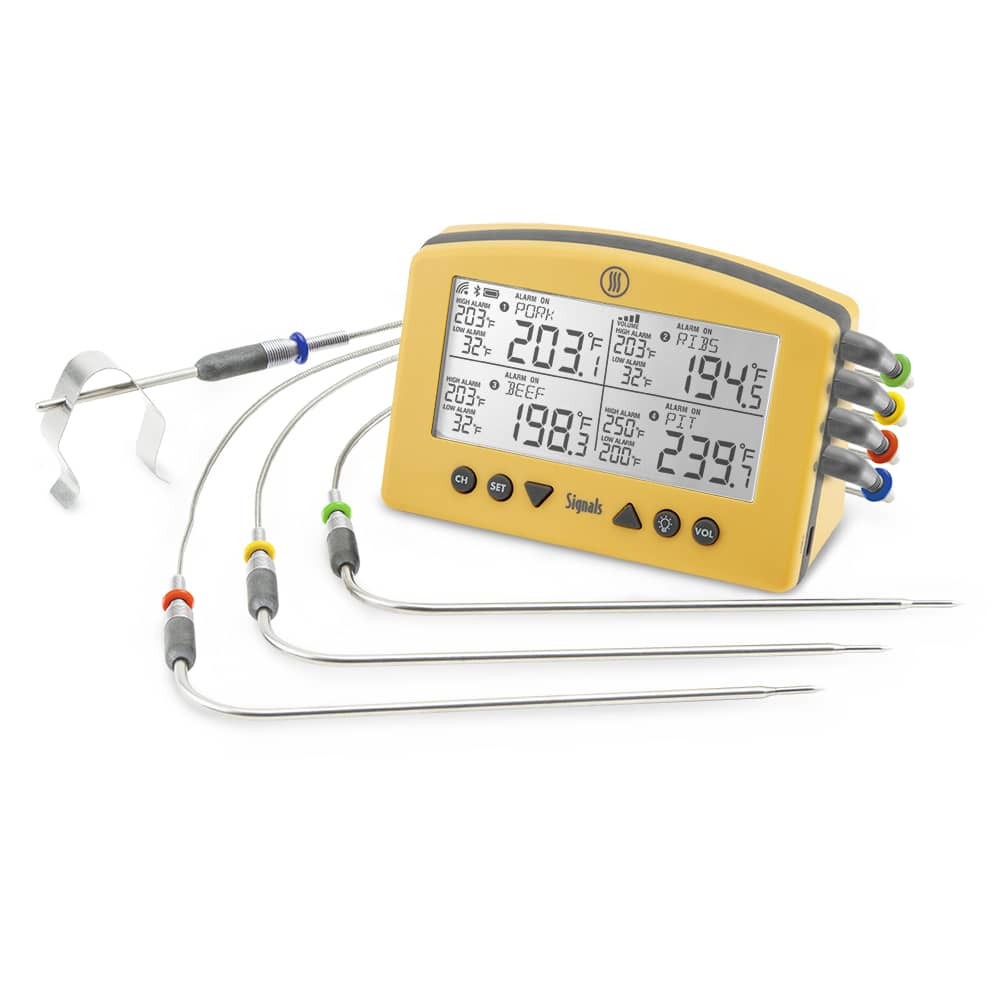
Attach your thermometer’s air probe to the grate of your smoker with the grate clip. You’ll want to be sure the clip is at least two inches away from the outside edge of the grate and one inch away from your meat. But you don’t want it much further than that: you want to know what the temperature is near the meat, not at some random location in your smoker.
Your Signals has enough probes to go into the flat as well as the point of the brisket. (The flat is the long muscle of uniform thickness.) You want a probe in each part so that you can have a more complete picture of what is happening, thermally speaking, in the whole brisket.
3. Set the Alarms
We set our air probe low alarm to 225°F (107°C) and our air probe high alarm to 275°F (135°C). This will keep our brisket right in the 250°F (121°C) range that we want for the duration of the cook. When the low alarm sounds, it’s time to increase the heat by adding fuel or ventilation. If the high alarm sounds, it’s time to cool things down by partially closing off the vents.
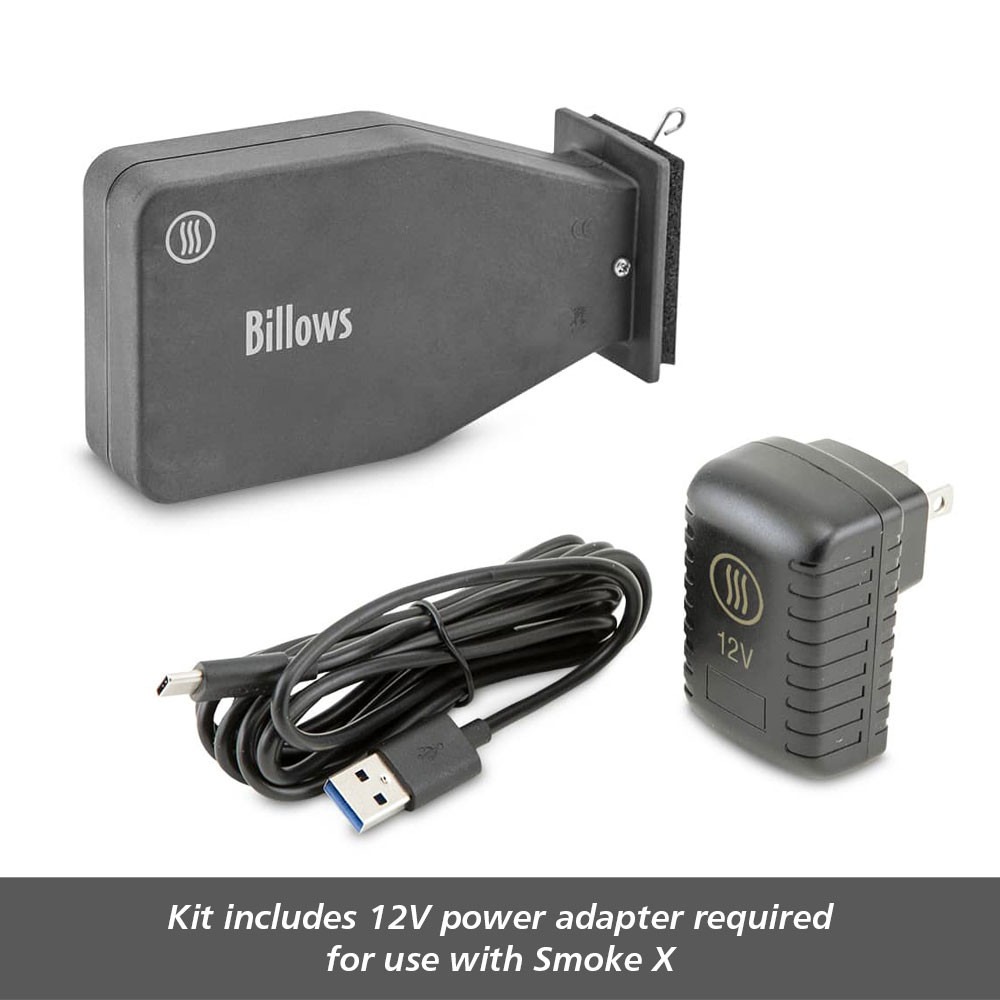
(If you have one, this is a great time to use your Billows™ BBQ Control Fan. You set the target temperature on your Signals, connect the billows, and the fan either provides or restricts air to the fire to maintain the correct temperature.)
We set the high temp cooking probe to 150°F (66°C). This will let us know when it is time to wrap our brisket.
4. Wrap It
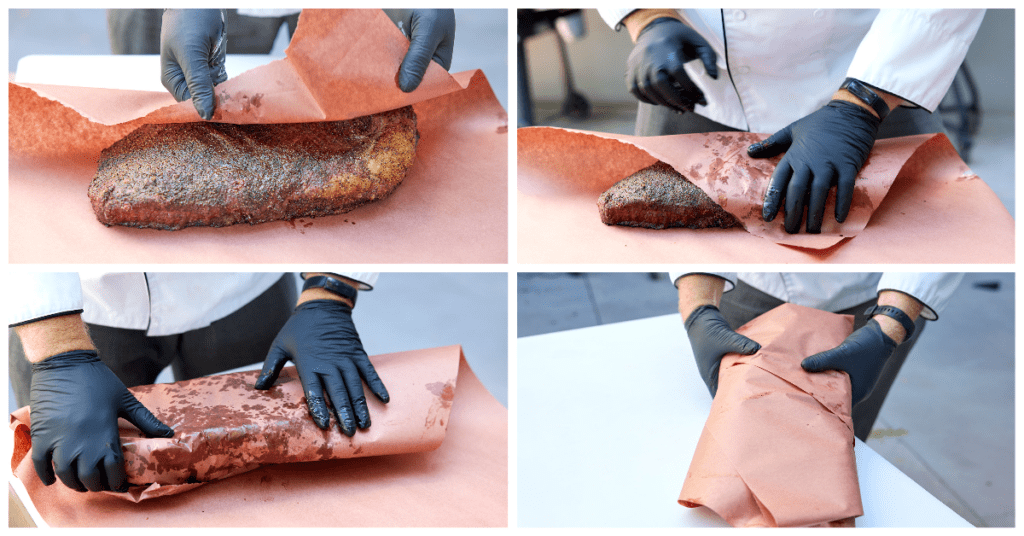
Once your alarm sounds at 150°F (66°C), it’s time to open the smoker and remove the brisket.
Be sure to use gloves or multiple tongs to handle the bulky hot meat. Be sure to close the smoker lid to prevent too much air from getting to your fire and causing a heat spike later on. Wrap the brisket tightly in two layers of peach paper or unlined butcher paper and place it back on the grate in your smoker.
Reset your Signals’ high alarm to 203°F (95°C)
➤ The Stall…Watch for It
The stall is the point where cooking seems to come to a complete halt. What was once moving along at a steady clip, the brisket’s internal temperature will seem to plateau, typically around 155°F (68°C). This temperature plateau can last for hours. The meat is essentially sweating, and losing heat through evaporation. The wrap will help retain moisture in the air around the meat, preventing evaporation. This will help the meat move through the stall more quickly with less drying. But sometimes patience is still required at this stage.
5. Continue Cooking
A wrapped brisket will feel direct heat less keenly, so at this point, you can turn your smoker up a bit. We turned ours to 275°F (135°C) to help push for the goal a little faster.
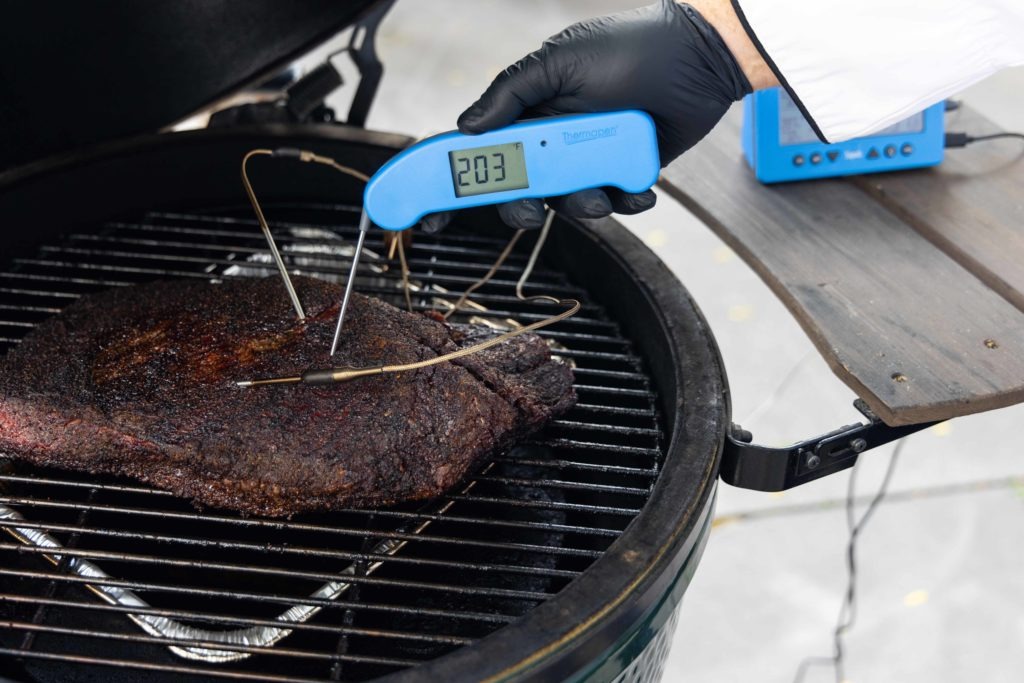
Mind you, it is a little faster. The meat still needs a couple of hours in a higher temperature range to fully render fat and dissolve collagen. Brisket can be done in a range of 200-210°F (93-99°C), but as a general rule, it’s safe to bet on 203°F (95°C).
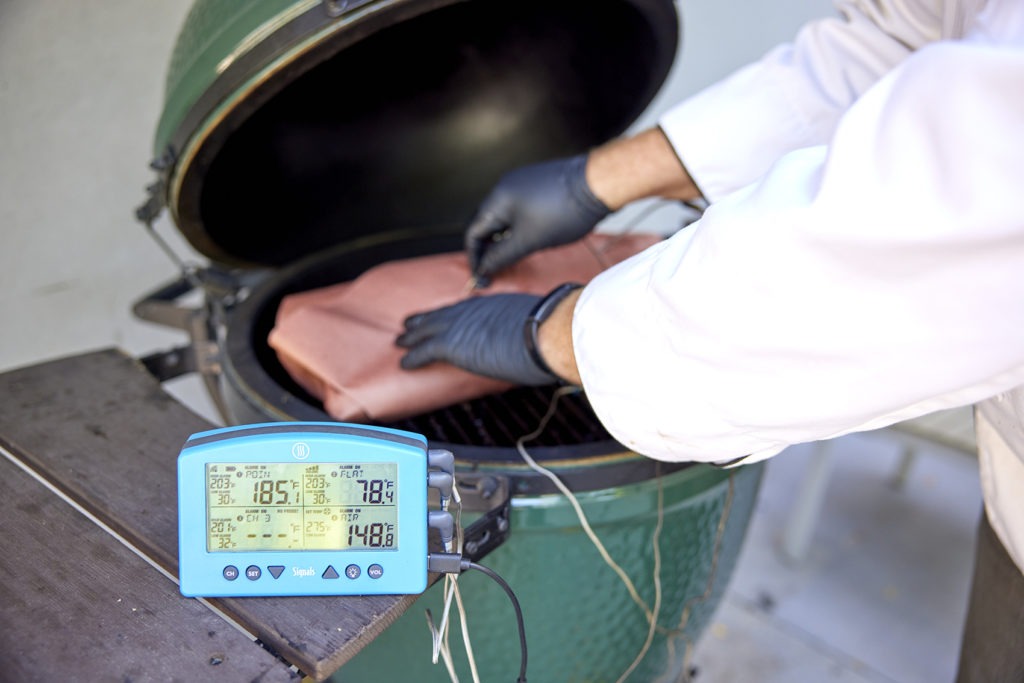
Brisket should be tender but not so tender it’s falling apart. You should be able to slice it into pieces that can just hold together, requiring a little pull to come apart. At perfect doneness, the entire hunk of meat will feel soft and jiggly. A Thermapen® ONE can be used to spot-check the temperatures as well as feel for internal tenderness.
➤ How Long Will It Take?
Who knows?!? How long a brisket takes to cook will depend on fat content, trim, size, smoker, and probably another half-dozen factors.
If you surmise that a brisket will cook in 8 to 10 hours, you can gauge that after about 4 hours, you’ll be in the stall, and after about 6 hours, the brisket will be pushing through the stall, starting its eventual climb to doneness.
Aaron Franklin
Don’t plan on starting a brisket at lunchtime for dinner, though! We’ve found that briskets take anywhere from eight to 14 hours.
When in doubt, start your brisket early. It is much better to finish an hour or two in advance and hold the brisket at a food safe temperature than to keep your hungry family or dinner guests waiting. It also gives you a chance to get cleaned up before everyone arrives.
6. Rest, Then Serve
Once your final high alarm sounds, remove the brisket from the pit but don’t unwrap it or remove the probe! Keep the brisket wrapped and the high temp cooking probe in place while you let it rest.
During the rest, the meat will relax and reabsorb some of the juices that were squeezed out during cooking. But more than that, the meat will remain in the collagen-melting zone until its temperature drops far enough. So the meat is literally getting more tender without adding more heat during the rest!
Keep an eye on the brisket’s internal temperature with Signals to track its gradual cooling. A good, solid rest will improve the quality of the finished meat but it is critical that you track the internal temperature to avoid the temperature danger zone 40-140°F (4-60°C).
7. Carving Your Brisket
There is actually quite an art to carving brisket, particularly if you smoked a “full packer” like we did with two different muscles laid against each other with grains running in perpendicular directions.
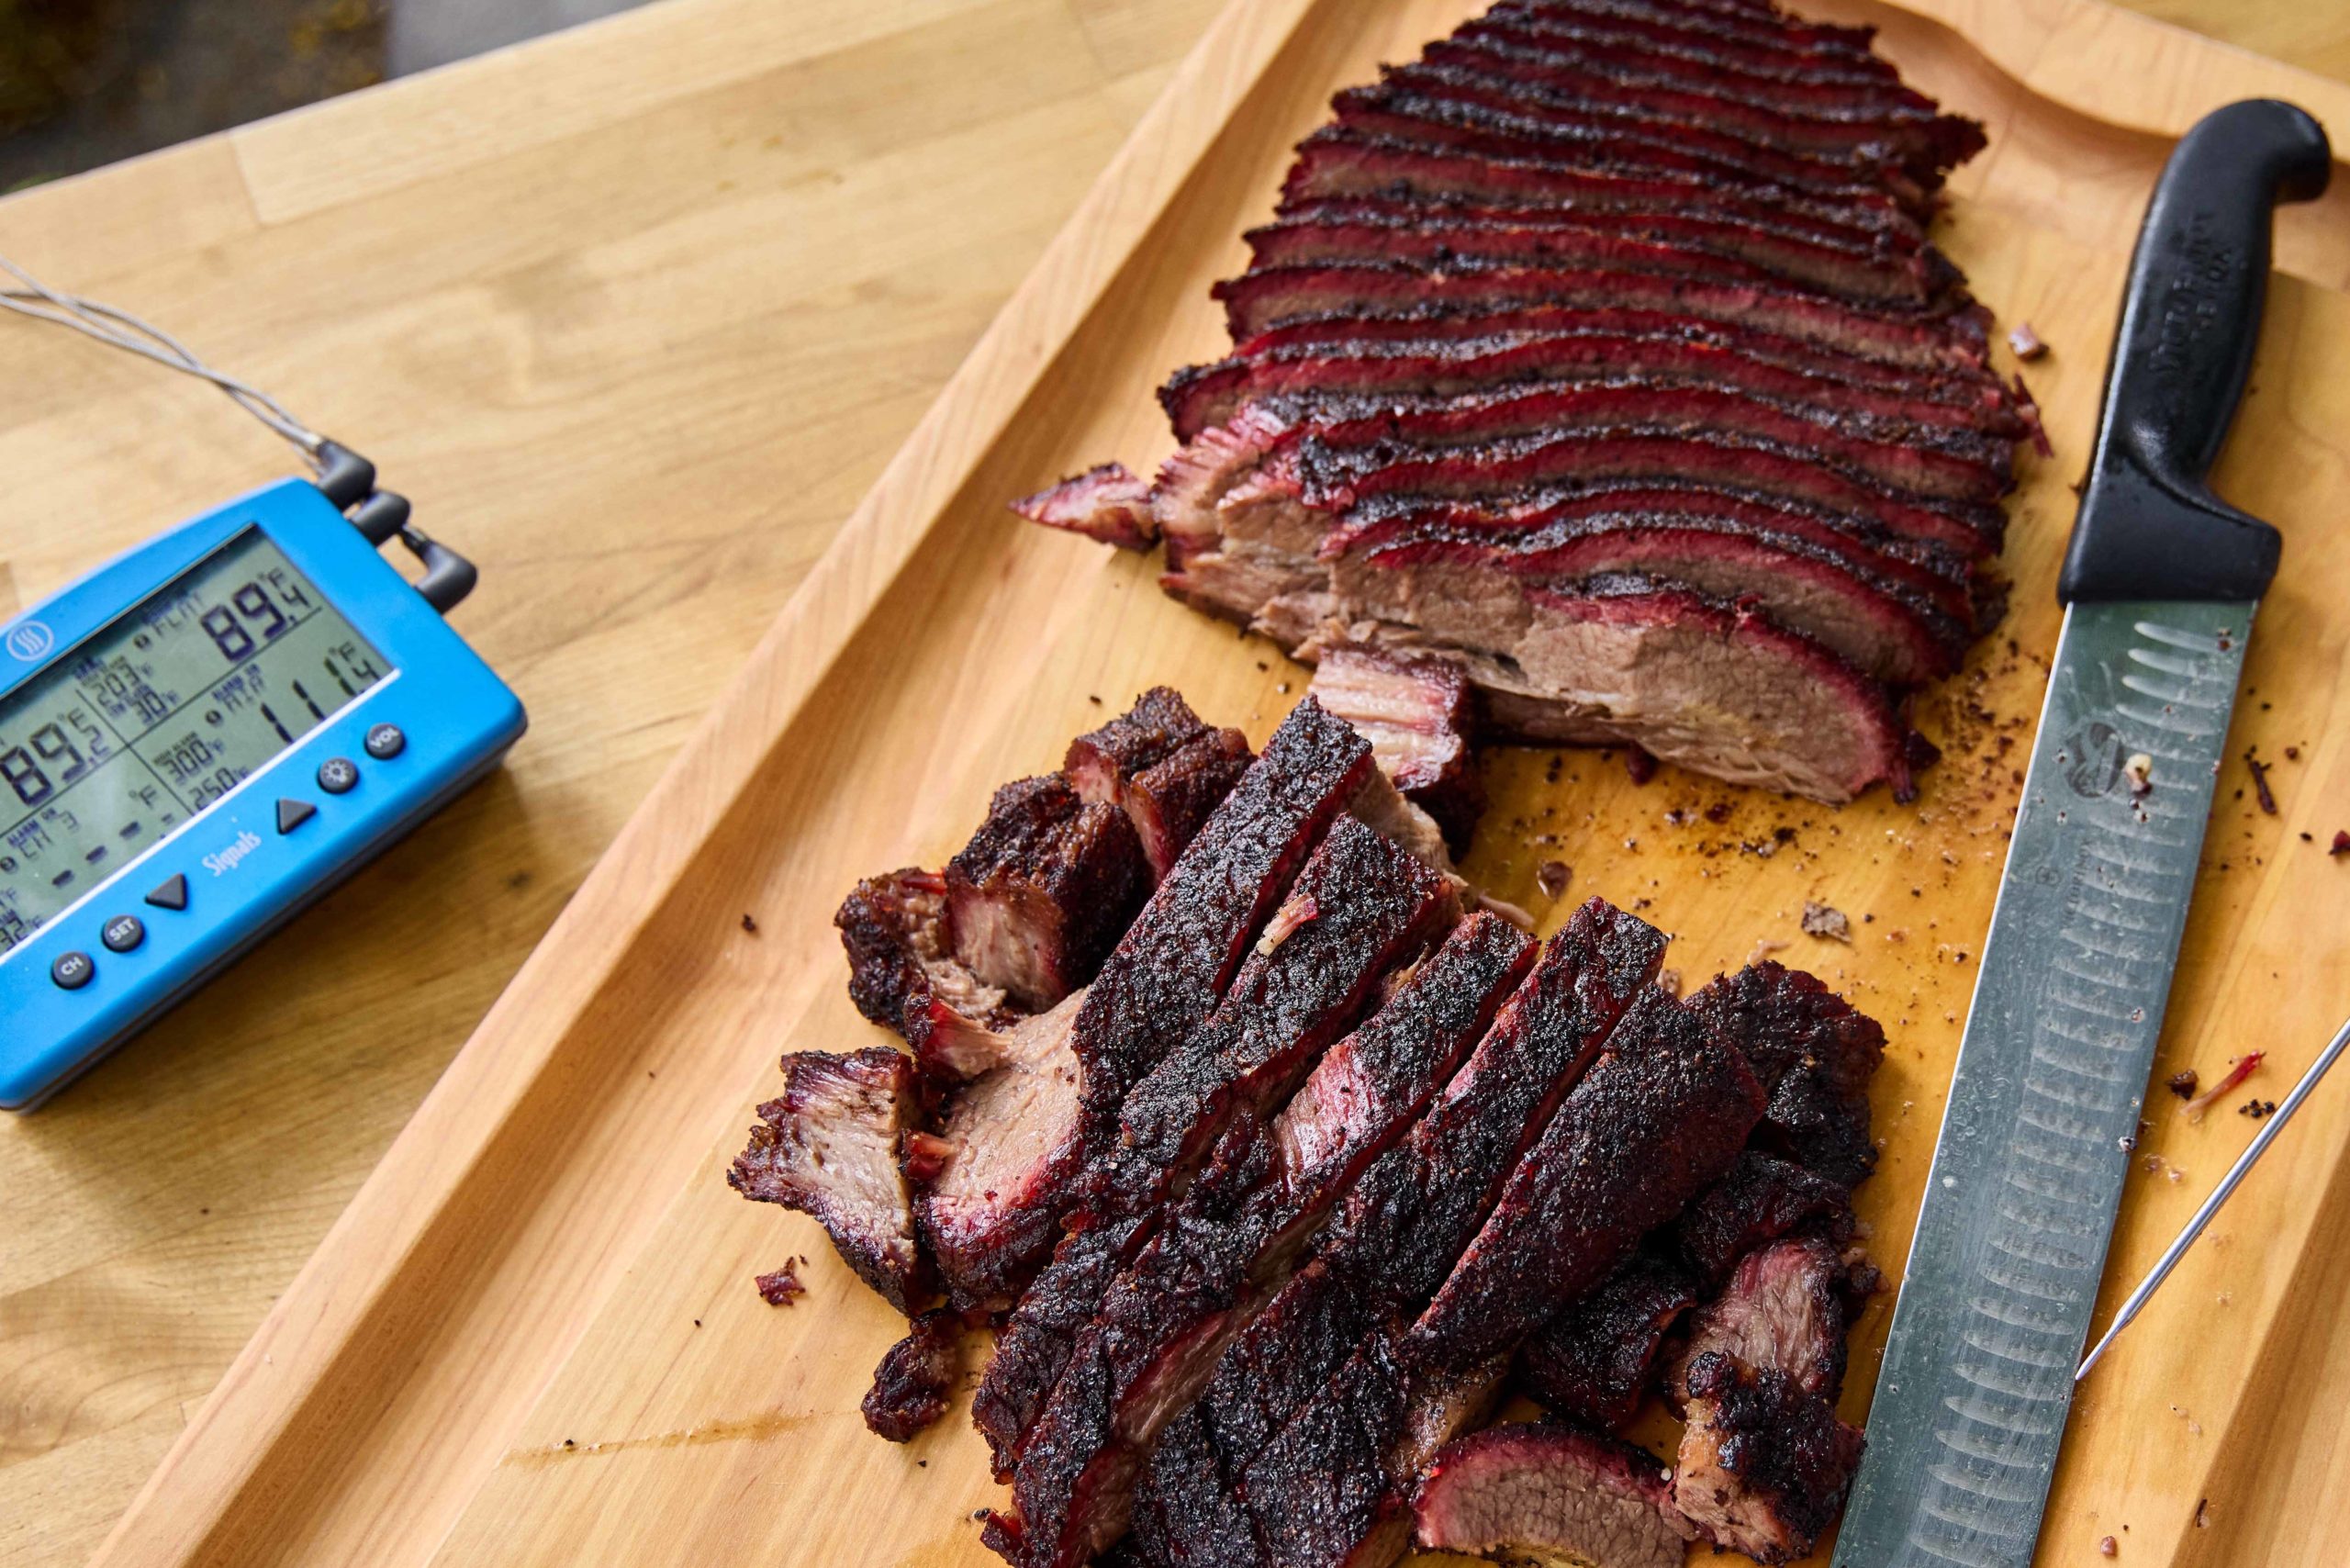
- Start at the tip of the flat, and work your carving knife with a gentle back and forth motion against the grain. Carving against the grain makes for more tender meat. Aim for 1/4″ thick slices.
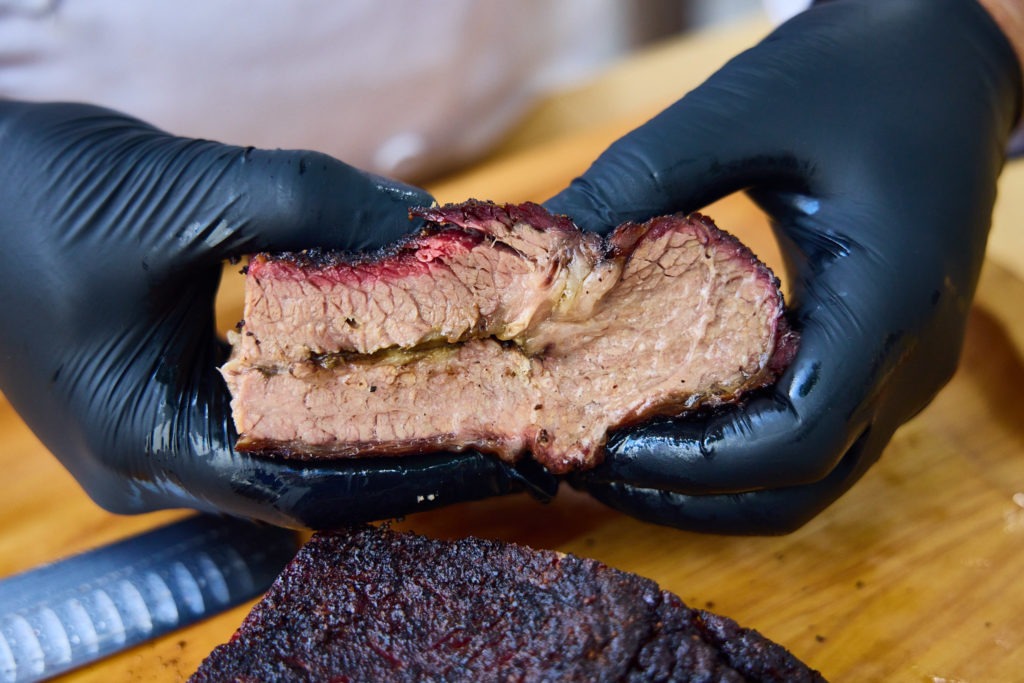
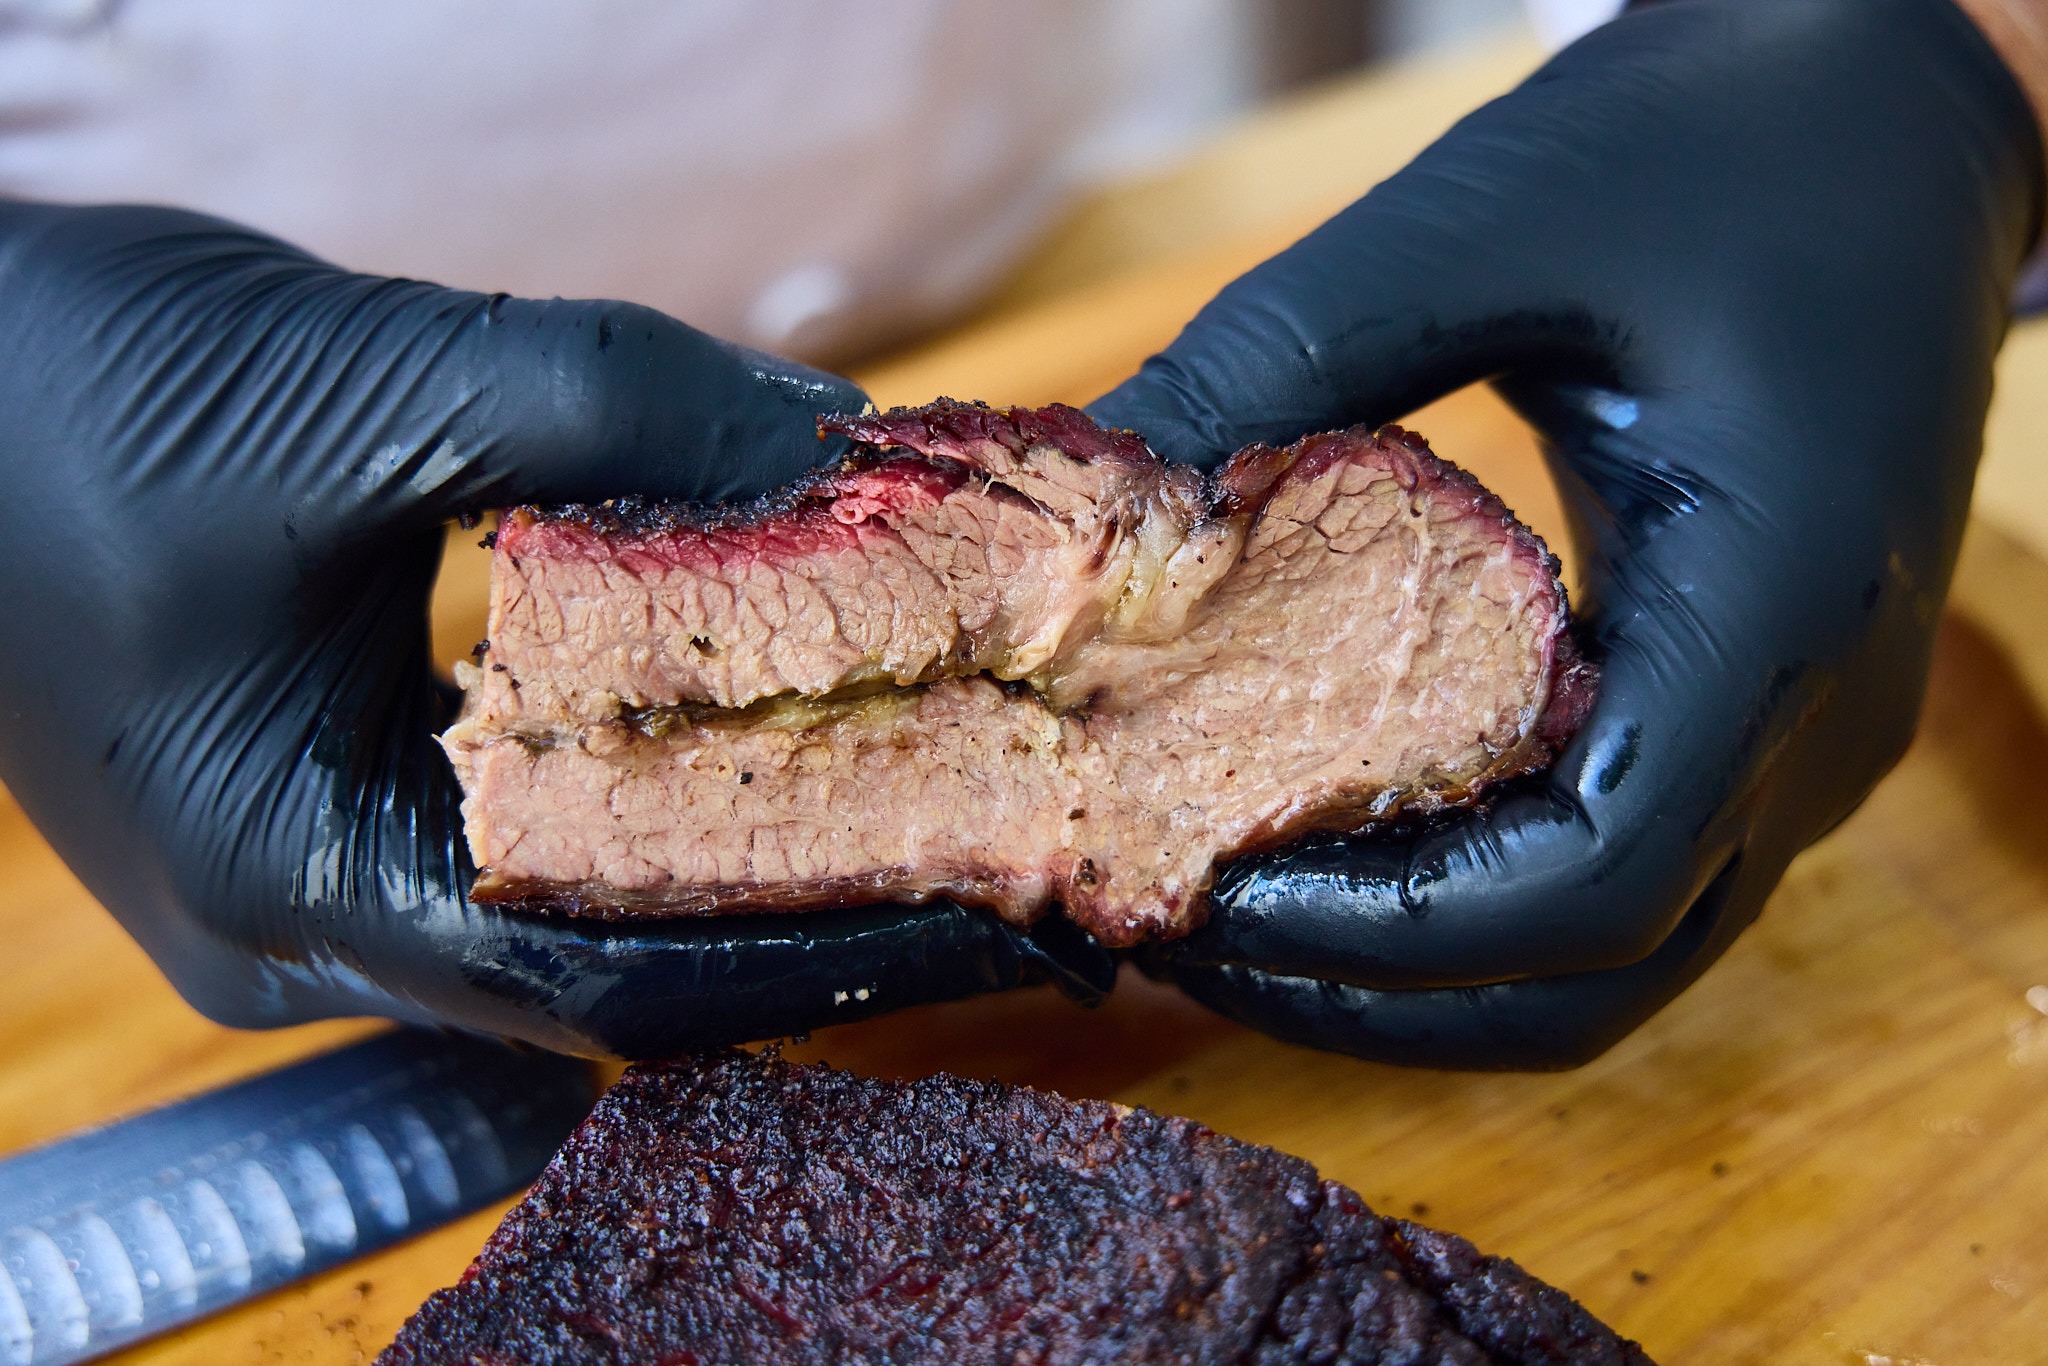
- About halfway to two-thirds of the way through your carving, you will hit the “deckle” or fat layer between the two muscles (pictured at right). Turn your brisket 90° at this point and start carving from the side to carve the “point” muscle.
Brisket is something that takes time and experience to perfect, and temperature control is a central variable in the equation. Using the right tools, like Signals, can help you get it right on your first try, or help you hone your idea of perfection even after you’ve cooked dozens of briskets.
6 Reasons Why Signals™ is the Right Tool for Amazing Brisket:
- Signals uses Pro-Series® probes with thermistor sensors, which provide excellent speed, accuracy, and maintain their calibration well over time.
- Signals reads four temperatures at a glance: one for the pit and three for your various proteins so you can monitor both the brisket AND the environment you’re smoking it in (never depend on your untrustworthy dome thermometer again).
- Signals has both high and low alarms for all channels—it is hard to overstate how critical it is to be alerted when your pit or grill drops below your optimal cooking temperature so you know when to add fuel over an extended cook like a brisket. Even pellet smokers are susceptible to jams, flame outs, and running out of fuel.
- Signals is compatible with Billows® BBQ Temperature Control Fan. Cook perfect, succulent BBQ meats over the course of many hours without having to worry about flareups, burn-outs, vent adjustments, or tending the coals. Confidently control your BBQ with ThermoWorks quality precision.
- Signals features a rugged industrial housing that is both splash-proof and shock resistant and will last a long, long time (it also features a convenient backlight).
- Signals can attach to your home WiFi and upload data to your ThermoWorks cloud account, where you can visualize data and study it to improve later cooks. You can also save notes to each cook about things you did well and what you want to improve.

Brisket isn’t just a meal. Perfecting it is a pursuit, a craft, a challenge, one that rewards you with food, satisfaction, and the admiration of your family and peers. It’s a performance as much as it is a cut of meat. And it sure isn’t cheap! With all of that riding on your cook, it’s important to use all the tools and knowledge you have at your disposal to strive for perfection. Use this post as an outline for your cook and use the right tools. Soon enough, you’ll be making pro-level brisket like you can only imagine.
Enjoy the brisket you’ve patiently worked so hard for!
Shop now for products used in this post:
Resources:
Franklin Barbecue: A Meat-Smoking Manifesto, by Aaron Franklin and Jordan McKay
Camp Brisket, Texas A&M University Department of Agriculture and Life Sciences



This is a GREAT article on smoking brisket! I learned a lot from this and I’m anxious to try smoking brisket.
Excellent article! I have 2 briskets in a slow thaw and thermoworks products at my finger tips. This is going to be fun and delicious! Thank you!
This looks like a very good and simple way to smoke a brisket. I can’t wait to give it a go. What is peach paper and how is it different than butcher paper? Also do you recommend injecting the brisket at all?
Alan,
Peach paper allows the meat to breathe better than standard butcher paper does–give it a try! As far as injecting brisket goes, it’s a matter of personal preference. We don’t with ours, but you could give it a try. If you do, let us know how it goes!
Thanks,
-Kim
Butcher paper is waxed on one side and you don’t want that wax next to your meat. Peach paper is not waxed.
What an excellent article on Brisket. My complements and will definitely be using my ThermoWorks MK4 on my next one.
Thank you! My husband has smoked several briskets and has experienced this ‘stall’ it freaks him out and he does everything he can to increase the temps (including using the shop vac to blow on the coals which covers the meat in a layer of ash ?). I will show this to him so he can relax and I can enjoy the
Un-ashed bark!
I disagree with using only salt and pepper as a rub, I have a rub that is fantastic which includes about 10 different spices.
Amy,
I’m so glad our post was helpful! The stall can certainly be frustrating, and wrapping the brisket is a helpful step. Many purists believe a 50/50 salt and pepper rub is the only way to go for a brisket rub, but there are many different rub recipes out there that are fantastic! Let us know how your next brisket cook goes when you give wrapping a try.
Thanks,
-Kim
Great article. I wonder if you could someday do an article to expound a bit on the last bit, keeping the brisket (or any other long smoking item) warm, and perhaps reheating it. I’ve found the greatest challenge around a brisket is the least exciting one, namely getting it on to the table for guests at the right time. I’ve learned to finish up well ahead of time, but haven’t found any good guidelines for keeping it warm without making a bark soggy, or drying it out. This feels like the sort of topic that would be ripe for a ThermoWorks experiment, and would benefit from accurate temperature monitoring. Thanks again.
Sure! We like to use a camp cooler and leave the brisket in there, often unwrapped, until it’s time to serve. If your oven will stay low enough (use a tool like SquareDOT to figure out its actual temperature) you can keep it in you oven on “warm”—that should be about 140°F, don’t go higher than 160°F. If the bark was well set to begin with, it should stay ok. Most BBQ restaurants hold theirs for up to 12 hours wrapped in peach paper.
What a great article. I made a brisket from here and used the ‘crutch’ as you called it. It took forever to raise its temperature from the stall. Overall 11 hours. Boy was I hungry. It turned out great and the guests loved it.
I’m a huge fan of my ThermoWorks thermometers. The wifi features of my Smoke and Signals units give incredible accuracy, flexibility, and confidence.
I like this article. The times and temperatures align closely with my experiences.
One thing I like to do is half wrap a foil boat under the peach paper wrap to catch all that wonderful juice to pour back over the final cut product.
Smoke on!
Enjoyed the article, but the question i have is do you want the the flat or the point to reach 150 deg before wrapping, also the same question for the finale temp
There’s room for discussion there, especially when it comes to wrapping. We tend toward point temp, flat gets to 150 too quickly. For the final temp, it should be pretty close, but, again, we favor point. A flat that is slightly overcooked is better than a point that is undercooked.
I want to cook a 4kg end brisket in my kamado Joe does the same method apply and how long should it take. I found your article very informative and helpful.
Yes, the same method applies. I’d plan on at LEAST 8 hours for it. If you’re done early, keep it warm in a cooler covered in a towel, it’ll hold great.