Simple, Perfect Roast Beef Tenderloin
Excellence vs. Perfection
I have not always been a chef. No, my roundabout education began as a music major at a small junior college with a proud and wonderful music department. Every year at the end of spring semester the students gave recitals as part of their studies. I would sit and listen to amazing young musicians, many of whom would go on to prestigious universities and conservatories to further their studies. Their skill was undeniable as was their promise, and the applause they received was not feigned or given out of politeness. But if one was to compare one of the many vocalists, pianists, or horn players to concert professionals, there was no comparison. Scott and Jenny could in no way compare to Emanuel Ax or Vladimir Horowitz.
There is a difference between very good, or excellent, and perfect. In an Internet full of hyperbole and over-exaggeration, where superlatives are neutered by ubiquity, that can be hard to remember, but it is an important thought.
A perfect dinner, a perfect beef tenderloin
This is the season of greatest festivity, with friends and family coming together in the darkest month of the year to celebrate in the light of love and friendship—a sentiment often expressed through lavish and lovingly prepared meals. The holiday season is one where, as hosts, we perceive more keenly the difference between excellence and perfection. In this post, we will explain our method for making beef tenderloin that is, to our tastes, perfect. Read on to learn how.
Contents:
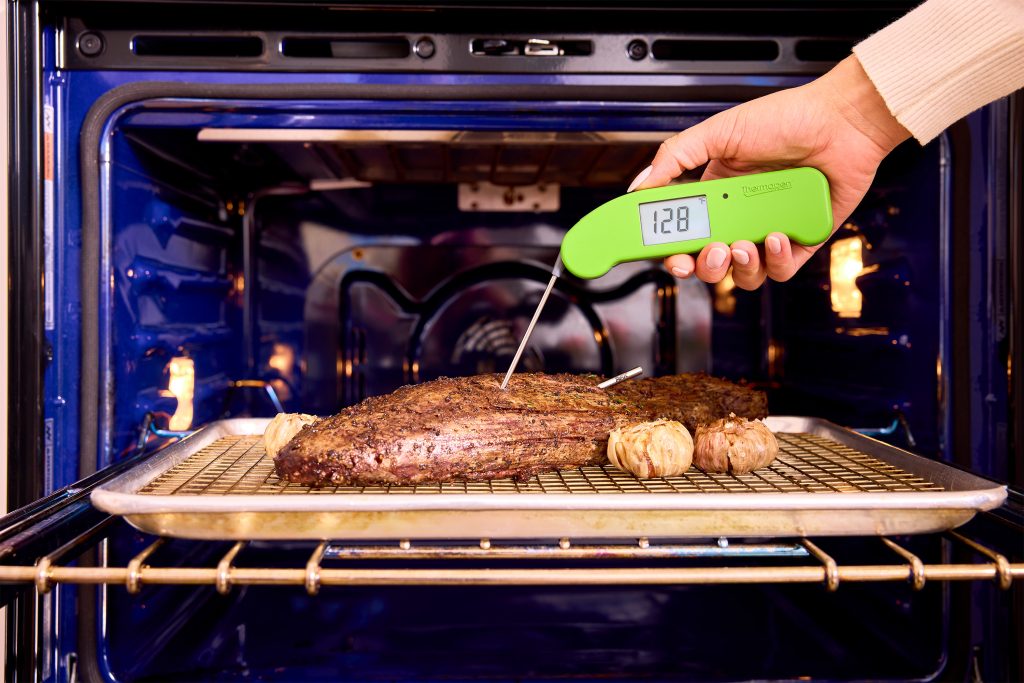
Get the tools for temperature perfection here:
Perfect tenderloin?
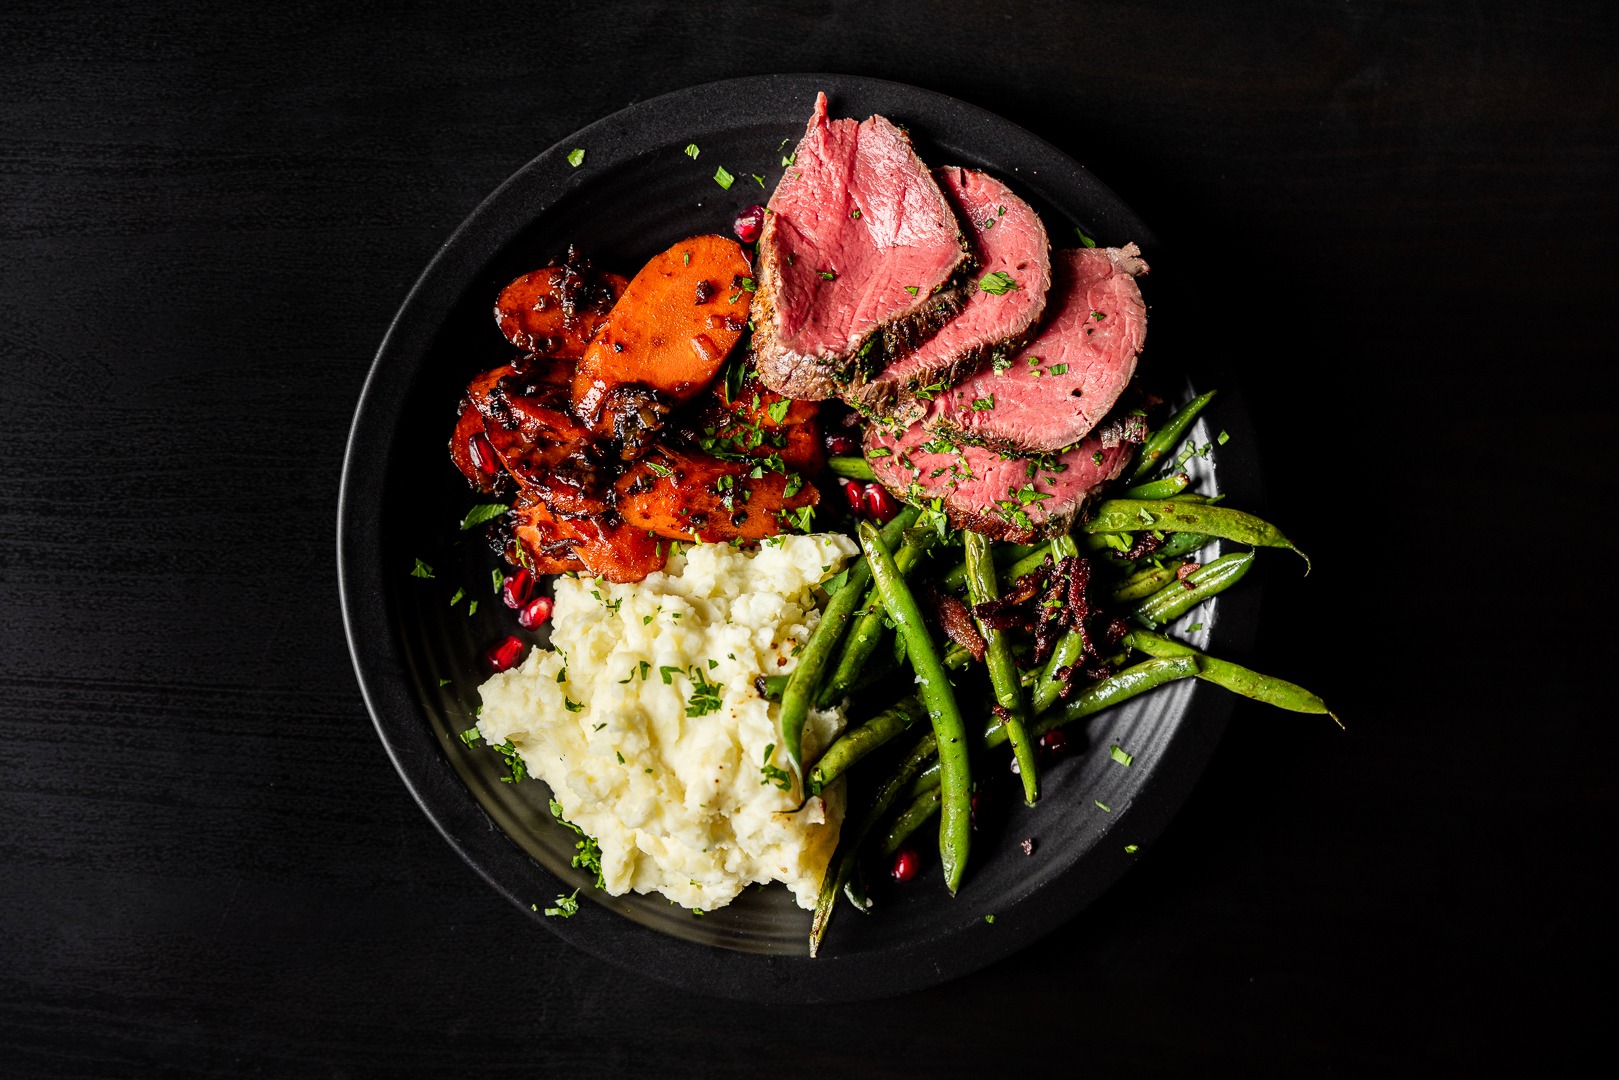
So what does perfection mean in a beef tenderloin? An excellent tenderloin is nicely pink in the center, is not tough or dry, and has good browned flavor on the outside. A perfect tenderloin is done just right, with an even color from one side to the other with no grey ring. It is tender, enough to cut with a fork and is filled with its natural juices. Perfection means not overcooking any of this expensive cut. It means letting the quality of the meat shine in its own right. Tenderloin perfection means that no matter whether you serve it hot from the oven for a dinner or cold sliced on a mid-day buffet, it is tender and juicy.
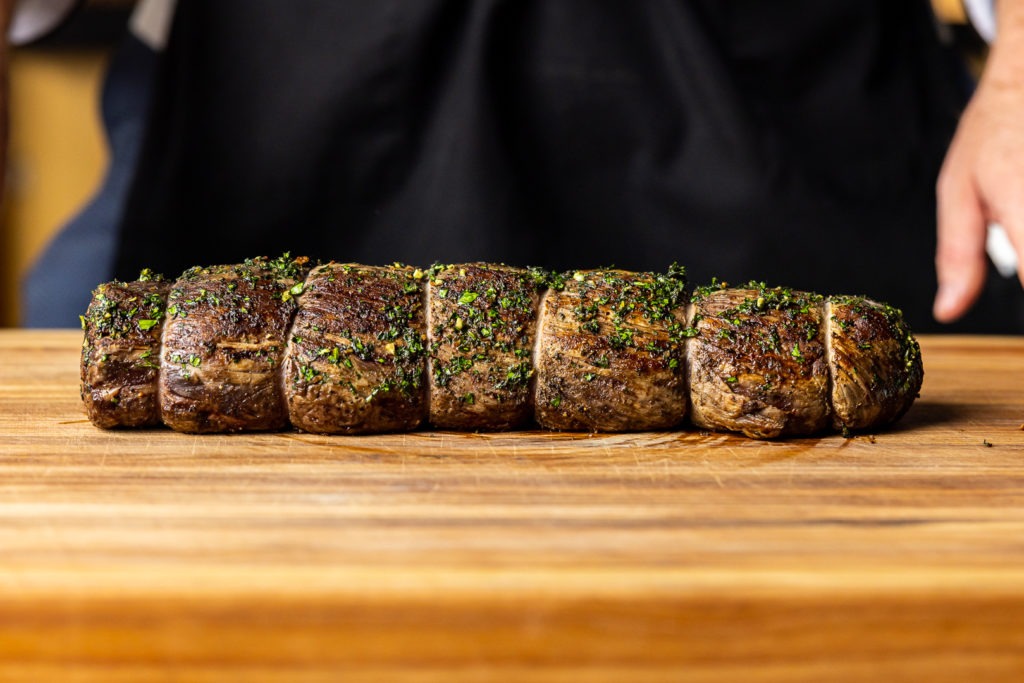
Beef tenderloin problems
Perfection, thus named, is inhibited by two prime elements: guests and biology. It is a sad fact that some guests like overcooked meat, even cuts of meat with the potential for a texture one could describe as “buttery.” If Uncle Phil just can’t abide even a shade of pink in his roast, is the rest of the party doomed to suffer his philistinism with him? No! Tenderloin is actually a perfect dish for this circumstance. Tenderloin can be cooked to a perfect medium rare—which is as low as most guests will want their meat to be cooked—and any dissenters can be appeased by quickly browning their slice in a hot pan with some butter and, if you are feeling particularly magnanimous, a sprig of fresh thyme.
Biology is a more difficult adversary than Uncle Phil. The very composition of the tenderloin (which we will cover in greater depth below) presents challenges for the cook. Tenderloin is actually quite an unforgiving cut of meat. overcook it by just a few degrees and your beautiful, expensive roast will be tough and dry. So how can we keep in the good graces of this king of cuts? Let us look first at the tenderloin itself to learn what its nature will tell us about how to cook it. Then we will consider various methods for cooking, try a demonstration of them, and observe the results. In this way, we can hope to achieve a perfect roast, despite the difficulty of the meat and the objections of Uncle Phil.
What is tenderloin?
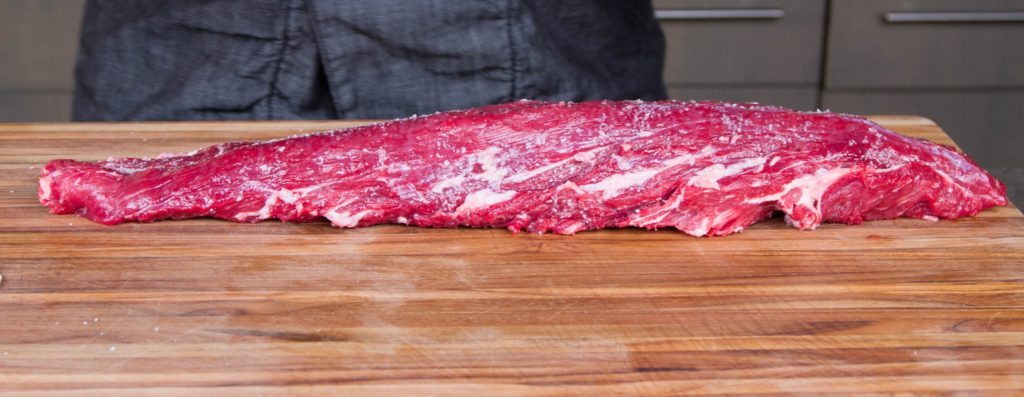
Tenderloin, the psoas major muscle, is properly named: it is one of the most tender muscles of a cow. It runs from the last ribs of the cow back to the rear hip. The muscle is responsible for moving the leg forward, but not for lifting it. That lack of resistance work translates to amazing tenderness when cut for steak or a roast. It is also one of the most sought-after and priciest cuts, with a mere ~14 pounds of pre-trimmed tenderloin available per 1200 pound cow. Natural tenderness means there is little connective tissue in the meat, so we needn’t cook it to a high temperature to make it palatable.
➤Composition
Not only does the tenderloin have little connective tissue, but it also has very little fat. Among the leanest of the beef cuts, tenderloin relies on the muscle fibers themselves (not on massive seams of fat like a prime rib) for flavor and on protein-bound water for juiciness.
➤What that means for cooking
These biological facts combine to paint a picture of how we might cook this meat:
- it will be tasty and tender at lower pull temperatures because of the lack of connective tissue
- cooking it too far will dry it out because there are no fat stores to keep it moist and the contraction of the muscle fibers at high heat will expel the water bound in the muscle
And so
- we should try to avoid high temperatures and
- we should consider dissolving/denaturing some proteins with salt before cooking to help retain the moisture
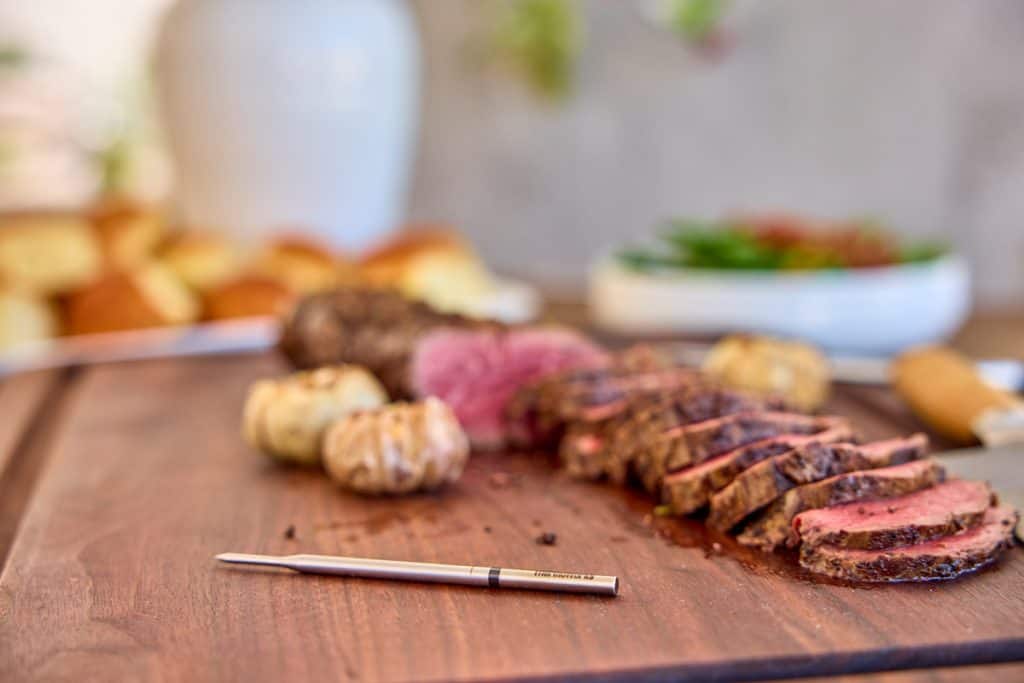
Accepted methods for cooking beef tenderloin
The food ‘web and a great many cookbooks (very many of them highly reputable) recommend blasting a tenderloin in a hot oven, 450–500°F (232–260°C), for a relatively short time to cook it, followed by a counter rest. The justification lies in the air-searing of the exterior, creating a crust of delicious Maillard browning.
Other authors and chefs call for a lower heat and slower cooking, usually preceded by a sear in a hot pan for the Maillard effect. Less drastic thermal gradients should lead to a more even cook through the width of the roast, though we may be sacrificing a crust due to the natural basting that will occur over a longer cook, eliminating some of the crispness of the crust.
Some recipes call for a reverse sear, but the “flying blind” nature of searing after cooking, when the meat is already heated and stands in danger of overcooking, is hard to accept. Keeping a probe thermometer in the meat during a sear is difficult, and we want as close to an exact finish temperature as we can get. Based on our previous trials with prime rib, we opted to go for a chill-sear-cook method for one of our tenderloins. We tested the high-oven temp method with the other tenderloin.
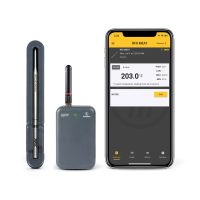
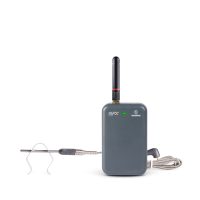
We wanted to see which method resulted in a more perfect Christmas roast. So we got out our RFX MEAT wireless probe thermometer and got to work. RFX MEAT is perfect for larger roasts that take a little longer in the oven because the app allows you to go about your business while keeping a weather eye on your rising meat temperatures.
Method of experiment
To determine the best cooking method, we took two tenderloins of comparable size, salted them with about 2 Tbsp of coarse kosher salt, and tied them with butcher’s twine to create two roughly even cylindrical shapes. We placed Pro-Series® penetration probes ~¼” below the surface of each to track our chill temps and placed them in the freezer at 2°F (-17°C) until our low-alarm sounded at our set 29.5°F (-1°C) (roughly 90 minutes). At this point, the exterior of each roast was cold enough to be stiff to the touch—partially frozen. We prepared a rub of olive oil, black pepper and minced fresh parsley, thyme, and garlic to coat each roast.
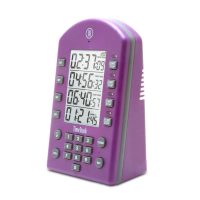
We seared the first tenderloin on a 450°F (232°C) cast iron griddle (but a roasting pan can work too), then rubbed it with the herb-oil mixture and placed it on a wire rack set into a cookie sheet in a 225°F (107°C) oven, we re-set our penetration probe and set the high-alarm to 125°F (52°C). Lastly, we started a count-up timer on a TimeStack to keep track of the cook time.
The second tenderloin was rubbed with the herb mixture straight out of the freezer and placed on a wire rack set into a cookie sheet in a 475°F (246°C) oven. Again, we placed our FRX MEAT probe in the center of the roast and set the high-alarm for 125°F (52°C). We used one of the other channels on our TimeStack to start a count-up for the high-oven roast.
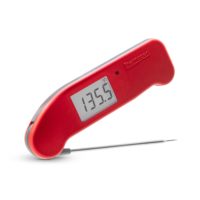
When each roast’s high alarm sounded, we verified the temperature with Thermapen ONE and allowed them to rest on the countertop finish carryover cooking. The slow-heat roast was given about 10 minutes of rest, and the high-heat roast was given at least 20 minutes. (Lower heat cooking methods require less resting because the temperature gradients don’t have as far to equalize.)
Results and comparison
The roast in the high oven reached its pull temp in just about 45 minutes, while the tenderloin in the lower-temp oven took much longer, clocking in at about 95 minutes. The time difference was significant, but, as we’ll show, the wait was well worthwhile.
➤Color, crust, texture
The high-heat roast had a slight crust that impeded the initial knife cut but added very little to enjoyable texture. It was beautifully pink in the pink center but was surrounded by a 1/4–1/2” grey band all around the edge. Once we began cutting, the meat yielded nicely to the knife and was tender and tasty. It was a great roast, one that a cook could put before guests without embarrassment and which would prompt sincere compliments.
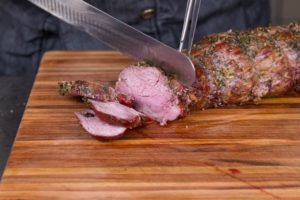
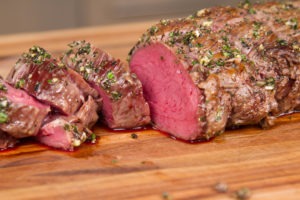
But the low-heat roast. Oh, the low-heat roast. The low-heat roast had no substantial crust to it, but was perfectly pink and evenly colored from edge to edge, with no discernable grey band at all. The tenderloin was visibly juicy and yielding under the knife and had a texture that was surprising in its tenderness and softness. You could cut it with a spoon. It was a roast that a cook could present with the full expectation of immediate and enthusiastic praise (as well as fond mentions months later).
➤Herb rub
One other difference was noticeable aside from the coloration and texture of the meat itself, and that is the effects of the heat on the herb-rub. The herbs and garlic on the high-heat roast had a much paler flavor than the low-heat version. This makes sense, as the high heat drives out the volatile oils and fragrances from herbs, and cooks the garlic more completely. The herb rub on the low heat-roast was more vibrantly herbaceous, with a more pronounced garlicky bite. We will address that in the recipe below.
Of course, just using salt and pepper is perfectly acceptable and delicious for this roast, but if you want the herby flavor, go for it.
Final outcome
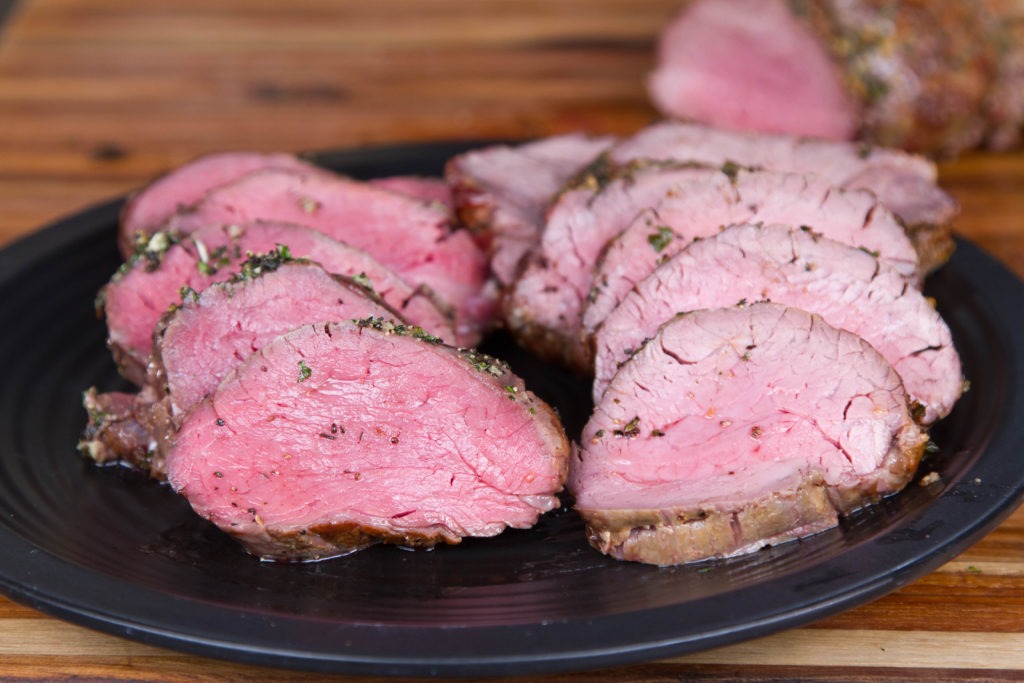
Both of these roasts were pulled from the oven at 125°F (52°C). Notice the consistently pink meat edge to edge on the left. This is the difference between excellence and perfection. The high-temperature tenderloin is very tasty, but the low-temperature tenderloin is evenly colored, soft, juicy and amazing.
Taking thermal control of your beef tenderloin roast by limiting the thermal gradients and monitoring the temperature results in a stunning presentation piece of the highest quality. And the RFX MEAT and RFX GATEWAY thermometer system makes getting “perfect” easy.
For many things in life, “excellent” is good enough. But for your holiday tenderloin roast, you truly can have perfection. All it takes is a little extra preparation and careful monitoring of your internal temperature.
Perfect Roast Beef Tenderloin Recipe
Ingredients
- 1 beef tenderloin trimmed
- Coarse kosher salt
- 1/4 C olive oil plus more for searing
- 1 tsp black pepper
- 2 Tbsp minced fresh parsley
- 1 tsp minced fresh thyme
- 2 cloves minced garlic to lessen the garlicky bite, you could cook it slowly in the oil over medium heat for a minute or two, then let the oil cool with the garlic in it
Instructions
- Instructions
- Tie (or have your butcher tie) the tenderloin into a mostly uniform shape, with the tail-end folded up under the roast to help form a uniform thickness.
- Salt the tenderloin generously and place in the freezer until the outside is chilled and well firm (partially frozen), about 30°F (-1°C).
- Preheat an oven to 225°F (107°C).
- Preheat a cast-iron skillet, heavy roasting pan, or griddle to 450°F (232°C).
- Add 1-2 Tbsp oil.
- Sear the tenderloin on all sides until well browned—about two minutes per side.
- Rub the tenderloin all over with a paste made of the oil, pepper, parsley, thyme, and garlic.
- Place the roast on a wire rack set in a baking sheet.
- Insert your RFX MEAT probe, being sure to insert it up tot he minimum immersion line, into the thickest section and place the roast in the preheated oven.
- Set the high-temp alarm on your ThermoWorks App for 125°F (52°C) for medium rare (higher for more well-done) and cook the roast.
- When the timer sounds, verify the temperature with your Thermapen ONE. If the lowest temperature seen is 125°F (52°C), remove it from the oven and allow it to rest on the counter for 5-10 minutes before slicing and serving.
References
- Bon Appétit
- Univeristy of Guelph Department of Animal Biosciences, Major Muscles of the Carcass
- J. Kenji López-Alt on SeriousEats.com


Can you use a chef alarm for this – I do not have a smoke alarm – & if so how to use it.
Doris,
Absolutely use your ChefAlarm! The Smoke worked so well for us because we were cooking two at a time, but you can use your ChefAlarm and the included penetration probe of in the deepest part of your tenderloin and still set the alarm to 125°F to get great results. If you use it for the chilling process, you can also set the low-temp alarm for 30°F and place the probe just below the surface. Good luck with it and let us know if you have more questions!
The chef alarm works well. It’s fast, accurate and the alarm is loud enough to get your attention.
A tenderloin is about the least beefy tasting cut so not over cooking to keep its great buttery texture and a good herb rub for flavor is a good target. The lower you cook it the more even it’s going to be. Try a salt rub for a day or two then let it sit out to warm up then a quick trip to the freezer to get the exterior cool. Dry it, sear it for some flavor, then the rub and low and slow in the oven.
I just made an eye round using the low-temp cooking method and my Smoke Alarm with the long probe from my ChefAlarm and the one that came with the Smoke Alarm. The shape of the roast was extremely irregular – very thick at one end and very thin at the other end. I tried to chill the thin end by placing that part of the roast in a plastic bag in iced water for an hour. That gave the thick end time to warm slightly while the thin end was cooled to near freezing. I set the oven temp to 200ºF and raised it to 225ºF when the internal temp of the meat reached 110 at the thick end. I removed the roast when the internal temp reached 115ºF at the thick end. By that time the temp at the thin end was up to about 125ºF. I left the probes in place while it rested and was pleasantly surprised that the internal temp at the thick end rose to 123ºF and the temp at the thin end actually dropped to 123ºF. I let the roast cool completely and placed it in a very cool place (outside) overnight. The next morning, when I sliced the whole roast on a commercial slicing machine, it was perfectly uniformly rare-medium-rare.
I’ve done these roasts many times before, but the Smoke Alarm gave me the most perfectly and uniformly cooked piece of meat I’ve ever made. Being able to monitor the temperature at both ends of the roast at the same time was what made all the difference. The Smoke Alarm is one of the best designed cooking devices I’ve ever used. It’s really indispensable.
A keeper; thanks. As to the results, I can understand the temp impact on the rub, but I’m confused about the difference in even coloring. I’d think that one would pull the high-temp roast at a lower temp, say 121 – 123, to allow for more aggressive carryover cooking. Wouldn’t that better balance the results and be a fairer comparison?
Frederick,
Thanks for writing in! You might make a fair point, but the thermal gradients are still going to be pretty stark in a 475°F oven.
Tenderloins, with their lack of thickness, don’t have as much thermal mass surrounding the center. So, given similar oven conditions and a similar center temp a large roast, like a prime rib, will have more carryover cooking than a thin roast like a tenderloin.
Because of this thermal-pressure difference, you just aren’t going to get the same even color. You may get less of a grey ring, but you will also be more likely to have a red rather than pink center. If we’re looking for even color across the whole roast, low temp is the way to go.
If you try it out, let us know how it goes!
Makes sense to me, now, Martin. And very timely, as I’m slow roasting a prime rib at 225º for Christmas. I got a surprising +10º carryover rise last year from a 200º cook, and this article and your reply helps me understand it. Thanks!
What is the purpose of freezing before cooking? Thanks! PS: I love my Smoke!
Debra,
Freezing before cooking creates a barrier of cold under the surface of the meat so that when you sear the meat, it won’t be able to push the internal temperature as high. The cold ring under the surface acts as an insulator for the sear so that no overcooking occurs. It’s a great way to help ensure that you have perfect edge-to-edge color.
Thanks and enjoy that Smoke! I love mine, too.
We do Beef Tenderloin similarly to #2… only we don’t pre-sear the meat. Instead we do a reverse sear at the end.
We (1) put the seasoned meat into the lower temperature oven; (2) when it is at 125 we take it out, tent it and let it rest. (3) When the resting temperature begins to drop / gets back down to 125 we quickly toss it into a 450 degree oven / under the broiler (turned a couple of times) just long enough to get a nice dark sear on the outside.
You end up with that nice even cook throughout, AND the flavorful crust so many of us enjoy!
The resting is what saves you on this after the cook and before the sear. I’m glad this method does so well for you!
Looking forward to trying out the low temp roasted version. i have a 6.5 lb tenderloin roast. Do you have a general idea of how long this will take? chilling the roast down to freezing promises to extend the time somewhat. Is 2-3 hours a good estimate?
Jason,
Yes! 2-3 hours is a good estimate. I think you will enjoy the results exceedingly!
Martin,
it was as close to perfect as anything ever needs to be. Thanks for the recipe.
Hi Jason, going to try this recipe tonight. How long did the cook time take for 6 1/2 pounds of tenderloin? Was it closer to two hours or three hours? Thank you.
I’d plan on it being closer to 2 hours.
Thank you, Martin. In general is there a time per pound you recommend when using this recipe of slow cooking?
That’s an interesting question, because it has an interesting answer. Once you get a tenderloin that is much longer than, say, twice its width, the cooking time stops increasing. Because of the cylindrical nature of the cut, once you go much past its diameter in length, heat is entering the meat as quickly form the surface of the cylinder as from the ends. So if we were to abstract and imagine a 10-foot long tenderloin, it wouldn’t take any longer to cook (in our 10-foot oven) than a tenderloin that is only 2 feet long, with an accompanying difference in mass and weight. Further, an infinite tenderloin in an infinite oven burning infinite fuel would be done in the same amount of time as a 3-pound tenderloin.
And since most tenderloins top out at maybe 5 pounds when poorly trimmed, it’s hard to assign a per-pound cook time.
So, to answer your question, for any roast that is over about7″ long, I’d plan on about 75-90 minutes. The variation in time there will depend on the diameter of the tenderloin and its initial starting temp.
Thank you this recipe! My tenderloin was perfect!
90 minutes in the freezer, pan seared on a cast iron pan, then about 90 minutes in the oven, at 126 degrees.
Sue,
I’m happy to hear that you liked it! Happy cooking!
Thanks for clarity on timing!
I am now brave enough to attempt this for dear friends!
Psyched!
I’m really enjoying your recipes and commentaries, Martin. This one in particular was as clear as a bell and, what is more, motivating! Thanks.
Thank you so much!
I have always been concerned that reverse searing creates a rapid change of temperatures at the end during the sear when grilling, making it difficult to get the exact desired pull temperature. Partial freezing of the tenderloin roast allows searing first which is great. It is far easier to obtain the desired pull temperature if cooking on low heat at the end. How well does this technique work for thinner cuts such as steaks and do you recommend it as opposed to the reverse sear? If so, after the sear, would you recommend turning only once, or more?
It can work wonderfully for smaller cuts like steaks. But when it comes to steaks, I tend to favor the reverse sear. I pull from the oven 15–20°F below my target and then sear it in a hot pan. If you give yourself enough thermal space, you can achieve excellent results. And yes, diring the final sear when reverse searing, I try to only turn once.
Followed the directions as stated. Had the roast on top of potatoes. Pulled it when thermo probe was at 128 F. Found the roast after sitting was still very under cooked. I had checked it with thermapen and it did register 128.
Could the freezer have caused the meat to be extremely bloody? Also IMO it did seem very rare.
What temperature do the rest of you use to assure a nicely pink but not so bloody roast?
If it read 128°F it was 128°f regardless of how frozen it started out. But in truth, 128°F will be on the rare side for some people. Give it another 5°F and you might like the result better. Do make sure you’re tempting the meat all the way through, though! Insert the Thermapen almost all the way through the meat and pull it back out slowly, looking for the lowest temp you see. You probably did that, but if not, it’ll help you have a better idea of the true doneness.
I listened to the low and slow, then fire it up…my first while beef tenderloin was PERFECT! pink to the edges, not raw. It pleased everyone! My meats have all been amazing since I purchased my Thermopen. I absolutely love it!
I’m confused. Are you searing the roast or not. In your description of the recommended method you say:
The second tenderloin was rubbed with the herb mixture straight out of the freezer and placed on a wire rack set into a cookie sheet in a 475°F (246°C) oven.
BUT in the instructions you say to sear the roast first. WHICH?
Sear first! We did a test, one with a sear and one right out of the freezer. But we found that the one where we freeze first, then SEAR then rub with herbs was better.
What about lamb chops, how do you recommend cooking them since they take a short time. Also, a lamb rack cooking preference? Thank you!
For rack of lamb, check out our instructions here: https://blog.thermoworks.com/how-to-roast-a-rack-of-lamb/. And for lamb chops, I recommend cutting them two-bones thick: https://blog.thermoworks.com/lamb-chops-recipe/
I like to cook on a smoker whenever low & slow is the recommending approach. Does searing first reduce the smoke flavor?
It might inhibit smoke penetration a tad, but you should still end up with a nice bit of smoke in it.
Martin I think you did a wonderful job explaining two methods for roasting tenderloins and comparing the results with a scientist eye using doneness temperatures for accuracy and reproducible results. However, I think an important temperature was left out. I would have liked to have known the highest temperature reached by each roast during the resting period and the final temperature reached after resting was completed. Surely the high temperature roast with much more residual heat would have peaked several degrees beyond 125F while the low temperature roast may have only risen to a peak temperature of a few degrees. Can you share the peak and final temperature for each roast with us?
Hey Bruce! Nice to hear from you again! I don’t remember exactly what the carryover ran to on the two roasts, but I seem to recall that the high-heat one went pretty close to 140°F while the low roast ended up in out target zone of 135–135°F. If I we’re to try to use the high0heat version without overcooking, I’d probably se my alarm to pull lower, say 110 or 115°F.
Thank you for the comparison of the two methods. I am going to go low and slow. I have two 6 pound beef tenderloins that I am cooking in the oven for Christmas dinner. Can you give me an estimate how long it will take to get to a medium rare level? I have 19 people coming, and I am stressing about it being done too quick or taking too long. Wanting to eat around 6pm. Is 3 hours too long, or not enough time? Help!
I hope it went well, I wasn’t on the comments on Christmas Eve! #3 hours would be somewhere between too long and just right. For future reference, it holds beautifully if you take it out of the oven for a few minutes then put it in a cooler to keep warm until service.
I ended up doing them for about 90 min, then wrapped in pink butcher paper for about 20 min, then cut and served. They ended up being perfect. Jotted down lots of notes for next time. Have a good New Year!
Fantastic!
If roasted in a regular oven, is the use of CONVECTION oven heating better than the standard baking setting?
I never use convection for this. the slow, gentle heat of the oven without convection is perfect.
I generally leave a good cut of meat out a good half hour to get it to come to room temperature before searing. If you freeze it and sear it cold, doesn’t that end up steaming it instead of searing it?
Not if you get your pan good and hot. A pan over 400°F is even better than 375°F, but we’ve found we got great sears right out of a chill cycle. The advantage lies getting a surface sear while the meat under the surface remains more resistant to overcooking because of the thermal barrier.
I have 2 separate 3lb tenderloins. The butcher tied them together to make a somewhat fat 6lb tenderloin. Should I separate them and cook separately? I only have one oven and one broiler pan.
I know I’m late to answer, but I’d do them separately, just give them an inch or two of space between them in the pan. More seasoned crust per bite that way!
I have a 5 lb. beef tenderloin, tail removed, a long piece with the big “head” on it.
I’m planning to do 225F and had expected to roast it for 2-3 hours (this is tomorrow and now I’m getting worried) but please convince me I don’t need to cook it in 2 parts, “head” and body ? And 2-3 hours should do it ? I don’t want to overcook the long piece.
Many thanks — fascinating article.
I’m sorry I wasn’t on on the comments during the holiday…I hope it turned out well! Cooking head and body would be fine, but doing it as one piece will also be fine. The heat piece will be more rare, which is great for those members of your party that like it that way.
This was wonderful! A Christmas Day success. I was so nervous and shouldn’t have been. Any tips for the leftovers both in storage and consumption?
Sauté slices lightly for steak and eggs for breakfast! (Or lunch…or dinner.) Vac-sealed, they’ll freeze until you feel the need for an amazing roast beef sandwich later on. But making a quick and easy Stroganoff out of the leftovers wouldn’t be terrible.
Outstanding explanation of what to do and why. I followed this and got outstanding results! Very uniform color almost all the way out to the edge. Will pull a little later next time just because I expected more carryover cooking but probably it is less when pulling from a cooler oven and without the high temp sear at the end. Thanks for a great recipe!
Fired up a 4.5 lb and 5.5 lb trimmed tenderloin from Costco into a 275 Fahrenheit oven for about 1 hour, then rotated. Cooked the patted dry , room temperature, dry-rubbed meat in foil covered roasting pan.
Inserted meat probe – read about 108 after 1 hour – at about 2 hour mark the probe read 120… cranked temp upto 375 the final 10 minutes- got meat upto 125… pulled it from oven & immediately quick seared in hot cast iron about 2 minutes each side. Roast now read 128 f and let meat rest before slicing & serving-
Turned out beautiful, even pink color, no brown exterior ring, no bloody center.
I give credit to “low & slow” and having a good digital meat probe to monitor and help accurately determine when to pull from heat source
I was doing the Kenji version of this recipe, but with a full tenderloin (tail folded so that it was nearly symmetrical). I have to admit that the new RFX system was transformative to my cooking. The sensors let me know that the meat was warming faster than I anticipated, and would reach 125 like an hour earlier than planned! (Yes, they not only will tell the instant temp at various levels of the meat, but can project the degree rise per hour!). So, I turned down my oven all the way to 140, which slowed the process down nicely, and then just raised the temp towards serving time.
It’s a great way to make a beautifully evenly cooked piece of meat! And (no skin in the game) the RFX system is better than any of the past probes (since I just check my phone, wherever I am).
It has had a similar effect on my cooking! I’m so glad your roast turned out so well!