Are Your Ribs Done? How Do You Know?
Father’s Day is here, and we all know what that means… BBQs will be out and ribs will be fired up across the nation. But that leads us to the age-old question. When do you know the ribs are done? Ignore the USDA safety temperatures. Baby Back Ribs may be safe to eat at 145°F but they won’t be tender or as flavorful as they should be. The collagen and fat have not yet melted into the meat. Connective tissues will be inedibly tough.
It is widely agreed that ribs are done between 180°F and 195°F. Some experts are even more precise and call for a variance of plus or minus only two or three degrees. Virtually all agree that temperature, and time at temperature, are the best gauges of rib “doneness.” However, getting an accurate or useful temperature measurement is difficult with ribs. The first problem is the number and mass of bones relative to meat. The space between bones can be narrow. And the thickness of the meat there is also narrow. A thermometer reading that is too close to the bone will be different than the temperature at the center of the meat. Most instant read and alarm thermometers have probes that are too large in diameter to get an accurate reading in rib meat. It can also be a challenge to maneuver the probe between the bones.
The difficulty of getting a good temperature reading has contributed to the propagation of BBQ lore surrounding other “tests” for rib doneness. Here are just a few: the time test, the tong test, the twist test, the popup test, the pullback test, the peek-a-boo test, the toothpick test, the manual separation test, the meat color test, and the fall-off-the-bone test. This is where mythology will mess you up. Several of these are not considered reliable, all are subject to personal interpretation and some are just wrong. The most common may be the fall-off-the-bone test. Now you may like yours this way and that’s just fine. But a real rib connoisseur will tell you you’re missing nirvana.
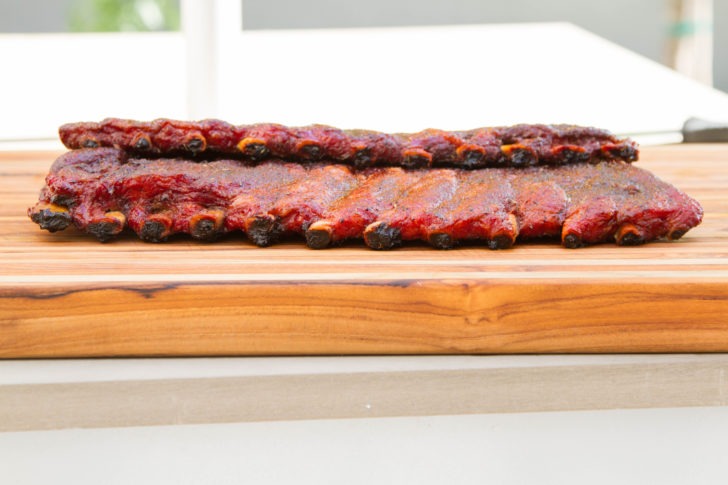
The most respected non-temperature rib test is employed on the professional competition circuit by the likes of the KCBS Certified Competition BBQ judges and is called the bite test. What’s great about this benchmark for a great rib is that anyone can do it. You simply take a bite out of the rib. If you can see where you took a bite – they’re perfect. If the meat falls off the bone – you’ve over cooked them. Now, what’s not so great about this benchmark is the fact that you just took a bite. Now you can’t serve that rib! Now that may not bother you but especially when learning to cook ribs, you could be taking more bites than you originally thought and soon half your ribs are gone.
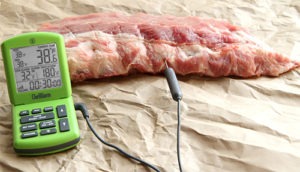
Enter the ThermoWorks ChefAlarm® with the Pro-Series Needle Probe. The Needle Probe is a specially made thermistor probe (1/16th of an inch all the way up the shaft) that is tiny enough to fit between the bones of even baby back ribs to give you an accurate reading of the meat. Outside of an expensive professional thermocouple system, this is the only alarm probe that is thin enough to do this job. Simply position the probe tip in between two ribs at the center of the rack. Make sure your probe tip is immersed vertically to the halfway point of the bones and centered in the thickness of the meat. Set the ChefAlarm High Alarm to 180°F. Cook your ribs low and slow. When the alarm sounds, set the timer for at least 30 minutes and make sure the ribs stay between 180°F and 195°F until the time is up. The ribs should now meet the competition BBQ bite test.
When talking rib cooking temperatures, Meathead from AmazingRibs.com has this to say,
The ideal cooking temp is about 225°F, hot enough to brown the surface, to develop a crusty bark, and to melt fat and collagens. On most cookers, when the oven temp is 225°F at sea level, it takes about three to four hours to cook a slab of baby backs and about five to six hours to cook a slab of St. Louis cut ribs or spares.
They are slightly undercooked at that stage. I then put the sauce on and sizzle it in on a hot grill for about 5 minutes per side. This finishes the cooking and makes sweet sauces taste their best. But you have to stand there and watch them so the sauce won’t burn. If you skip the sizzling step, add another 30 minutes of cooking time at 225°F.
At higher cooking temperatures decrease the cooking time, for example, at 325°F, baby backs can be done in only 90 minutes, but there will be shrinkage and they will be tougher. At higher altitudes, increase the cooking time 20% or more. The key here is to keep the cooking temp under control, and that is the barbecue chef’s craft.
As Meathead mentions, monitoring your cook heat is critical to not rushing nor overcooking the ribs. The ChefAlarm also offers a Pro-Series High Temp Air Probe for that exact purpose. A second ChefAlarm can be set to track the exact internal temperature of your cooker at all times. The constantly displayed Max and Min temperatures show you the cooker performance. High and low alarms could be set to warn you if the heat needs adjustment. With this knowledge, you can perfectly control how your meat is cooked.
Happy Father’s Day!


Great rib article!! Thanks for the useful info.
Thanks for the tips excellent came out my ribs regards from Carnes Gourmet in San luis potosi
Nice art. Thanks for the info
In an oven at 225 it can take at least 6 and up to 8 hours for baby backs. In a BBQ where there is convection it can be reduce to as little as 4 hours. I have a pellet BBQ that minimizes convection at that temperature and six hours is about average for Baby Back ribs.
I do not use temperature nor time. I look for the meat to begin to pull back from the bone ends. When around 1/2 inch of bone ends are fully exposed along the length they are done. The ribs may break in half when lifting them at that point.
Variations in cooking can be smoke at 185 for half an hour then to 225. Sometimes I will finish by raising the temperature to 315 or even 350 and then pulling out immediately when the oven/BBQ reaches that temperature. This can give a very nice finish but be careful not to overcook.