Butterflied Pork Butt: Better Flavor in Only 4 Hours
I love a good pulled pork sandwich. 1 When it’s done right, it’s so good.
But it isn’t always done right, is it?
We all love good pulled pork. It tastes like summer and is probably the perfect food for a family BBQ. But it takes forever to cook; it’s easy to overshoot; and there usually just isn’t enough flavorful bark and seasoning to go around.
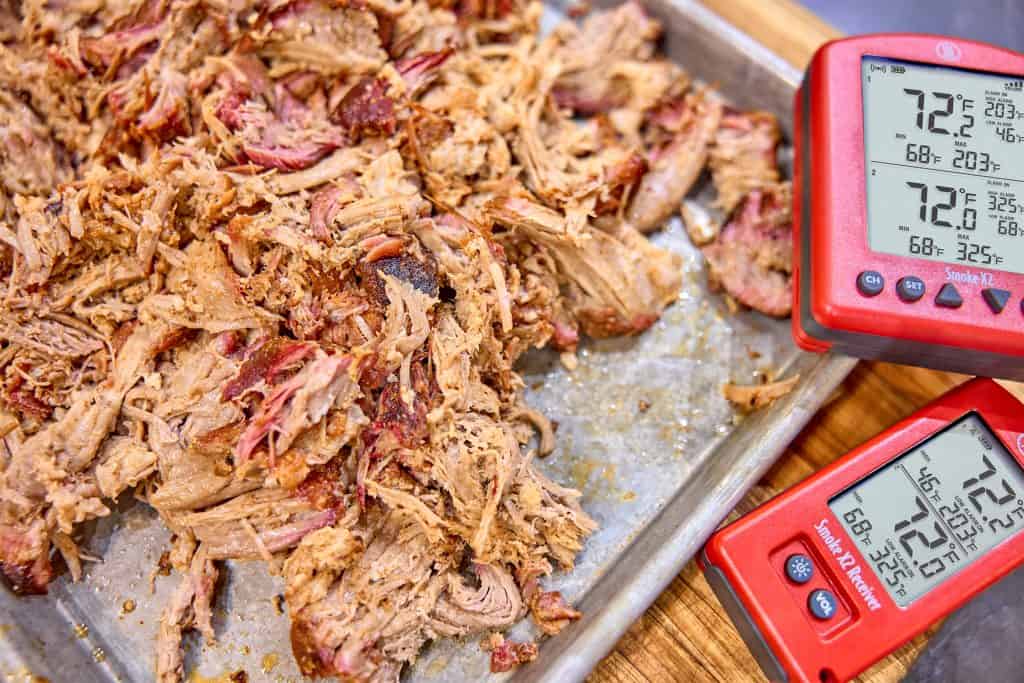
We wondered if we could get pulled pork that is more flavorful with deeper smoke to the table in far less time. Spoiler alert: The answer is yes. With the Smoke X2™—and some thermal thinking—we were able to get killer pulled pork in about four hours. The result: Butterflied pork butt. Let’s take a look!
Get the gear you need for this cook now:
Why pulled pork takes so long
Getting a pork butt to pull and shred easily is a matter of rendering out the tough, connective collagen. And while collagen dissolution is a function of both time and temperature, in general, a pork butt has had enough collagen rendering by the time it reaches 203°F (95°C). The problem, from a time perspective, is the shape of pork butt. Pork butts are roughly shaped like an oblate spheroid, or maybe like a shoebox for a heavy pair of work shoes. however you describe the shape, the point is that it’s thick and wide and there’s a lot of stuff crammed into that relatively small surface area.
Because of the way heat transfer behaves, it takes a long time for the innermost bits of the pork butt to heat up to the pull temp. You really have to cook it low and slow, because if you cook it at a higher temp for the whole time, it will dry out the outside by the time the inside gets to where it needs to be. 12-hour cooks are common when it comes to pulled pork.
Why pulled pork can be bland
Even if you nail the temperature and texture on a pork butt, there’s still the issue of seasoning. Whenever I go to a cookout or am faced with a tray of pulled pork, I always try to sneak the bits with the most bark. After all, that’s the most flavorful part! But in the end, there’s typically not much seasoning per cubic inch of pork butt. By the time it all gets pulled and shredded, well, let’s just say that a lot of the inner meat often could be more flavorful and frequently needs that vinegar sauce!
To solve this problem, pitmasters started injecting pork with flavorful brines and mixtures, and that can go a long way toward solving the blandness problem. It’s actually a pretty dang ingenious solution. And it makes for tender, delicious interior pulled pork. But not everyone has an injector ready to go every time they smoke a pork shoulder. Might there be another path to a more savory pork butt?
Another solution to long-cooking and bland pulled pork
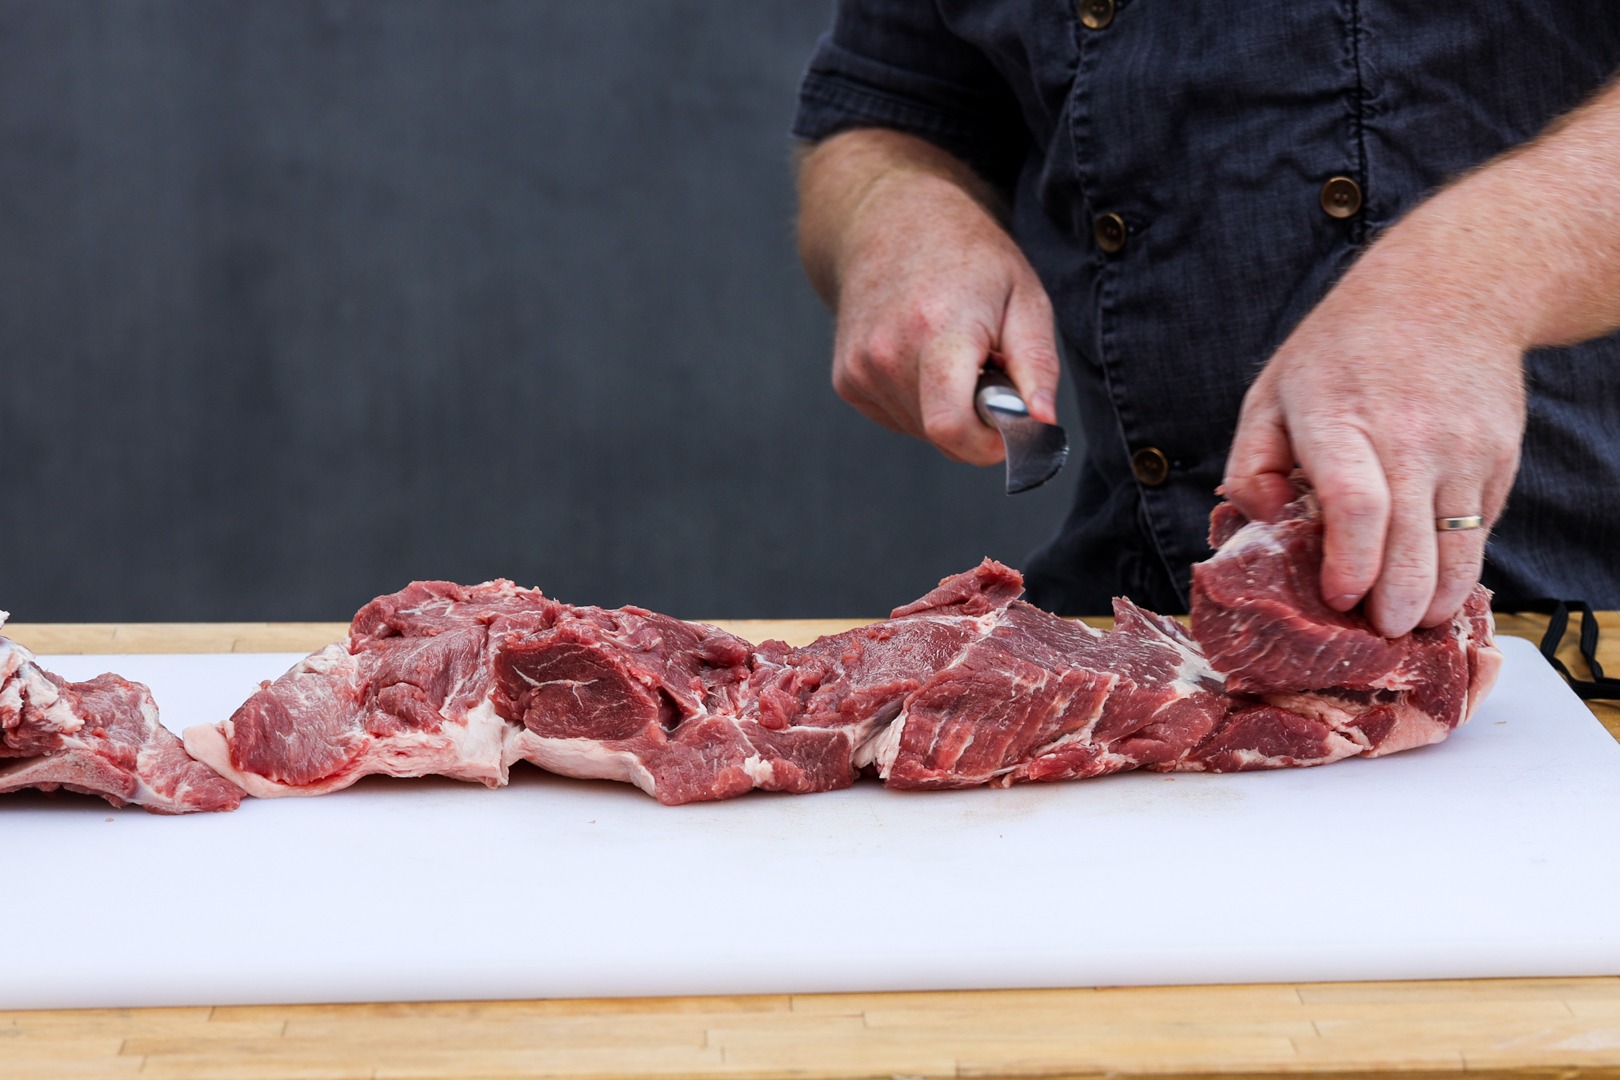
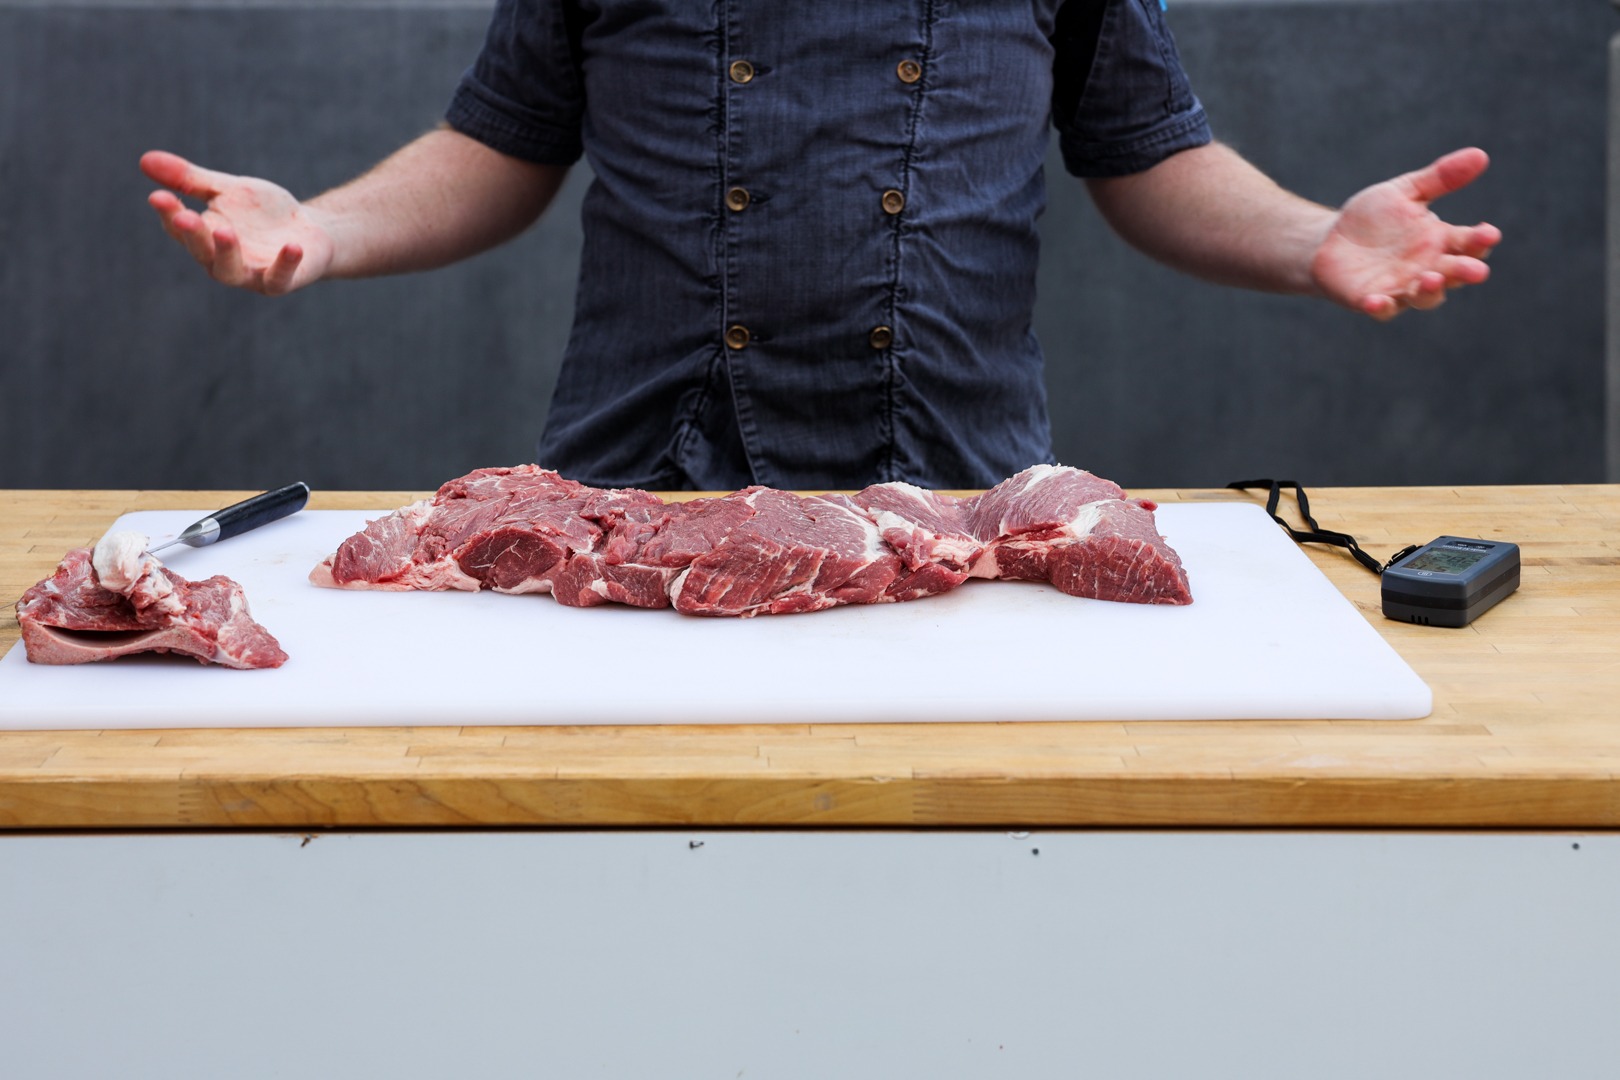
Our solution? Butterfly the pork butt. By cutting out the bone (or using a boneless butt) and slicing it so that the shoulder lays out flat, you end up with a longer slab of meat that is only a little thicker than a rack of ribs. When the butt is rearranged like this, heat can penetrate the meat far more easily and quickly than when the butt is whole—meaning a much faster cook.
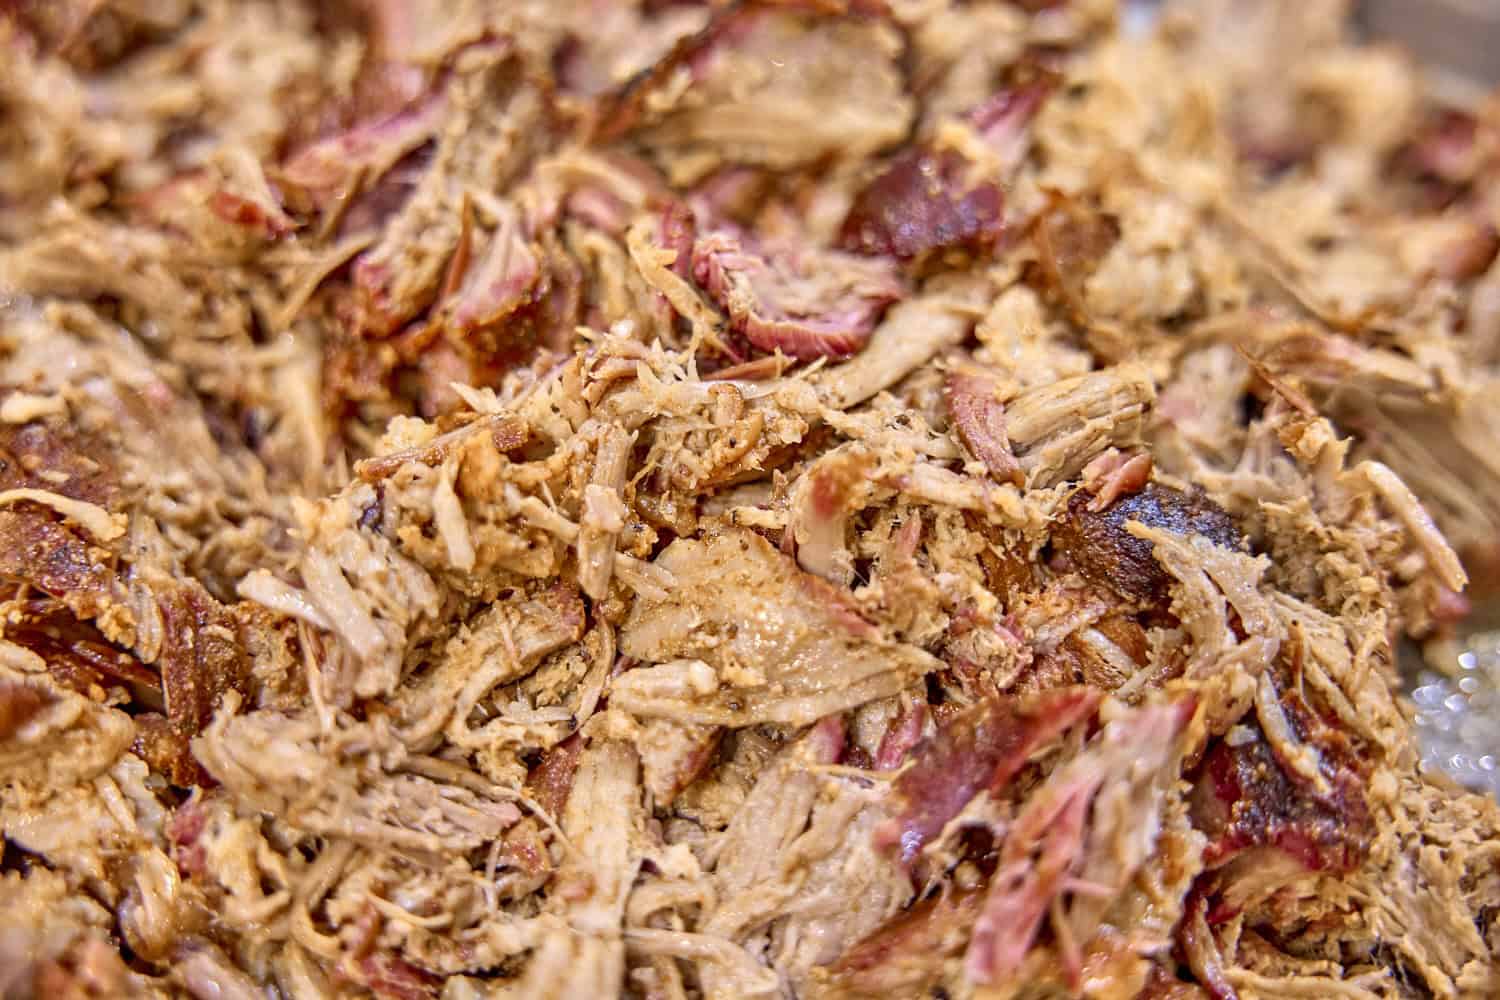
And you get much more surface area for seasoning. By unrolling the pork shoulder, we expose much of what had been the inside of the cut to our seasoning, and we also expose a greater surface to the smoke itself. As a percentage of the total meat, a butterflied butt has a lot more smoke ring than a butt cooked whole.
But bone in tastes better! Right?!?
Whether or not bone-in meats taste better is a topic of heated controversy, but in actual fact, the bone doesn’t add a lot—at least, not according to Meathead:
But bones contribute no significant flavor to meats cooked by dry cooking methods such as grilling, low and slow barbecue, oven roasting, or frying (frying is considered a dry method because there is no water). A tiny bit of marrow might escape the ends if they have been cut, and a miniscule amount may escape if the bone has been sawed open lengthwise, as it often is for T-bones and ribeyes. But the small amount of liquid in red marrow does not travel far onto or into the meat. It can influence only the meat immediately adjacent to the bone.
It is possible that some of the fat and collagen inside the marrow can exit through the pores in the bones, but again, this is a very small quantity and there is no way it can travel more than a fraction of an inch into the muscle if it can somehow get beyond the sheath surrounding the bone. Some marrow may drip onto the fire, and when it incinerates the smoke and gases might strike the surface of the meat. But this is a small amount of the total drippings, most of which is edge fat, intramuscular fat (marbling), and myoglobin (mostly water from within the muscle cells).
—AmazingRibs.com
Plus, boneless butts are also easy to come by and pretty cheap at certain large-box discount-club stores of which I can think. This is a great way to use them!
How to cook butterflied pork butt
Prepare the smoker and the meat
- Preheat your smoker to 275°F (135°C). Using a Smoke X2 and a Billows™ BBQ-control fan set to your target temperature will make that easy.
- If you didn’t buy a boneless pork shoulder, debone your pork shoulder. This can be tricky business. Even though I’ve deboned several pork shoulders in my days it’s still confusing to me. Use a sharp knife and stay as close to the bone as you can.
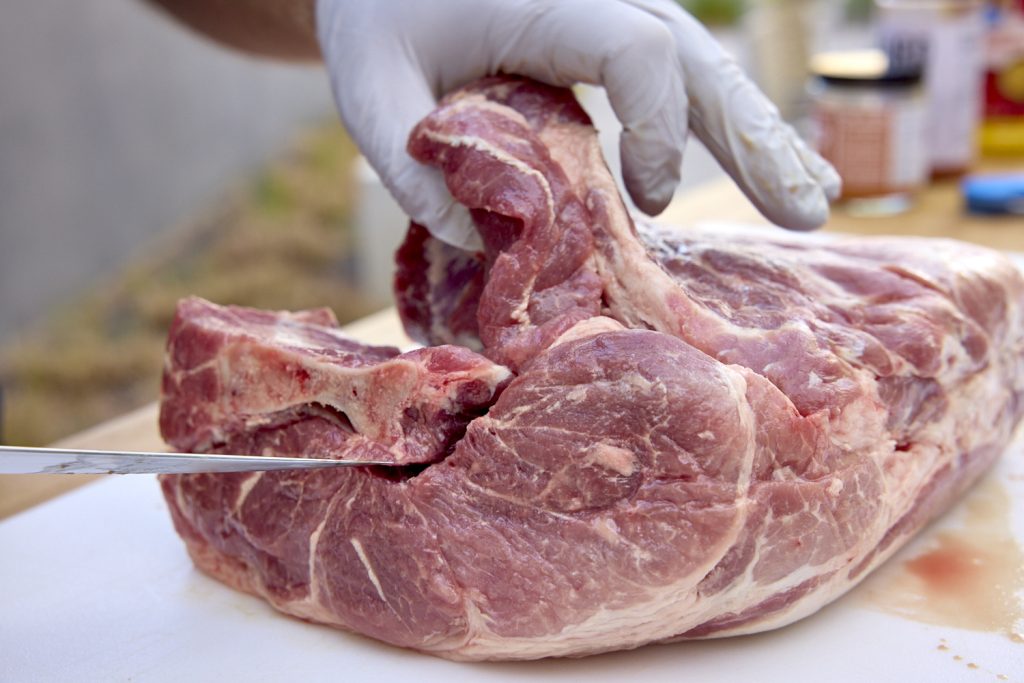
- Once the shoulder has been boned out, or if you’re using a boneless one already, there will be a large, floppy gash in the meat. To butterfly the shoulder completely, you just need to carry that cut further. keeping your knife parallel to the cutting board, slice along the meat so that it kind of unrolls as you cut along. Some areas, especially where the bone was taken out, will be quite thin. Just try to keep it all in one piece.
- Trim off any stray bits that will burn in the smoker.
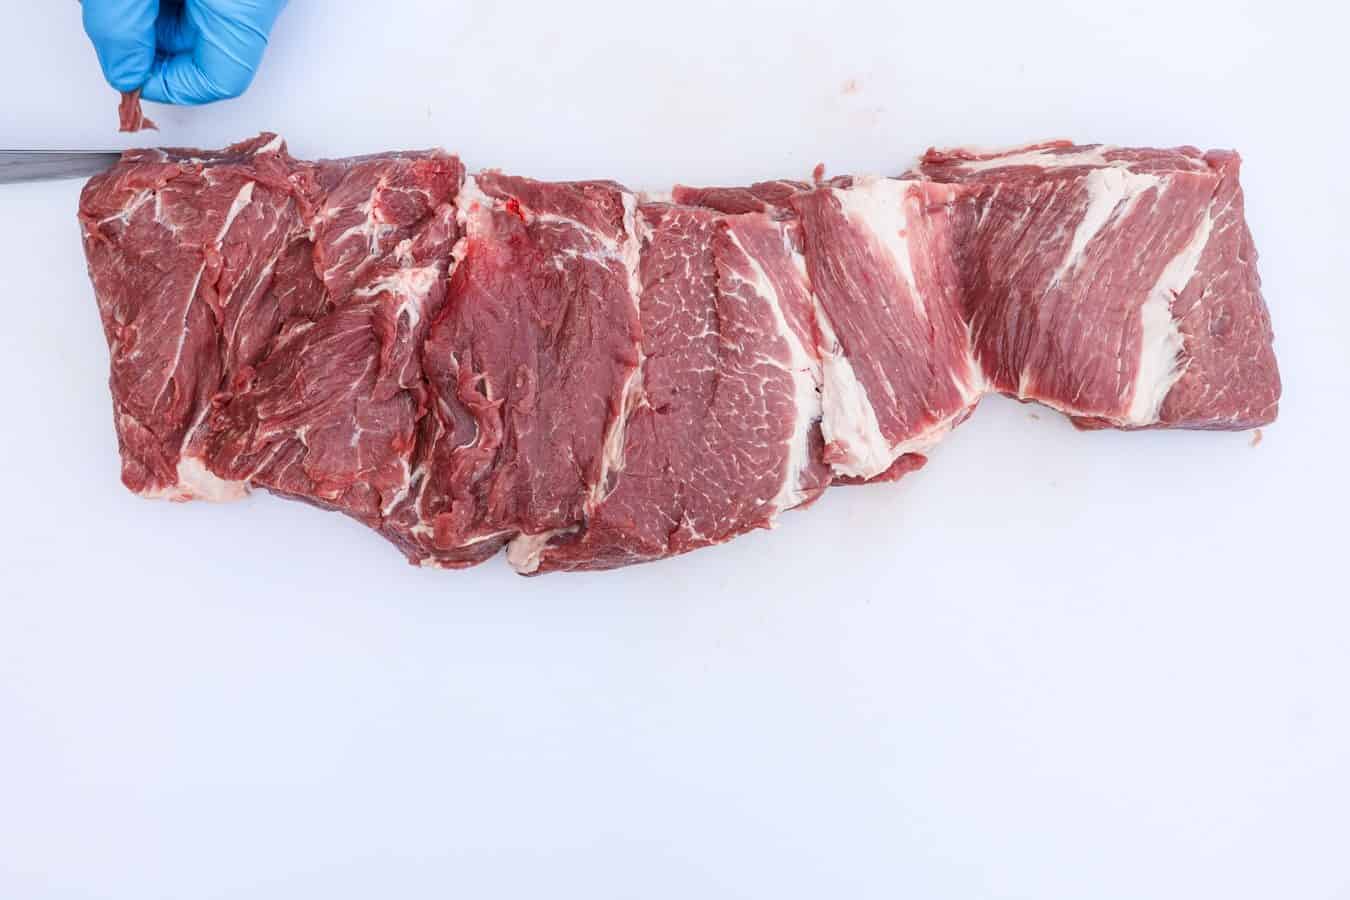
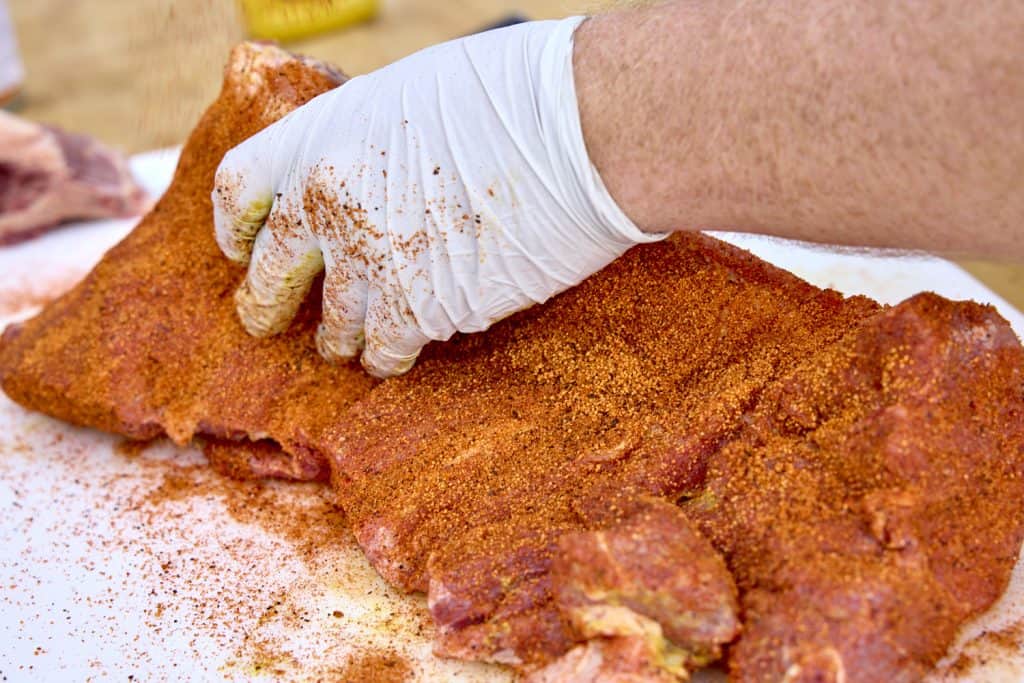
- Once the butt is butterflied, season it well with the rub of your choice. Don’t over-season it. Remember, there will be more seasoning per unit of volume here than on a whole butt. Season on both sides and be sure to get into all the nooks and crannies.
Smoke the pork
- Get the meat on the smoker. When you place the meat in the smoker, squish it together a bit in any thinner parts. This will help create a more even thickness and a more even cook.
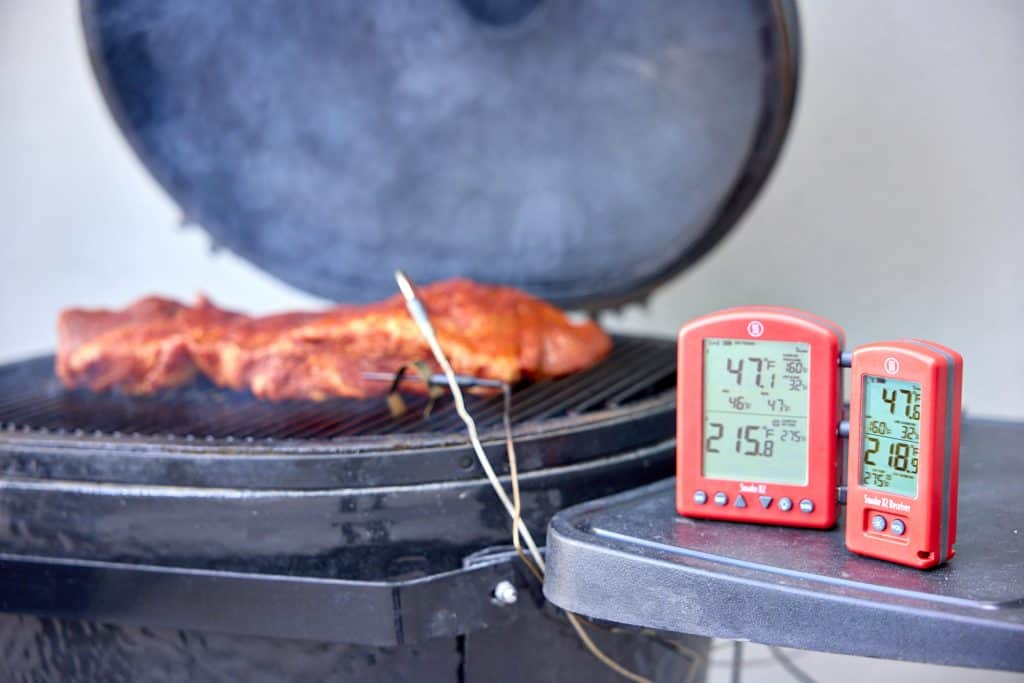
- Insert a probe into the meat and set the high-temp alarm on your Smoke X2 for 160°F (71°C).
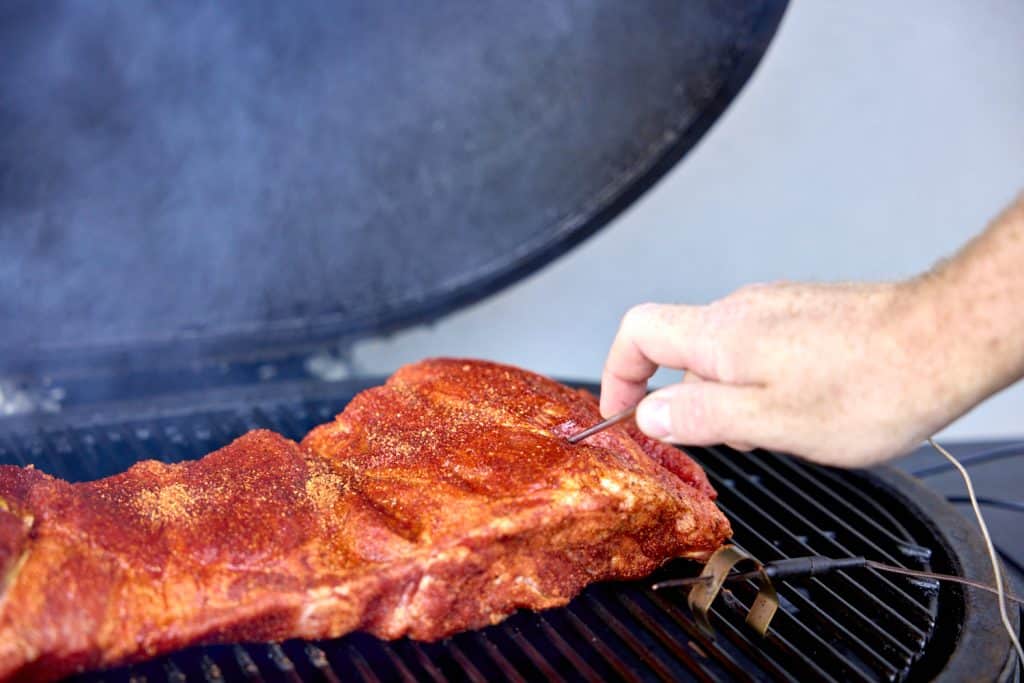
- Allow it to smoke until the high-temp alarm sounds. Check it occasionally to see if it is drying out in any spots. If so, spritz it with some cider vinegar.
Wrap the pork and keep smoking
- When the high-alarm sounds on your Smoke X2, check to make sure the bark has set.
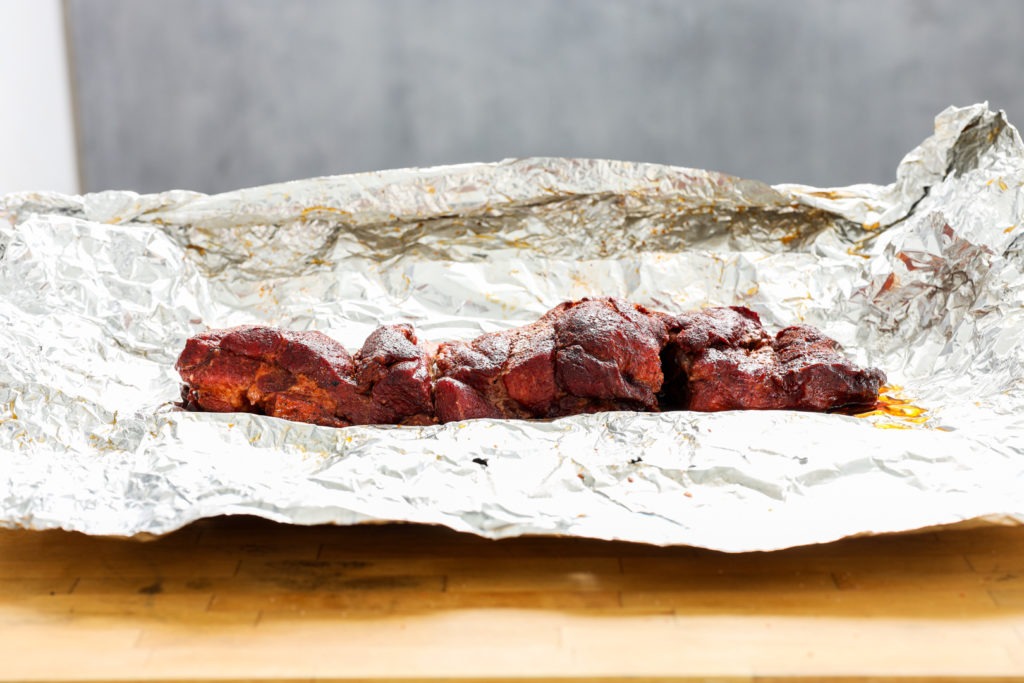
- Remove the pork from the smoker. Spritz it again and wrap it well in some aluminum foil. Now it really looks like a rack of ribs!
- Put the wrapped pork back in the smoker. Probe them through the foil and set the high-temp alarm for 203°F (95°C).
- Set the fan-control temp to 325°F (163°C).
Check and rest, shred and serve
- When the alarm sounds on the pork, poke it a few times in various places with your Thermapen® to make sure that it has reached the target temperature throughout and also to check for resistance in the meat. If it’s hot enough and feels like you’re poking warm butter with a hot poker, it’s done!

- If the meat is at the proper temperature but still offers a little resistance in a few places, allow it to rest, wrapped, on the counter for 15–30 minutes.
- Open up the wrapping and check out your pork. Grab a tiny bit from a corner and taste it. Yum.
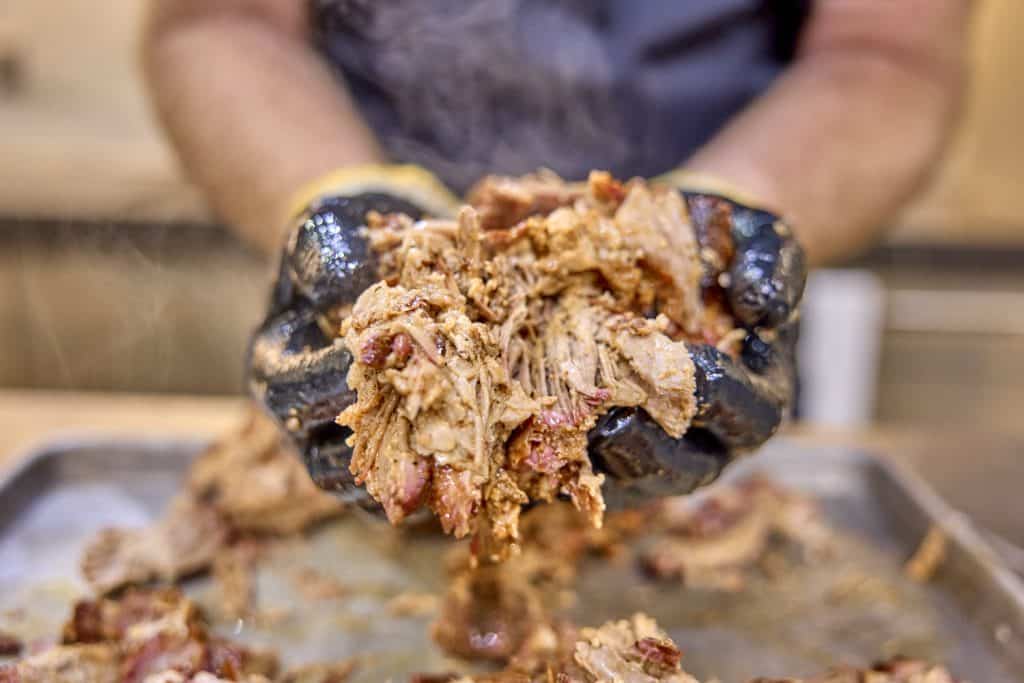
- Shred that pork! It should be very easy to pull apart and shred
- Serve!
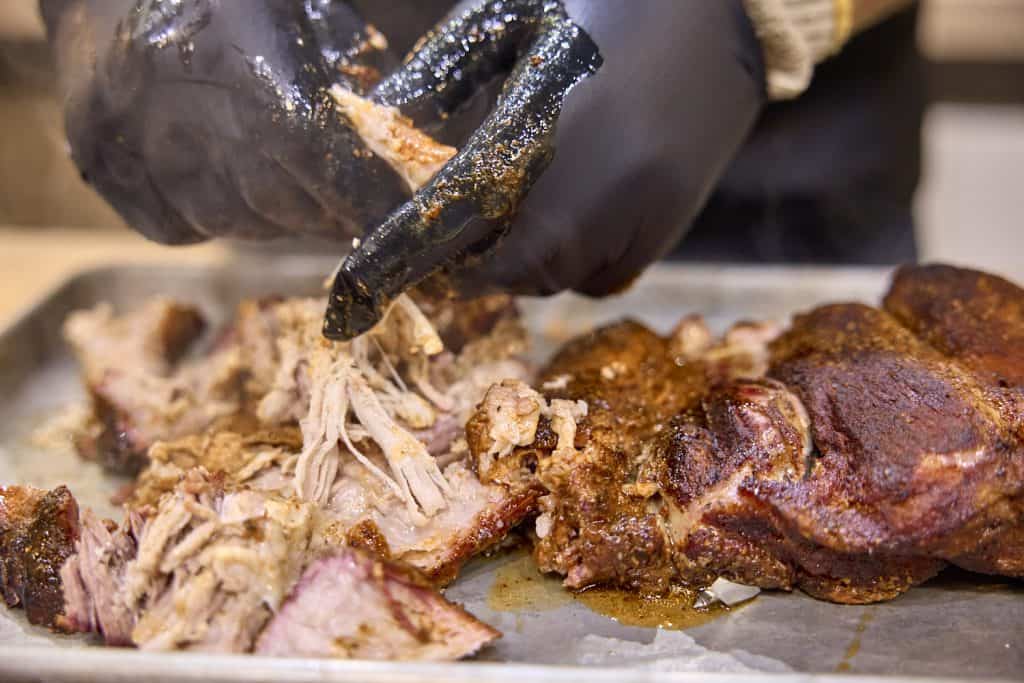
This is probably going to become my go-to method for pulled pork. It’s fast (for BBQ!), it’s easy, and because of the higher seasoning-to-meat ratio, results are better tasting than what I usually get from long-cooked whole butts. The Smoke X2 and Billows pairing makes perfect pulled pork like this something you can do almost on auto-pilot. It’s a real game-changer. Give it a try this weekend, or, heck, do it someday after work and have a late dinner!
My sauce preference tends toward those of the Carolinas, either mustardy (South) or vinegary (North) or—heresy!—spicy cayenne and black peppered vinegar with a heavy proportion of dried mustard in it.↩





Great idea, I am going to try this. I butterfly (spatchcock) Chicken and Turkey, why not a butt! I know it will take less time and cook it until it is done however what is the total time or at least an estimate. Thanks
About 4 hours.
Any thoughts about wood chunks in the smoker?
I love apple for pork, but whatever you like will be great.
This is not easy to come by, but fig wood (wood from a fig tree in case “fig wood” is confusing- it is uncommon after all) is AWESOME for smoking pork. Chicken, too. It makes a very sweet smoke and it is almost impossible to overdo it.
That sounds DELICIOUS! Almond wood is also a subtle, sweet wood.
Most important part of this method was left out, how long did this cook take? Is it two hours, ten? And I don’t see any real bark formation, it looks a little red but nothing like a long smoked pork butt.
It takes about 4 hours total, maybe more for a very large shoulder. The bark was well set and passed the scratch test. Bark will certainly get darker and barkier in a long cook than it did here, but none of us could tell the difference in taste!
Scott,
That’s fantastic! Using a stick burner is fun, but not everyone has the time or the skills. Give the butterfly method a try in your stickburner—I’d love to hear how it goes.
With some rain in the forecast, I have a shorter window than usual. I’m thinking your butterfly method might be just perfect to squeeze the smoking session in. Plus I’m a little busy right now and like the idea of not tending for an extra long time. I’m gonna give it a try on my Weber bullet.
Comment when you do it, I’d love to hear how it goes!
Cooked two pork butts using the butterflied method in my gravity feed smoker yesterday for my family and the neighbors, it came out fantastic. The seasonings were more prominent,and plenty of great tasting bark. It took about 5 hours, using cherry wood for the smoke. Since every body enjoyed it so much I am sure to cook using this method again and again,
I made this yesterday on a conventional 18″ weber kettle with kingsford charcoal briquettes and applewood chunks. In a light rain.
Started with a 7lb 12oz butt. Removed 2lb 7oz of bone and fat in the butterfly process. Put 5lb 5oz on the grill. Temp control was difficult. It varied between 200 and 275 (I do this type of cook very infrequently, so I don’t know how much charcoal to use, how much to open the vents, when I need more fuel, etc.) Apparently I was having about the most fun possible! But, if someone had dropped a nice temperature controlled smoker off on my patio, I wouldn’t hesitate to use it. Rather I would think I’ve now got extra time to do something more fun. If better/easier control helps someone put a better meal on their table then good for them.
Anyway, instead of going back to the grill (and all the control difficulty) for the second half of the cook, I finished with three hours in a foil covered shallow roaster in the oven at 300 F. I know I won’t win any contests doing that.
Total cook time was 7 hours given that I ran too cool on the front end, but the result was great. I will use this butterfly method again for sure. It’s cut 5 hours off my cook time even with my mistakes.
Fantastic!
Hey Randy. You might want to check out the Pit Barrel smoker. I bought one in 2015 and it has really set my backyard bbq’s free! I used offsets before that with mixed results and very long days. This cooker does stuff in about 2/3rds the “normal” time and has very consistent controlled temp pretty much built-in. It allows me to focus on the funner stuff of prepping the meat, experimenting with my own rubs and sauces, and getting other stuff done while the cook is on. There’s always plenty of bark and beautiful red rings. Oh, and not one of my family, neighbors or friends – not even one – has ever complained about the meat being too tender and juicy. Hmmm. Anyway, check it out.
Great great post!
Will try this as soon as I can.
Another example of why I stay a fan of your Co. Thanks!!
Rich,
Thank you! Let us know how it goes!
Isn’t this exactly boneless country-style ribs? (except I might pull them at 195 to keep them a little firmer).
Unfortunately, “country style ribs” seems to be a poorly defined name. It is rather loosely applied by various butchers to either strips of pork butt or of pork loin, depending on what they have on hand. If this is what they sell in your area as Country style ribs, then yes!
I usually cook shoulder whole at about 230-250 F. Even when it does come without a bone and already butterflied, I tie it. Usually takes 16-19 hours. I tried this method yesterday at 230 until it got to 160, wrapped it, added 1/4 cup of broth and finished to 200 at 275-280F. The flavor was great, definitely way more flavorful that traditional way. Normally I enhance the flavor by sprinkling more rub and mixing it in after it was shredded. This time I did not have to do that. One downside, however, was that my shoulder came out a lot tougher than usual. It was very difficult to shred so I ended up slicing some of the pieces. The texture was still pretty good, and was NOT chewy. Guests liked the taste of this method much better.
Tried this yesterday. Overall it was OK. I liked that it had a bit smokier flavor but I didn’t like that it was a bit tougher compared to the non-butterflied version. The cook time was just under 5-hours compared to around 9-hours wrapped and 18-hours unwrapped.
Overall I was hoping for more flavor. I may try this method again and work the bark a little more. My go-to method will still be cooking whole and wrapping but this quick version is nice for when time is a little short.
So, I know that I am committing heresy asking this question, but I live in an apartment now so my Traeger is in storage. If I butterfly the pork, would I cook it (unwrapped) in the oven at about 180 (basically lowest temp on my electric oven :(() until it hits the alarm temp of 160 and then spritz an wrap and bump oven temp to 200 and cook until alarm sounds at 203?
Absolutely! Just because you can’t smoke it doesn’t mean you can’t enjoy some tender meat. I’d still use the temps we recommend for the smoker, part of the point on this one is to cook it more quickly.
Is it doable to start smoke it OUTSIDE of storage? Would that be allowed? Get a few hours of smoke, then finish off in oven. Don’t know if it’s doable at storage site, but when I’m pressed for time, or it’s brrr cold, it works for me. Frees me up to prepare other dishes and warms up the house!
I am going to try this method out soon. I was wondering if this recipe would work without the texas crutch at the end (ie foil wrapping). It strikes me that not wrapping might help the bark develop a bit more. Although, it would add to the cook time, of course. Any tips or advice on whether it would be safe or just silly to try this recipe without wrapping would be greatly appreciated.
Amelia,
I think it would work. Of course, as you say, it will take longer, but I feel certain it would work, and would still be faster than a whole, solid butt. Give it a shot and let us know how it goes!
I’m down with good BBQ, I don’t care how you produce it. Especially at home. It SHOULD be easy IMO. When you have family and a job, smoking a brisket becomes a chore. I personally have to take time off work to do it properly. Having a device that manages temperature better than I can not only frees me up to do things like be with my family, work, take care of other random things, sleep, etc. but it also makes better BBQ, which I think should be the ultimate point at the end, good BBQ. Competition BBQ and restaurants are for sure using technology, very few today are doing what people are calling “traditional” style. If it tastes good, who cares how it was made?
I started with a 8# butt. About 5-6# after removing bone and fat cap. I started the smoke at 10 AM at 270. To my shock, it had reached 160 by 11:30. Wrapped in foil and transferred to a 330 degree oven. Again, to my shock it had reached 190 by 12:45. I decided to slow it down, reducing the oven temp and unwrapping the meat. At 2:30 it had reached 201. Checked it with thermopen and it was like butter. Unwrapping it allowed a nice bark to form.
Verdict:
Only an hour and a half in the smoke was not enough to get good smoke flavor. Next time I will start at 230 degrees. When it reached 160, I will wrap and heat until it reaches 190. Then the last 10 degrees will be done unwrapped.
I tried this yesterday and it will be my go to way of doing pork butt in the future. While it was cooking I misted it every 1/2 hour with a 50/50 solution of Apple juice and cider vinegar and heavily misted it when I wrapped it. After cooking I put it in a cooler and covered it with towels so it could rest. It was very tender, moist and flavorful. My wife raved about it and she doesn’t like pulled pork, or barbecue.
I’m going to simplify and give this a try with pork steaks so I don’t have to do any butchering. I probably will keep my temperature at 225 to give the collagen a little more time to render.
Haha. Totally get your point. It has taken me years to be ok with my focus on taste, with a preference for using technology to make it easy. I am totally capable of doing things the hard way but don’t see the point anymore.
My approach splits the difference. I cut the butt in half just inside the bone. One half bone in, one half boneless. Funny, they cook in half the time. It doesn’t interrupt my sleep schedule having them ready for dinner.
Do you have recipes for the three sauces you like.
Sadly not. I just reach for them at the BBQ restaurants! I improvise them sometimes, but never measure anything for it.
My first thought about this method would be the loss of moisture…..and residual liquid fat that makes BBQ tasty. Why sacrifice those components for more bark when the balance is already there?
I will stay with the whole smoked butt and dress the pulled pork per ENC preference.
There isn’t any more moisture loss, as far as I can tell. This method comes out juicy, fatty, moist and delicious. Personally, I find most pulled pork to be a little bland, and the increase in bark fixes that.
Sounds tasty, but you constantly leave behind folks (like myself) who don’t have a smoker (or a grill, for that matter). Why don’t you publish more recipes that can be cooked in the kitchen, on a stove or in the oven? Or include that variant with the smoking instructions?
You’re right, of course. For this recipe, though, you can follow all the same steps, with the same temps, just in your oven, and it’ll come out great. I’d just use some smoked paprika in your rub to get some smoke flavor in there.
Sounds like a great method! Sure beats a 10-12 hour smoke. I’m going to give it a try this weekend. How did you set up your smoker? Direct or indirect heat, and did you use a water pan?
We did not use a water pan. I’d say the heat was…direct? It was a pellet smoker in this case.
Your thoughts on foil versus pink butcher paper for the wrap portion of the cook.
Both are great, foil will finish the cook faster. There is som transpiration that occurs with the paper, making the “seal” incomplete. ti will still get you through the stall more quickly than naked, but a little slower than foil. But becuase there is some water loss through the paper (resulting in a longer stall than foil) the bark can be a little nicer. I’ll use which ever one is closer to hand.
This is good to know! Gophers finally got my fig tree, so I’ve got it cut and drying now.