Are you looking for a way to spice up your chicken eating? Hoping to find a way to get past bland, overcooked chicken? Do we have the dish for you! Chicken piccata, the Italian 2 classic, is a phenomenal, easy way to wake up your weeknight chicken dinner with a dinner-party-worthy dish.
There are many recipes for this American Italian restaurant staple, and we’ll be adhering very closely to the one by Alton Brown from his book Alton Brown: EveryDayCook, a solid example of the genre. And we, being ThermoWorkers, will be sure to give you the thermal tips you need to get it right. Dig in.
What does piccata mean?
There’s veal piccata (what the Italians use more) and chicken piccata (the Americanization?) and you can even find other renditions of piccata (swordfish, say). But what is piccata exactly? The term piccata, according to Merriam-Webster comes from the “feminine of piccato, past participle of piccare to lard (meat), probably from French piquer, literally, to prick.” The “pricking” of the meat may well refer to the process of tenderizing a cutlet by pricking it repeatedly with a tenderizing tool (like a jaccard knife). And that makes sense given the relatively recent appearance of the term: its first appearance in this sense dates only from 1949.
However, the term piccata does also appear in Italian cookbooks from the mid-1800’s where it means spiced or seasoned. So, chicken piccata is flattened/tenderized seasoned chicken. Well, that doesn’t sound amazing.
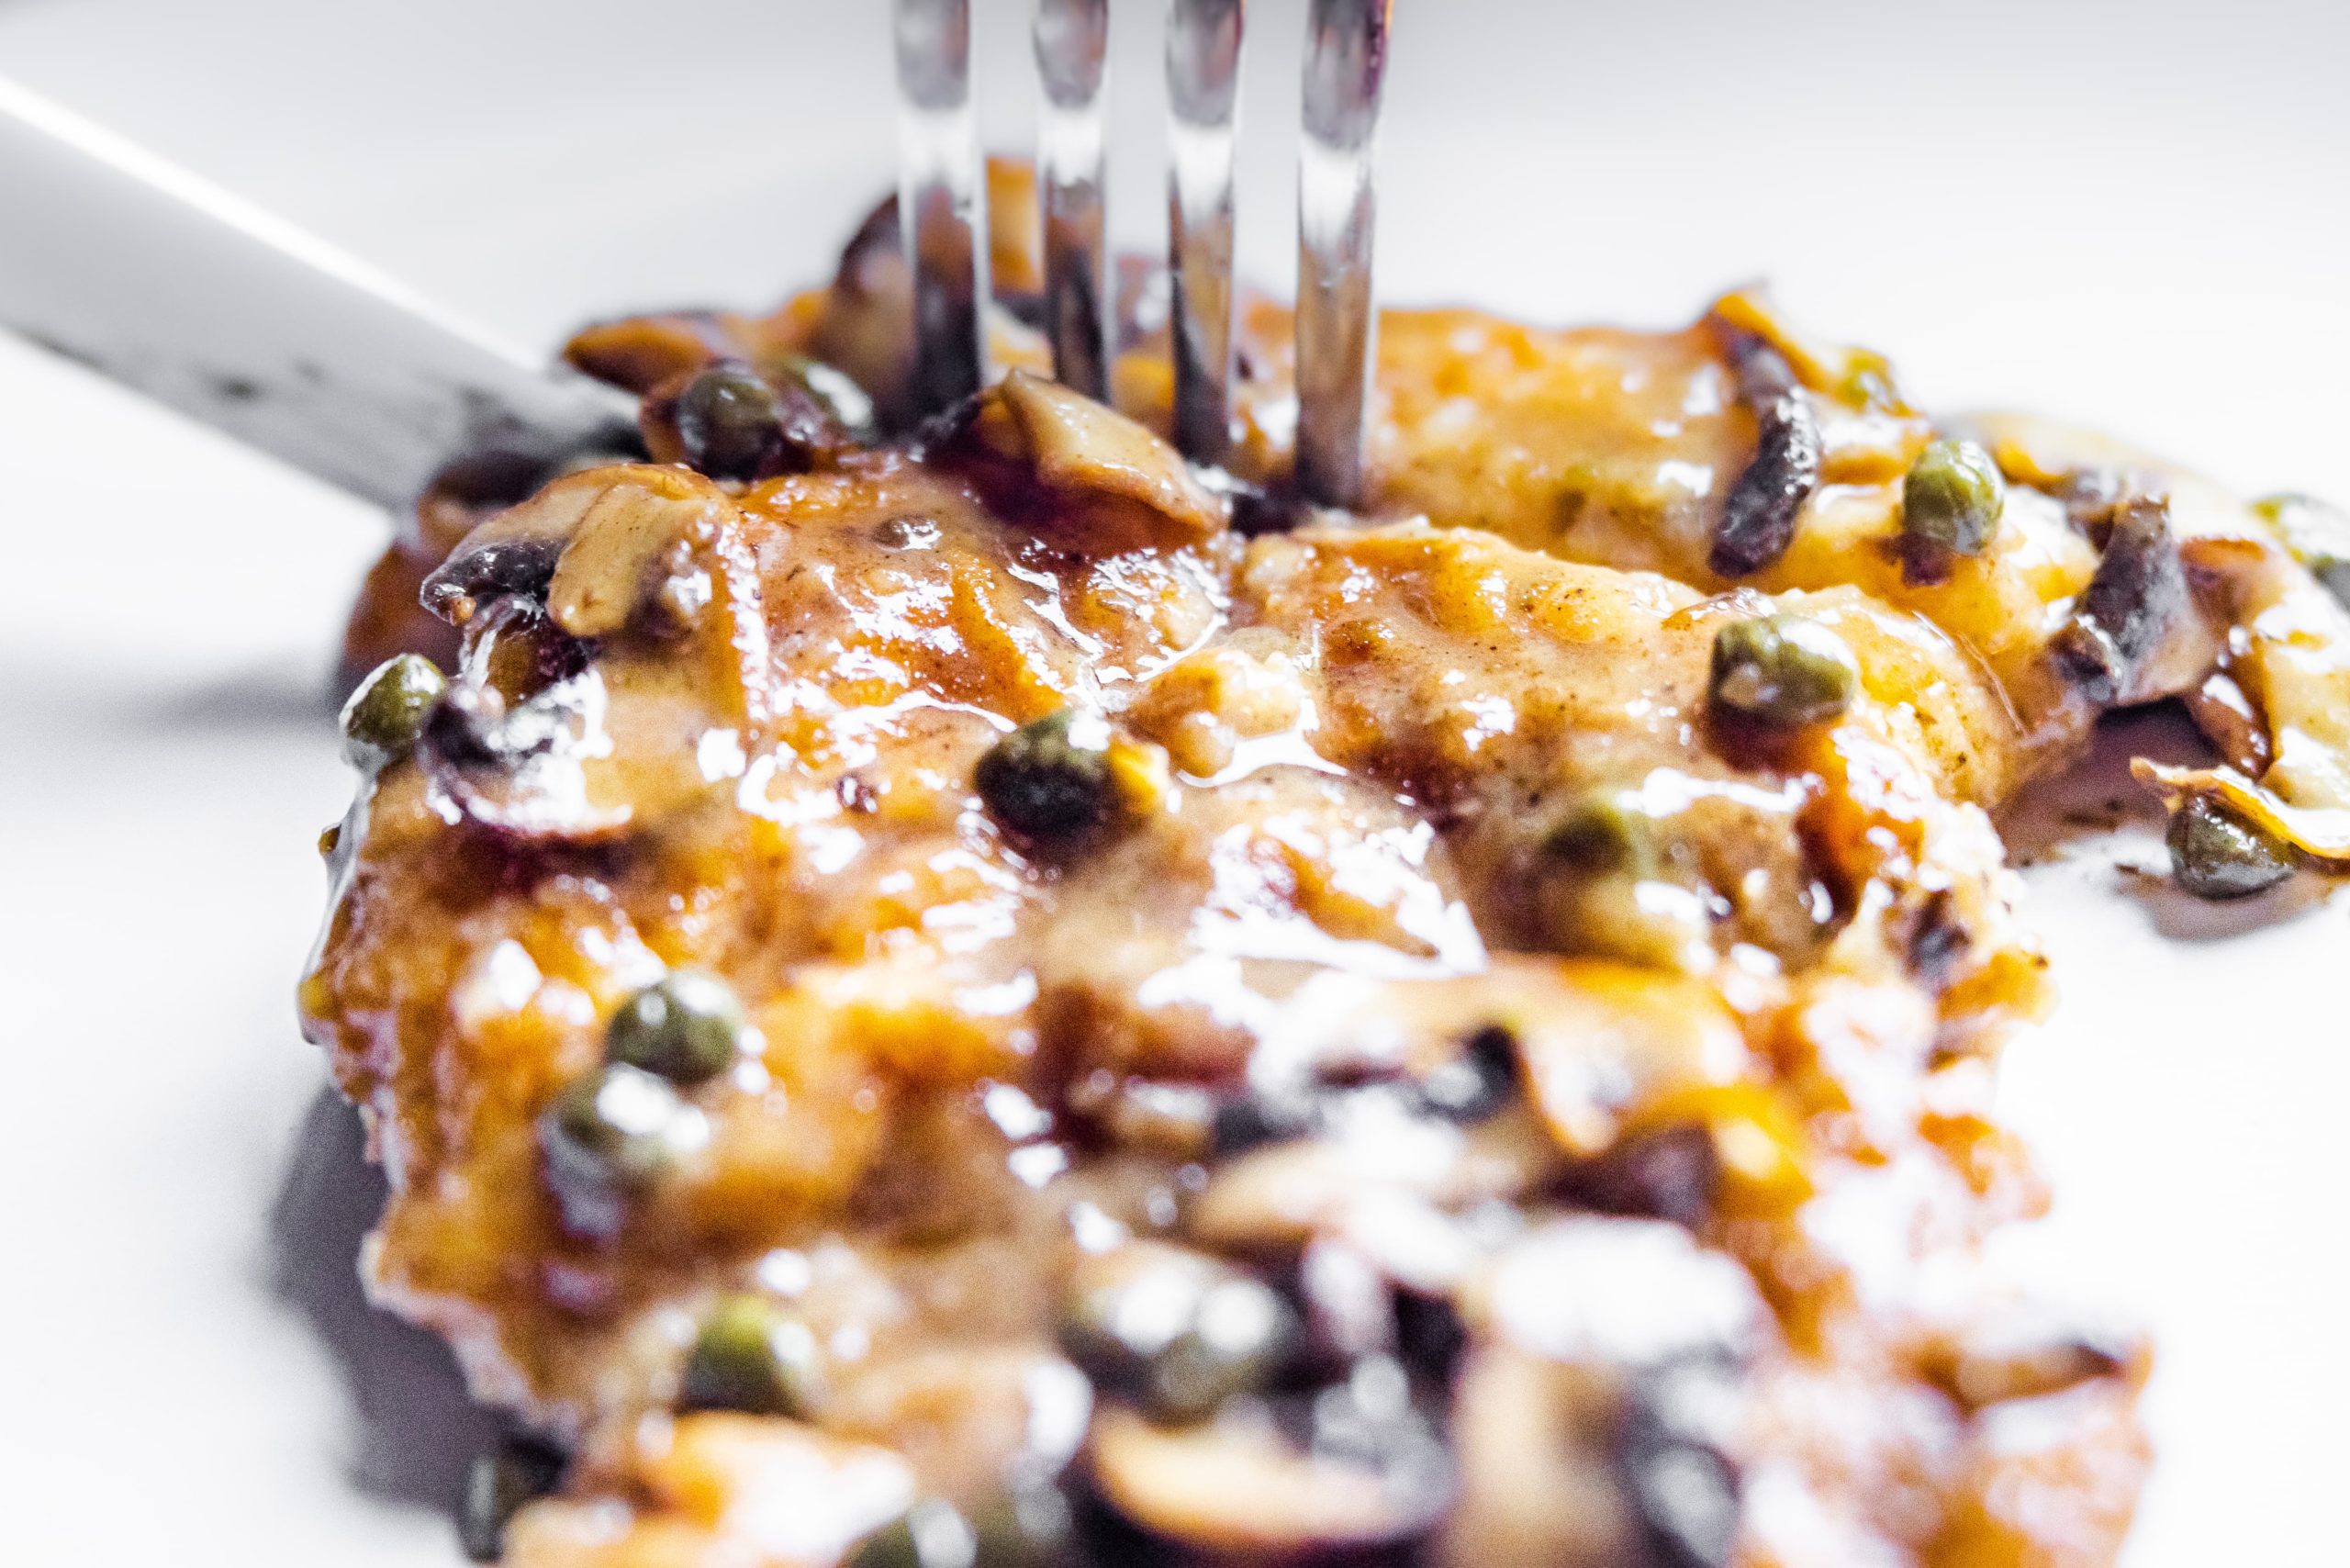
But what piccata has come to mean in a broader culinary sense (a sense the Italian cook would not necessarily agree with) is a cutlet of meat that has been floured, browned in oil/butter, and served in a sauce of lemon and capers. The combination of bright lemon juice and sharp/salty capers is unbelievably good, and in this recipe where we add a flavorful grounding of earthy mushrooms, it’s quite nearly sublime.

Thigh vs breast for piccata
Chicken breast is far too easy to overcook and dry out. It happens all the time. The muscle fibers in breast meat denature at lower temperatures and have little to no connective tissue to act as a “backup” to the moisture loss that can occur in the meat itself. Given the frying-then-braising nature of this dish, that tendency to dry out is a recipe for disaster.
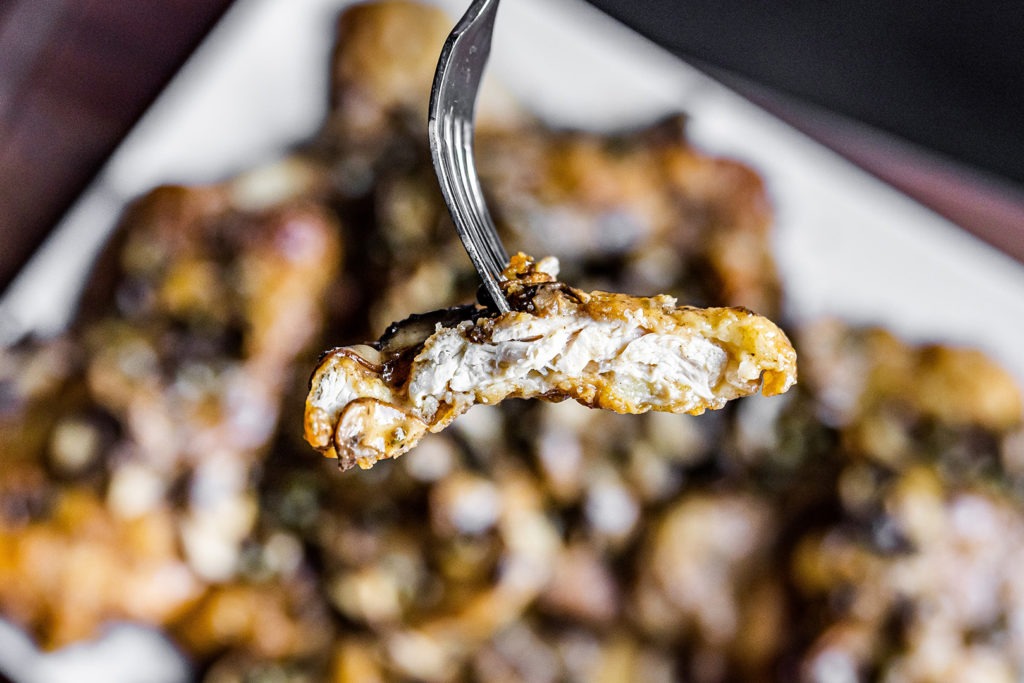
Dark meat chicken, on the other hand, has plenty of connective tissue that can break down as the chicken cooks, releasing moisture as the muscle fibers squeeze their own water out. The thinly pounded chicken thigh will end up much more juicy and succulent than will butterflied chicken breast. Use thighs.
Doneness temps for chicken piccata
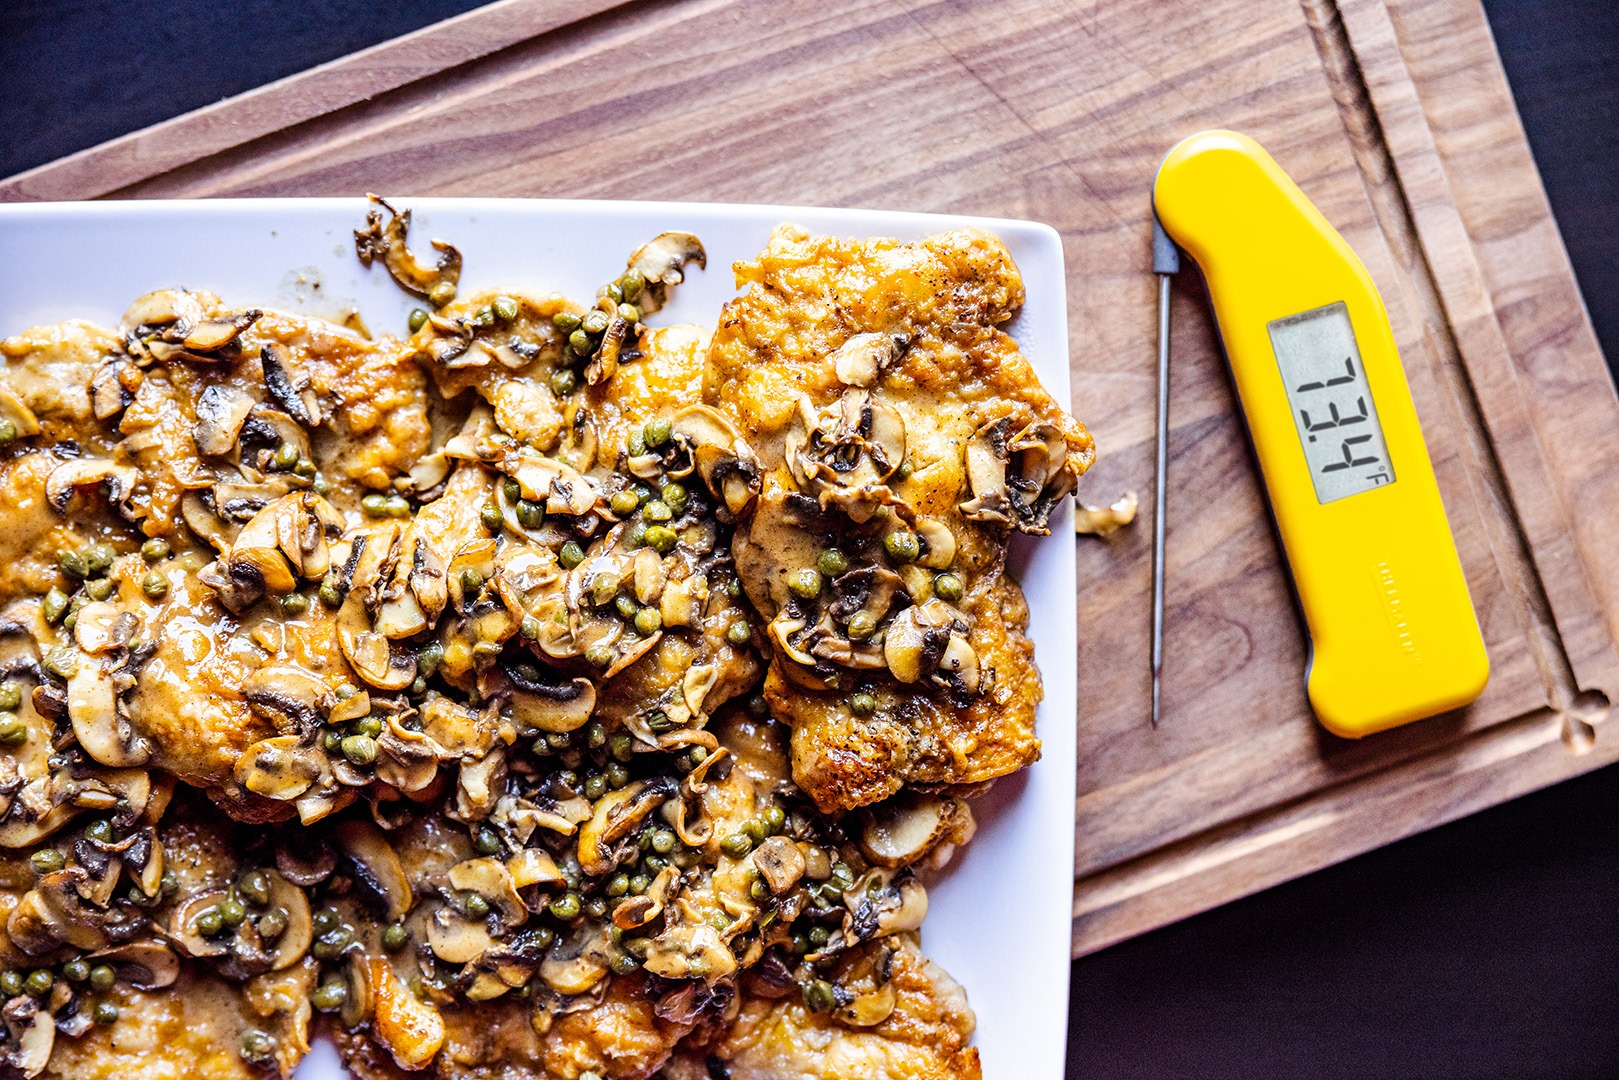
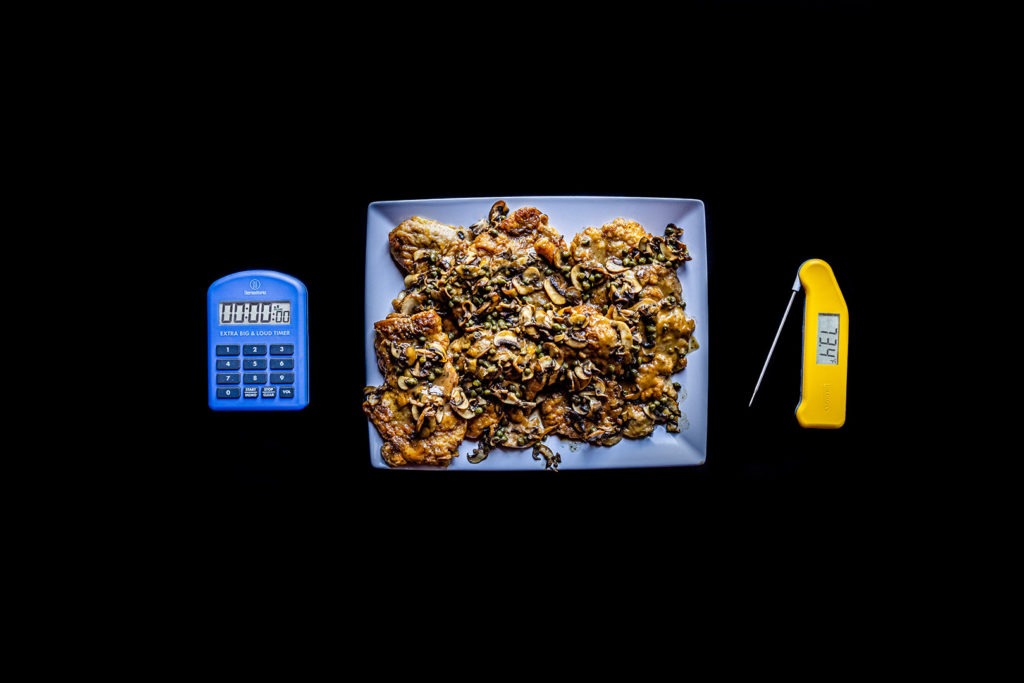
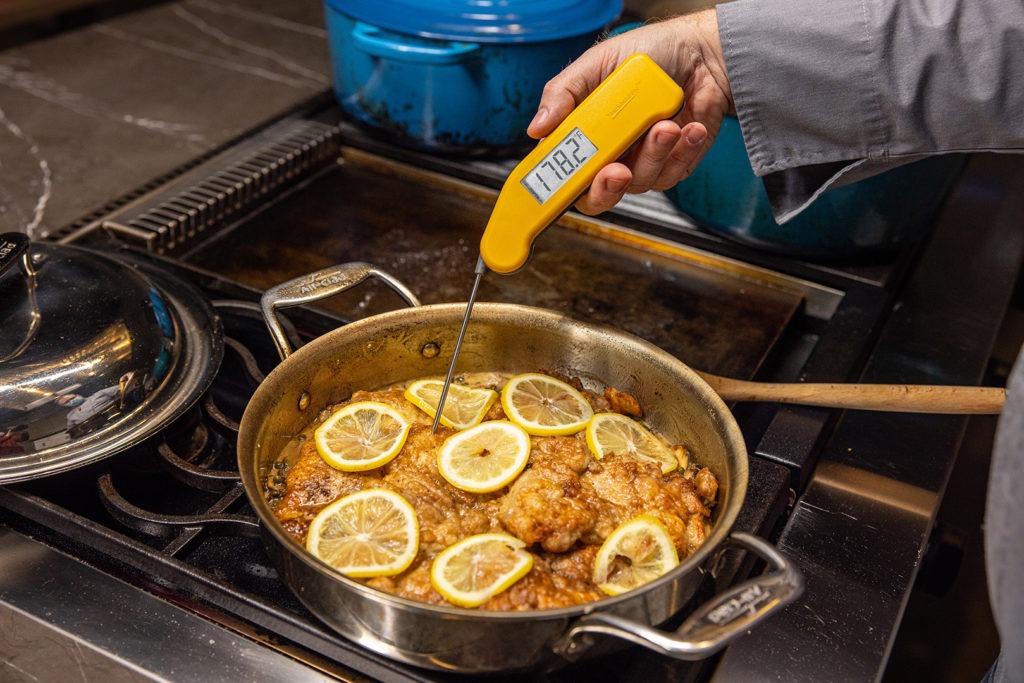
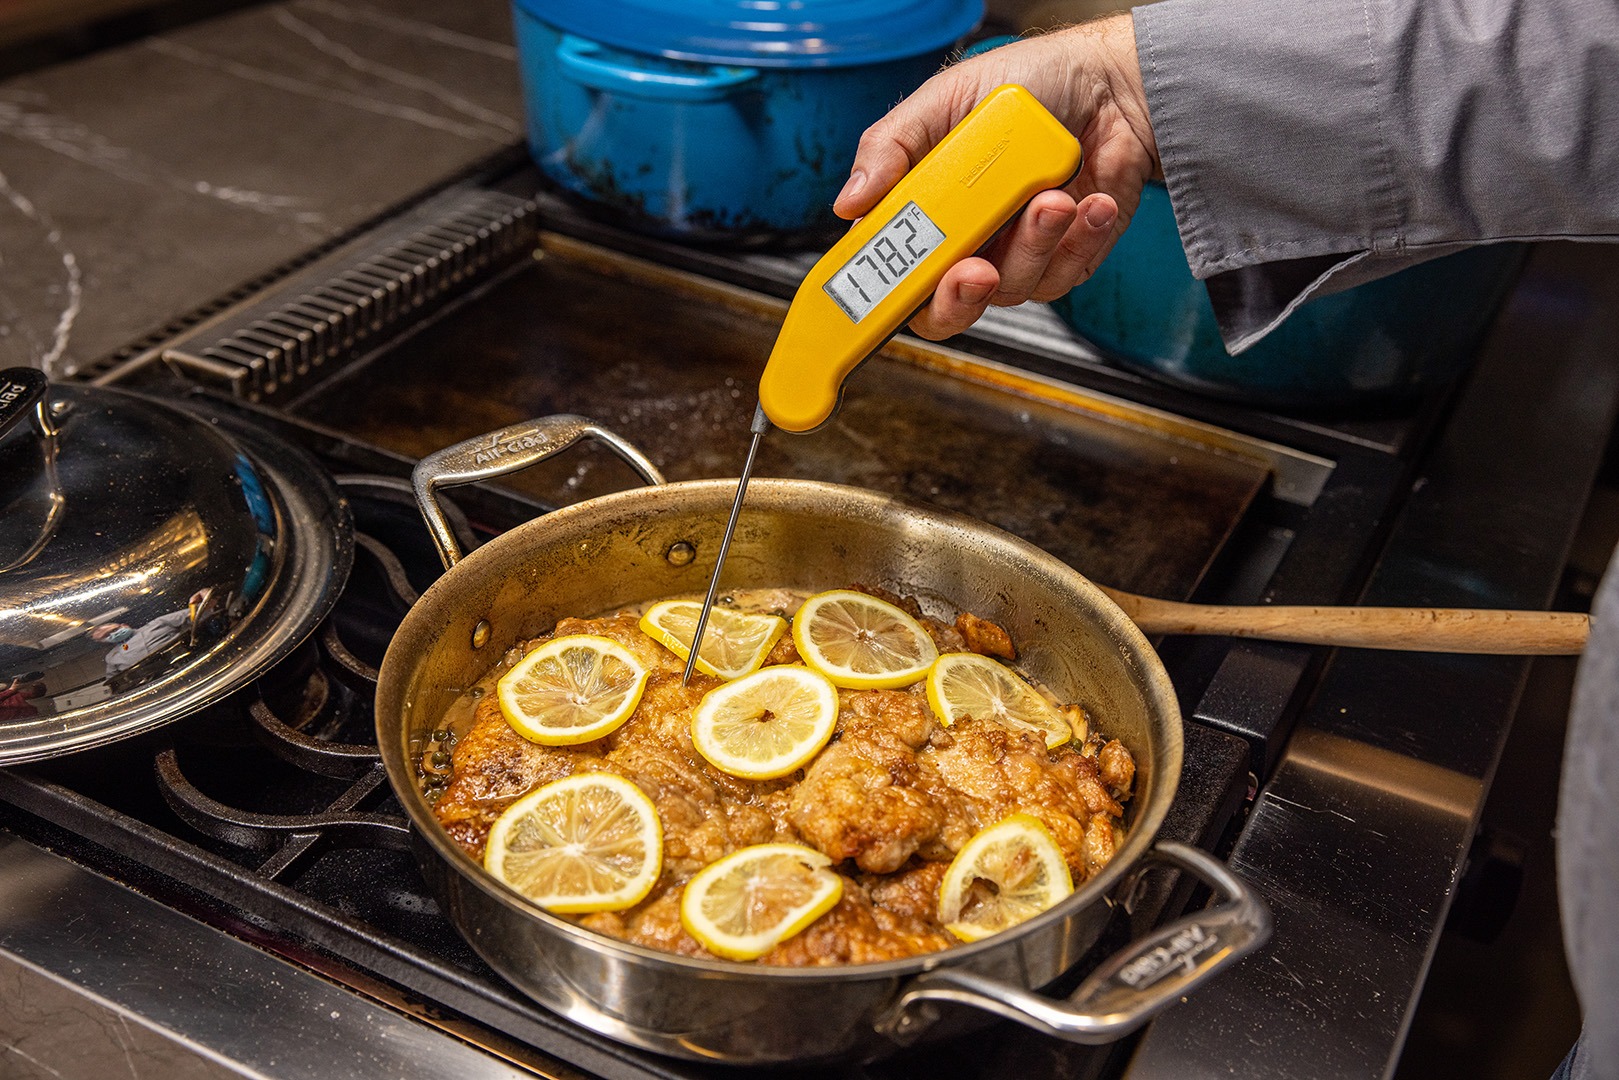
Being thigh, this recipe for piccata can take more heat without drying. In fact, it likes a little more heat. Thigh meat is best when cooked to 175°F (79°C)—or even higher. Using your Super-Fast® Thermapen® to temp the thinly pounded thighs will help you know that everything is cooked just right, and the Thermapen is well suited for the task as it is not only fast and accurate but has a tiny sensor right in the tip of the thermometer that can easily measure temperatures in something as thin as a piece of piccata.
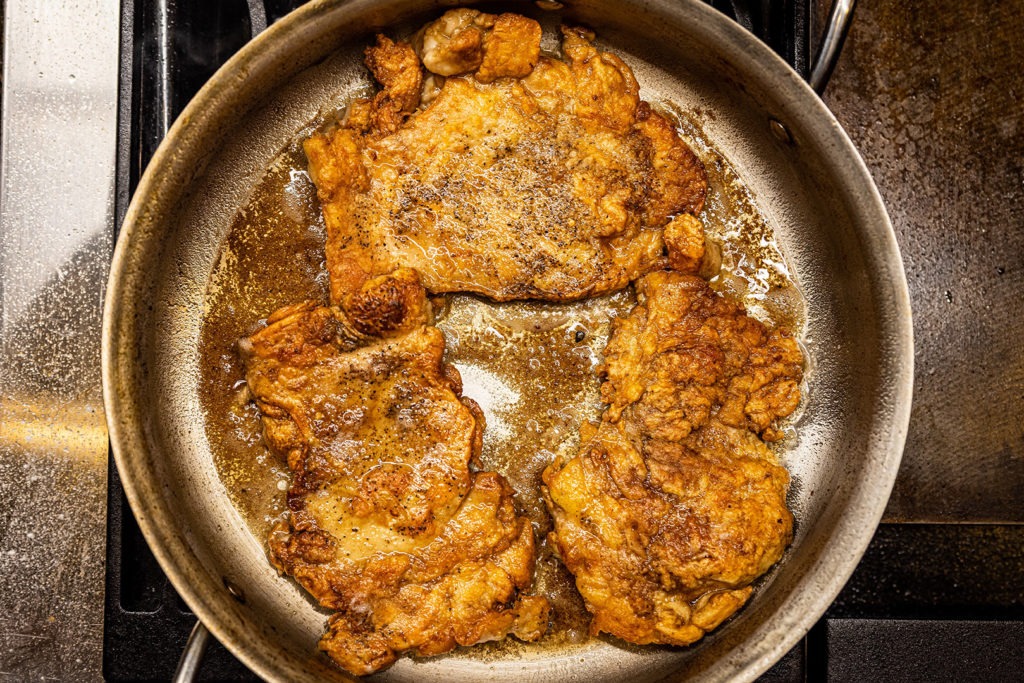
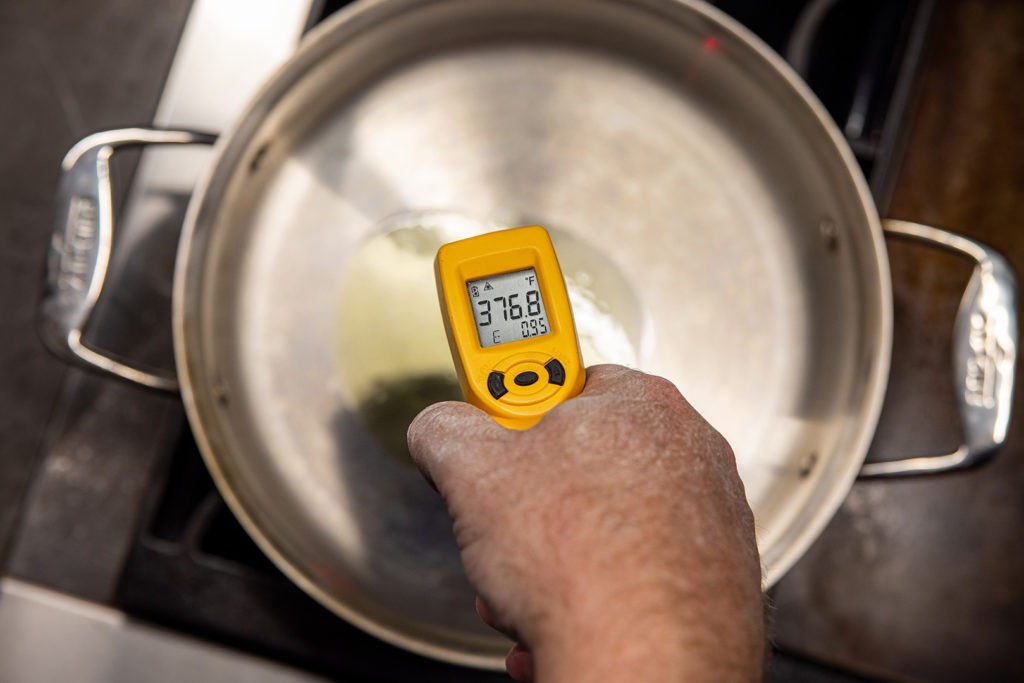
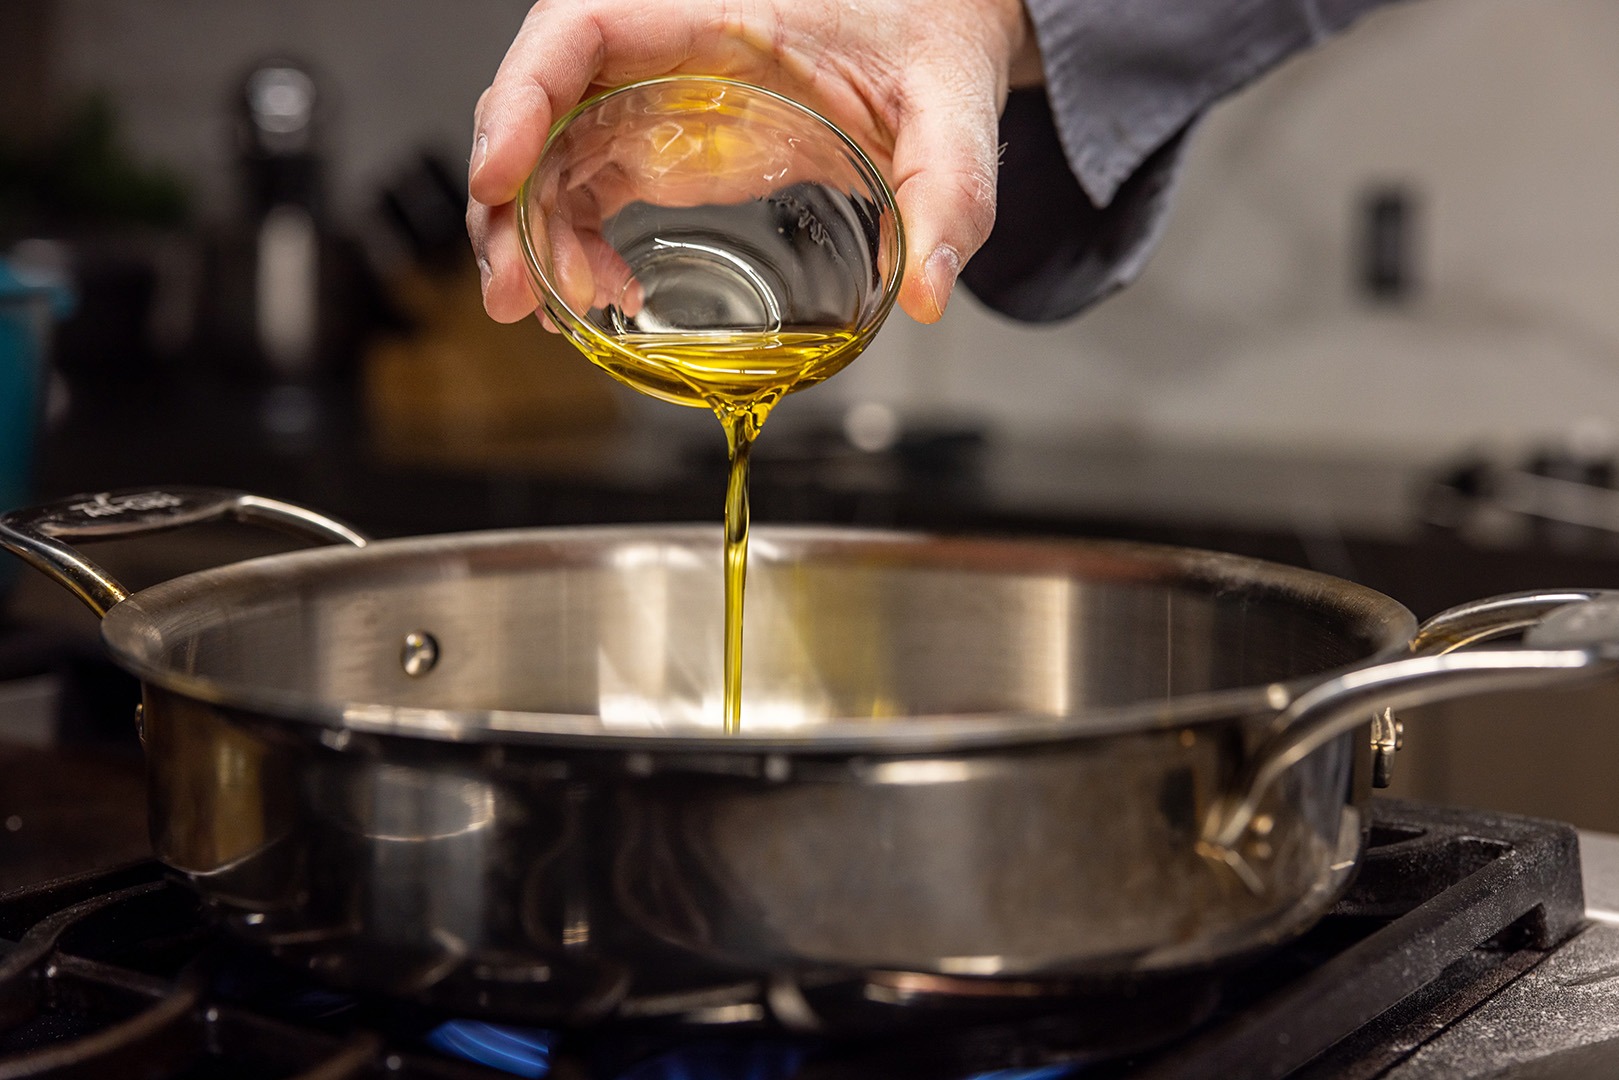
As for the browning of the chicken, that should happen in a “hot” skillet. But what does that mean? In this case, it means about 375°F (191°C). We used an IR thermometer to check the pan’s heat before adding the chicken, but you can also temp the oil by tilting the pan to one side and using your Thermapen to check the pool of oil that accumulates.
A few notes on the piccata process
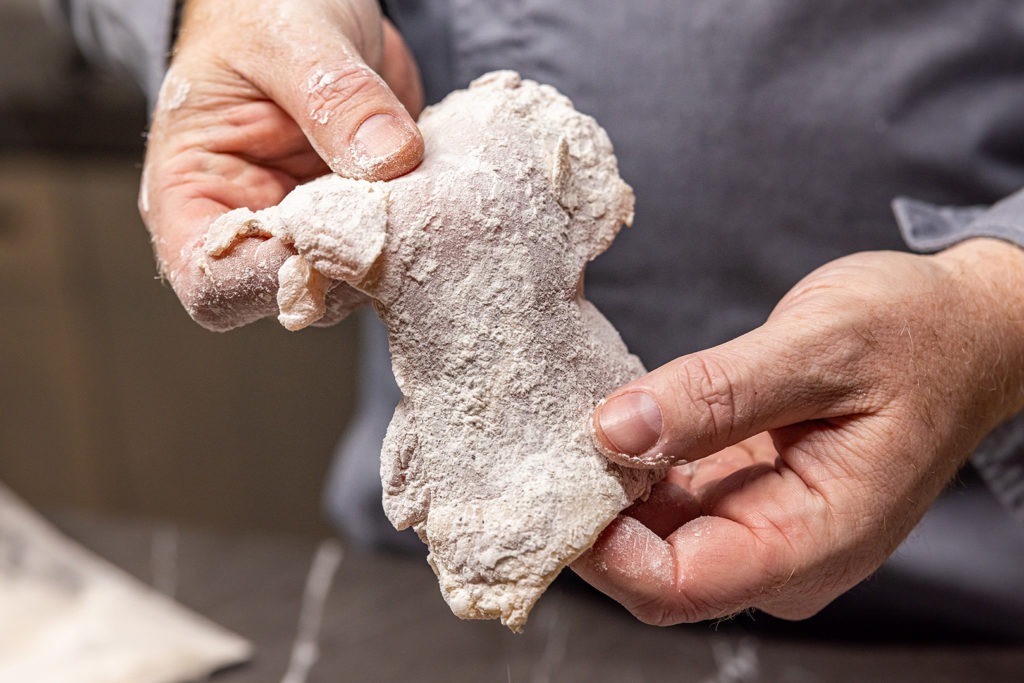
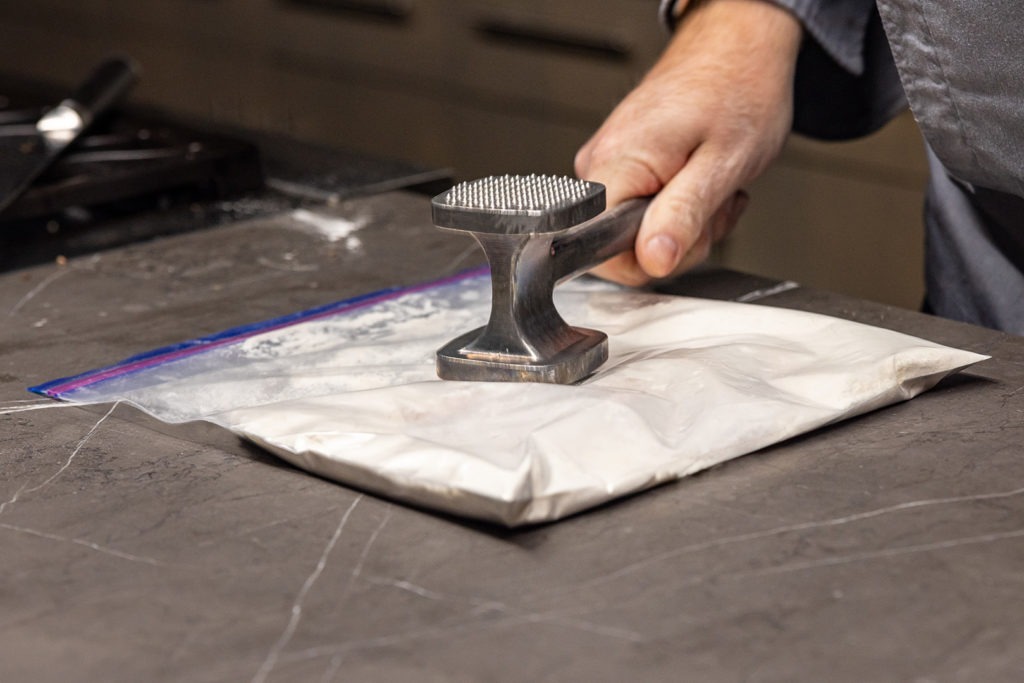
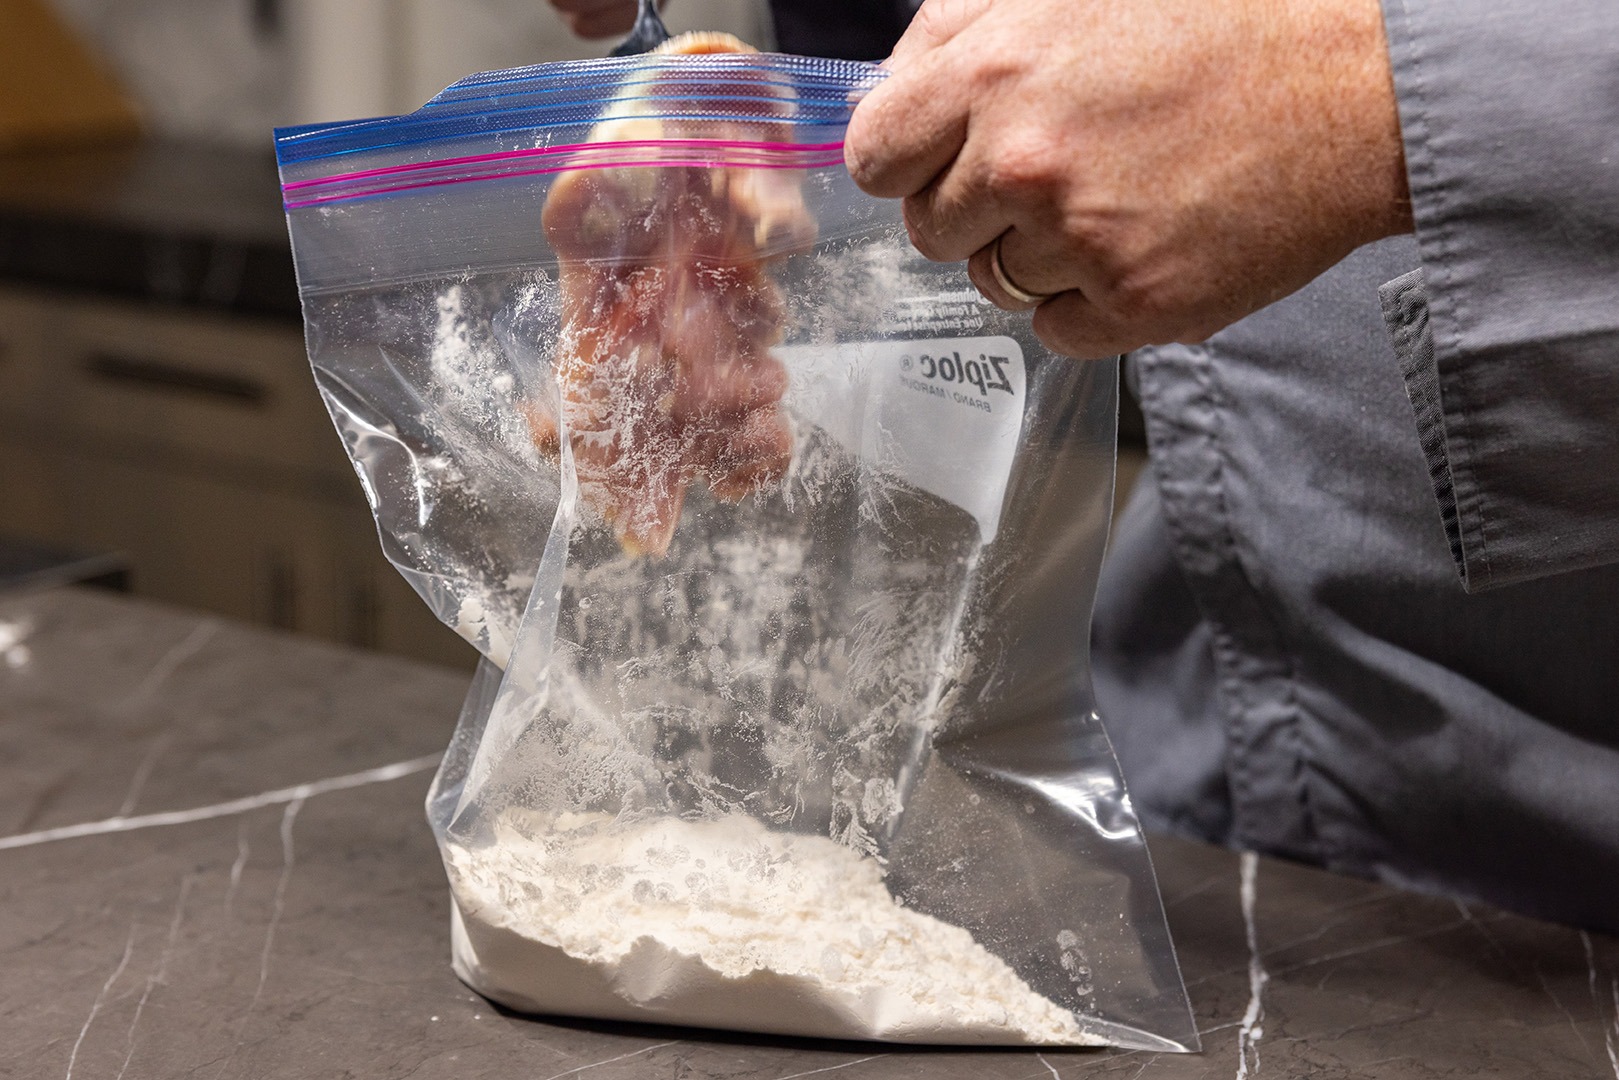
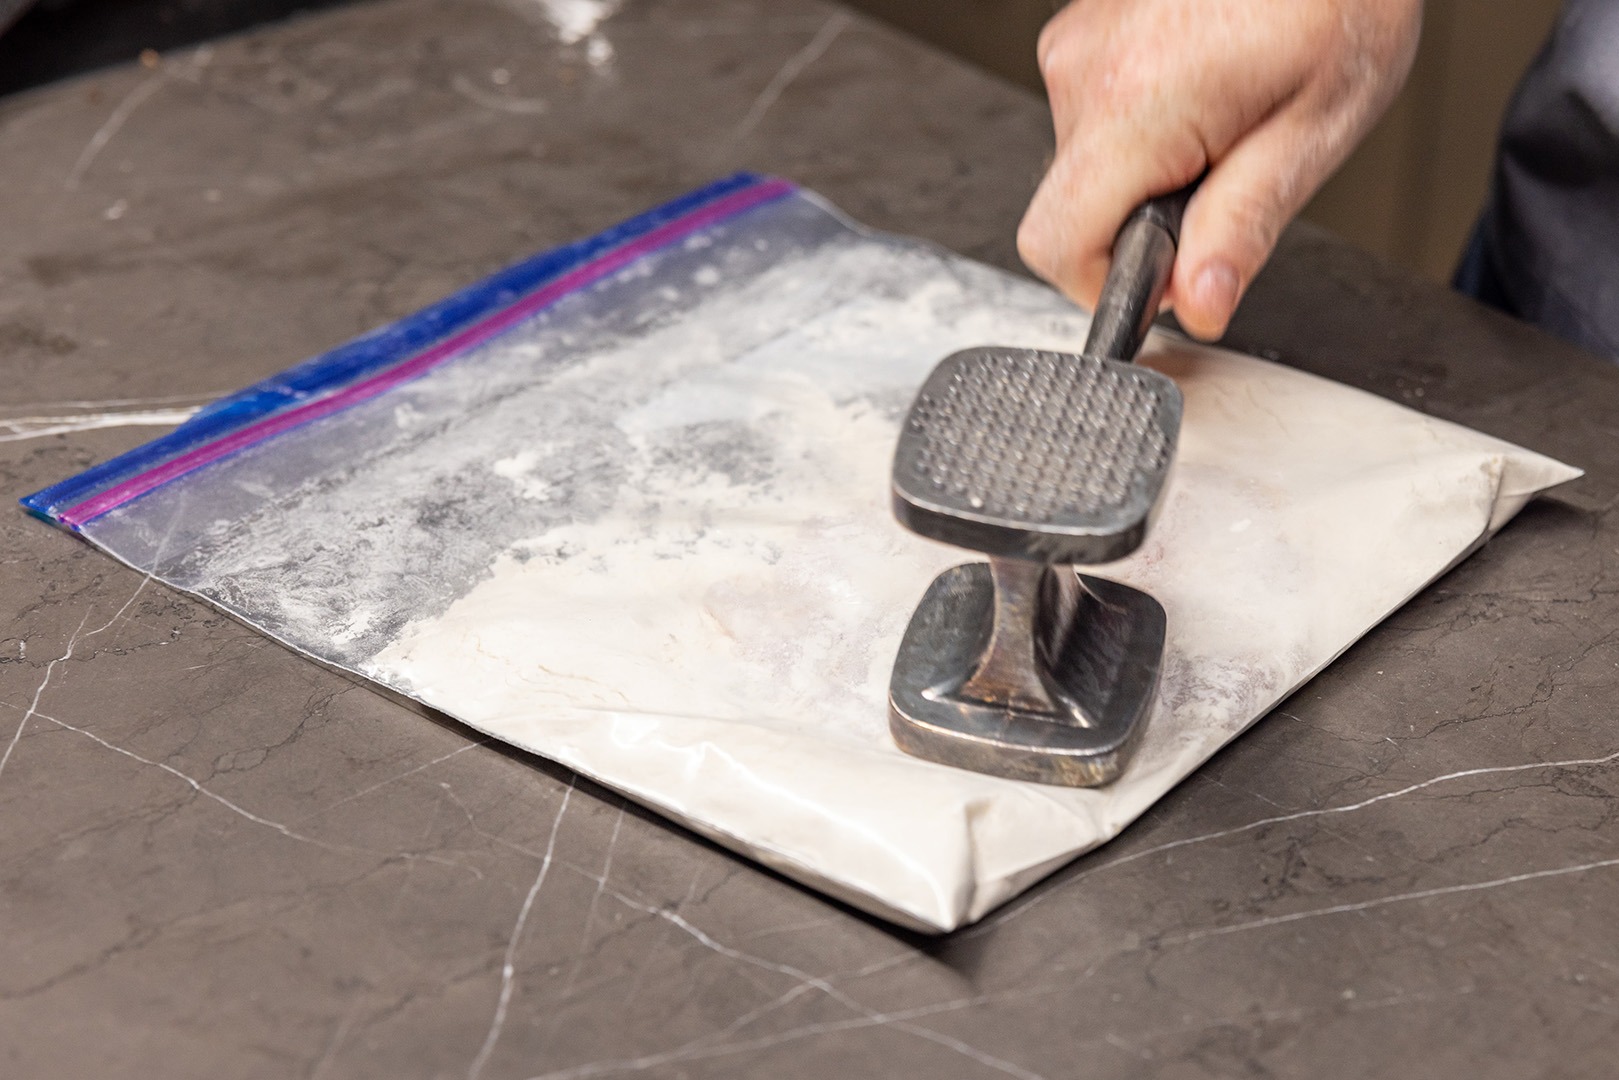
Alton Brown introduces a terrific innovation for flouring and flattening the piccata in this recipe: do it all at once. Whole boneless skinless thighs are put one by one into a plastic zipper bag with flour, danced around in it, and then flattened with a meat pounder right in the bag. You end up with a super even coating and you can just throw the bag of extra flour away when you’re done.
The chicken is fried just enough to brown it, then removed from the pan to make room for the mushrooms to sauté. Capers are added and cooked before the chicken is added back to the pan. Though it starts out as a lightly fried, floured chicken dish, this is, in fact, a very quick stove-top braise. The browned-but-not-fully-cooked chicken is put in the pan atop the sauce with the wine, stock, and lemon juice and cooked with the lid on. If you’re looking for the chicken to come out crispy and crunchy, you’ll be disappointed. You shouldn’t expect that, and that’s just fine: the flavor of the breading/browning persists, and the flour acts as a thickener in the pan sauce we create during the braise.
As you cook this recipe, you’ll be overwhelmed by the bright, fresh smells you’ll encounter, and by the absolute delicious look of the dish at basically every step along the way. keep your eye on the critical temps with your Thermapen and you’re sure to get amazing results. Trust me, you’ll want to put this one on repeat.

Chicken Piccata recipe
Description
Chicken piccata based on Alton Brown’s recipe from Alton Brown: EveryDayCook (pg. 117).
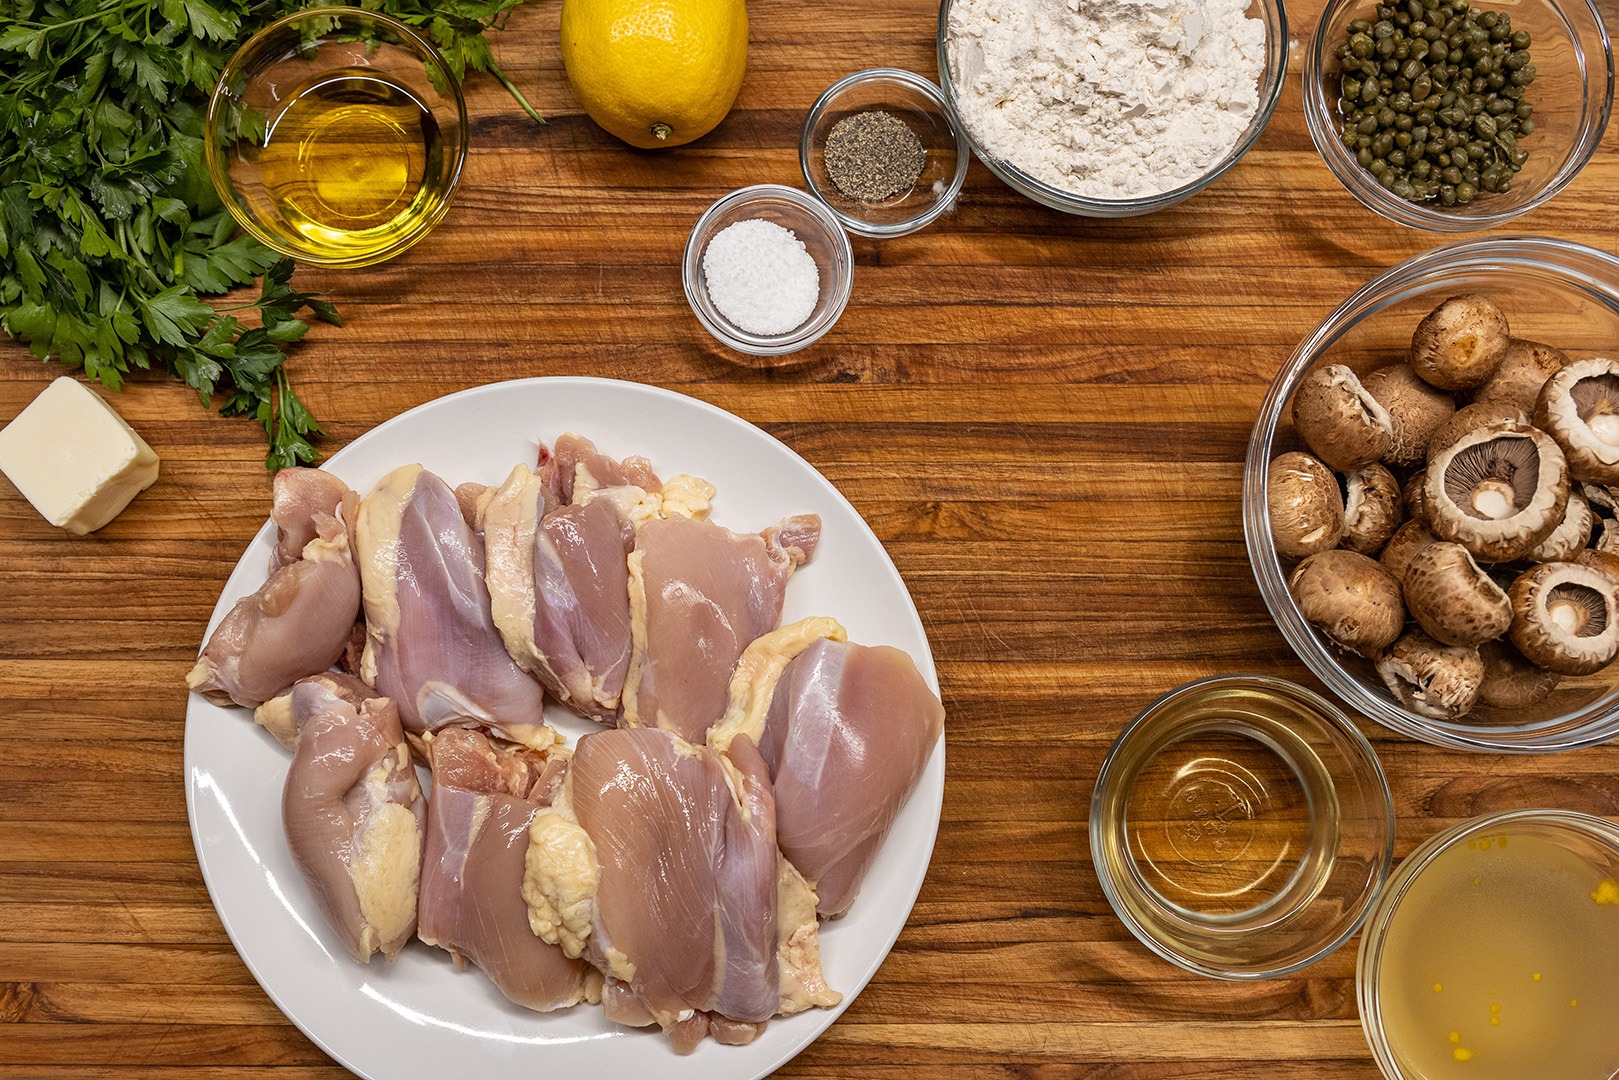
Ingredients
- 3 oz white wine
- 4 oz chicken broth
- 1 lemon, half of it sliced into 8 thin slices, the other half juiced to get 1 1/2 Tbsp juice
- 8 boneless skinless chicken thighs
- 2 tsp kosher salt, divided
- 1/2 tsp black pepper
- 1 C A.P. flour
- 3 Tbsp unsalted butter, divided
- 2 Tbsp olive oil
- 8 oz mushrooms, thinly sliced
- 3 Tbsp capers, drained—not rinsed
- 2 Tbsp chopped flat-leaf parsley for serving
Instructions
- Combine the stock, wine, and lemon juice in a container. Set aside.
- Season the chicken thighs with pepper and 1 tsp of salt.
- Put the cup of flour in a gallon-size sturdy zip-top bag.
- Add one chicken thigh to the bag and toss it around to coat. Lay the bag on its side on a sturdy work surface and press most of the air out, sealing the top.
- Pound the chicken out flat in the bag with the flour. Turn it over at least once during the pounding. Aim for about 1/4″ thick.


- Remove the flattened meat from the bag and add another thigh and repeat until all the thighs are flattened.
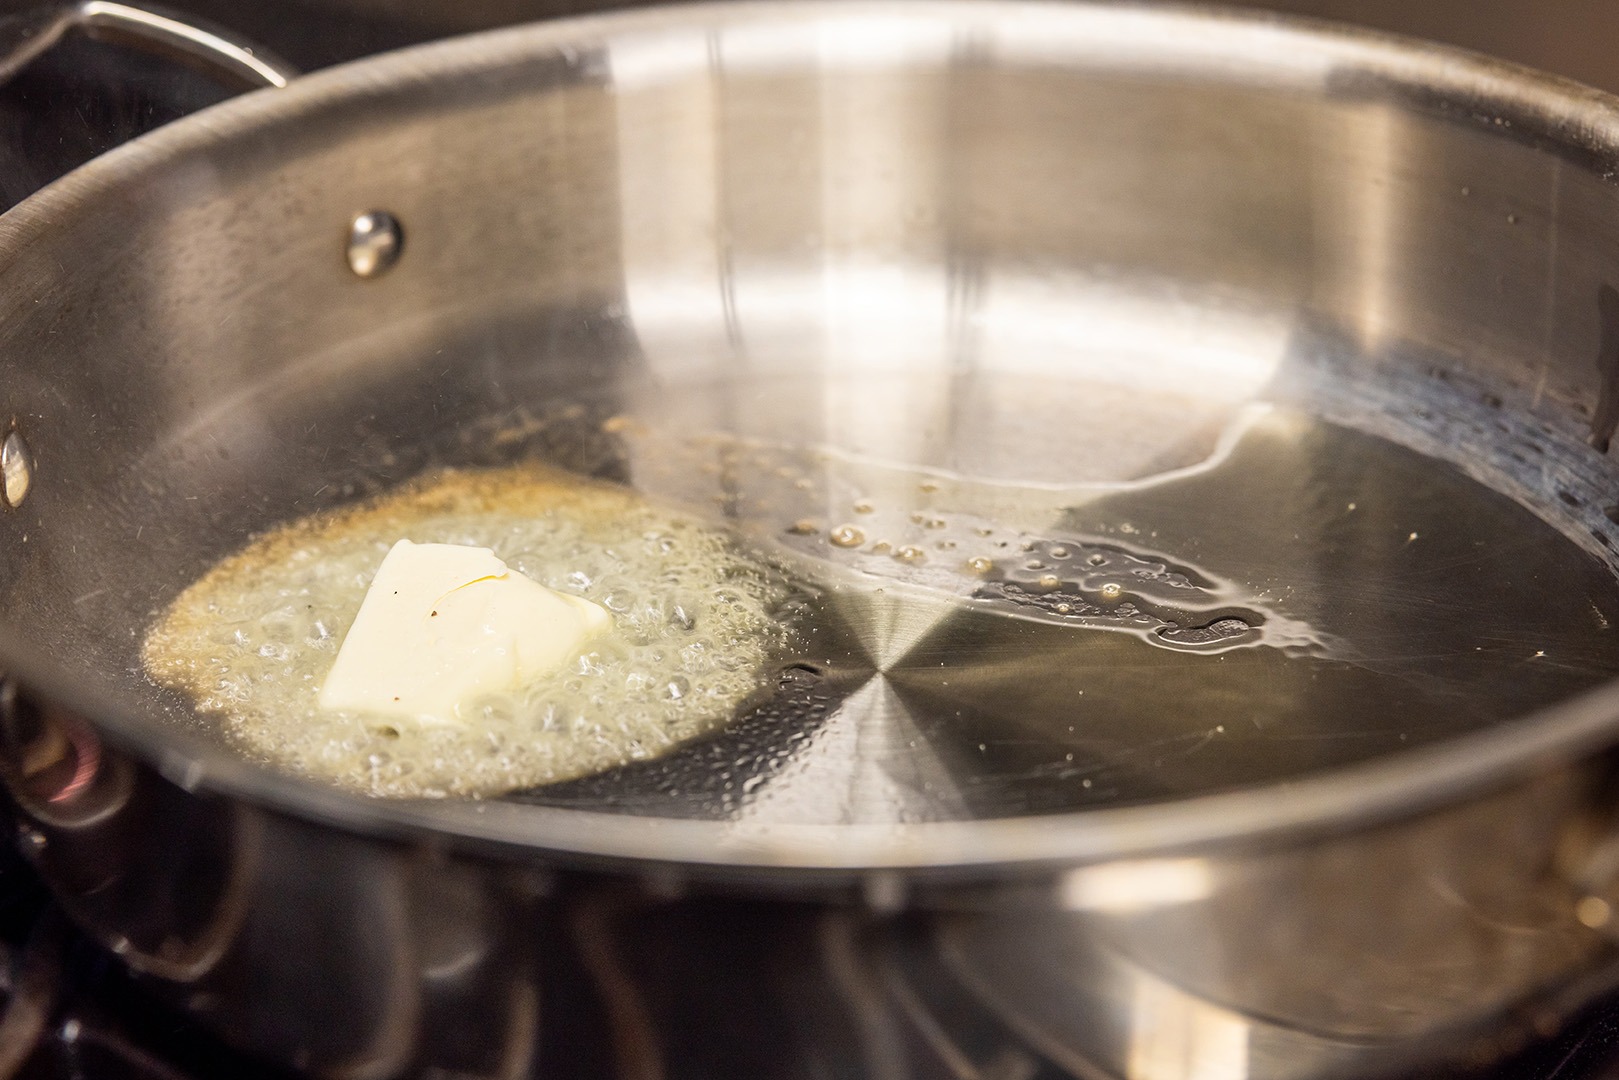
- Heat a large skillet that has a lid over high heat. Add 1 Tbsp of the oil to the pan and temp it with a Thermapen or an IR thermometer. It should be about 375°F (191°C). Add 1 Tbsp butter to the pan.
- As the butter foam subsides, put four of the flattened thighs into the pan and cook on each side for about 1.5–2 minutes, until nicely browned.


- Remove the chicken from the pan and set it aside.
- Add another tablespoon of oil and another tablespoon of butter to the pan and cook the remaining four thighs. Remove them from the pan as well.

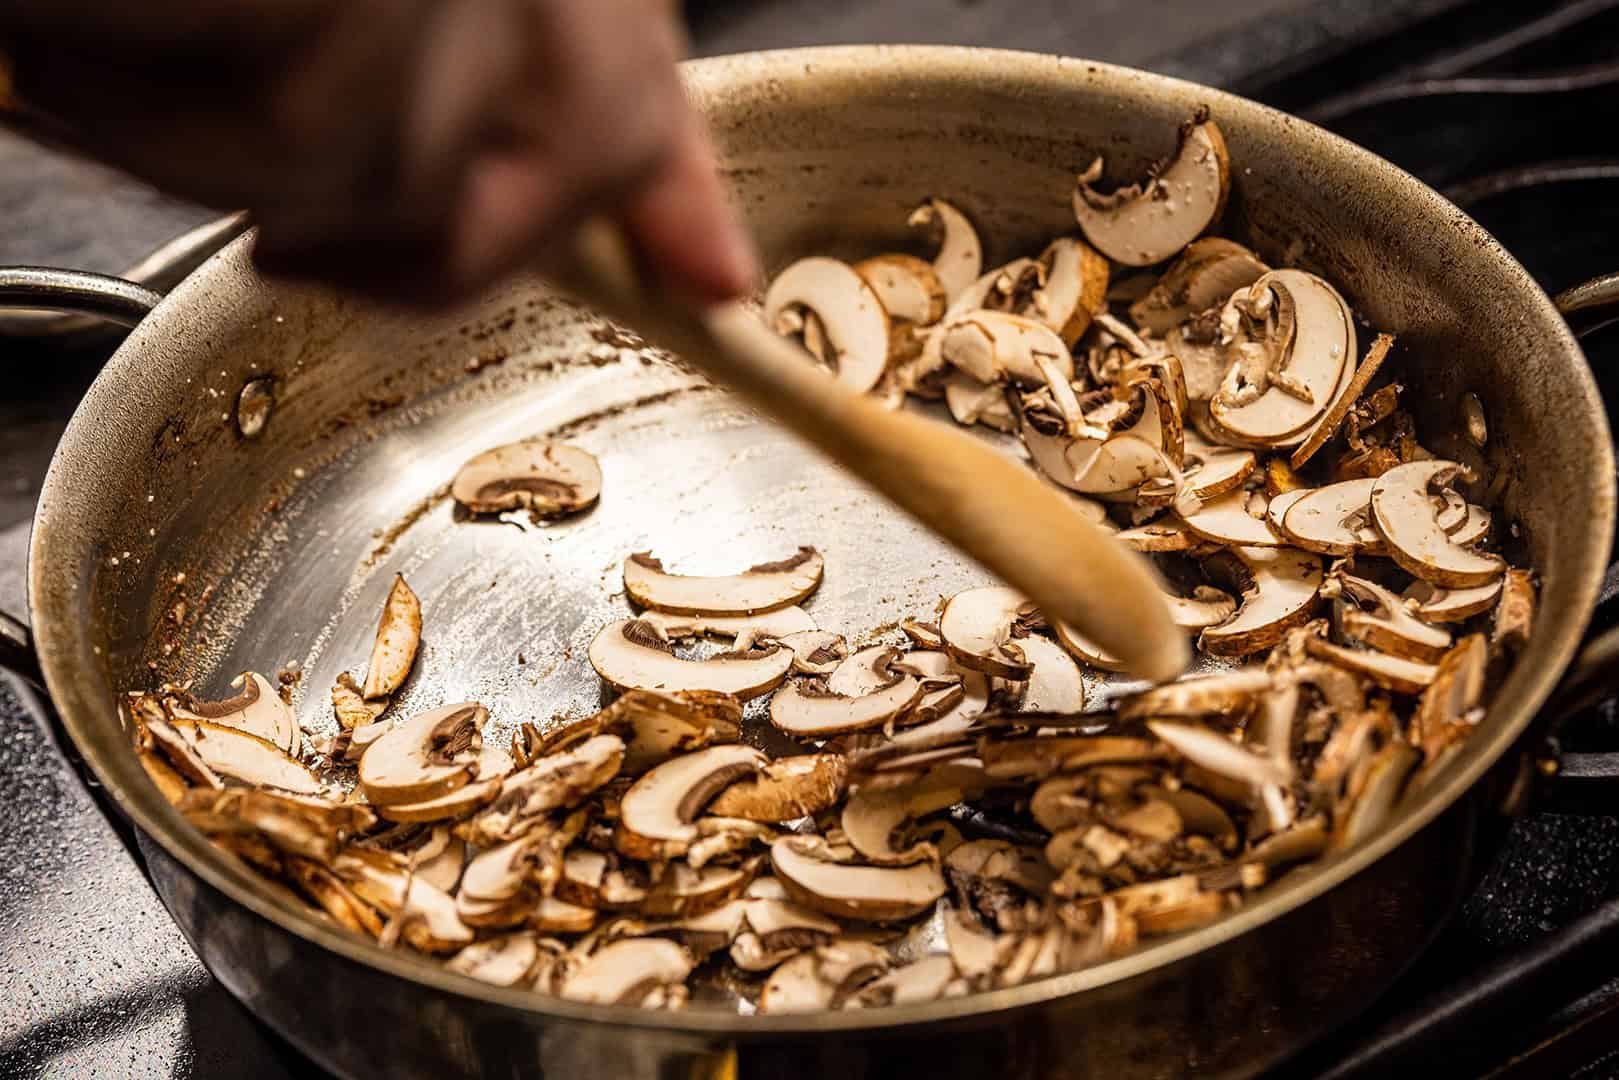
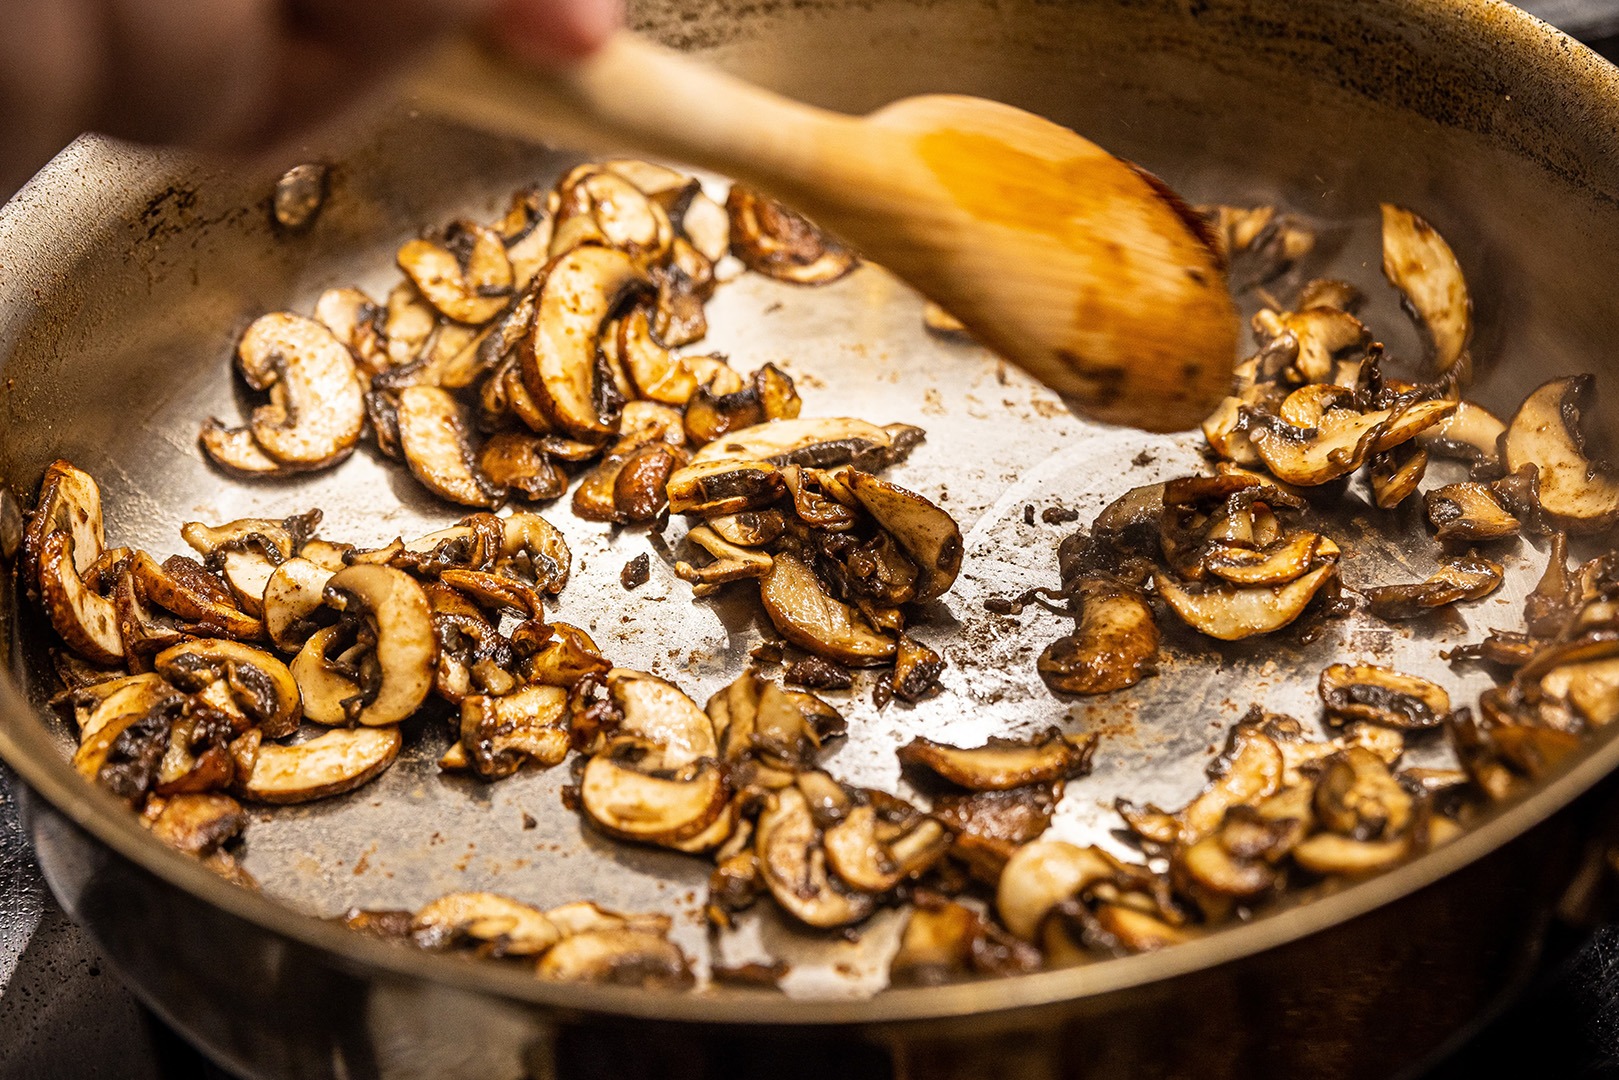
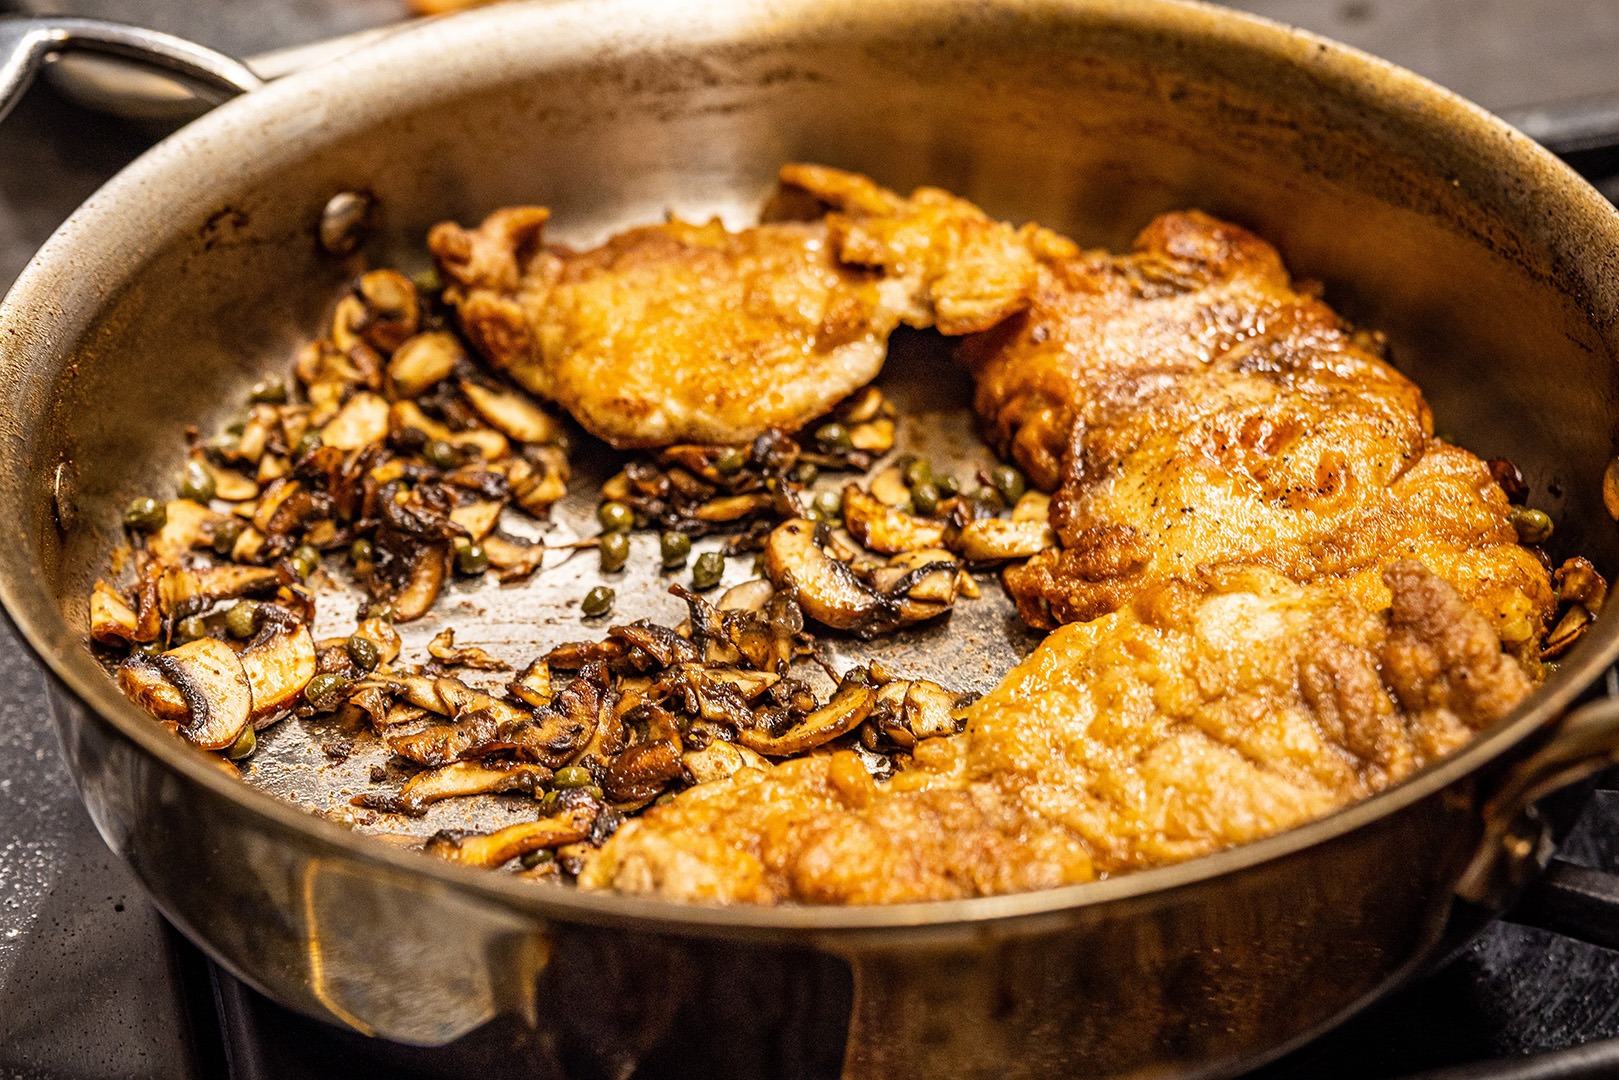
- Add your thinly sliced mushrooms to the hot pan and cook with the remaining teaspoon of salt until they just start to brown.
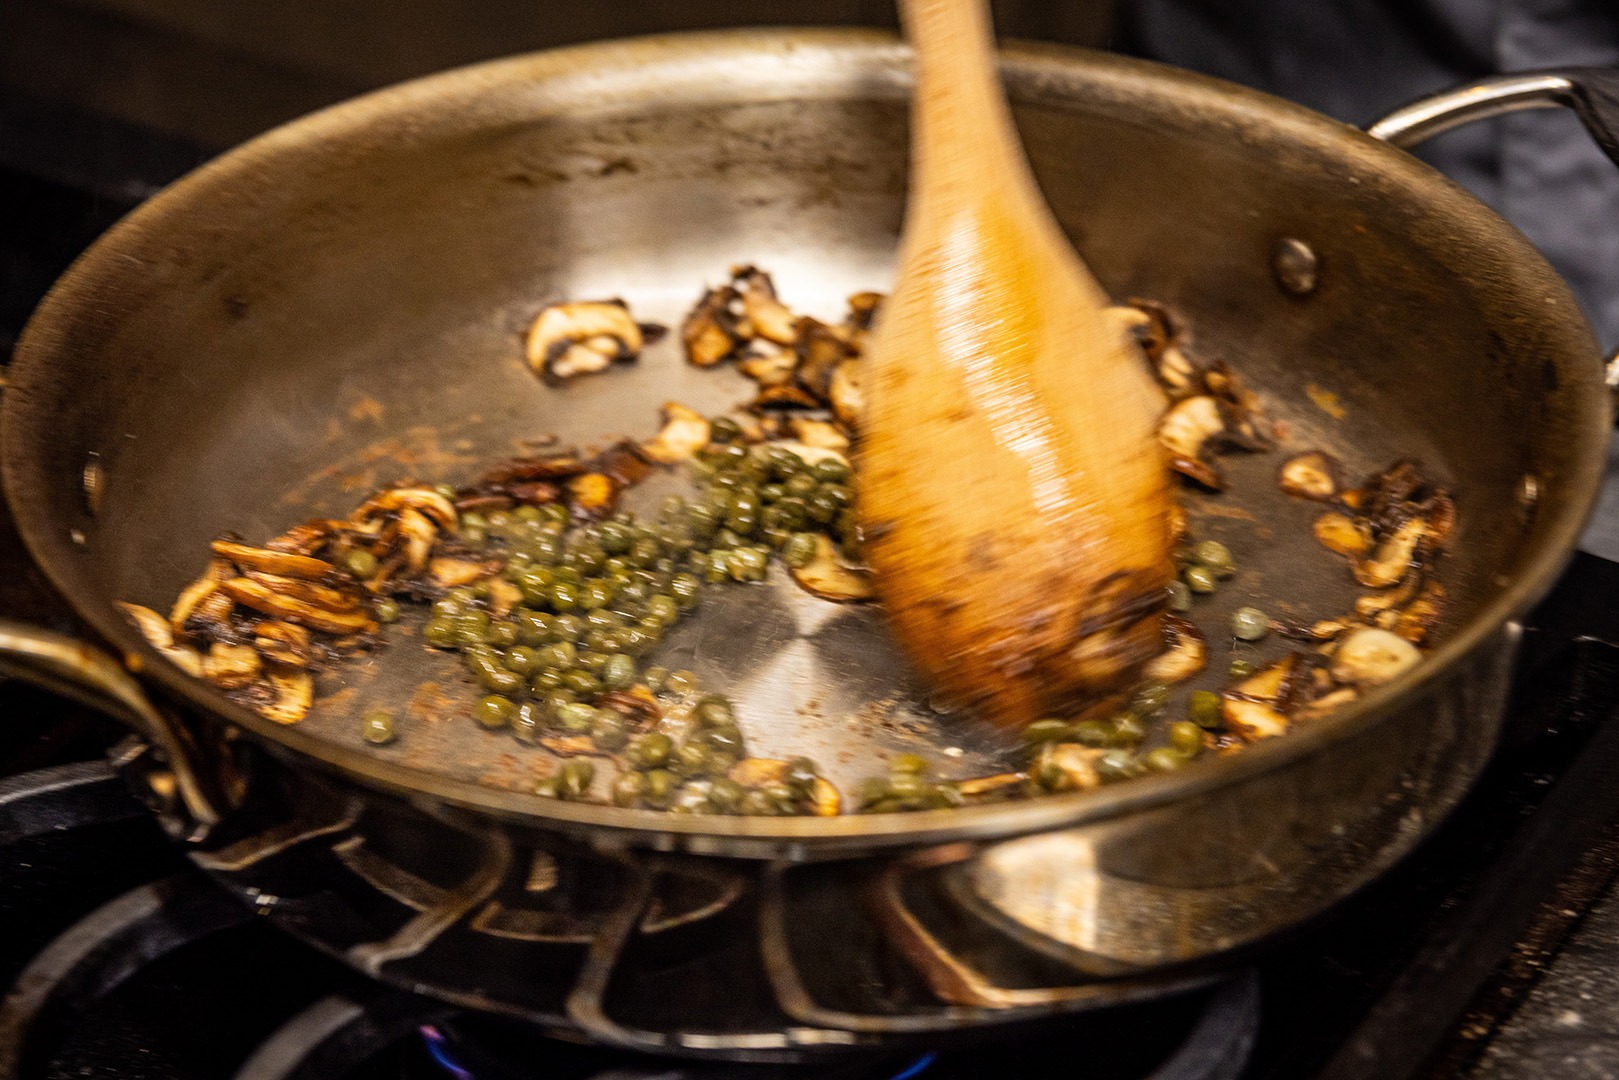
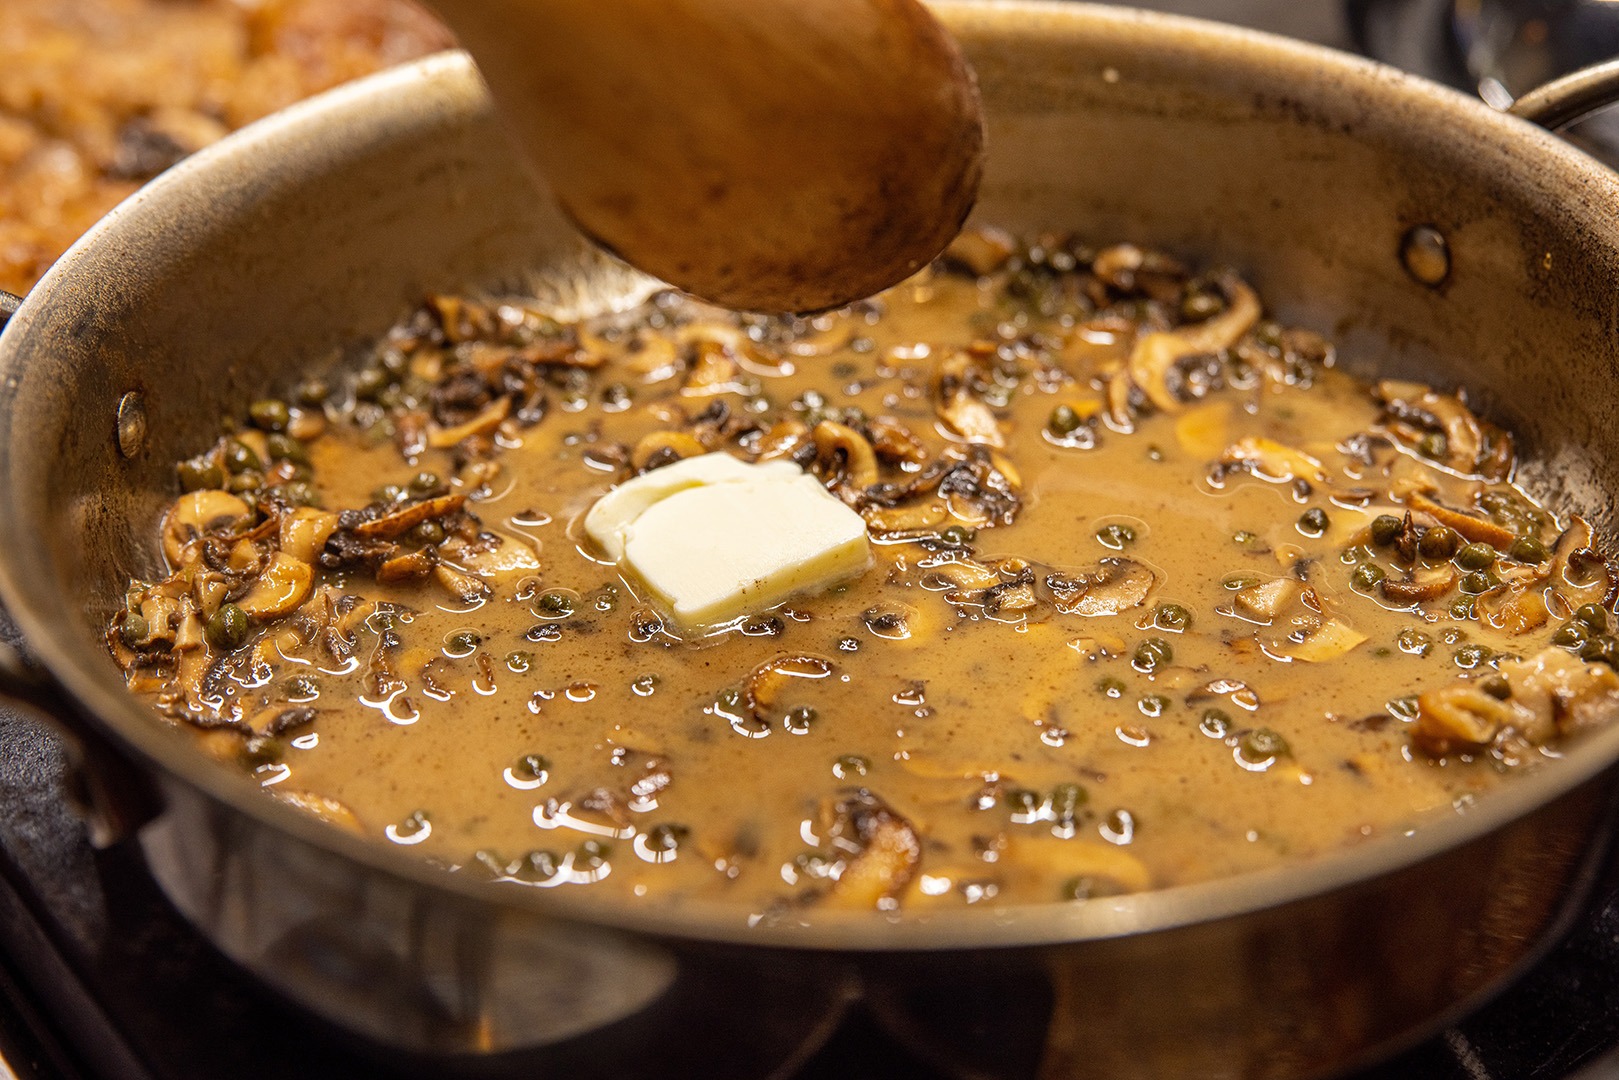
- Move the mushrooms aside and add the capers to the pan. Cook for about 1 minute, then stir together with the mushrooms.

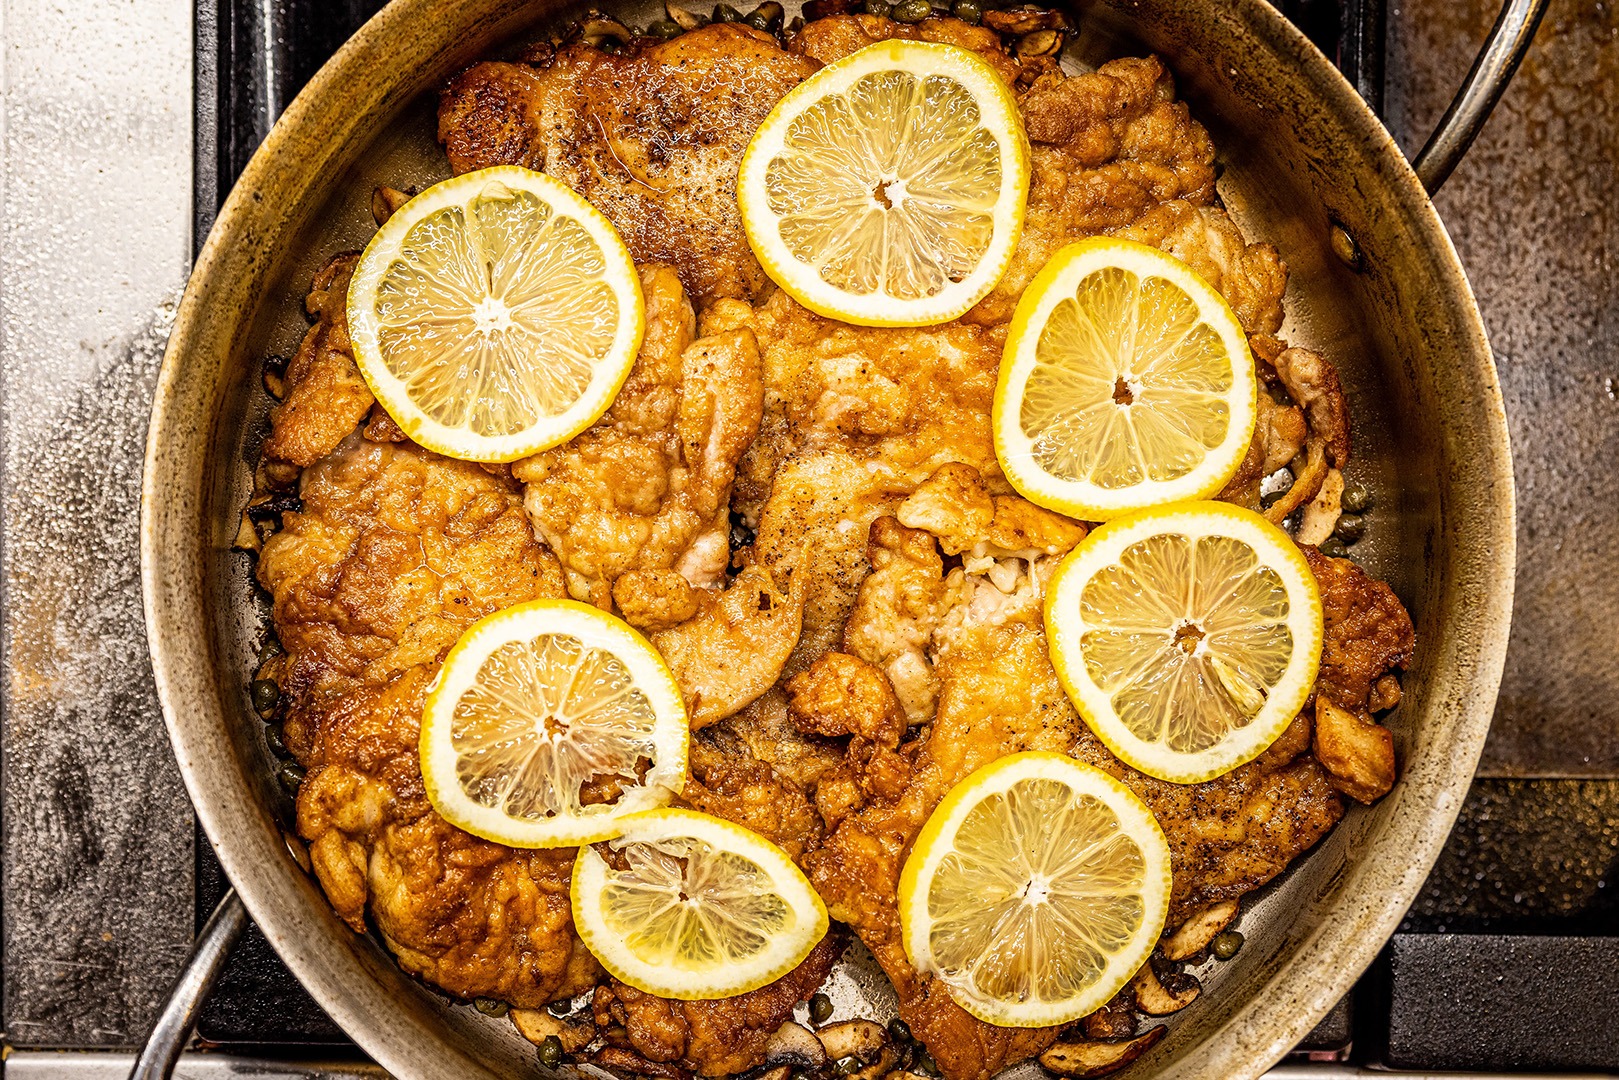
- Put all the chicken back in the pan. It will need to overlap. Top with the lemon slices.
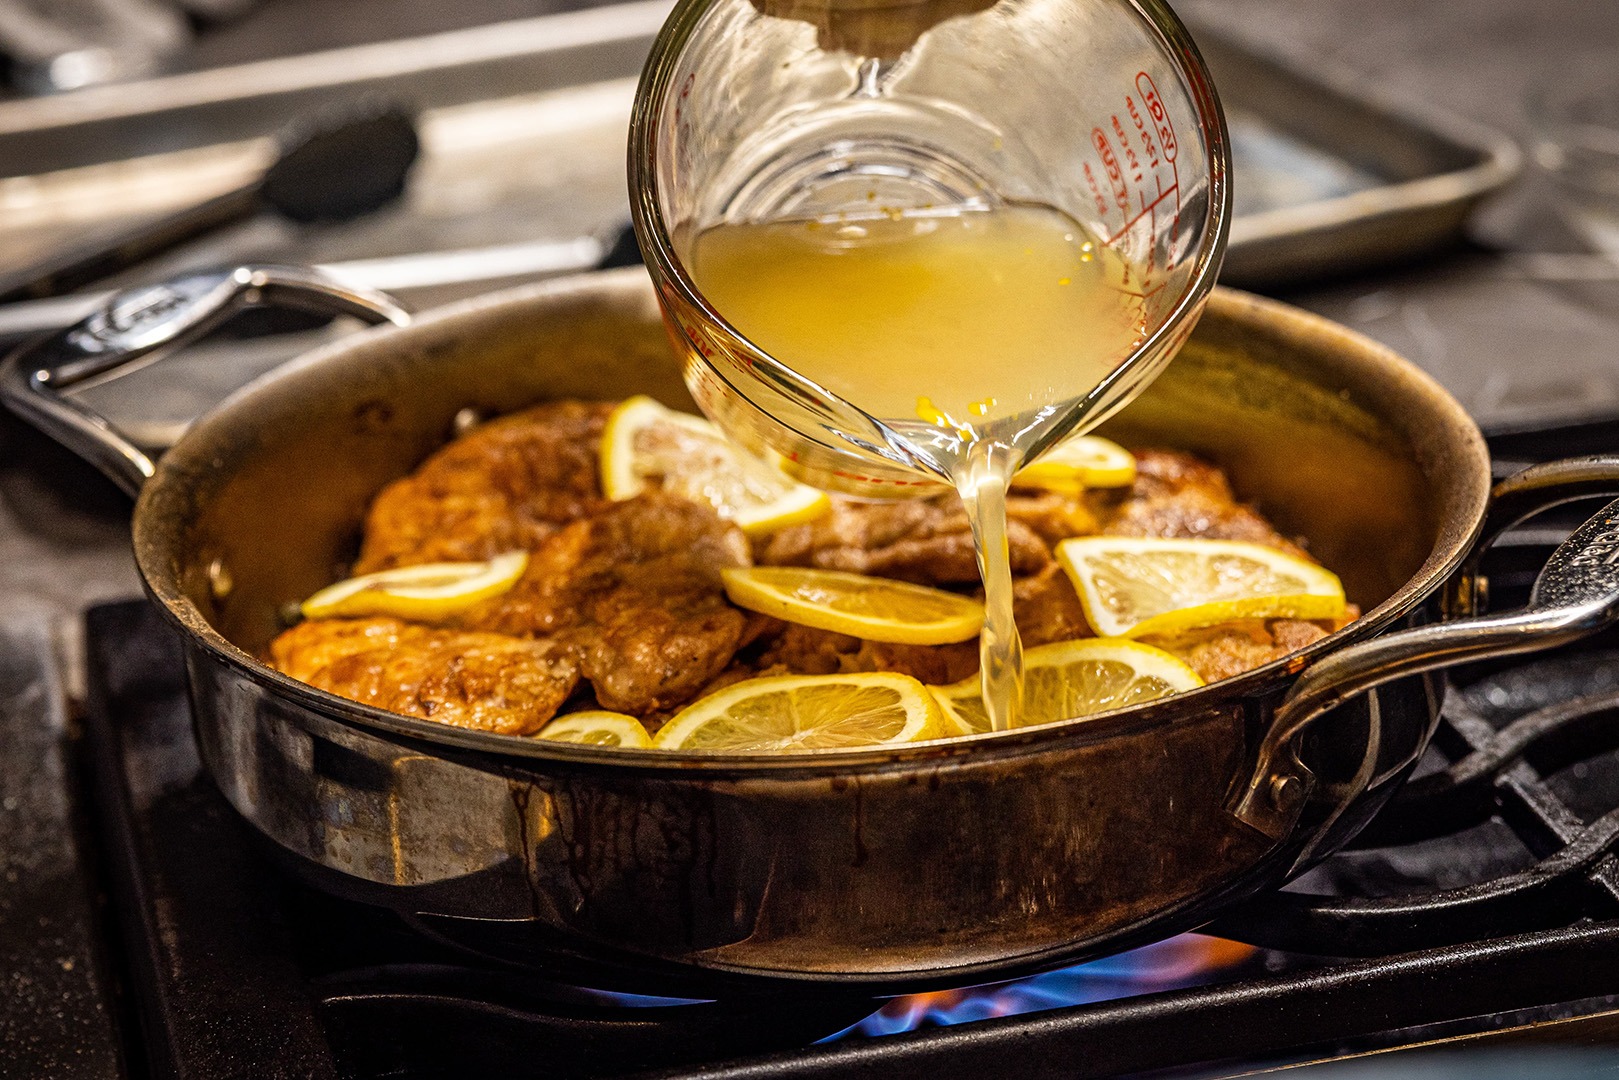
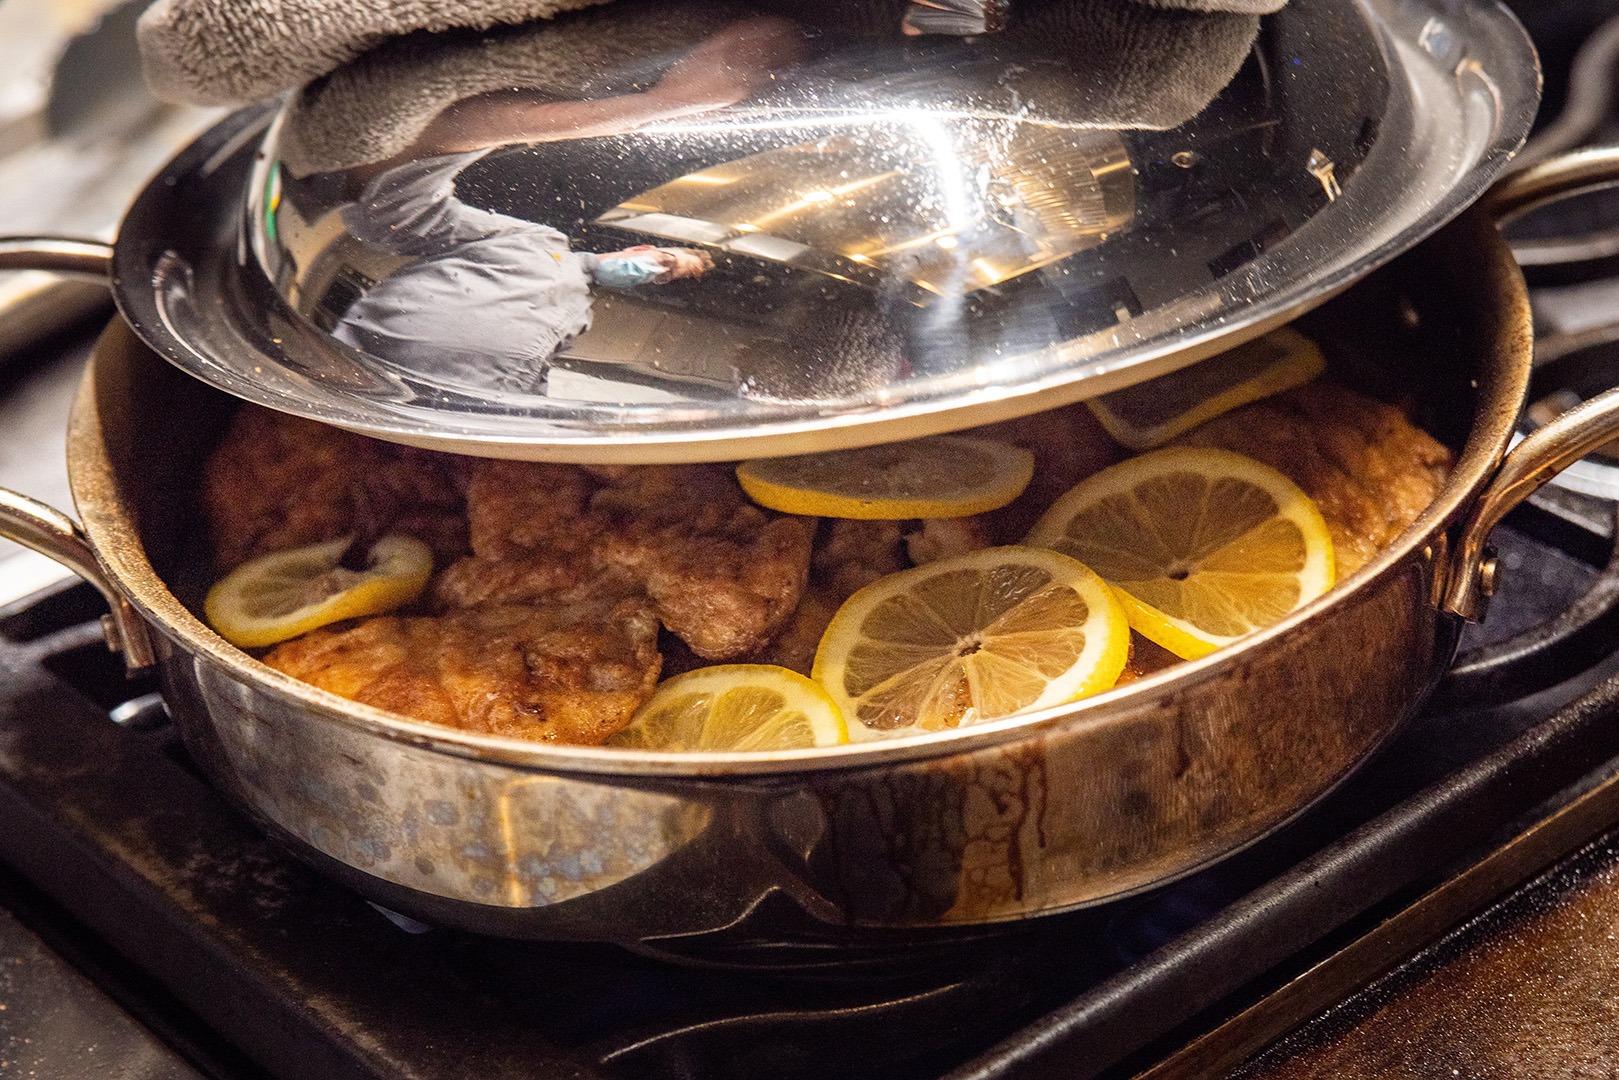
- Pour in the stock/wine/lemon juice mixture, turn the heat down to low, and put a tight lid on the pan.

- Cook for about 5 minutes, then start checking doneness with your Thermapen. When the chicken pieces reach at least 175°F (79°C)—or up to 195°F (91°C)—remove them to a serving platter, discarding the lemon slices.

- Add the remaining tablespoon of butter to the pan and turn the heat up to bring the sauce to a boil. Boil the sauce to thicken it, stirring, until it is saucy and clings to the back of a spoon.

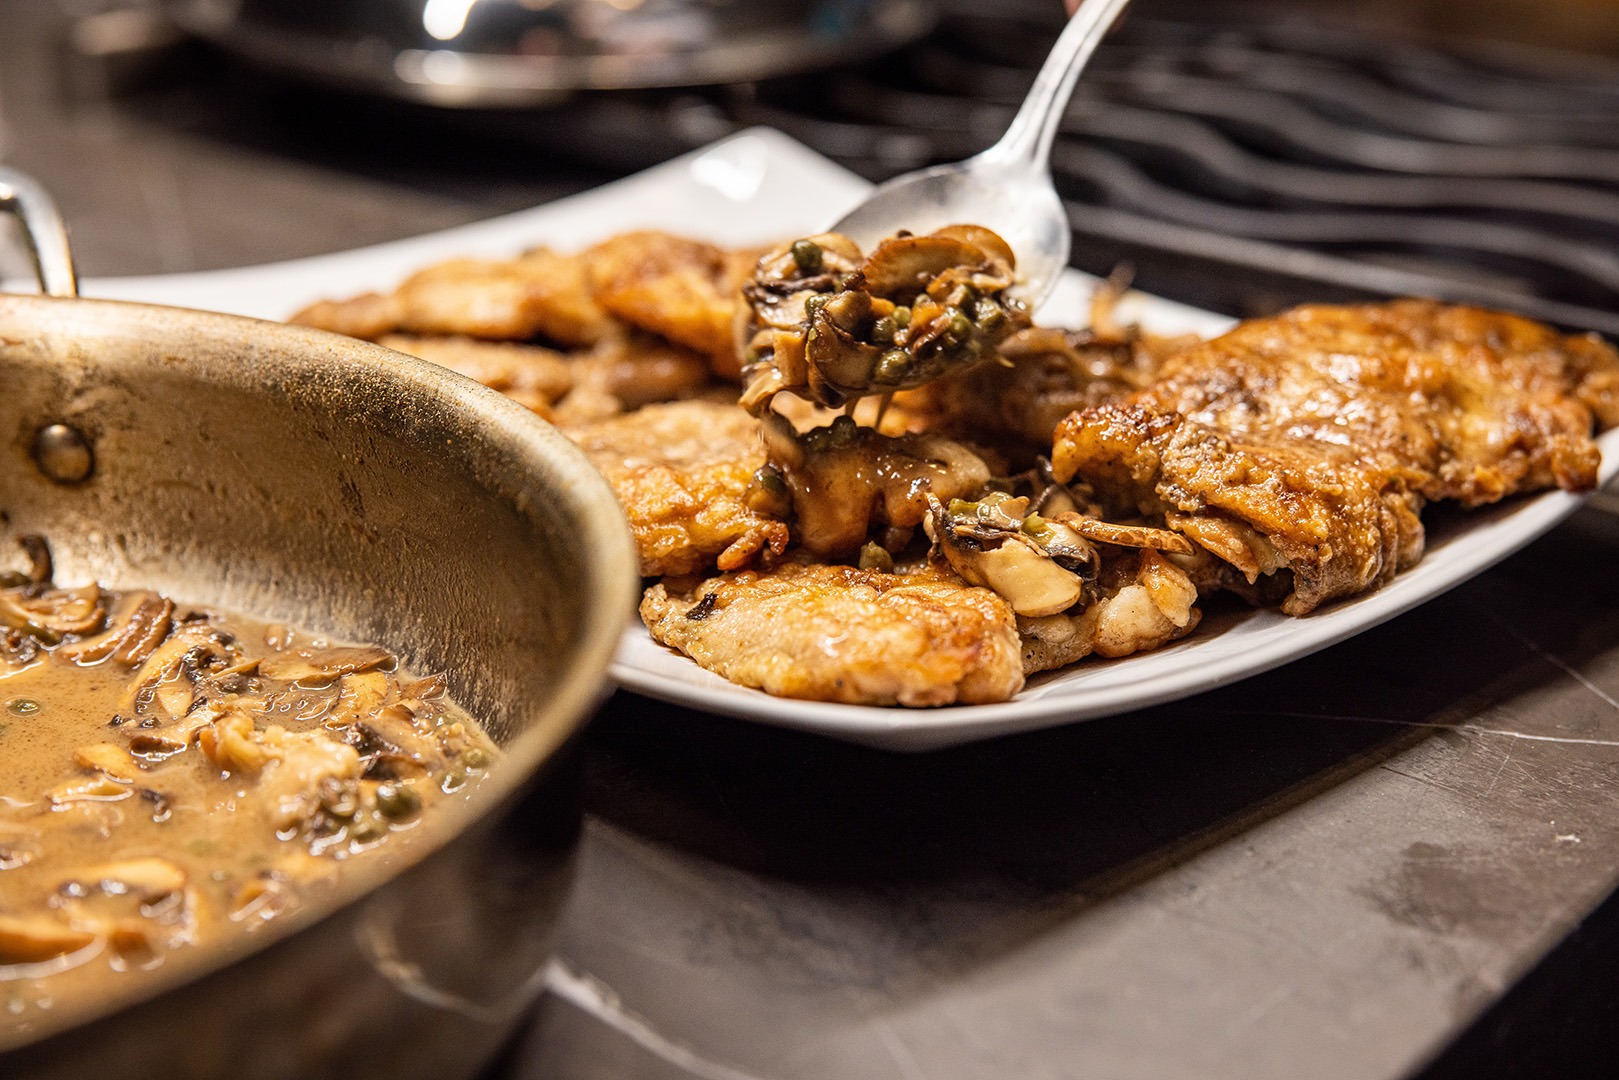
- Spoon the sauce, capers, and mushrooms onto the piccata and serve. It goes great on a pile of buttery egg noodles, a mound of steamed rice, or, for full decadence, a waiting pool of risotto. It’s also amazing on its own!

Stuart says
It would be helpful to state the number of servings.
Martin says
This makes 4-8 servings depending on how hungry everyone is and what you’re serving it with.
Chef Pace says
Excuse me for a correction, I’m from Milano and a chef (now retired) piccata is the Milanese word for scaloppini, it can be finished with different sauces, not only lemon. The word picatta comes from the Italian word picchiata, meaning beaten. I use Thermo products exclusivly and find them extremly accurate and easy to use.
Martin says
I am happy to be corrected, thank you for the information!
Virginia Goodwin says
Used Alton Browns recipe with great success so this was a shoo-in. Have never cooked with a thermometer but will invest in a thermopen before I cook the next roast beef. Sounds like an insurance policy for cooking.
Martin says
It really is a great insurance. Happy cooking!
Karin Hodgson says
Globally we need to reduce our use of plastics and exposure to microplastics so I would appreciate a different methodology for this recipe.
Martin says
Fair point. You can just as well flour the chicken in a bowl or paper bag and pound it out between sheets of wax paper.
Carole says
Thanks for bringing up the plastic. I’m trying to figure out how to eliminate single-use plastic from my life. It sure ain’t easy!
Cathy says
Going to try this soon looks so good
James Eckley says
As soon as I saw this recipe, I knew I had to make it. Your detailed instructions made it a breeze to replicate this recipe and the results were incredible. The chicken was moist and flavors of the sauce was addicting. This is now going to be one of my all time favorite dishes!! Thank you so much for posting it!
Martin says
Wonderful! Thanks for sharing!
Elizabeth Lewis says
I made this last night for dinner exactly as written, and it was amazing! I really like the method of pounding the chicken in flour. I’m probably going to steal that one for other recipes 🙂 The seasoning was spot on, not too lemony. We do like extra sauce, so for us the amount of sauce the original recipe yields was perfect for two. This is now my go to chicken piccata recipe. Thanks, Martin!
Martin says
I’m glad you liked it!
Caroline Cunningham says
Hi!
You specify Chicken Broth in the list of ingredients, and then mention Stock in the instructions…
Preference for one over another?
Thank you!
Caroline
Martin says
No preference! Either will do.