Grilled Rib Eye Steak: Reverse Sear and Thermal Principles
If there were a President of Steaks, it’d be the rib eye. There’s something special about the cut, with tender, well-marbled meat that smells somehow better than any other steak. It’s a great way to celebrate anything: Father’s Day, Independence Day…Dinner. In today’s post, we’ll be showing you how you can get the best results when grilling this amazing cut, and we’ll also talk about one of the best ways to top it: homemade compound butter.
This rather expensive steak is one you really don’t want to mess up by overcooking. To eliminate any chance of that cardinal food sin, you should cook your steak by the reverse sear method.
What is the reverse sear method?
A traditional sear is an old trick for cooking steaks, whereby you’d sear the steak in a hot pan or on a hot grill and finish it in the oven at a lower temperature. This helped prevent overcooking—in part—but also created a delicious crust. The reverse sear is the opposite of that: you cook the steak in a low-temp environment first until it is about 15°F (8°C) below your target pull temperature. Then you sear the steak to give it that tasty crust and to finish the cooking.
Why reverse sear?
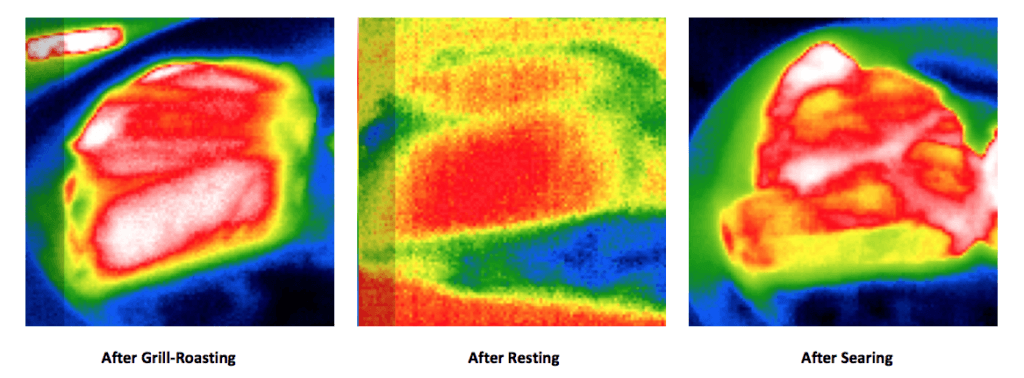
By cooking the steak evenly throughout, you can be assured that you are getting just the doneness that you want. The gentle early cook gives you greater control over meat temp because the temperature gradients from exterior to interior remain relatively mild throughout. If you sear first, you’re setting up a steep temperature curve through the thickness of the meat that can push you into doneness range with unexpected rapidity. Getting your meat close to done and then pushing the surface to a crust just gives you more control over the finish, the perfect pink that you are looking for.
Put another way, by grill-roasting a rib eye—or other—steak in a 220°F (104°C) environment, the thermal gradients within the meat are kept broader, meaning the center temp is much closer to the surface temp. When the steak reaches 110°F (43°C) internal temperature, the outside region is still much cooler than it would have been if you had seared it first. If you then sear the steak quickly over high heat, you get a great Maillard-browned crust but little to no grey-ring in the steak.
Reverse sear is the best way to get edge-to-edge even doneness on a thick steak without a thick band of battleship gray meat just under the crust. —The Science of Great BBQ and Grilling, by Meathead Goldwyn
(Incidentally, when the pink pigment myoglobin heats beyond 140°F (60°C) degrees, it denatures and turns brown. And while this change from pink to brown is not what makes a piece of beef well done, it is indicative of the kind of heat that does cook meat to well.)
How to set up your grill for reverse searing steak
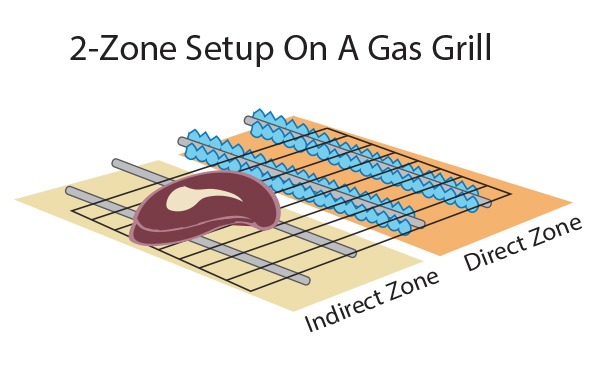
To grill a steak by the reverse-sear method, you need two zones: a direct and an indirect cooking zone. For gas grills, that means turning one side of your grill to high while leaving the other side off. For charcoal or wood grills, that means banking your coals to one side while either leaving the other side empty or even putting a pan of water in the space.
Using the air probe on the indirect side—where it’s safe from high heat and from flare-ups—monitor the temperature and adjust your lid or vents to keep it in the neighborhood of 220°F (104°C). Setting up your grill in this way will give you the two zones you need to gently grill-roast your steak and then sear it.
What thermometer?
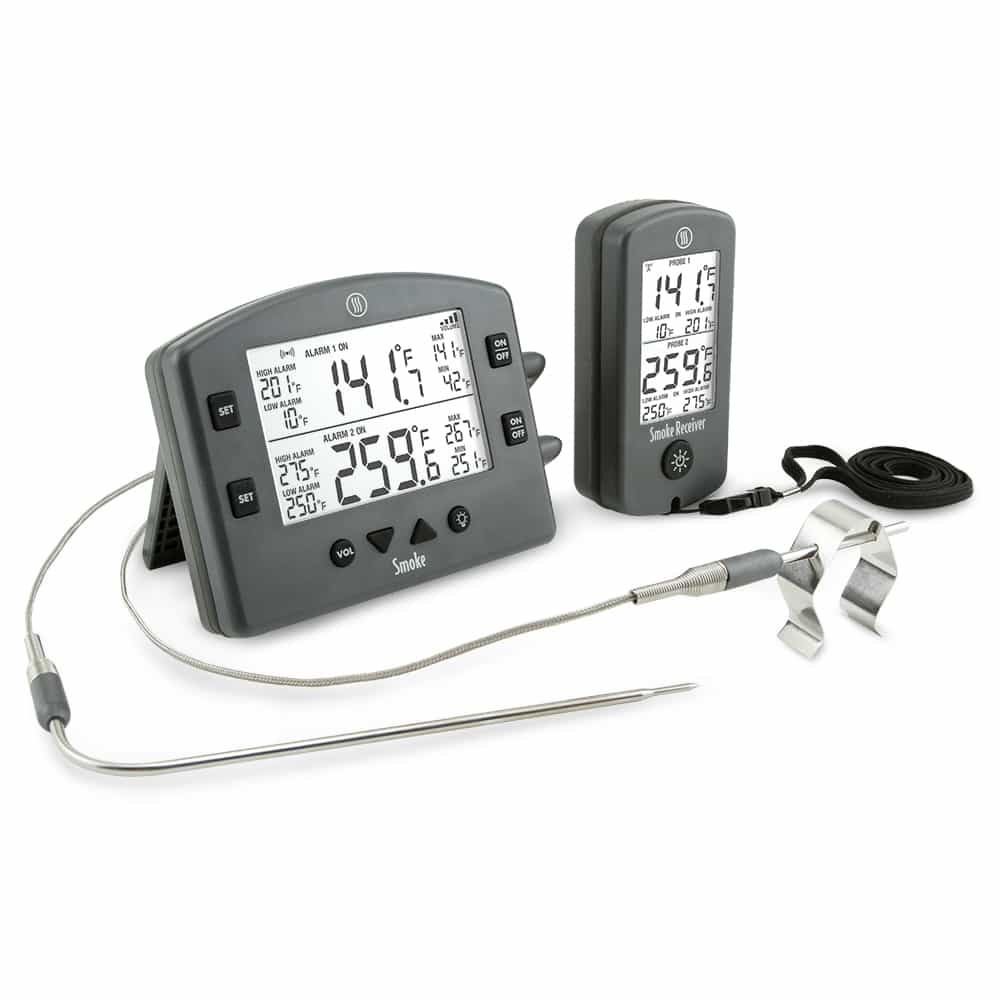
For grilling, we usually do not recommend a leave-in probe thermometer. Though our probes are rated for high heat, the flare-ups that accompany standard grilling can reach temperatures as high as 1200°F (649°C), enough to fry the sensor or the cable on your probe. However, with indirect grilling things are different. By keeping the meat—and the air and meat probes—from directly above any flame or heat source, the probe is also protected from the jets of fire that will unavoidably happen. We recommend a SmokeTM dual-channel thermometer, which can monitor the air temp as well as the meat temperature at the same time.
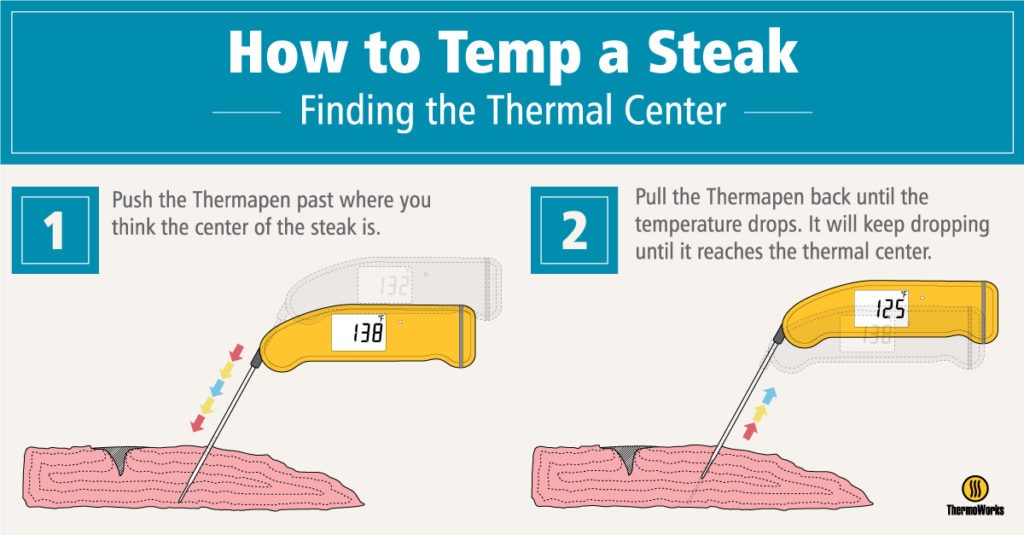
Once your steak has reached a temperature that is about 15°F (8°C)lower than your preferred doneness (130-135°F [54-57°C] for medium-rare or 135–140°F [57–60°C] for medium), remove the probe and move the steak to the hot side of the grill for searing. A few minutes per side should give it the Maillard browning and crust that you want. For the searing, use a Thermapen® to check the temperature throughout the sear. As soon as the lowest temperature you see is 5–7°F (3-4°C) below your target temp, pull the steak. Carryover will bring it the rest of the way up.
Note: feel free to let the steak rest between the grill-roasting and the searing for as long as an hour. The equilibration and cooling of the gradients in the meat will give you a little extra room to really sear both sides well before you reach your internal target temp.
Rest your grilled steak
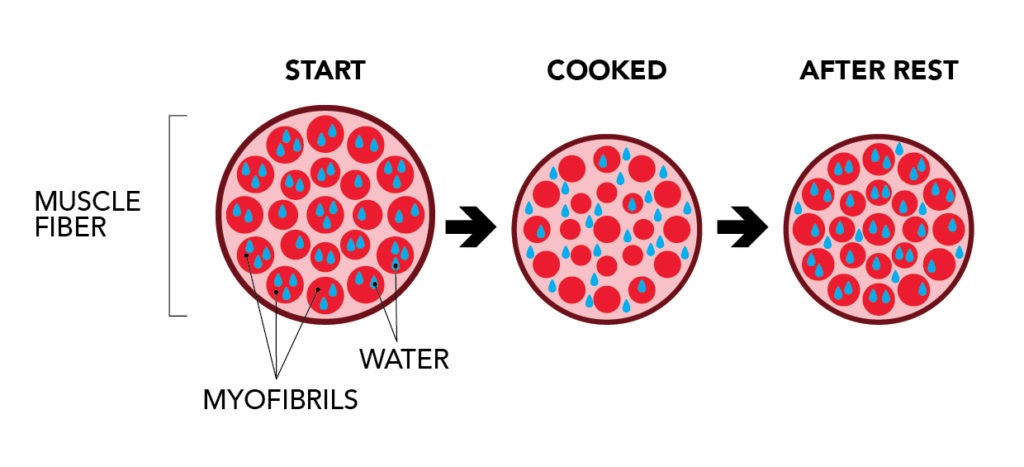
As the steak has been cooking, especially during the sear, its protein fibers have been constricting, squeezing out stored water. Allowing the steak a resting period will help those fibers relax some, pulling the water back in like a sponge. Without this resting period, all that water will drain out as soon as you cut into it. So tent the steak with foil for 5-10 minutes before cutting in and enjoying yourself.
Once that meat has cooled slightly, its structure relaxes—the muscle fibers widen up slightly again, and it’s this small change in shape that makes all the difference. —The Importance of Resting Meat, by Kenji Lopez-Alt of SeriousEats.com
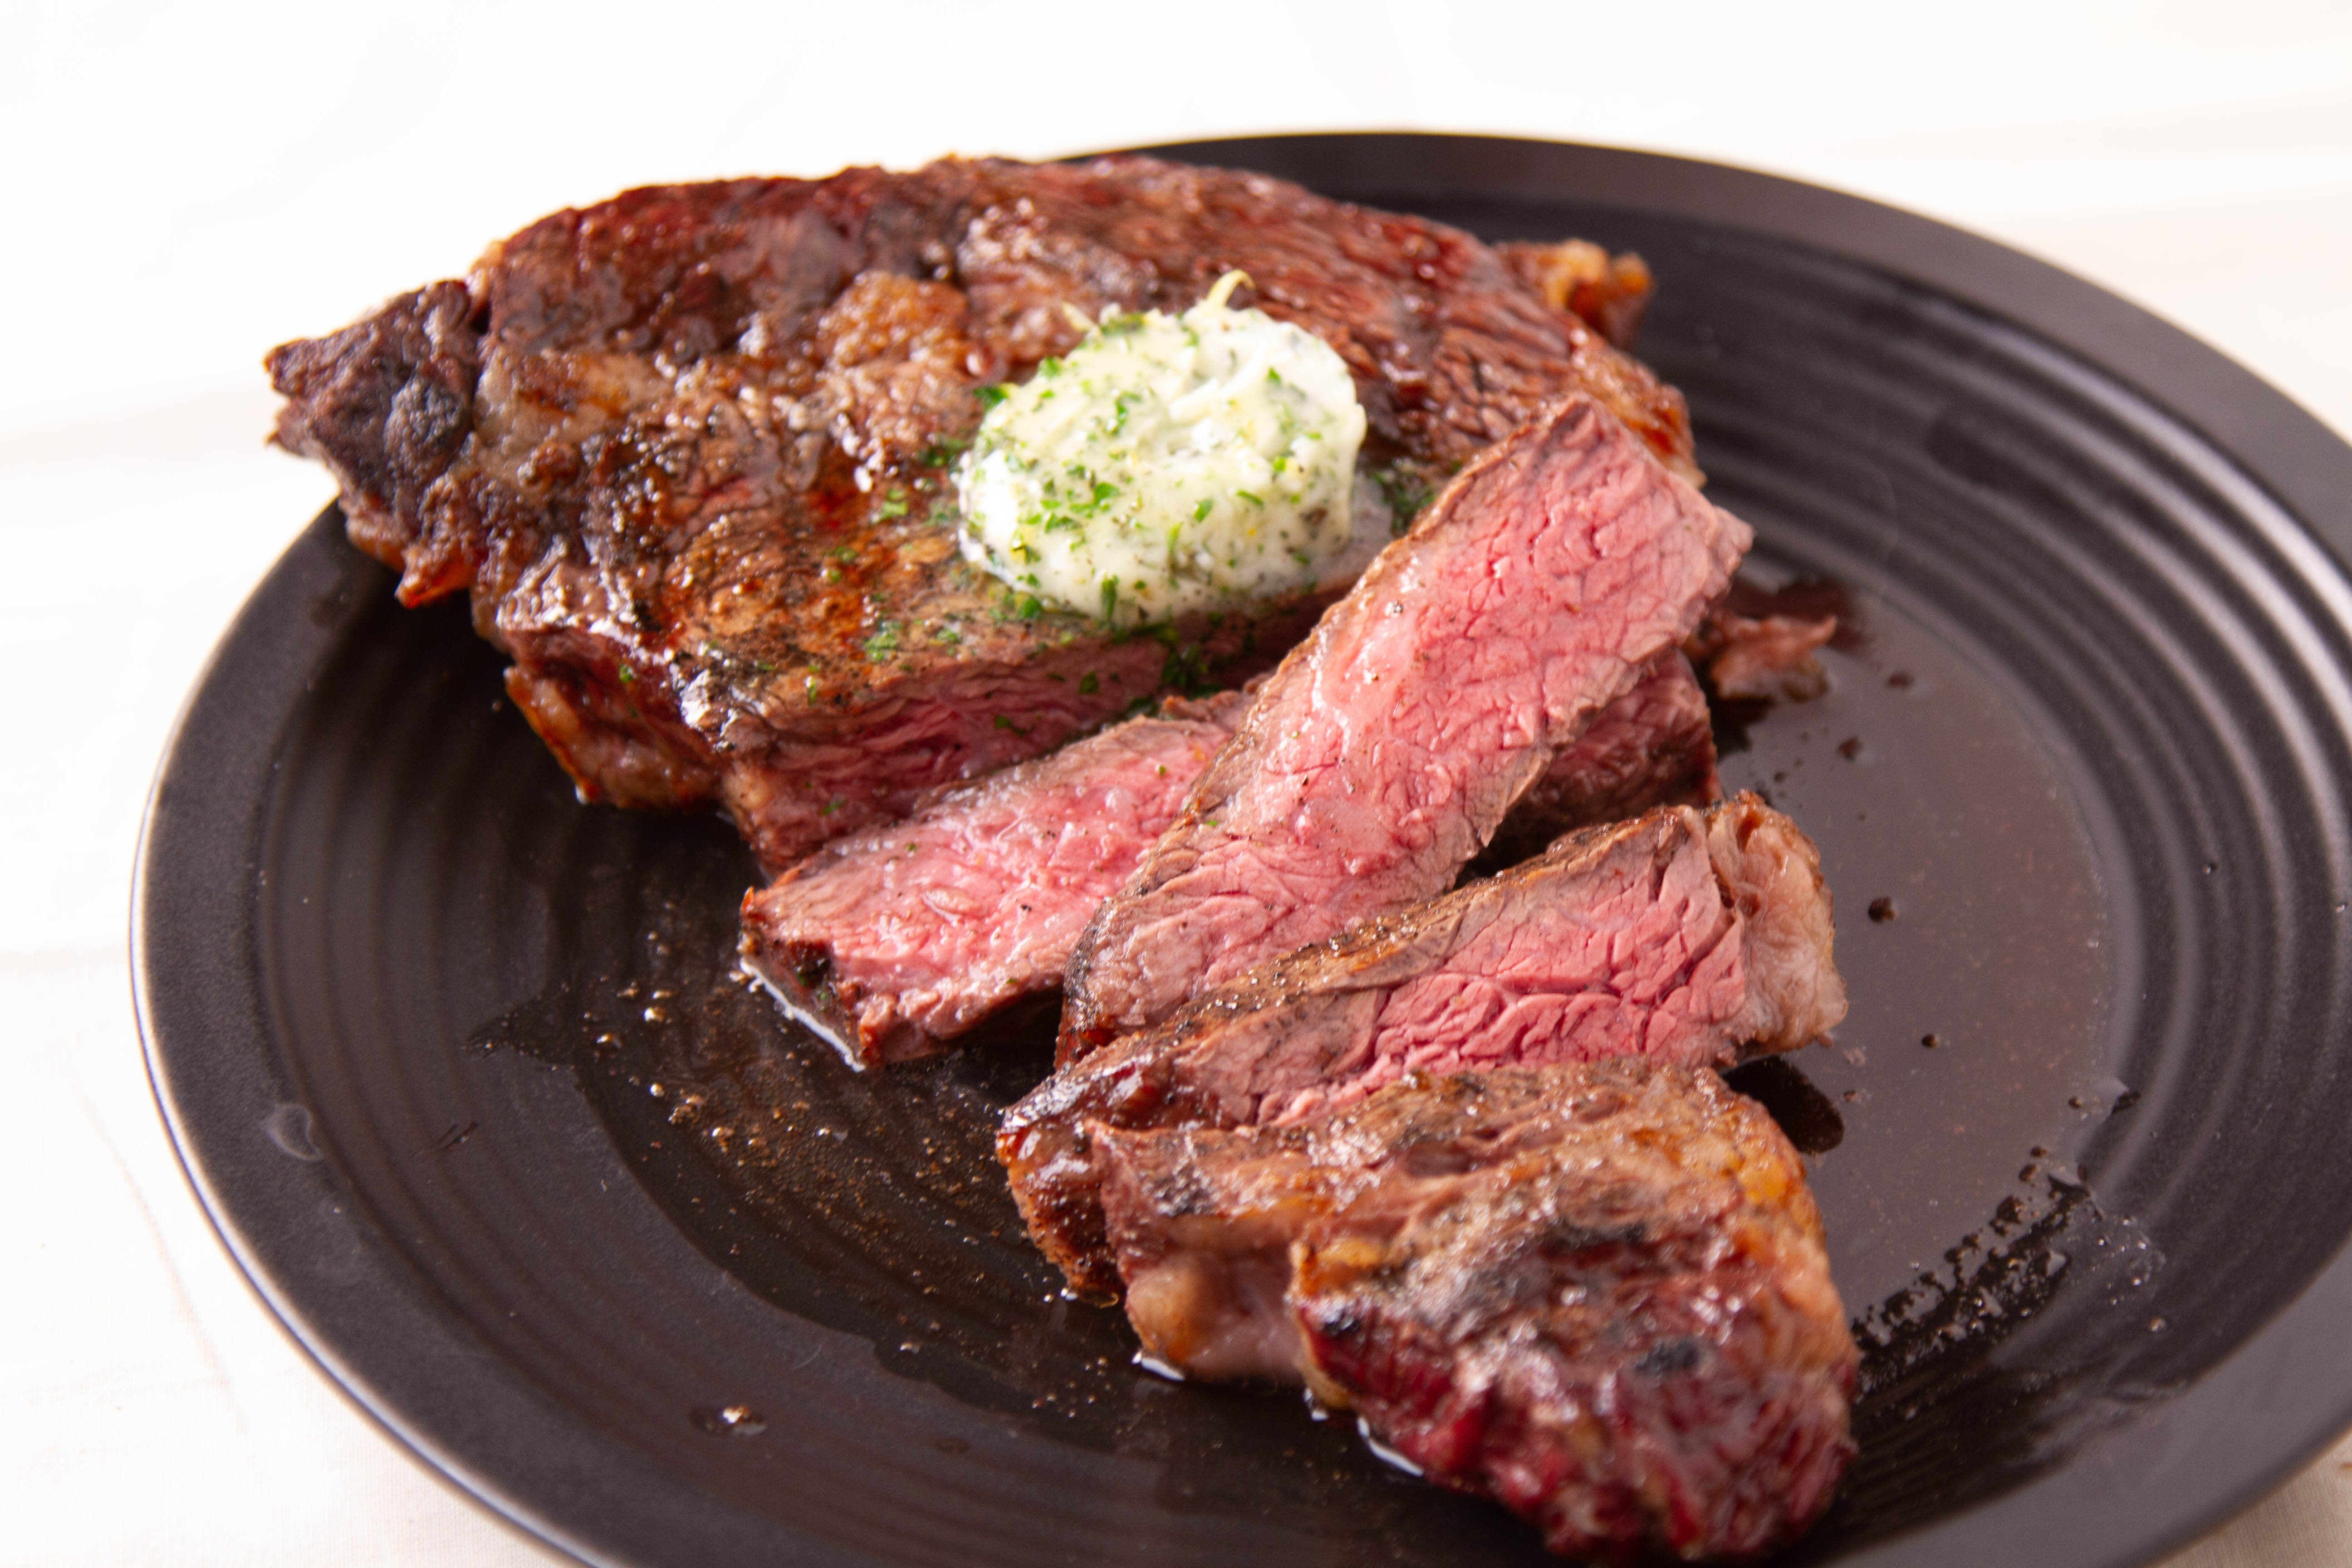
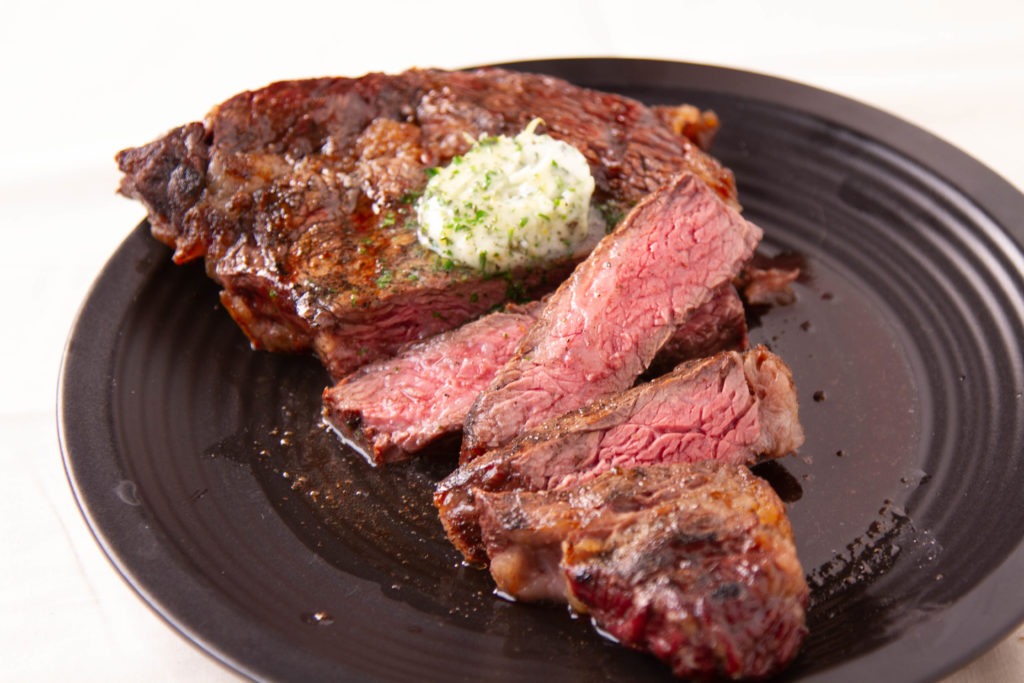
In addition to giving your steak the chance to stay juicy, the resting period also gives you a chance to get that delicious compound butter melting on the top!
Compound butter
Compound butter is a term for butter that has flavorful ingredients mixed in with it. Compound butters are easy to prepare and delicious, plus, their ability to be frozen for a long time makes them a great make-ahead item that you can bring out at a moment’s notice to add a gourmet touch to any meal.
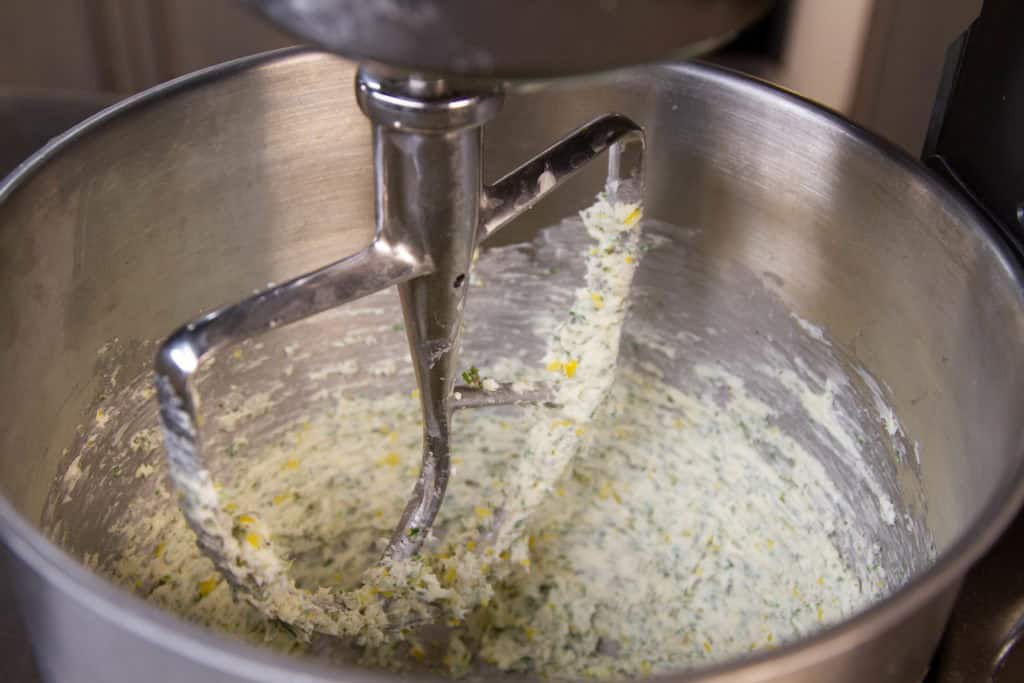
To make a compound butter, simply choose your flavorings and place them with your butter into a stand mixer. Use the paddle attachment to mix them together until softened and well combined. Form the butter into a loose cylinder and wrap it in parchment or wax paper. You can store it in the refrigerator for 3-4 days or in the freezer for months.
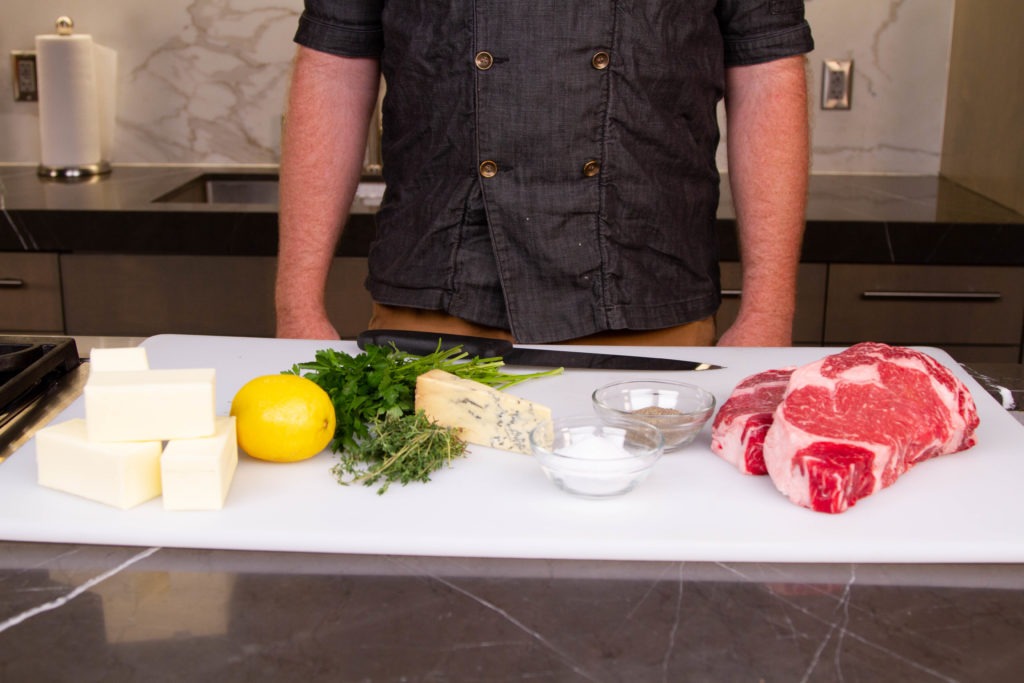
Flavoring the butter is up to you. The most famous compound butter is Maître d’Hôtel butter, which is flavored with lemon juice, parsley, salt, and pepper. For this cook, we made two butters, one with herbs and lemon zest, the other with Stilton blue cheese. But let your imagination run wild! Add herbs or spices, your favorite BBQ rub, or even sweet ingredients like brown sugar and cinnamon—though maybe not for steak!
Beef Temperature Chart
| Beef Doneness | Final Doneness Temperature |
|---|---|
| Rare | 120–130°F (49–54°C) |
| Medium Rare | 130–135°F (54–57°C) |
| Medium | 135–140°F (57–60°C) |
| Medium Well | 145–155°F (63–68°C) |
| Well Done | 155°F (68°C) and up |
You can accompany this dish with golden, crispy french fries for an authentic bistro presentation, but no matter how you serve it, temperature and thermal principles really are necessary to cook a steak properly. By using thermometers to actually watch the temperature and a two-stage process that ends with searing, you can get edge-to-edge perfect doneness. If you’re going to get good quality steaks for Father’s Day or any other occasion, they deserve nothing less.
Print
Grilled Rib Eye Steak: Reverse Sear and Thermal Principles
Description
Grilled Ribeye Steak with Compound Butter Recipe
Ingredients
For steaks:
- 2 quality rib eye steaks, about 1 ½” thick
- Salt
- Ground black pepper
For compound butter:
- 2 sticks butter
- 1 tsp lemon zest
- 1½ tsp minced fresh thyme
- 1 Tbsp minced fresh parsley
- ¼ tsp ground black pepper
or
- 2 sticks butter
- 2 oz good quality blue cheese (Stilton preferred)
- ½ tsp minced fresh thyme
- ½ tsp lemon zest
Instructions
For the steaks
- Set up your grill for 2-zone cooking by heating one side.
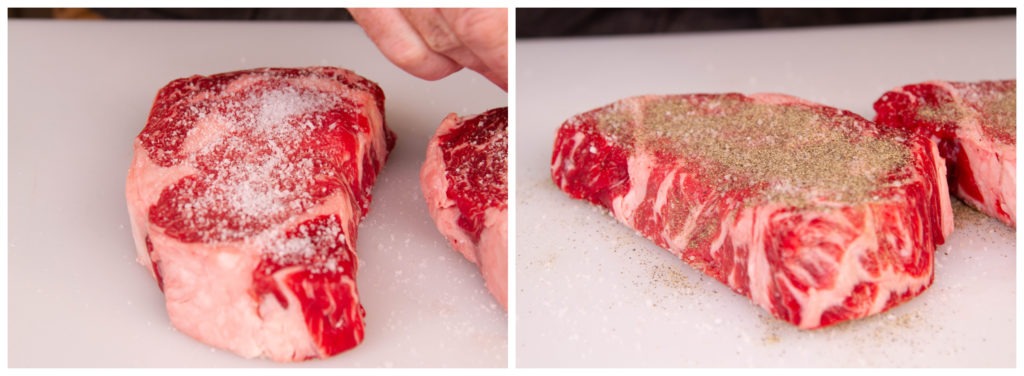
- Salt and pepper your steaks.
Grill Roasting
- When the grill is hot, place steaks on the cool side of the grill.
- Probe a steak, making sure that no part of the probe, transition, or wire crosses the high-heat zone.
- Set up the air probe, near the steak but far from the hot zone.
- Set the alarms on your Smoke: 110°F (43°C) high alarm for the meat—or 15° less than your desired doneness—and 250°F (121°C) high alarm for the air.
- Let the steaks cook.
- When the alarm sounds on your steak, verify the temp with your Thermapen.
Searing
- Move the steaks to the hot zone and continue cooking.
- Flip the steaks after 2-3 minutes, checking regularly with your Thermapen.
- When your steaks are 5° below your target temp, pull them from the grill.
- Tent the steaks and let them rest 5 minutes.
For the butter
- Prepare flavorings.
- Mix the butter and flavorings well in a mixer.
- Press out into a rough cylinder.
- Roll in parchment paper, forming into a better cylinder.
- Twist ends of the paper to finish the form.
- Store in refrigerator or, if for later use, the freezer.
Bring it all together
If your butter is cold and firm, place a slice of it on each steak as soon as they come off the grill. If the butter is still quite soft from beating, you can add it right before serving. Either way, it will melt and spread its flavors over the surface of the steak, pooling at its base to create a sauce as fine as any chef could ever hope to make.
Shop now for products used in this post:
Resources:






I do this, but the first step is to sous vide the steaks to the proper temperature. Always spot on and you can add garlic and rosemary, etc., to the bag before “cooking.”
Mike,
We are huge fans of sous vide cooking. It takes all guesswork out of making a perfectly cooked steak.
Thanks!
-Kim
I have a brand new Therma pen and the boot to keep it convenient on my refrigerator door, and I have a brand new Anova sous vide. My husband has a brand new gas bar-b-q grill and I also have a year old counter top induction cook top that I love using with my Lodge cast iron skillet. (Do I sound like a commercial already?) I used my sous vide for the first time three days ago and was happy with the results, sort of. I dry brined 2 1″ Delmonico steaks, pre seared them and then put them in the sous vide for 3 hours at 130F. My husband and daughter had been skeptical, but were happy with the results. I, however, believe I will use the sous vide first, after dry brining and seasoning, next time and then quickly sear the already cooked steaks AFTER taking them out of the bath. I have owned my cast iron pan for about 30 years and that, in combination with the maximum sear level on my induction cook top gives me the Maillard Reaction in less than 2 minutes per side, so I shouldn’t be overcooking my already cooked interior, nor burning my spices. We’ll see.
We use a similar process for ribeyes for a large crowd. Early in the week we dry marinate loins with favorite rub then smoke them whole to 100-110 internal temp on an offset pit running 200-225 degrees. Refrigerate until the event a few days latter. On day of event, slice into steaks while meat is chilled (a stiffer loin is easier to slice) Put on grill to finish off to desired temp searing one side rotating 90 degrees for sear marks but not flipping. I pull just as fat starts to giggle as it becomes translucent. Pull and rest. They will be fork tender. Serve with sear side up. Not searing second side keeps tender. Try it.
Joey,
Thank you for sharing your tips! That does sound like an amazing way to handle smoking meat for a crowd.
Thanks!
-Kim
That sounds great! I’m going to show your post to my husband. I’ll bet he’ll want to try it. Thank you!
I’d like to give this a try w rineyes but have a few questions:
1) What type of salt do you recommend for the dry brine? Kosher?
2) How much salt per steak do you recommend for the dry brine?
3) Leave the dry brine salt in place or rinse it off and dry the steak before putting on a smoker?
I love my Smoke Thermometer!!! It’s easy to use and very accurate.
Rick,
Great questions!
1) Yes, kosher salt. It adheres to food well and dissolves easily.
2) I don’t have a specific amount that I’d recommend per steak, but a light sprinkling will suffice to season and help with moisture-retaining properties. It’s a matter of personal preference.
3) We did not rinse the steaks after the dry brine. You can absolutely rinse or even soak the steaks in water (you would only need to soak them for about 15 minutes) to remove excess salt on the surface of the steaks if you’re watching your sodium intake.
Thanks!
-Kim
Really great tips. I have been a competition bbq pit master for years (I ‘m 66) as well as the designated home outdoor grill chef. Steaks are the toughest meat for me to cook. These tips are really great. Thanks for sharing.
I just have one favor to ask. Do you have any tips for grilling multiple steaks for 5 or 6 people each wanting a different doneness, like 2 well, 2 medium, 1 rare and getting them served all the same time?
Sincerly,
George of Indianapolis
Home of the Greatest Spectacle in Racing
George,
The best way to manage cooking your steaks to different degrees of doneness is to keep an eye on internal temperatures with your Thermapen. Pull them at their respective pull temperatures to arrive at desired doneness. See our Chef Recommended Temperature Chart in our Learning Center. Pull each steak 5°F below your desired doneness temperature and let them rest for 5 minutes.
Thanks!
-Kim
My husband bought me a sous vide for Mothers Day, knowing I’ve wanted one for a while now, and my adult son, also knowing I’ve been wanting one, but not knowing my husband had already made the purchase, asked if I would like one as a belated Mothers Day gift. I think I’m going to say yes, because it would solve for me the same problem you are experiencing.
I refuse to cook well done steak for ANYONE I believe it’s a waste of good meat and only proper for a hamburger. Therefore, with two sous vides, I could have one group of steaks at medium-rare and another at medium, and post sear each for the same length of time on the grill or the pan. It would only mean I would have to keep track of which steak I’m searing, but I could put a blue ribbon-ed toothpick on the medium rare and a red ribbon-ed toothpick on the medium.
For rare steaks, I wouldn’t bother with the sous vide at all. I’d just sear the brined steak until it frees itself off the grill or pan easily, and leave the inside cool and red, and I wouldn’t bother with the tooth pick, either (no toothpick would mean rare). The bum who asks for rare and then wants it cooked more can take his steak to the microwave and fix it himself.
I tried the above suggested method with an electric smoker on one boneless ribeye last night. The hour at 175 degrees did almost nothing to the steak, but add some smoke flavor, which was great. I had to cook the steak on the gas grill at about 400 like I would a normal raw steak. any thoughts about what went wrong?
Bill,
Were you monitoring the ambient smoker temperature right at the level of the meat? Was there any wind that could have caused cold spots in your smoker? Maybe next time you could increase your smoker’s temperature to 200°F. Glad to hear you had some good smoke flavor on the steak. Let us know how it goes if you give it another try.
Thanks,
-Kim
I like your style Kim.