All About Pork Ribs, and the Thermal Path to Juicy Tenderness
If you offer me properly cooked, brisket, pulled pork, or pork ribs and said I could only have one of them, chances are good that I’d pick the ribs. There’s something so satisfying about the gentle tug it takes to pull the meat from the bone, the tactile feel of eating with your fingers, the pile of bones that stacks up higher and higher as you become fuller and fuller. Ribs are fun.
But ribs are—though to a lesser extent than brisket—shrouded in mystery. There are so many options! Spare or baby back? St. Louis? Dry or sauced? 3-2-1? 2-2-1? Must the membrane be peeled? What temp do I cook ribs at?
There is no need for such confusion. Ribs can be dead simple, with just a few easy-to-remember critical temperatures. Once you have those down, everything else is just refining a recipe to your taste. Here, we want to lay out the basics of ribs, from the different kinds to the temperatures you need to cook them to juicy, tender perfection. Let’s get into it!
Rib types: What is the difference between baby back ribs, spare ribs, and St. Louis-style ribs
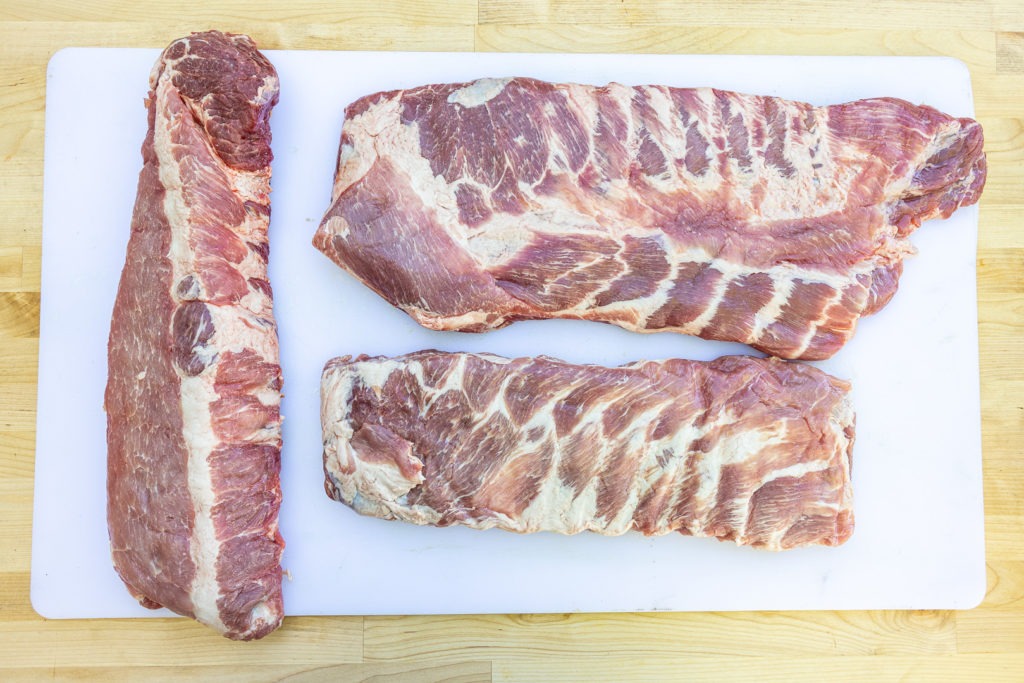
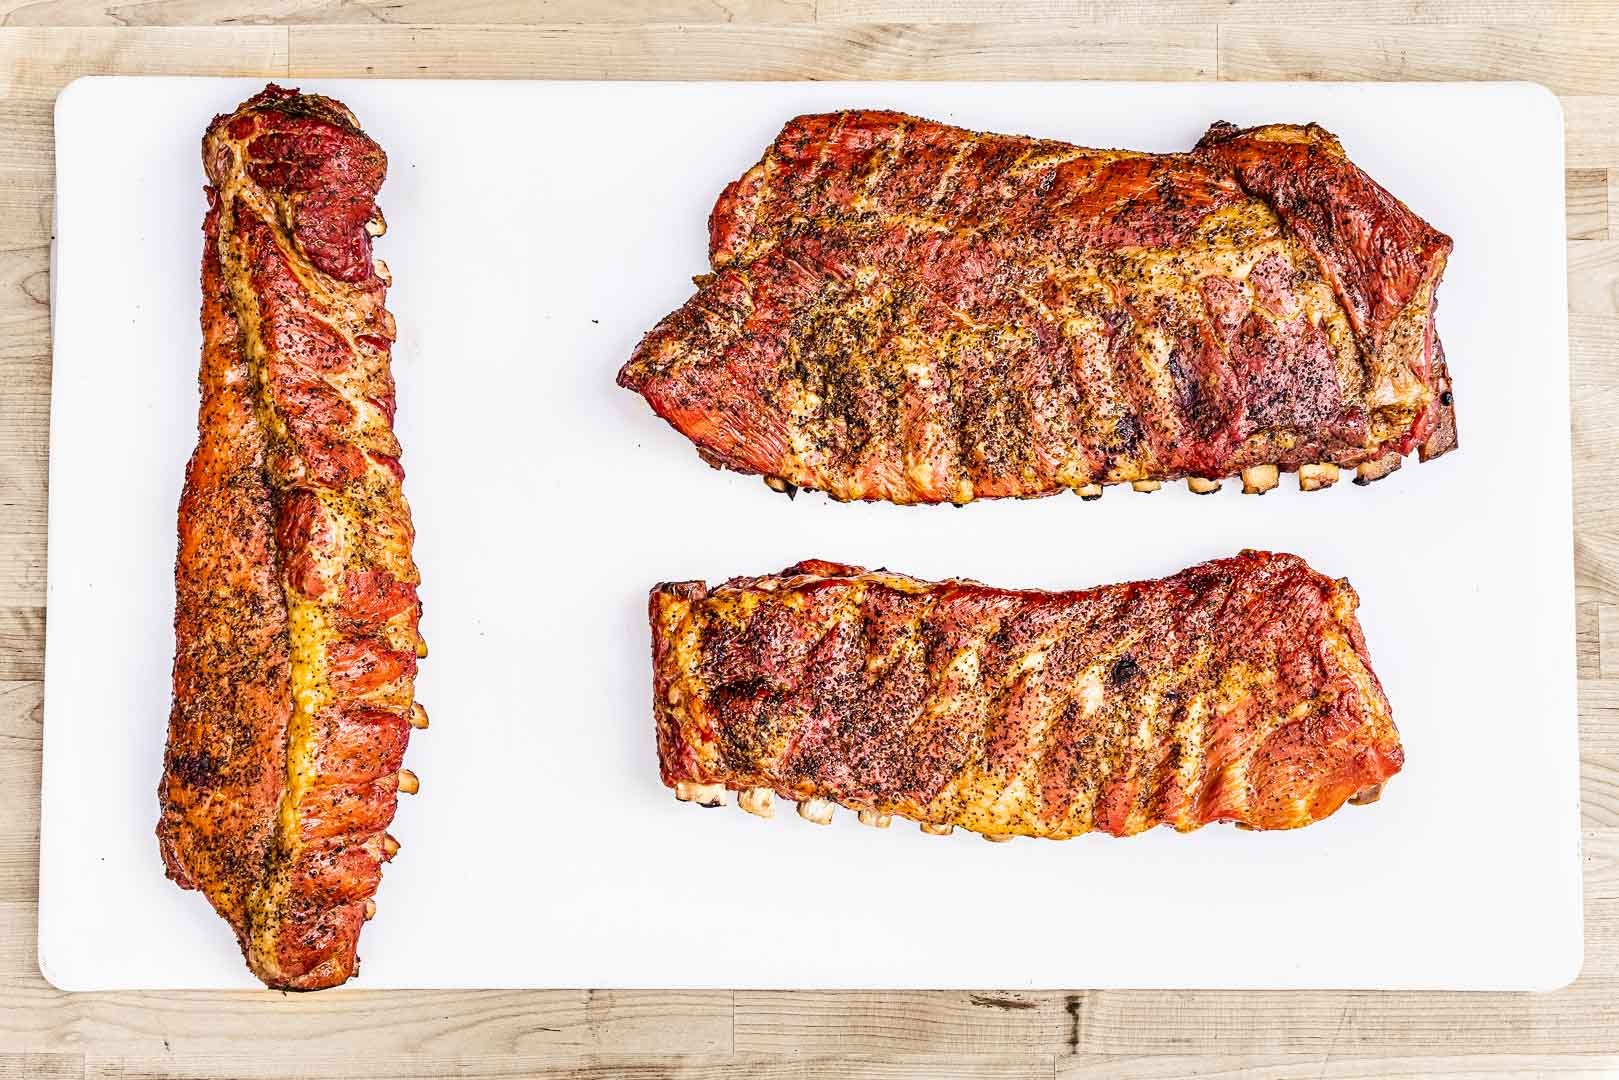
To begin with, there are three types or styles of ribs that we mean when we talk about pork ribs. There are baby back ribs (also called pork back ribs), spare ribs, and St. Louis-style ribs. We’ve included a picture with all three kinds laid out next to each other for reference.
Baby back ribs
First, there, on the side, you see baby back ribs, which come from the top of the rib cage, right by where it attaches to the spine. These ribs are more curved than the others and, by dint of their location directly under the loin, very meaty. In fact baby back ribs often have an extra “cushion” of meat atop their bone structure. This meat is transitional meat, not quite loin, not quite rib. The higher meat-to-bone ratio helps to account for their continued popularity, even all these years after a certain fast-casual chain dropped the jingle that made them famous. The thicker meat also means that they cook differently, taking more time for the heat to reach the center of the cut.
(Baby back ribs are equivalent to beef back ribs, though no butcher will allow any bit of ribeye to remain as a meat-cushion atop the beef version!)
Spare ribs
Next come spare ribs. Spare ribs take up where the baby backs let off and go all the way down to the belly. Full spares have a section of cartilage-y bits near their “natural” (uncut) end. They also include the sternum bone, ensconced in one corner of the slab. A full slab of spares is wide and takes up a lot of real estate on the smoker, but, because of those cartilage bits some other anatomical stumbling blocks, it doesn’t necessarily provide much more enjoyment per square inch than does a rack of baby backs. That being said, they are the default rib in the American BBQ mind, and are widely considered the “original.”
St. Louis-style ribs
This brings us to St. Louis-style ribs. St. Louis is famous for its BBQ sauce consumption, and they tend to make their ribs on the saucy side, but the sauce has nothing to do with St. Louis-style ribs! St. Louis-style is a specific cut of ribs, recognized by the USDA as “Pork Ribs, St. Louis Style” (NAMP/IMPS 416A), consisting of a slab of spare ribs trimmed of the sternum, rip tips, and cartilage. They are a tidy rectangular shape and have relatively straight, flat bones. Chances are good that when people talk about spare ribs, this is actually what they mean. Though they may cost a little more than spares per pound, I think the value is solid. Yes, some people love the knobbly bits, etc. on the spares, but in general, most people just want to pick up that bone, suck the meat off of it, toss it down and keep going. St. Louis-style is great for that.
What are country-style ribs?
Country-style ribs aren’t ribs. In fact, I can’t for the life of me fathom how they got that name unless it was handed them by a grocery store executive from the city who didn’t know thing-one about ribs—or the country. Country-style “ribs” are strips of meat from the shoulder end of the loin and the shoulder itself. Yes, they are vaguely rib shaped, but this (very useful) cut of meat is about as much a rib as the trotter is. I don’t understand the “country-style” bit. “The country” is where BBQ got its start, and that’s where ribs that are actually ribs are eaten. Is the idea supposed to be that they’re rustic? More rustic than carving up a slab of ribs with a big knife right at your plate and eating them off the bone with your hands, smearing sauce all up your face? Sir, I think not!
Rib-eating needs a roll of paper towels—country-style ribs get a fork. Don’t get me wrong, it’s a good cut for many things, but I wish the guy that thought up the name had gone a different direction.
Cooking pork ribs
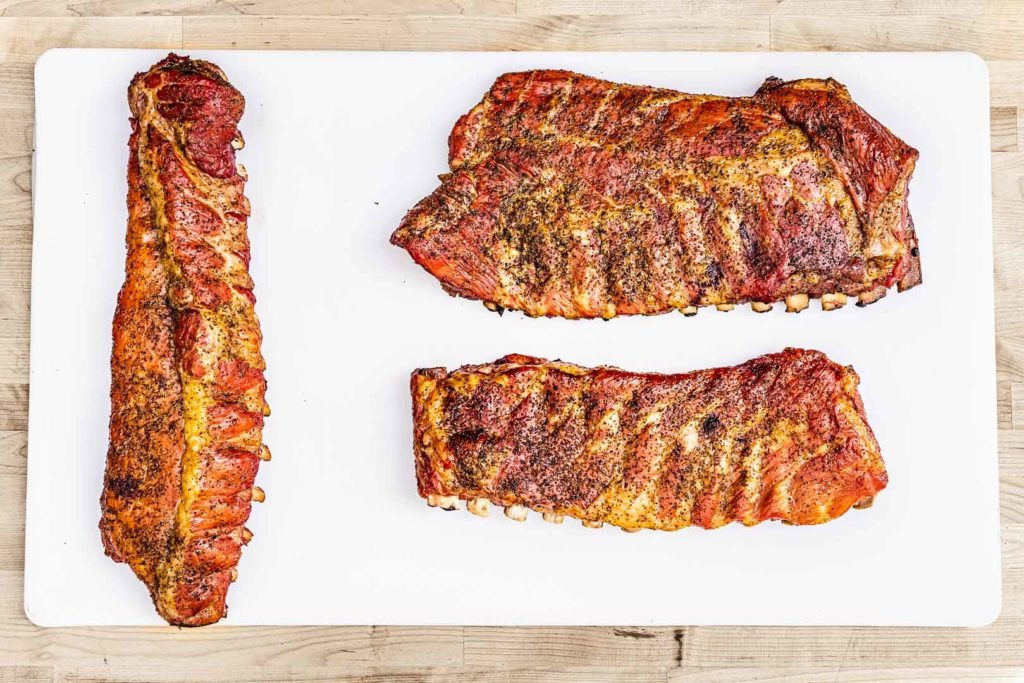
Armed with a better understanding of rib species, we can move on to their preparation. You’ll find voices for and against every choice that lies on this path, but ultimately there are very few things that must be done to get good ribs. You must season them to make them delicious. You must melt the collagen and other connective tissues in these otherwise tough cuts to make them tender. In fact, the melting of collagen into gelatin—a process that happens mostly above 170°F (77°C)—is of prime importance. If you served me tough ribs, well seasoned or tender ribs that I can shake salt on at the table, I’d take the latter over the former in a heartbeat. But we don’t have to either/or this thing. We can get the seasoning and the tenderness.
Removing membrane from ribs: is it necessary?
First, as we move through the preparation, comes the question of removing the rib membrane. On the back (bone) side of every rack of ribs, there is a fibrous membrane that runs down its length. It is generally accepted that this should be removed. (Well, not every rack has it. Some producers will remove the membrane before selling the ribs. If those are the ribs you have, you can get very frustrated trying to remove a membrane that isn’t there.)
To remove the membrane, try to find a loose corner of it, making a small incision under it if necessary. Then get a good grip on it (a tea towel or paper towel will help), and pull it up. Your chances of getting it all in one go are small. Instead, you will most likely take it off in fits and starts, patchwise. This is fine and happens all the time to everyone. But boy it feels good when you get a whole membrane to come off in one swipe.
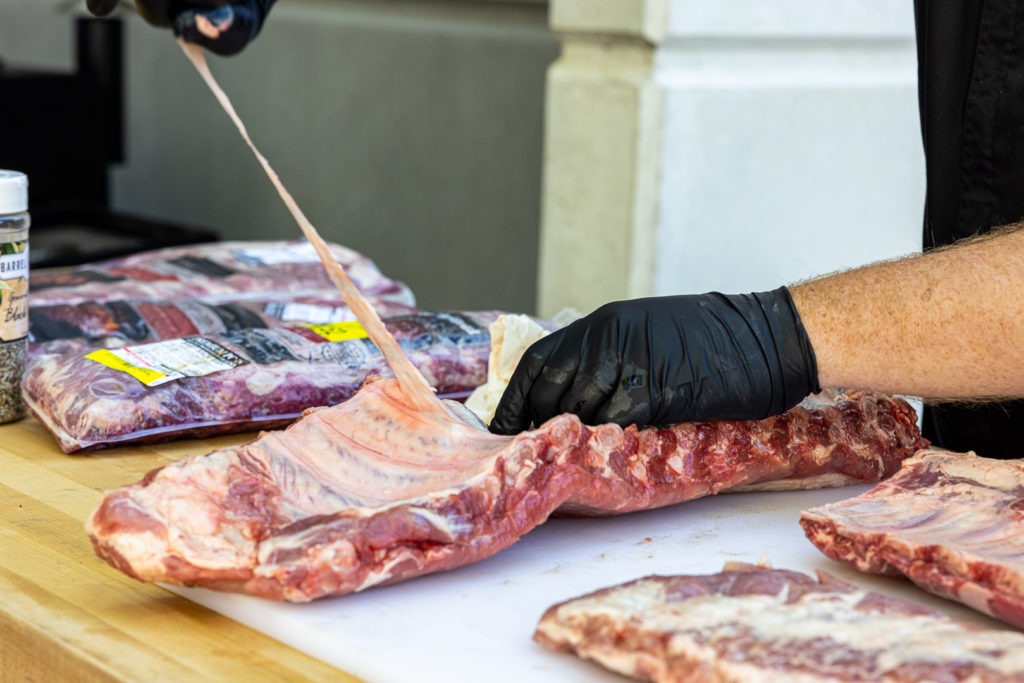
But what if, despite your best efforts, the membrane just won’t come loose? Don’t worry about it. Removing the membrane is, as I said, generally recommended, but by no means is it a requirement for good ribs. If your rib membrane is being stubborn, score it with a sharp knife and move on. I’ve made several slabs both ways, and the scored ribs stand up to their stripped counterparts very well.
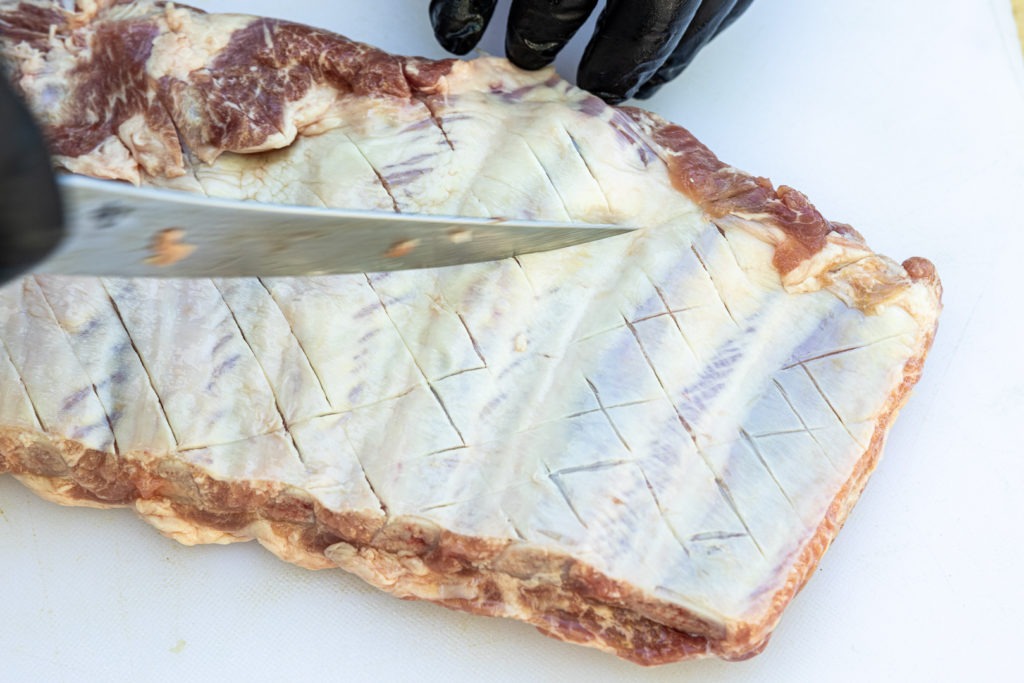
Trimming the flap from spare ribs and St. Louis-style ribs.
If you’re cooking spare or St. Louis ribs, there will usually be a flap/mound of meat on the bone side of the slab. To make for more even heating and uniform doneness across the slab, this should be trimmed down. Try to get it pretty close to the bone, but don’t worry if you don’t get it all. On our rib cooks, we like to season that trimmed meat and toss it onto the smoker next to the ribs so that we can have a mid-cook pre-rib snack.
Seasoning ribs
Do I need a binder to apply rub to ribs?
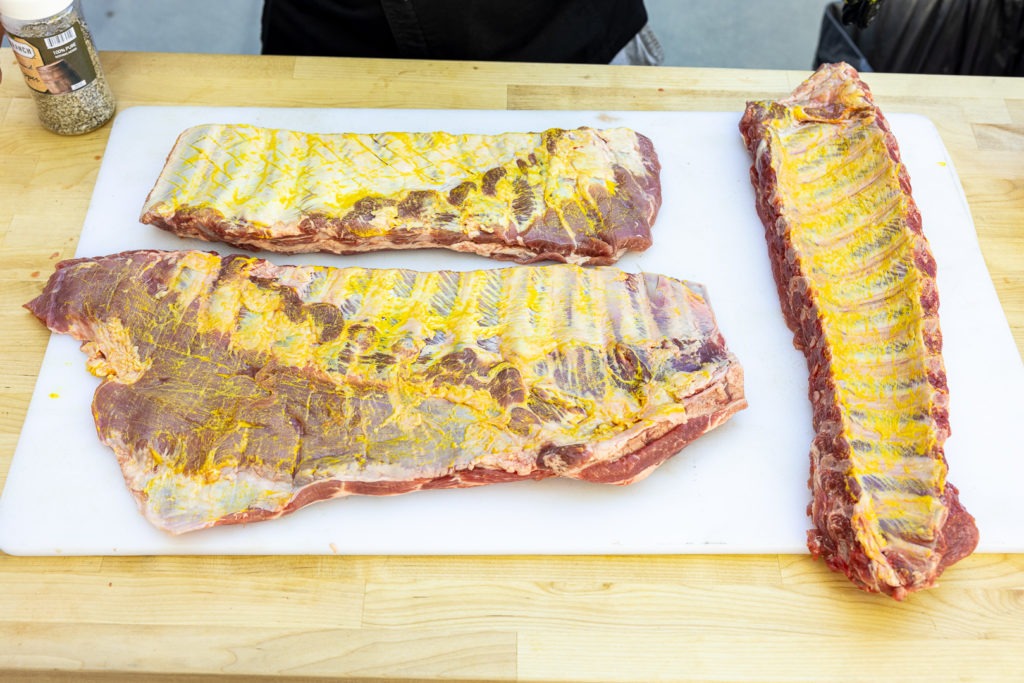
As you can see here, we chose to use a little bit of yellow mustard as a binder for our seasoning. Though I like this step and never skip it, it is by no means necessary. Applying the rub directly to the meat will work, and probably just as well! But I like the instant adhesion you get to some of the drier (fattier) parts and to the bones when you use a binder. Mustard is traditional, but you can use whatever you like. The point of the binder is not to add flavor (you won’t taste this few teaspoons of mustard after all is said and done), but just to get the rub to stick. I like it, but if you’re going for a pared-down, simple rib cook, feel free to leave it out.
Applying the seasoning
Seasoning ribs is fun and easy. You can use whatever you like to season them, from your favorite BBQ rub to a simple combination of salt and pepper. (We did both for the images in this post.) Note that though they are called rubs, BBQ seasonings are most easily applied by shaking them onto the ribs to evenly coat them, then patting the rub into the meat so that it adheres. A spice-shaker or the rub bottle itself is a great way of applying the rub.
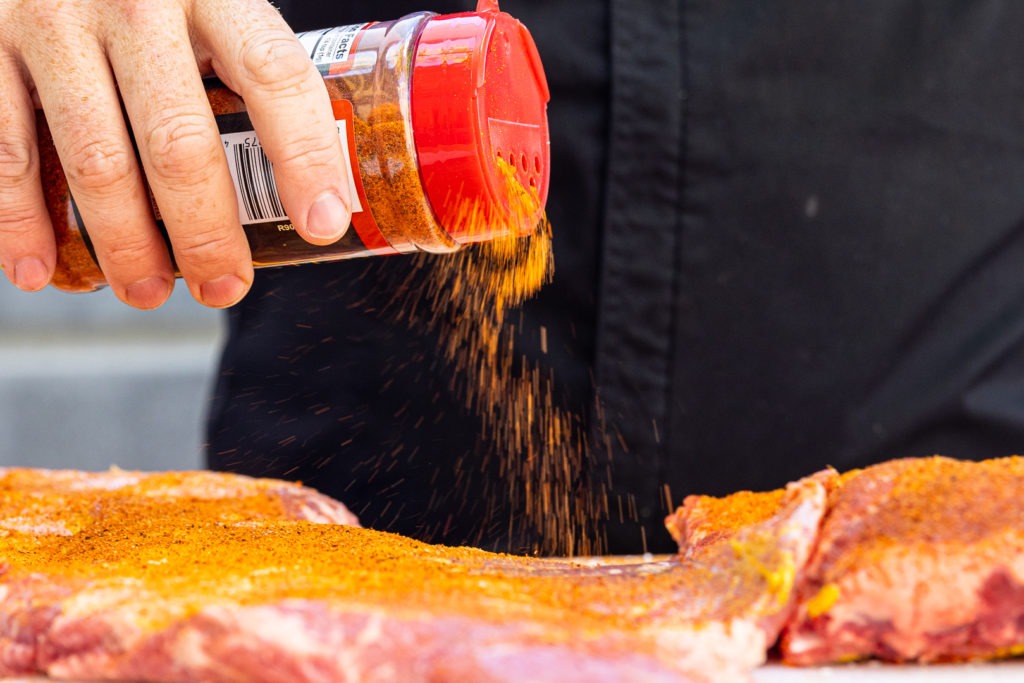
Once the rub is applied, you want to let it “melt” in a bit. This isn’t actual melting, of course, but the drawing of liquid out from the surface of the meat into the rub. The salt pulls water from the cells through osmosis, and the water brings proteins and other molecular bits with it. This coating of protein-rich juices and spices will eventually cook to form the bark on your ribs.
Note: to spritz ribs or not to spritz ribs?
If you read about BBQ a lot, you’ll run into all sorts of opinions about spritzing. Spritzing—opening the smoker and spraying the ribs with liquid like vinegar, apple juice, or beer—will help prevent the bark from charring during a long cook and will help more smoke stick to the surface. But spritzing adds little flavor directly to your ribs, so don’t stress about what liquid you use.
While it’s good for bark (if applied after the bark has set) and good for smoke flavor, it is not thermally advantageous. In fact, spritzing can actually slow down the rib cook. Spraying ribs with liquid will cool them as that liquid evaporates in the smoker—possibly even lowering their internal temperature—stealing the thermal momentum they have achieved. How much time you lose when you’re already fighting a stall is hard to say, but it certainly won’t speed things up!
If you decide to cook your ribs naked (the ribs, not you) then spritzing can really help your bark, and you should consider spritzing every half hour or so once the bark has set up. But if you’re wrapping your ribs, you won’t need a spritz. (More on that directly.)
Smoking ribs and temperature: cooking to temp, not to time
You may have noticed that in the above discussion of rib-types, there was no mention of the different times and temperatures needed for the different styles. The reason for this is that, in the end, you don’t need to cook them differently. It’s like with steak: medium-rare for a tenderloin is the same temperature as medium-rare for a ribeye or a sirloin. Cooking ribs to temperature is the same.
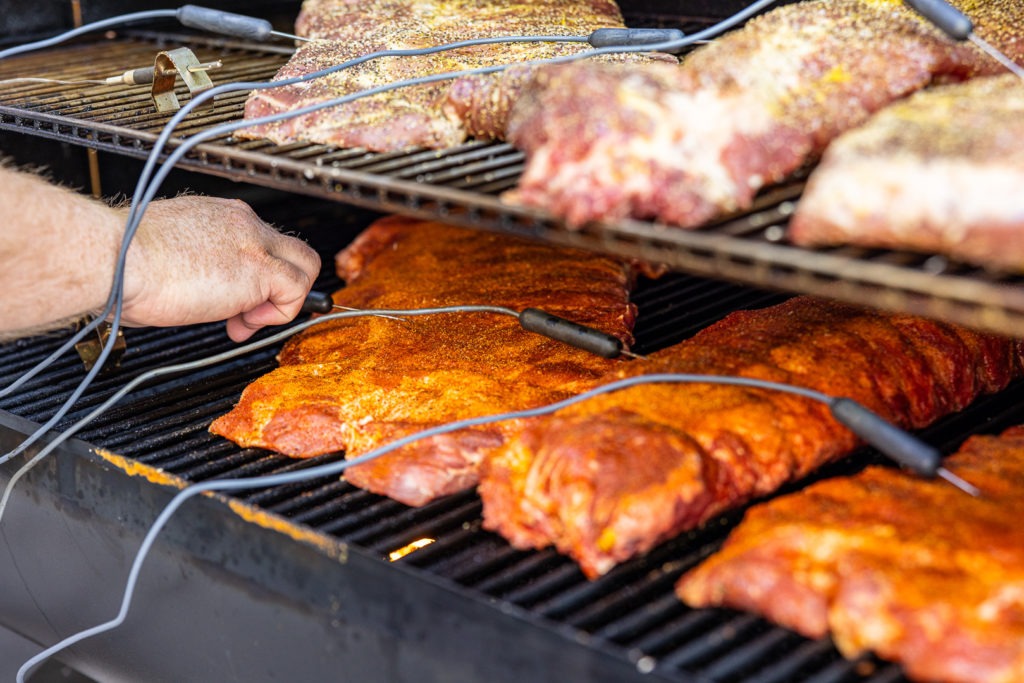
Ok. I know that many, many people will read this and say things like “you don’t need to cook ribs to temp, just use the bend test” or “I’ve never cooked ribs to temperature before and they’re delicious.” So I want to be clear up front: I’m not saying you must cook ribs to temperature and disregard the 3-2-1 rule or anything like that. I’m not saying the bend test isn’t efficacious (necessarily). I’m saying that, especially if you’re not a bona fide pit-master yet, you can simplify your rib cooking by relying on only a couple of key temperatures, and that doing so will give you easy results without a lot of fussing about details.
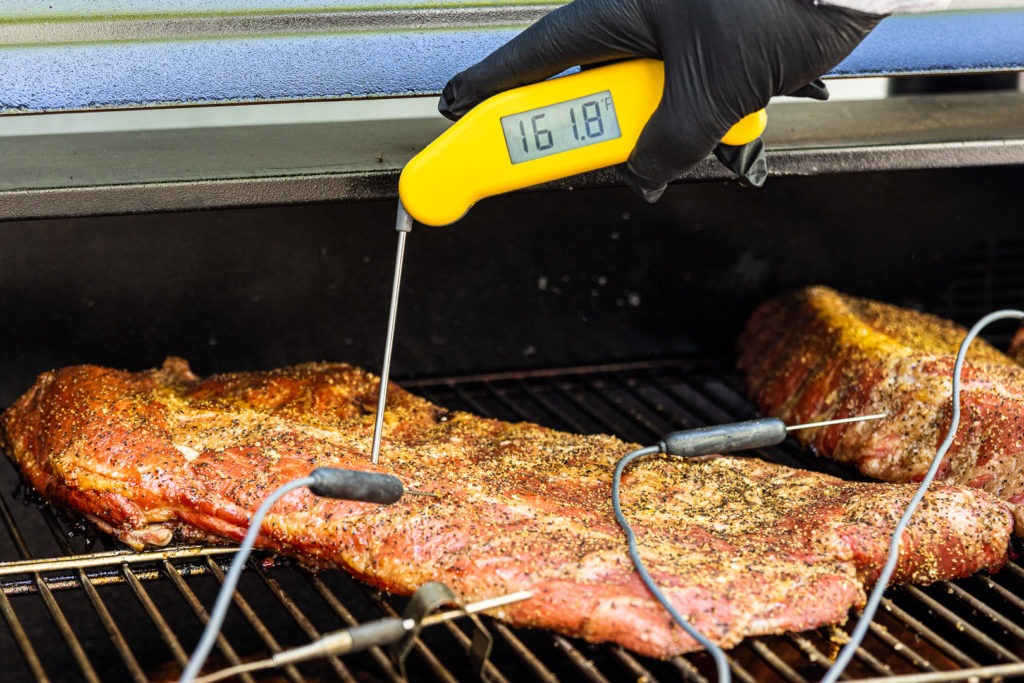
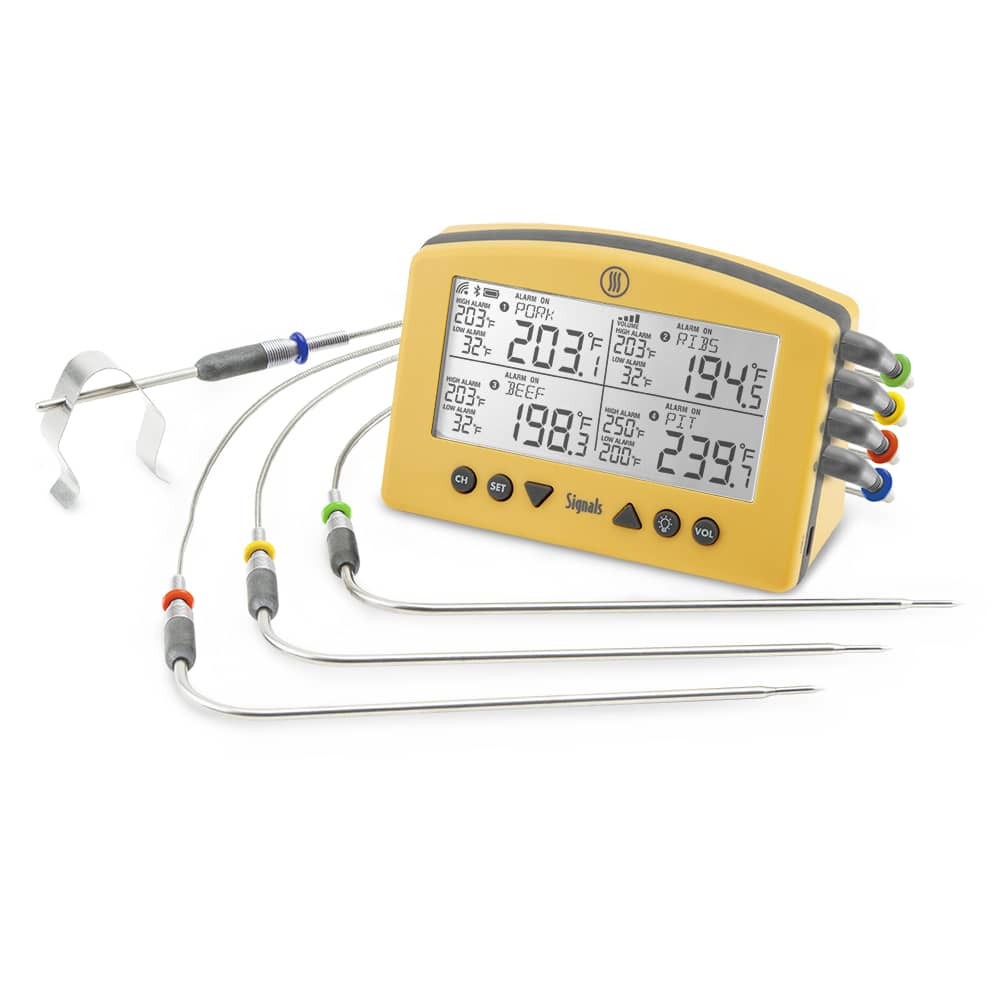
Forget the lore, forget the “traditions.” Make killer ribs by cooking them in a smoker burning at 275°F (135°C) up to an internal temp of 160°F (71°C), then wrapping them in foil and cooking them until they reach 203°F (95°C). Then let them “dry out” in the smoker for another 20 minutes, unwrapped. Use a leave-in probe thermometer like Signals™ to monitor the temps and they’ll turn out great.
Why?
By cooking the ribs to 160°F (71°C), you give the bark a chance to set up and you give the meat a chance to absorb smoke flavor. Great, we like that but what about the wrapping?
We wrap ribs to combat the “stall.” When meat cooks past about 155°F (68°C), its fibers contract, expelling water. The water makes its way to the surface and evaporates in the hot smoker—in essence, the meat perspires. This evaporation cools the meat, creating an hours-long time during the cook wherein the temperature nearly flatlines. As if that weren’t bothersome enough, the stall happens just outside of the good collagen-melt zone. So the meat sits there, not getting appreciably more tender for what can feel like an age.
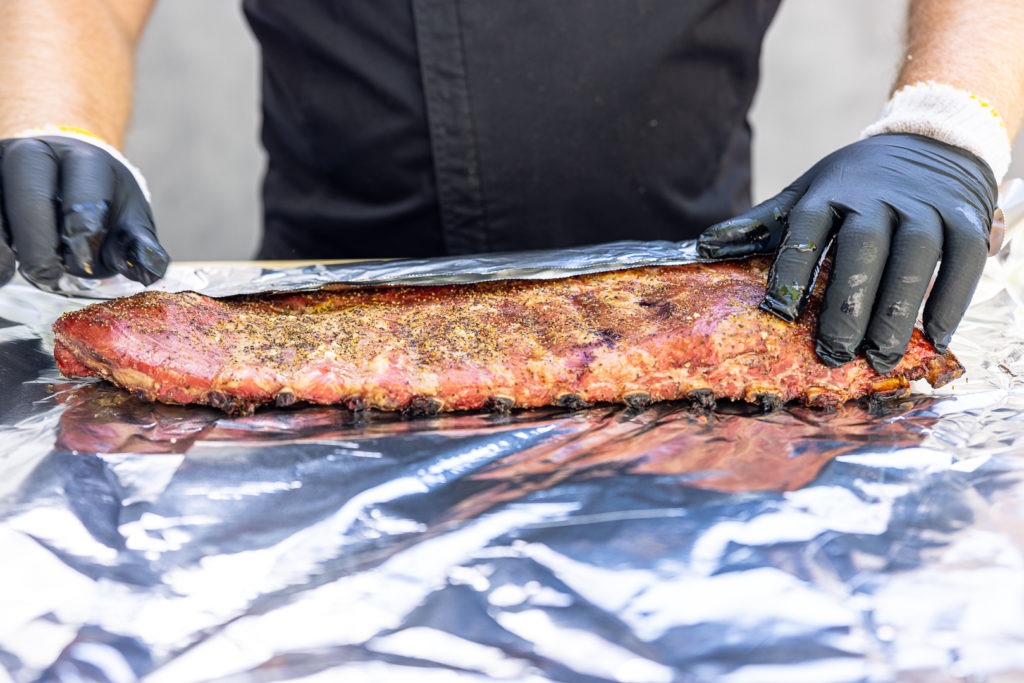
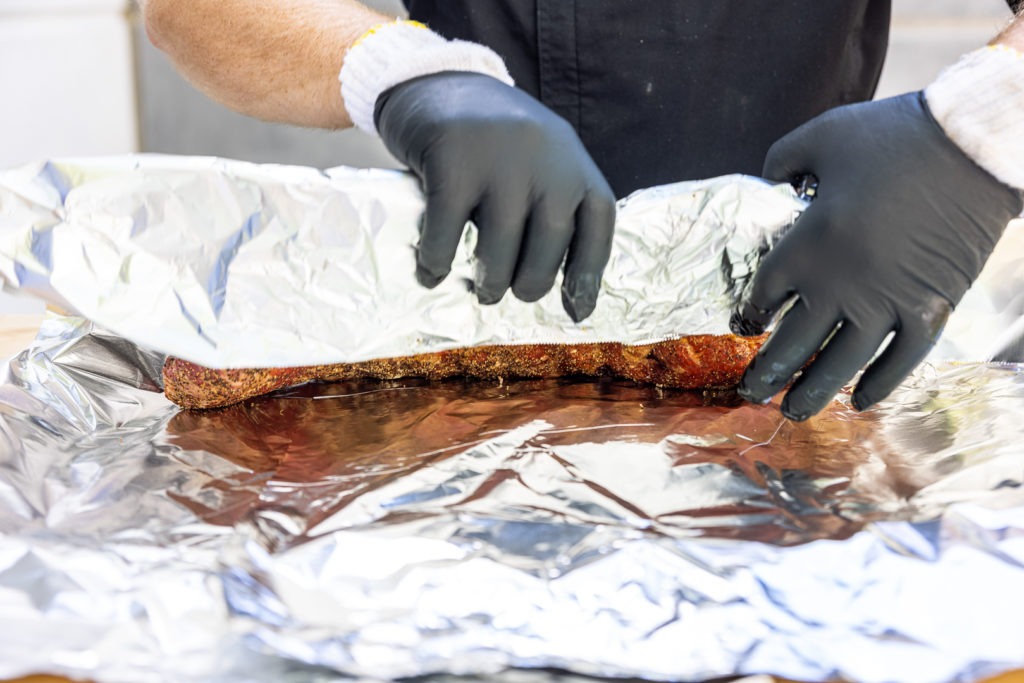
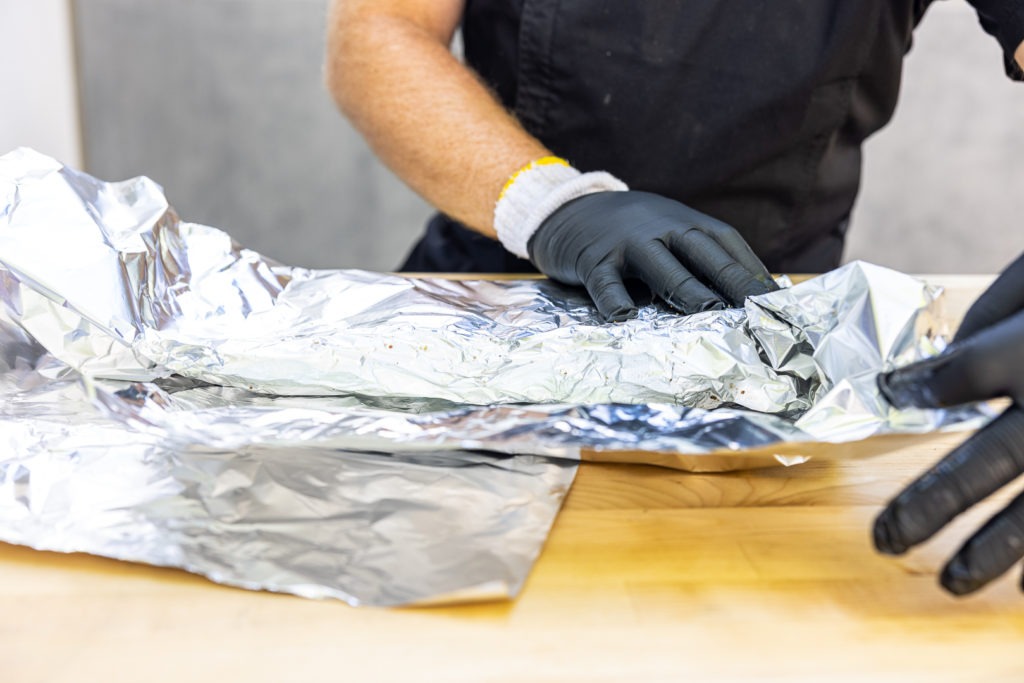
By wrapping your ribs in foil (or paper, if you like) you create a high-humidity environment where there is no evaporation. All the heat that goes into the ribs goes into raising the temperature and melting the collagen. By the time the ribs reach 203°F (95°C) they will usually have had enough time in the collagen-melt zone to be nice and tender.
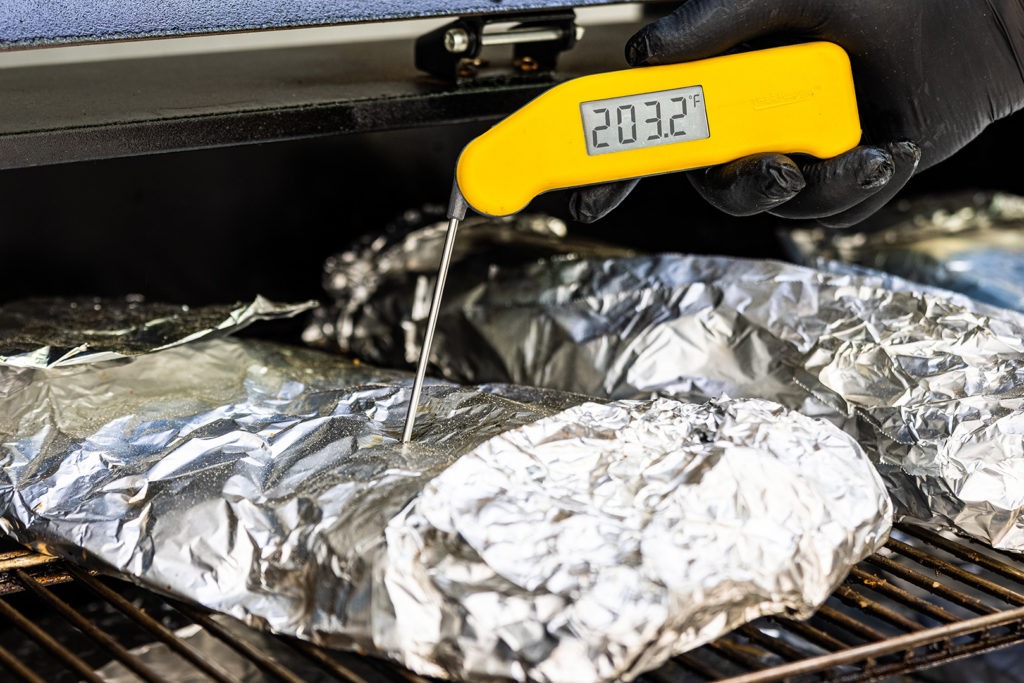
You may still be unconvinced. But here’s the thing. Each rack of ribs is different, each smoker is different, each location within the smoker is different. We cooked six racks of ribs at the same time and they all reached 160°F (71°C) at wildly different times. If we had wrapped the baby backs when we wrapped the spares, their bark would have been destroyed as it hadn’t even set by that time.
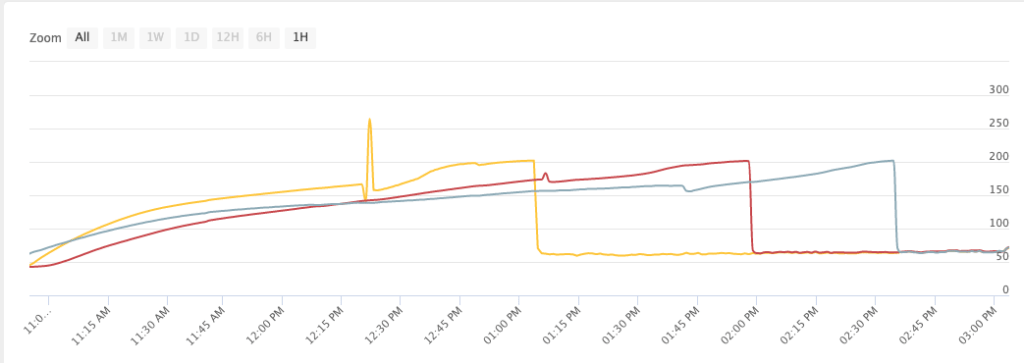
Consider this graph from the ThermoWorks app of the temperatures for the racks of ribs on the bottom grate of our smoker. It shows how different the times to certain temperatures can be. The rack closest to our heat source reached 160°F (71°C) well before the others did. We wrapped each set by temp, not by time. (Also, you can see that each rack had at least partially stalled by the time we wrapped it and you can see the how the wrap beat the stall as the temperatures rise much more quickly after each wrapping.)
Using hard-and-fast time rules for cooking ribs (or any food, really) is like using gallons of gas expended to measure distance. Sure, there is a correlation in there, but based on your car’s MPG and how fast you drive on the way, you may not end up at your desired destination. Measuring miles is far more accurate for distance, and the same goes for temperature and doneness.
It’s like Steven Raichlen says:
The most accurate way to assess the doneness of smoked foods is to check the internal temperature with an instant-read thermometer. Even the pros do it. Especially the pros do it.
—Steven Raichlen, Project Smoke, pg. 30
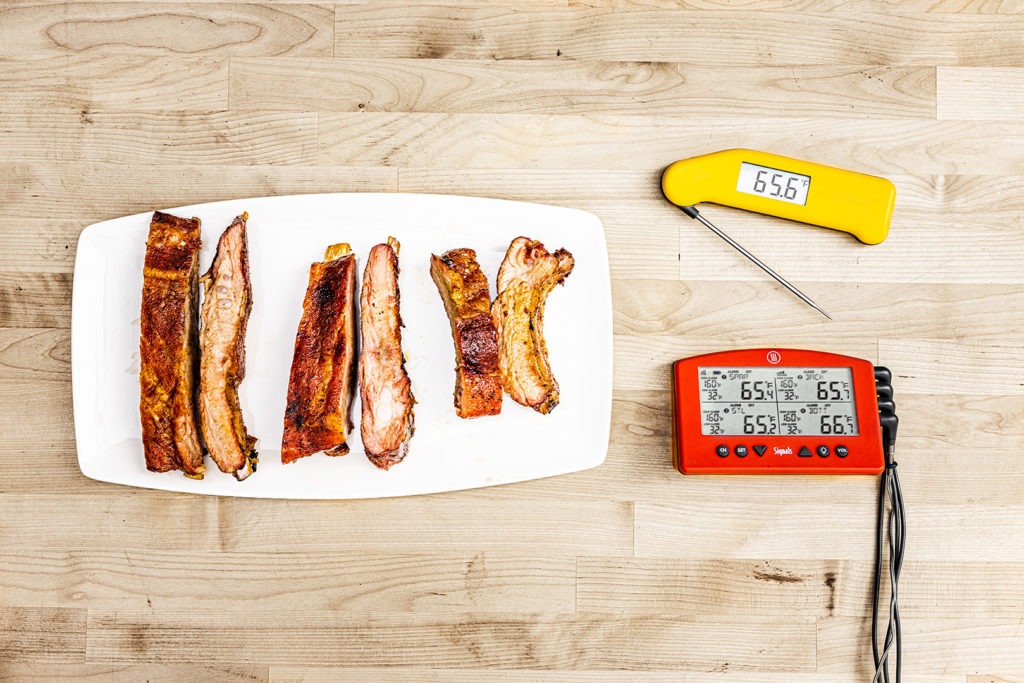
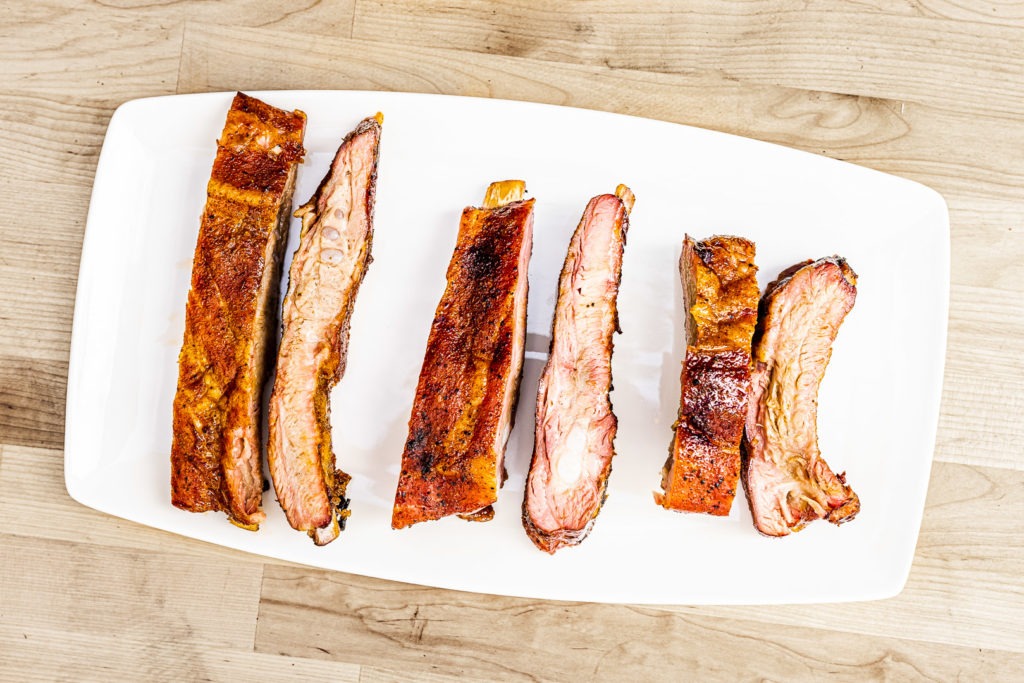
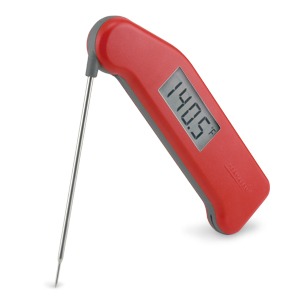
Cook at 275°F (135°C) with a leave-in probe thermometer until 160°F (71°C), wrap the ribs in foil, and cook to 203°F (95°C), then verify both final temp and tenderness with an instant-read thermometer like Thermapen®. That’s it! Everything else is personal preference, a question of how much time you want to put into preparation, how much you want to work on getting a very specific kind of “bite.” All six racks that we cooked clung to the bone just until we bit and pulled a little bit and left a clean bite mark. If I wanted them to fall off the bone, I’d give them another degree or two in the foil.
Using thermometers like Signals and Thermapen and these simple, critical temperatures is the fastest, easiest gateway to tremendous homemade ribs. Give it a try and I’m pretty sure you’ll experience happy cooking.
Shop now for products used in this post:
“[/rant]”↩


What temp do you set the smoker at after you wrap them? Do you leave at 275??? How long is the total cook time for an average set of ribs. Just trying to get an idea before I give this a try.
You can leave it at 275°F or up it all the way up to 325°F with great success. We left it at 275°F for this cook.
What temp do you cook at after wrapping? Do you leave it at the 275? What is a rough total cook time for your method?
Leaving it at 275°F is best, but you can up the temp to 300 or 325°F.
I find it hard to get the temp on the ribs because the meat is so thin, I dont know if its meat or smoker heat. Where is best place to take the temp of ribs?
Probe the ribs between bones. It’s easier to do if you get the optional needle probe, but just make sure the very tip of whatever probe you’re using is equally distant from the top surface and the bottom surface of the meat…or as close as you can guess!
Great article with tons of great information. The only thing I would add for advice is “know your crowd”. The debate I hear a lot is how done should they be. The pros will all say there should be some pull on the meat and have a little chew to it. I can tell people that until I’m blue in the face, but 95% of the people I know like them “fall off the bone” best. I know that it is technically overdone at that point, but most of the people I feed prefer it that way. So my advice is know your audience. Particularly women and kids seem to prefer the fall off the bones, so you may want to cook them a bit more if this is your main feeding group. In my experience, guys don’t seem to mind the chew as much, but even then, most prefer the fall off the bone. Any thoughts?
This is exactly true. If you have a KCBS judge over for dinner, aim for a bit of a cling-and-bite, but most “civilians” generally love fall-off-the-bone ribs. For me, as long as they aren’t tough I’m probably going to be happy!
If I have a KCBS judge, or any judge over for dinner, they’re eating what I make! If they want to judge me, they can sit in the driveway! If Im at a competition, I go by their rules. Hence, I don’t join competitions. I love mine both ways, but the fall off the bone is what most prefer, including me.
Now Im hungry again!
Well said!
What is the best unit to coordinate with the Billows Fan? I want to use them on my Big Green Egg. I know the Signals works but is there another option? How about WiFi and/or Blue Tooth connection to your phone. Thanks.
John,
Good question! If you want WiFi/Bluetooth and fan control, Signals is the way to go. If you don’t need the connectivity, Smoke X2 or Smoke X4 are the way to go.
Hi. I can’t use any type of grill at my condo. Do you have a recipe whereby I could cook baby back ribs in the oven?
Thank you
Yes! Follow the same instructions the same, but using your oven set to the same temp as the smoker. Probe the ribs the same way and everything.
To add what Martin said, if you want a smokey taste, can do two things:
1. Use some liquid smoke. Thats the safest.
2. Wrap some wood chips in alum, foil, a few fork holes in the top and place over the oven element, or flame in the bottom.. Youll need your fan but only for the firt 1 1/2 – 2 hrs. After that youre wrapping them. Small holes in the foil, you dont want any flames. Enjoy!
Chef Martin , Thank you for sharing your wisdom . I too am a firm believer in cooking to temperature .I’ve done the 3-2-1’s and the 2-2-1’s and like you said , it all depends on the rib . I’ve gotten mixed results just going by time .
I use “Smoke”and “Signals”mostly for steaks and chops and monitoring the smoker temperature. Smoking to 160 should be perfect , It gives me a guideline I can follow to keep the perfect bite at 203 .
I really enjoy your videos , you and your guest chefs are real chefs, you know what I mean .
Thank you for your comment!
I do the 3-2-1 method for ribs. I have a Masterbuilt Gravity Series 560 Digital Charcoal Grill + Smoker and when I am done the 2 part, I crank up the heat to sear and put BBQ sauce on. And everyone loves my ribs, when done.
As my Biology teacher drove into my head on numerous occasions, Osmosis is the movement of water only, from an area of high concentration to an area of low concentration, through a semi-permeable membrane, ONLY. This does not include alcohol, beer, flavors etc. Anything else is diffusion! Other than that it was a well written and very good article. Personally I had never ever checked the temps, and maybe I should have but I got lucky and my ribs always turned out great. I like using the 4-2-0.5 method myself, after much experimentation it was what we like the best, to be honest sometimes they can’t wait and want them as soon as the foil is off! LOL. My next experiment is to try butcher’s paper and see how we like that. By “we” I means my family friends, and neighbours. Keep up the great work and the great products.
Grizzlyss
Good point on the osmosis!
Martin this is a great post about ribs, demystifies many aspects. I tried to follow your instructions closely with some St. Louis ribs, turned out fantastic. Don’t know how I could have done it without my Signals and Egg. Thanks for providing such clear and detailed information, I will try to share this with others who struggle to get consistent results.
For the millions of people who don’t have access to a grill or smoker; please think about also giving directions for the use of a stove-top smoker or using the oven.
JMan,
That’s a good point. The same temperatures and methods hold for an oven cook, you just won’t get any smoke flavor or smoke ring on the ribs. Set your oven to somewhere in the neighborhood of 250°F and cook your ribs just as we describe.
About 2/3’s through the article you mention “Cooking them until they reach 203°F (95°C). Then let them “dry out” in the smoker for another 20 minutes.”
You don’t repeat that advice at the end of the article, is it still recommended?
It’s a matter of taste. I like to let the bark re-dry a bit, but if I were very hungry, I’d dive right in.
You guys make great products. I have at a minimum $2500 in Thermoworks products in my home and have probably given more than that away in gifts. As I said, great products.
That being said, stick to what you know best and not making statements just to move a little more product.
Explain simple way to BQ ribs.
Excellent article and easy to understand. I appreciate your final comments and chart showing the ribs ALL cook at different times. I have been frustrated that my ribs always seem to come off much earlier than the articles I have read indicate (or maybe I’m pulling the ribs at the stall and not finishing it off) which makes me think I have blown it. I also appreciate your various articles and advice.
When you say “dry out” in the smoker for another 20 mins, do we want to also kill the pit temp at that time too?
No, keep the smoker on during that time.
Define the color codes of the graph vs the cut of ribs. Does one cut take longer than another?
Yellow is Spare, red is St. Louis, and grey/blue is Baby back. Note that the spares were also closest to the heat source!
how do you measure and regulate the temperature in the smoker?
One great way to regulate it is with Billows BBQ control fan, but measuring can be done with any of our leave-in-probe thermometers like Smoke, Smoke X2, or Signals.
When you use the temperature method, rather than the 3-2-1 method, you never know what time the ribs will be finished. So, you can’t “time” it to be done at a certain time, i.e. dinnertime. What do you do with it so that it stays warm if you finish early?
Ariel,
Luckily, ribs rest exceptionally well! you can pop them in an insulated cooler for hours without much degradation in quality. When the guests arrive, carve them up and send them to table!
When you wrap the ribs do you add anything with the ribs in the foil? Honey, brown sugar, butter?
You can, and many do. Some butter and brown sugar are often welcome, but that depends on the flavor you want the ribs to have in the end. If you love sweet ribs, go for it. But it isn’t necessary by any means, and if you want just the flavor of the rub and meat to shine through, skip the extras.