While there is much to commend the classic American pizzeria-style, delivered-in-a box pizza, it will almost always fall short of a Neapolitan-style pizza. When Raffaele Esposito created the Margherita pizza in Naples back in the mid-1800’s and launched the popularity of pizza, he used a woodfired brick oven that had enough heat to lightly char the chewy crust, giving it a flame-kissed flavor that was as important as any toppings.
But I don’t have a brick pizza oven, and, statistically speaking, neither do you! So, how are you to get a crisp-char crust on your favorite homemade pie? The grill! Opinions vary, but most people will agree that an “authentic” pizza oven must be in the range of 600–900°F (343–482°C), and your house oven just can’t hit that temperature. And anyways, in the summertime, who wants it to!
By grilling your pizza, you can achieve the kind of temperatures you need for maximum flavor development while also sparing your household a roasting. But where to begin? What temperatures do you need to know to become a real pizzaolo? Read on to find out!
Contents:
- How to make pizza dough
- Grill setup for grilled pizza
- Topping tips for pizza
- Pizza dough recipe, grilled pizza recipe
How to make pizza dough
The best pizza doughs are made with bread flour. Bread flour has a higher protein (gluten) content and can, therefore, create a crust that is chewier and more pliable. Chewy crust is one of the most sought-after characteristics of a pizza crust, and pliability is necessary if you want to fold a slice in half without it crumbling like a biscuit. Use a good quality bread four for your pizza dough.
Note: Some people will tell you to use only Italian Tipo-00 flour for your pizza. This is good advice, except that it doesn’t necessarily refer to high-protein flour. Tipo-00 refers to the largest granule size of the flour, not its protein content. You can find pastry AP of this fineness, if you look, and they could even be pastry flour. Go ahead and use Tipo-00 if you can find/afford it, but make sure it’s high-protein flour for pizza our pasta.
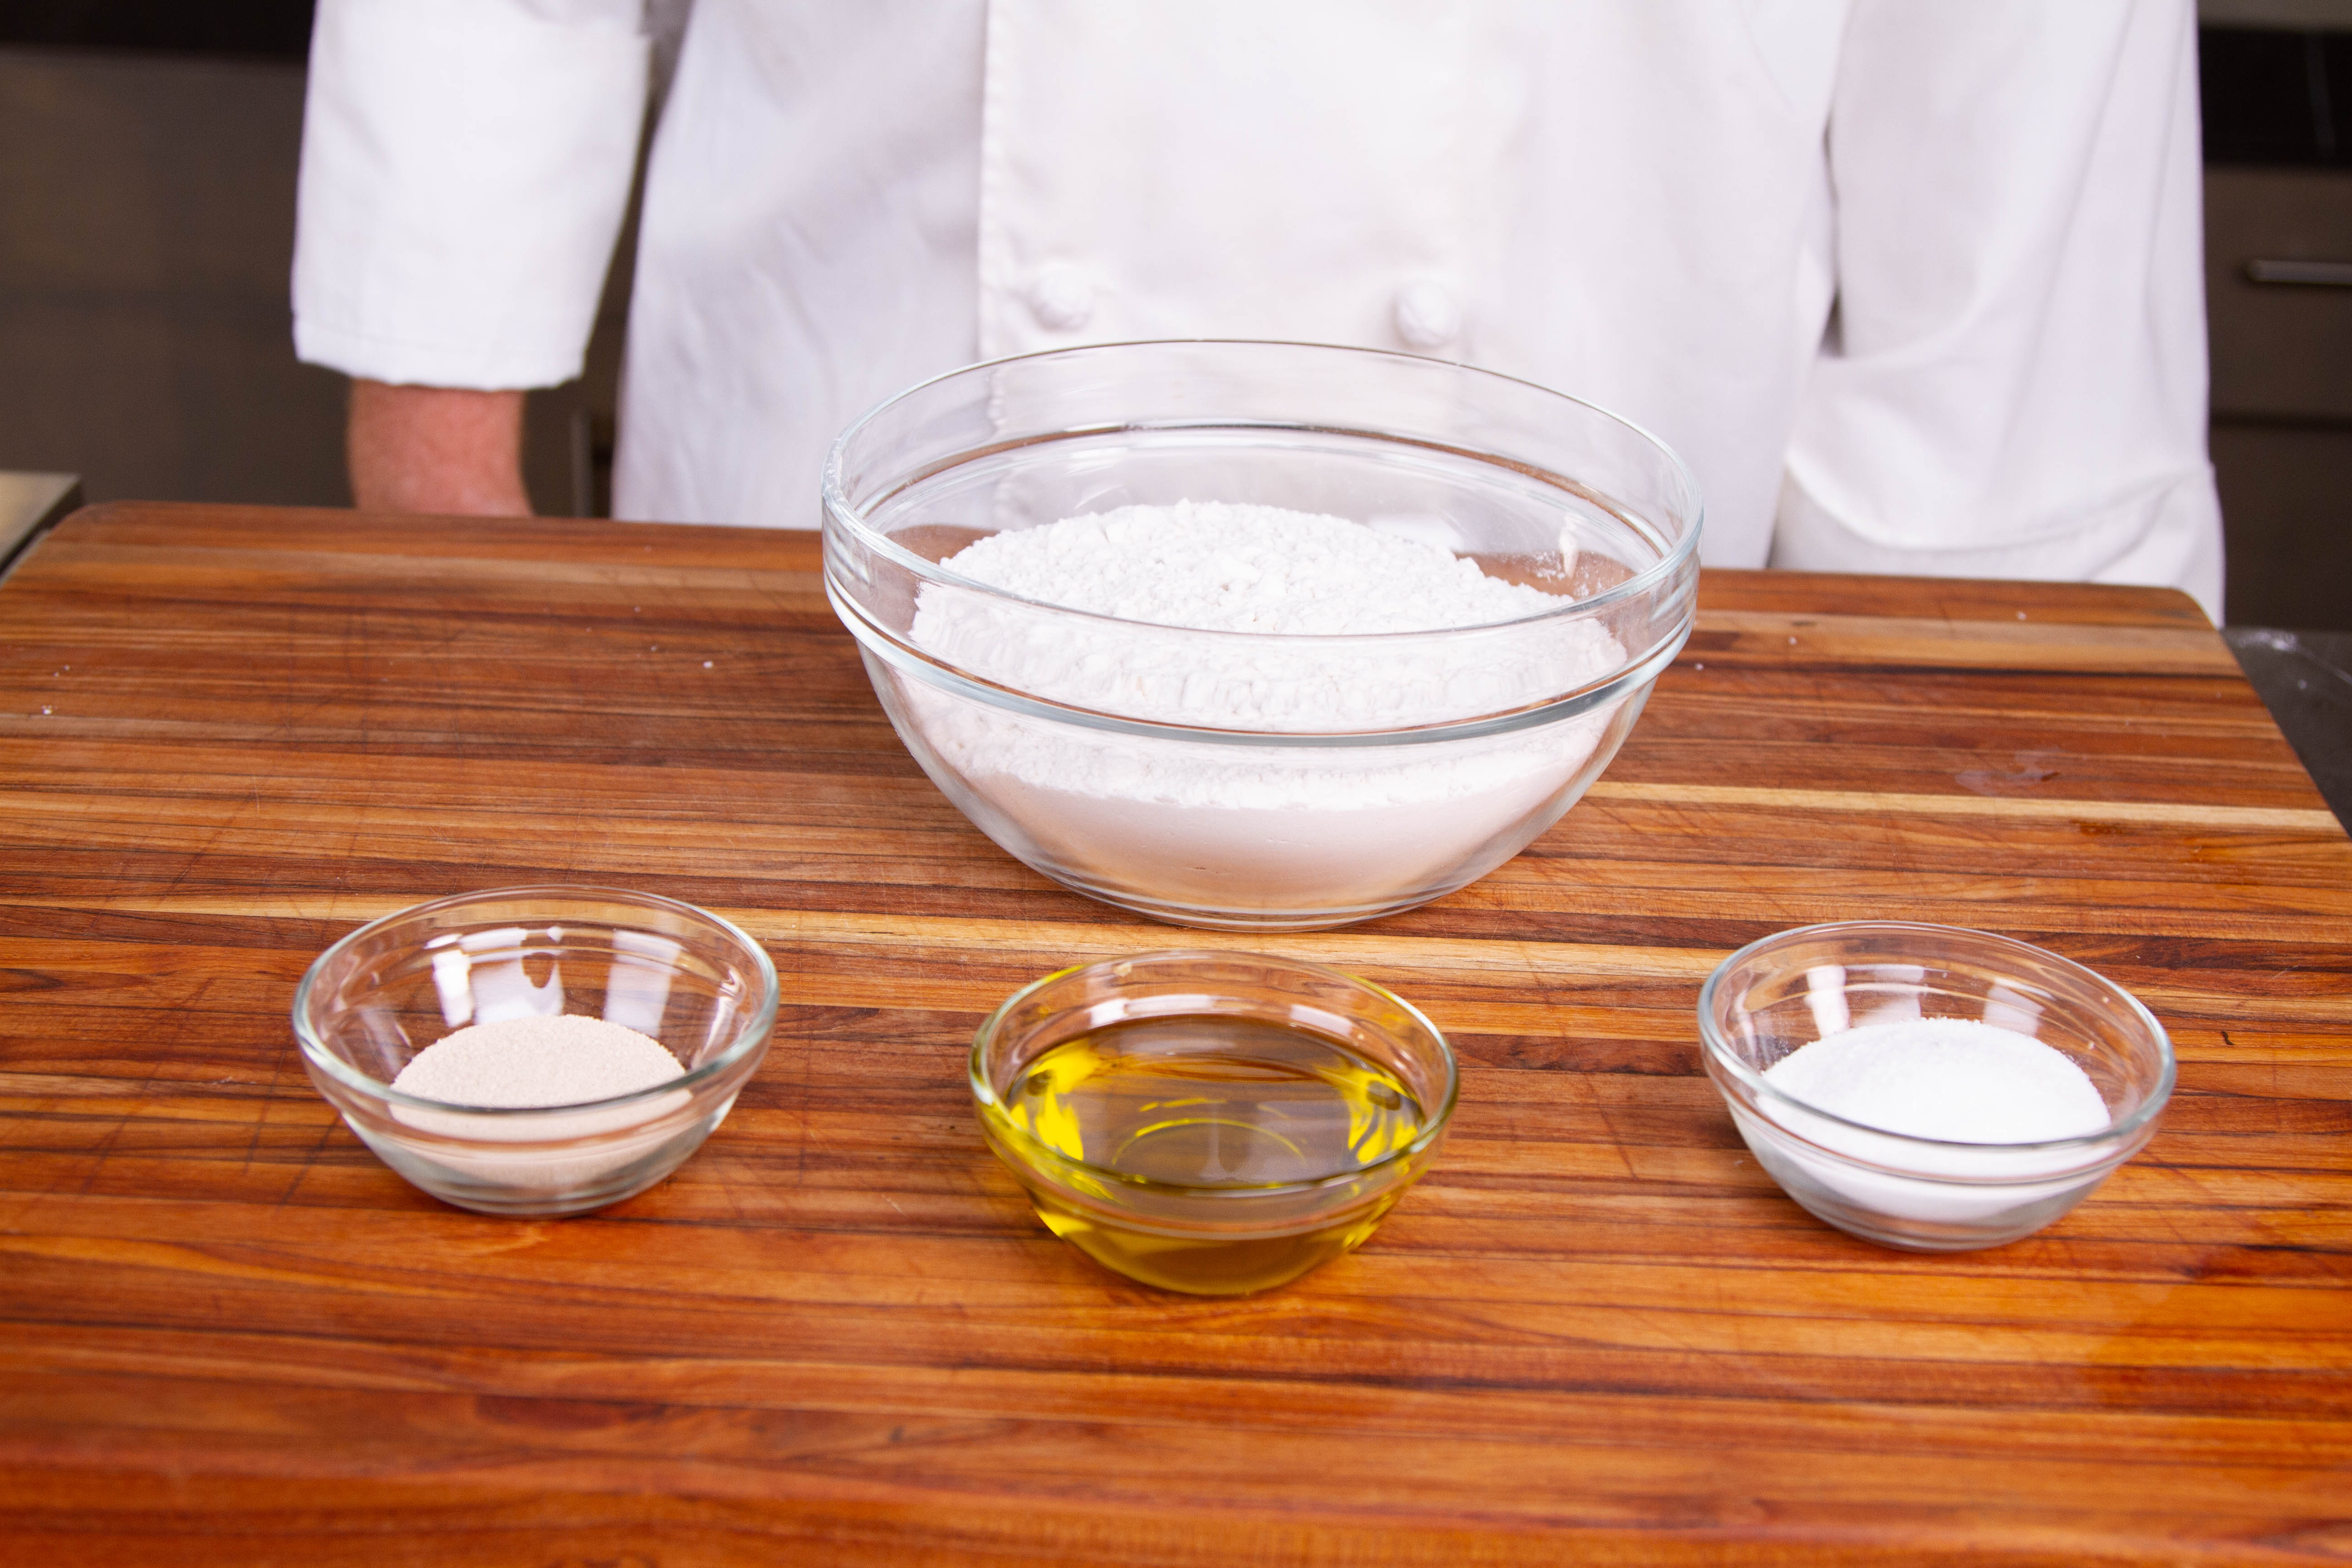
After flour selection, the rest of the ingredients for pizza dough are simple: water, yeast, a little sugar if you like, salt, and a nice helping of good olive oil. There is no mystery to the ingredients. It’s all in how you put them together.
There are two important factors that will affect the outcome of your dough:
- temperature and
- kneading.
Critical temperatures for pizza dough, also kneading
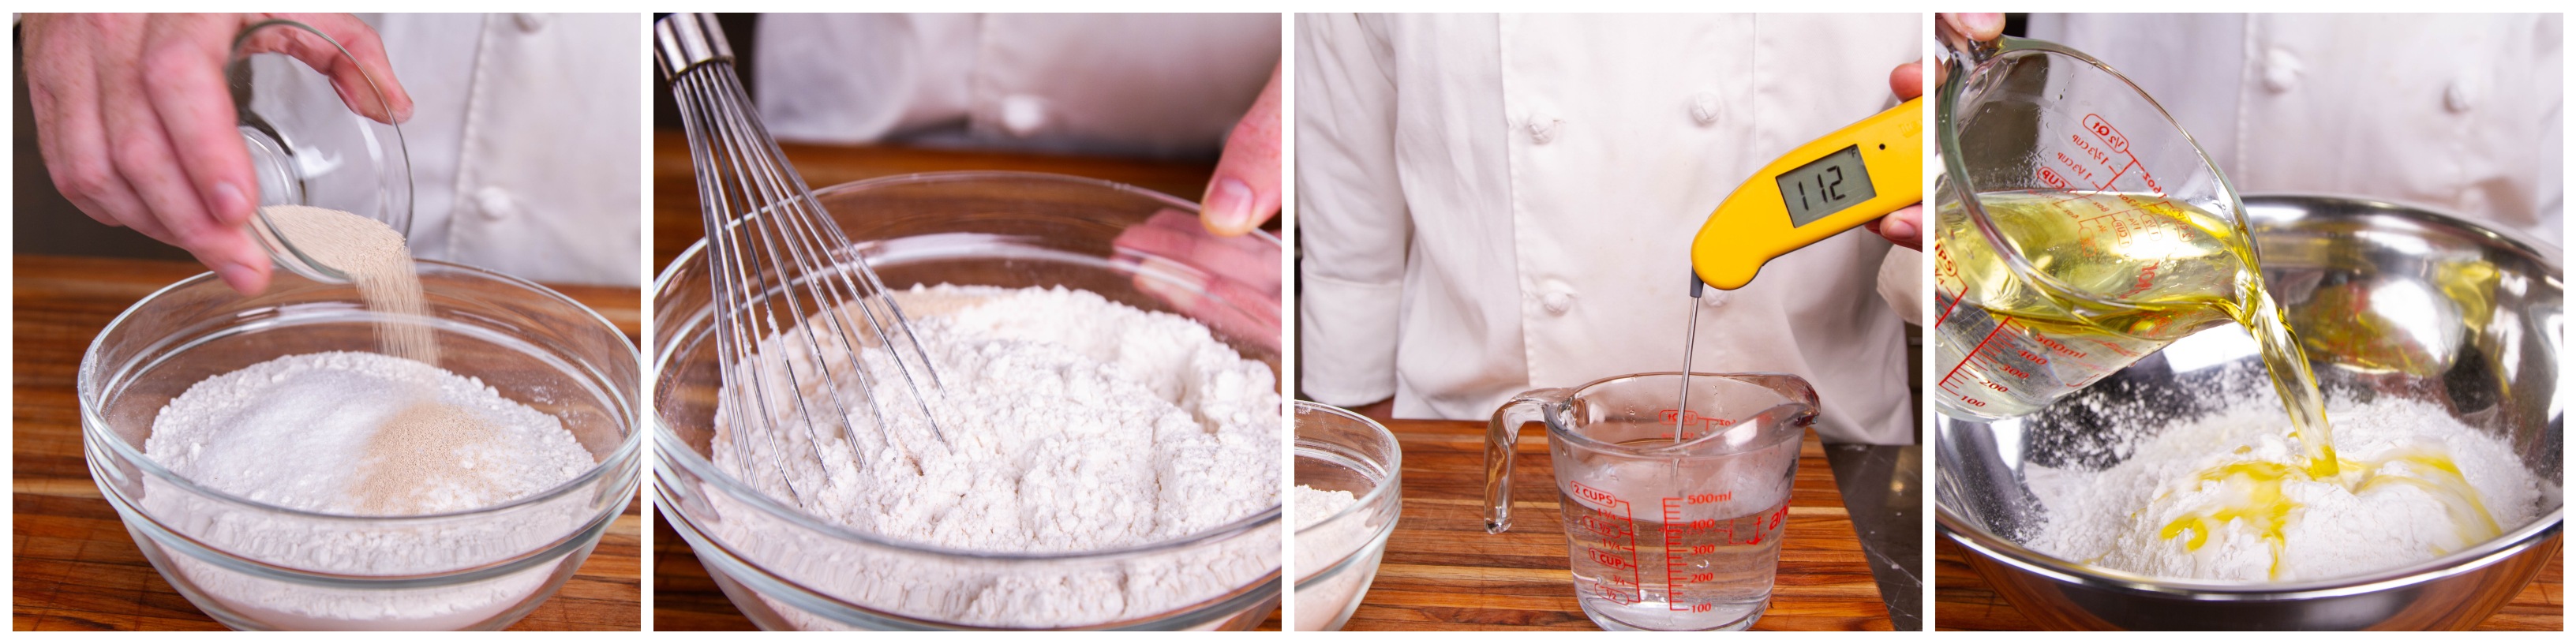
The temperature of the water that you add to the dough is of critical importance to the success of your pizza.
If it’s too cold, your yeast won’t rise quickly enough. If it’s too hot, you can actually kill the yeast and it will never rise. Not only will your dough be flat and hard to manage if that happens, but it will also taste flat and uninteresting. (We’ve written about the importance of temperature in making bread before. Read more about it there!) If the water is far too hot, you can even denature the proteins in the flour before you get a chance to develop the gluten.
The ideal temperature for the water in your dough is 105–120°F (41–49°C), which will activate the yeast without overheating it. Using a fast and accurate Thermapen® will help you get the environment for your yeast just right. Be sure to take extra care to get the water temperature just right before adding it.
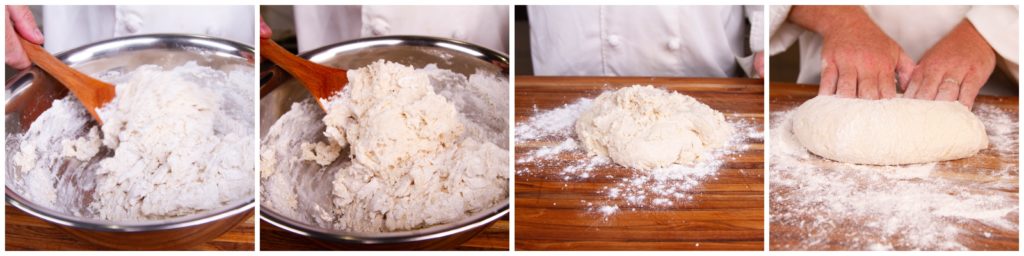
With everything combined at the proper temperature, it’s time to knead.
To get the classic chew of a pizza crust, you need major gluten development, and that means major kneading. Kneading the dough increases the gluten connectivity and makes stretchy and elastic. Knead the dough until you can take a small piece of it and stretch it out into a very thin membrane. This “window pane” test is used by professional bakers to make sure their bread is ready for rising.
Be warned, this may take up to 10 minutes of kneading. Be strong (or use a mixer with a dough hook).
Once you’ve combined the ingredients and kneaded them together, you’ll want your dough to be in a comfortable temperature range. Check it again with your Thermapen so you can know what to expect from the rise. If your dough temp is in the 80’s °F (30’s °C) you can expect a quick rise. If your flour was cold and your dough finishes the kneading cycle in the 70’s °F (20’s °C) you can expect a longer rise time.
After kneading very well, you need to let the dough rise for a while. A barely warm oven is a great way to proof your dough (proofing is what bakers call allowing dough to rise), as is a cooler with some warm water in the bottom. Yeast rises best when the air temperature is 85°F (29°C), so try to get an ambient temperature as close to that as is possible.
Let the dough rise until its volume doubles before shaping the dough to make your pies (or tossing it in the air, if you feel so inclined).
Grill setup for grilled pizza
There are two ways you can set up your grill for grilling pizzas: with or without a pizza stone.
Grilling with a pizza stone
You may say to yourself that grilling pizza with a pizza stone isn’t very, well, grill-y, and you may be right about that. But by placing your pizza stone directly on the grill surface, you can get a surface temperature that rivals a woodfired pizza oven!
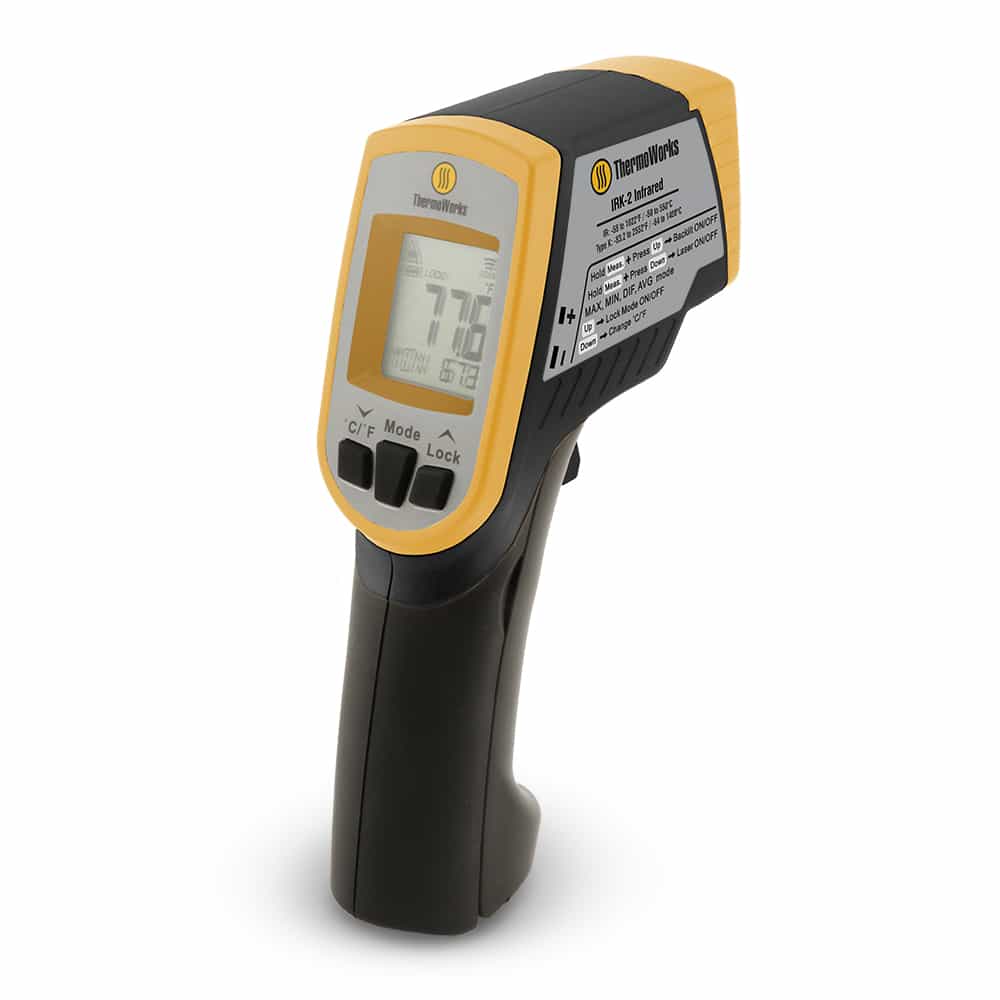
To cook on a pizza stone, place the stone directly above your heat source (gas or charcoal work well for this) and let it preheat with the grill. You’ll want a surface temperature of at least 570°F (299°C) on the stone, which you can read comfortably from a distance with an infrared thermometer like the IRK-2 that has a circle laser showing the area where the temperature is being measured.
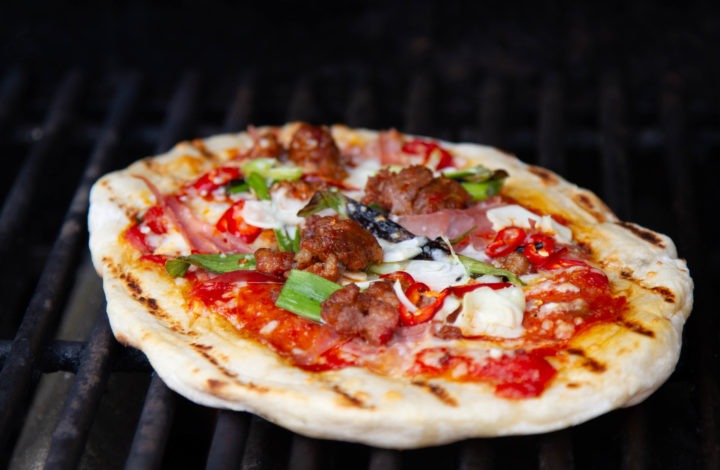
Once the stone surface is up to temp, slide your shaped dough onto the stone, arrange your toppings, and close the lid for cooking. Check the bottom of the pizza after a few minutes to see how it’s doing. A well-browned, crisp crust is the goal, and if your air temp is high enough, you’ll get bubbly brown cheese at the same time the crust is ready.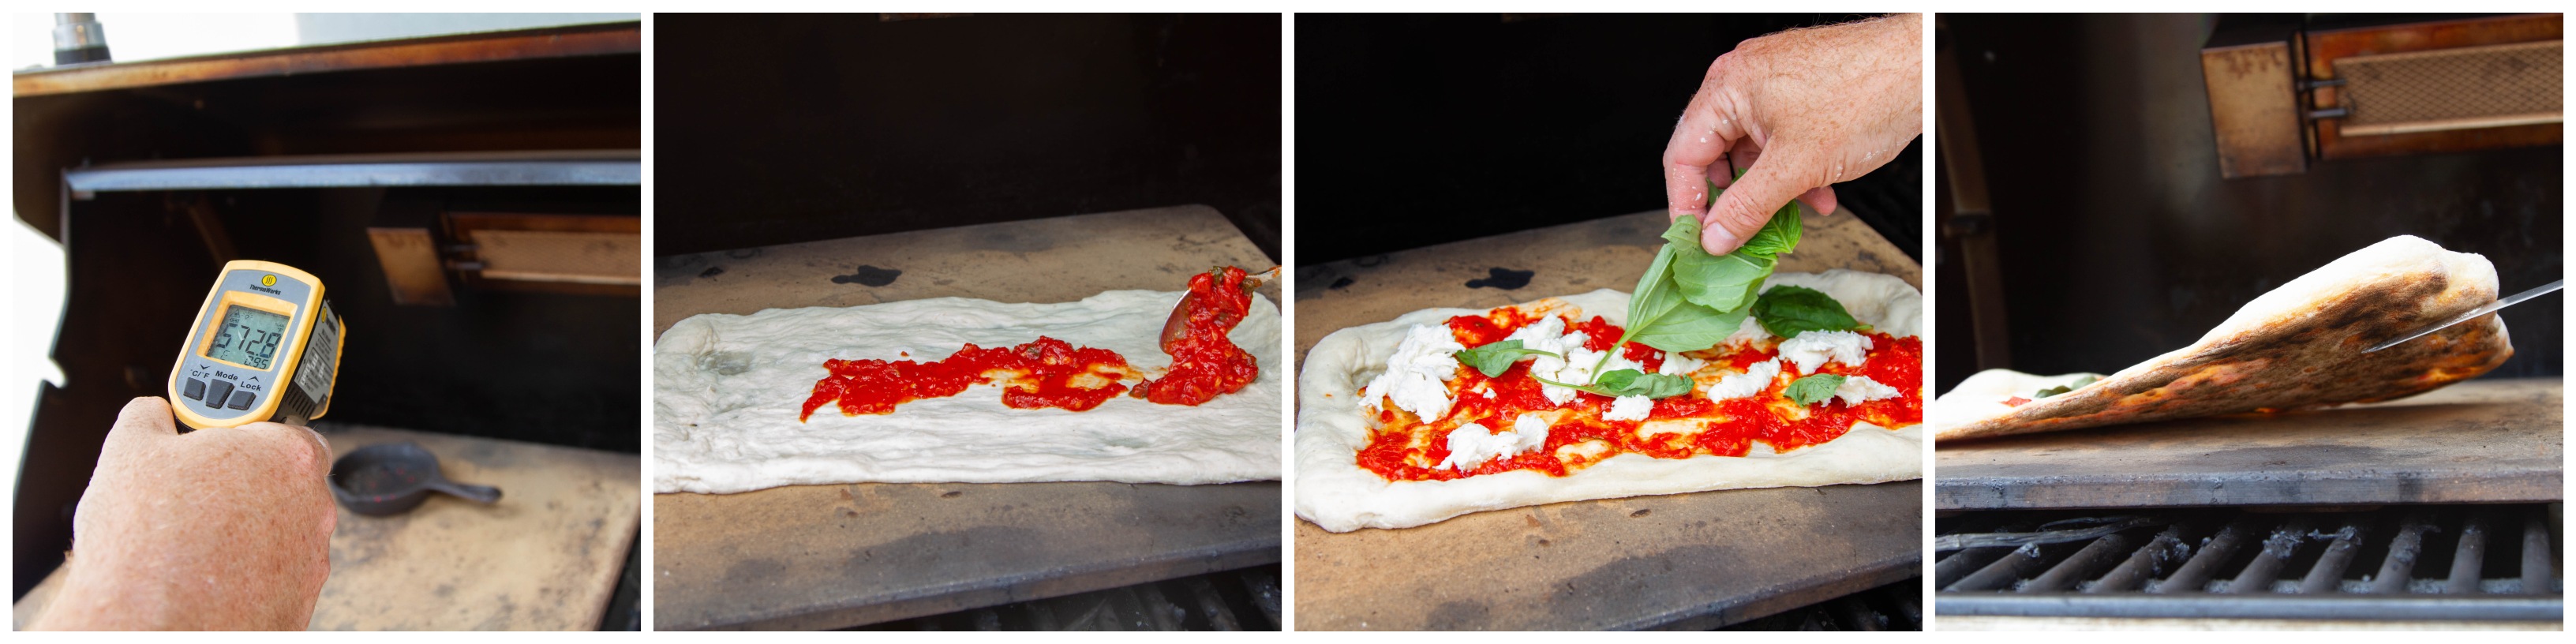
Cheese browning is dependent on many factors, as it turns out. The strain of bacteria used to make the cheese can affect its coloration by limiting or accentuating the content of galactose, which browns more readily than lactose. In general, cheeses will brown well at or above temperatures of 450°F (232°C). If you want browned cheese, your air temp will need to exceed this level.
The advantages of this method are its ease—it’s easier to not burn the pizza this way—and its convenience for smaller grills. As you are cooking directly over the heat, you don’t need room for two-zone cooking.
The disadvantage is the length of time it takes to cook the pizzas. On our gas grill, the pizzas took about 7-8 minutes to cook with this method. That’s not a long time, but when you’re anticipating hot, melty, crisp pizza, it can feel like a long time.
Grilling on the grill grate
Grilling directly on the grate is a little more exciting and a little more challenging. Gas grills are a little easier to wrangle with this type of cooking, but if you can get a steady, even fire on your charcoal grill, the higher temps will reward you with cheese bliss. The surface of your grill will likely be in the 600°F (316°C) range, which is perfect. Check it with an IRK-2 pointed at a cast iron pan to make sure it’s hot enough before you begin.
You’ll need to set your grill up for two-zone cooking and have a lid for your grill at the ready. To cook pizza on the grill grate, shape the dough, then place it directly over heat on the grate. Close the grill for a little less than a minute, then check the dough. You want the bottom to have well-browned grill lines on it and the top to be quite bubbly. Remove the dough from the grill using tongs and place on a work surface (upside-down cookie sheet). Brush the bubbly side with olive oil, then flip it so that the grilled side is up. Oil that side also. Sauce and top the pizza and slide it back onto the grill over direct heat for another minute to set the dough before moving it to the indirect-heat side. 
Replace the lid and cook until the cheese is melted and bubbly.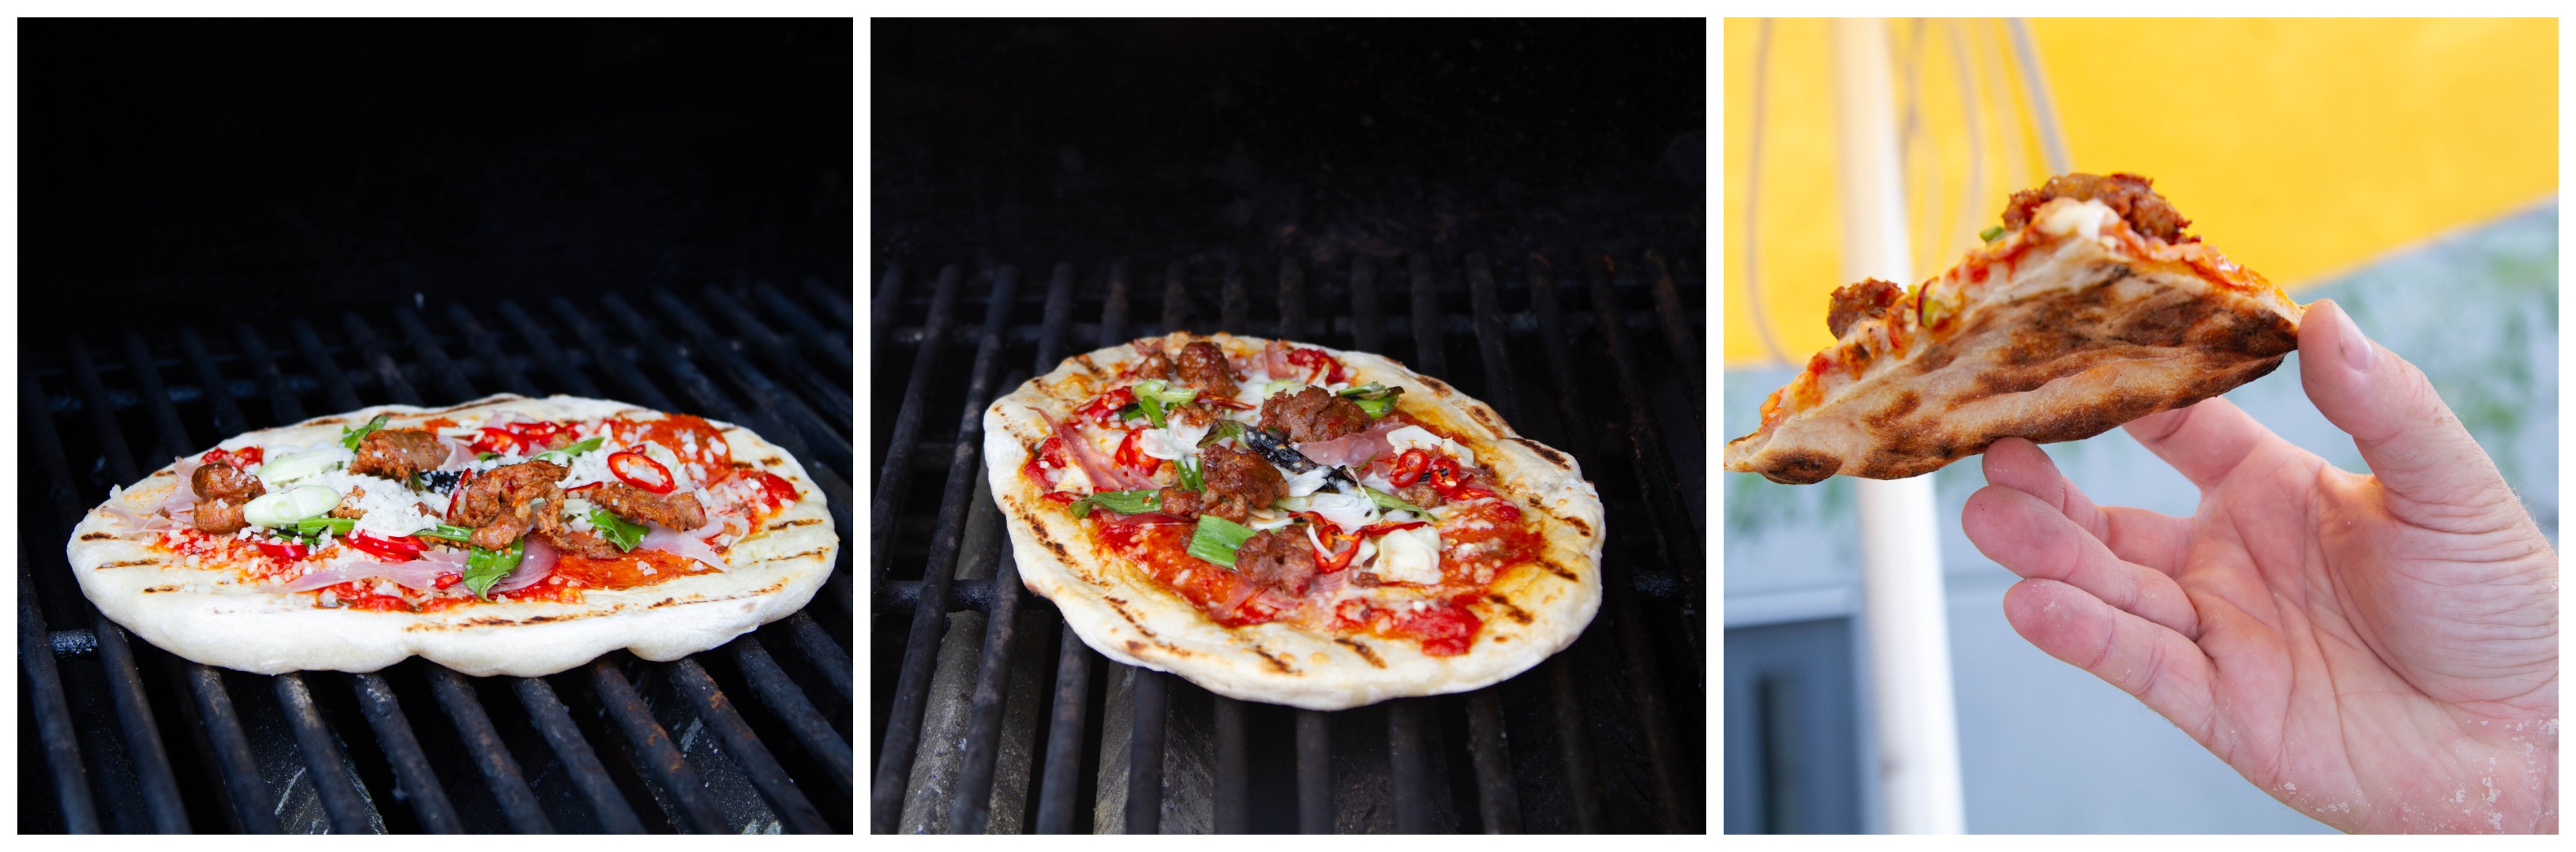
The disadvantages of this method are its fallibility—it can be easy to droop dough down into the fire—and its active time—there’s a lot more action than putting it on the grill and waiting. But then, that might be an advantage in its own way.
The advantages are the sheer fun of it and the smoke-flame char patches that will develop, reminiscent of the charred bubbles on a Napoli pizza.
Saucing and topping a pizza
Use any sauce you like for your pizza, but use far less of it than you think you’ll need. A bare skiff of sauce across the surface of your pie will suffice without bogging your crust down in sogginess. The same goes for cheese. I like a cheesy slice as much as the next guy, but you’ll be surprised at how far a little cheese goes on a pizza. Don’t put a mountain of it on your pizza. Too much cheese is hard to melt, harder to get bubbly, and becomes unpleasant on a nice thin crust.
The type of cheese is up to you. I like a blend of mozzarella and provolone (equal parts) with a little parm in the mix, but try your favorite to see how it goes.
As for toppings, let your imagination run wild. Bacon, pepperoni, and tomatoes; charred scallions and fresh sweet corn; pesto, wing sauce, Alfredo. Make a pizza with Nutella and strawberries for dessert. Just don’t put more toppings than the crust can bear.
Cook hard-to-cook toppings first. Pre-brown your sausage, blanch and dry broccoli, even roast or sauté peppers first for the best texture. Don’t count on anything cooking that is thick and dense. If it takes a long time to cook on the stove, it’ll take a long time to cook on the pizza!
Note on dough: If you just want to grill a pizza but don’t want to make pizza dough, ask a local bakery if you can buy a lump of dough. They often oblige and it will make delicious pizza. Just make sure your grill is at the proper temperature!
Grilled pizza dough recipe, grilled pizza recipe
Recipe from Simply Recipes Homemade Pizza
Grilling tips from Bon Appétit and Simply Recipes
Ingredients
- 1 1/2 cups warm water, 105–115°F (41-46°C) as measured on a Thermapen
- 1 Tbsp active dry yeast
- 3 3/4 cups (490 g) bread flour
- 2 Tbsp olive oil
- 2 teaspoons salt
- 1 teaspoon sugar

Instructions
- In a mixer or a large bowl, combine dry ingredients.
- Make sure the water temp is correct, then add the water and the olive oil.

- Mix to form a shaggy dough mass. If using a mixer, switch to a dough hook at this point.
- Knead the dough for 7-10 minutes until it is smooth and elastic.
- Check the temperature with a Thermapen.
- Place the dough ball in a bowl greased with olive oil, cover and allow to rise, optimally in a location that is 85°F (29°C).

- Once the dough has risen to double its size, punch it down and divide into 8-oz chunks.
- Roll out or hand-shape each crust to an 8-12″ oval as you need it, making the pizzas in turn.
- The crusts can be ugly shapes, perfect roundness is not necessary.
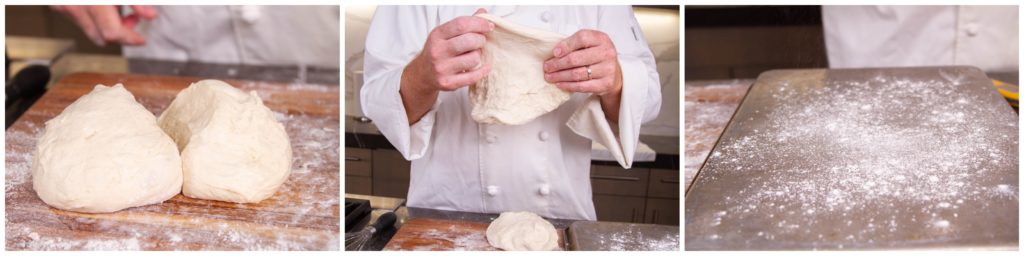
- Place the shaped dough on a floured pizza peel or upside-down cookie sheet and then slide it onto the grill.
- Follow above directions for cooking pizzas on either a grill grate or a baking stone.


 There’s nothing quite like a hot, fresh pizza from the grill. You have control over the sauce, the cheese, the toppings, and the crust. And with the knowledge you get form your Thermapen and your IRK-2 thermometers, you have control over the temperatures, which means you can better affect the outcome.
So dive in, make some dough and make pizza night a new tradition. You’ll never want to cook a pizza any other way!
Shop now for tools used in this article:


Billy Bargagliotti says
http://www.pizzanapoletana.org/public/pdf/disciplinare%202008%20UK.pdf
Is the “OFFICIAL” pizza recipe from the Italian association of maple style pizzas.
The permitted temperature for cooking is 905F,
90 seconds is allowed for cooking.
Deviate from their recommendations and you will be issued a warning to change your process!
Most American ovens will get to 550F, and that is it.
However, I have developed a way of getting excellent crusts.
The biggest enemy to a crispy crust is the wet tomato sauce you put on top of an uncooked wet crust.
So,
Slide your crust onto a 550F PIZZA STONE AND PEEK UNDER THE CRUST IN 1-2 MINUTES.
If it looks like it has brown spots, remove it.
Now turn your crust over and add toppings to the partially pre cooked crust.
Then finish cooking any way you wish, oven or grill.
OH WHAT A DIFFERENCE!
David says
Billy, Thank you for the link, I will use it as reference.
I use a baking steel and put it under the broiler, set it for high broil.
I have had good results that way. Checking the temperature and letting the mass of the steel finish the bake.
Your thoughts?
David
Michael G Kesler says
Thank you so much ! Great Instructions.. Never knew what I was doing wrong.. Again many thanks—GREAT PIZZA !!!!!!!!! Mike Kesler
Martin says
Mike,
I’m happy it worked well for you! Happy cooking!
Jeff H says
Ditto (almost) on the certified Neapolitan, or Naples style (not “maple”–infernal autocorrect!) pizza.
Pizza is, like nearly all food, a matter of personal preference. You’ll find hundreds of recipes with an online search. I agree with the article in most part, but not all.
I took a pizza making class at an Italian cooking school (in U.S.) and have used its recipes and techniques many times with my home oven and stone. All ingredients are measured by weight for accuracy, butter is used instead of olive oil (a violation of the Neapolitan rules), no sugar, and starts with ice water. It’s made at least 24 hours ahead and immediately refrigerated for flavor development (“retarding,” a la many bread makers). It’s shaped when still pretty cold because it’s easier to hand-stretch. Tastes great. Same dough can be used for calzone, stromboli, and stuffed pizzas, these with an egg wash for color.
Sauce can be white, pesto, or your preference, but for classic tomato sauce, crushed tomatoes are used (preferably whole canned, well hand-crushed and not watery–I use a strainer to drain off some watery juice), garlic and herbs added just before use, and spread in a spiral pattern from middle outward using a spoon or ladle. Be careful not to get closer than about an inch from the edge with sauce or cheese to avoid problems with cleaning your oven or stone. Avoid piling ingredients in the center of the pie and making it soggy.
To avoid soggy crust, limit moisture in the sauce and the amount of cheese (whole milk, low-moisture mozzarella!); compose the pie and put it in the oven without delay; use a fully preheated stone and don’t undercook. I’ve never found raw sausage didn’t cook well in the 9 minutes or so at 550*. Slice vegetables thinly enough so they will cook quickly, possibly giving them a light coating of olive oil after slicing. I hate using propane–it makes my stone dirty.
Last time I assembled the pizza on a “copper” grill mat (one that is rated for at least 550*) over my peel, slid it onto my stone in the oven, and it worked great, no sticking, cleanup was easy, and no mess from corn meal or flour.
Martin says
Jeff,
Thank you for sharing your expertise! It is true that retarding the dough will yield better flavor, of course. This is a great run-down on some very important things to remember, so thank you.
Happy cooking!
Scott says
Just tried this on a Master Forge smoker grill. Used a full chimney of charcoal. Two major points I screwed up:
1. You need a Pizza Peel to get on and off grill.
2. On a charcoal grill make sure your coals are well below the crust.
My first attempt? To close to fire on side 1 and struggled to get it on and off grill. I must admit the “ugly pizza” tasted like a million bucks!
Martin says
Scott,
Excellent points. I’m glad that it was delicious despite its cosmetic failings!
Maria says
Absolutely love this pizza recipe. It’s the only one I use. I make it every Friday night, my husband and kids love it. ???? I’ve also done it for other members of the family and they can’t believe how amazing and authentic the pizzas turn out ?
I’ve been using a shop bought pizza sauce but would love to make my own.
Martin says
Maria,
I’m glad to hear it! Homemade sauce is really easy. Just saute a little garlic, add a can of tomatoes and a few basil leaves, salt, and let it cook until the tomatoes break apart. You can also puree it if you want a smoother sauce. Good job impressing the family and keep up the great cooking!
Maya says
After many failed attempts with pizza dough…… This recipe was perfect!!!! I’m very picky when it comes to pizza, and this is now my go to recipe! Thank you so much!!!
Kate says
Oh my heavens. I cannot believe I found this site and this recipe. You have made my day. I too lived in Italy with so many fond memories. I was a child when my father took a job with Pirelli. Then there were the Detroit days and a lot of waiting in line at Buddy’s for the best pizza ever. You have sparked a lot of interest for me. Thank you.
Martin says
Kate,
I’m so glad you found us, too! I hope you try this pizza out some time and let us know how it goes. Happy cooking!
Jenny says
I love colorful recipes indeed, and this pizza is absolutely flavorful!
Love this so good, our family really enjoyed it… saved it to one of my pins for pizza night! thanks! ?
Martin says
Jenny,
Fantastic! Glad to hear it!