

Perfect Porchetta: A Temperature Roadmap
Have you ever had porchetta? You know, the classic Italian dish that dates back to Roman times, that might well have been eaten by Roman Emperors? The one where you wrap a pork belly around a stuffed pork loin and roast it until the skin crisps into pork crackling? You’ve never had it? Boy, are you missing out!
What is porchetta?
Porchetta (pronounced por-KEH-tah in the Italian) is an amazing example of pork cookery and one that the Italians have been loving for centuries. It is sold in sandwiches from road-side bistros and from food trucks and is brought, whole and gleaming, to the table of family celebrations. Originally, it was made from a whole side of a pig that has been deboned, rolled up, and roasted on a spit. Yum. Now it is usually made by wrapping a pork belly around a pork loin and roasting it. Still yum.
Since most of us don’t have a whole side of a pig, let alone a spit on which to cook it, we’re going to show you how to cook a delicious and traditionally flavored porchetta that is both juicier and far easier to make than the original. It’s so tasty that it will knock the turkey right off your holiday table.
Perfect porchetta roast
A perfect porchetta roast should have:
- Tender, juicy meat
- Plenty of seasoning, much of it from fennel
- Crispy crackling that is not hard to bite into/through
A roast that meets any of those criteria will be good, but a truly excellent roast will meet all of them.
Porchetta problems
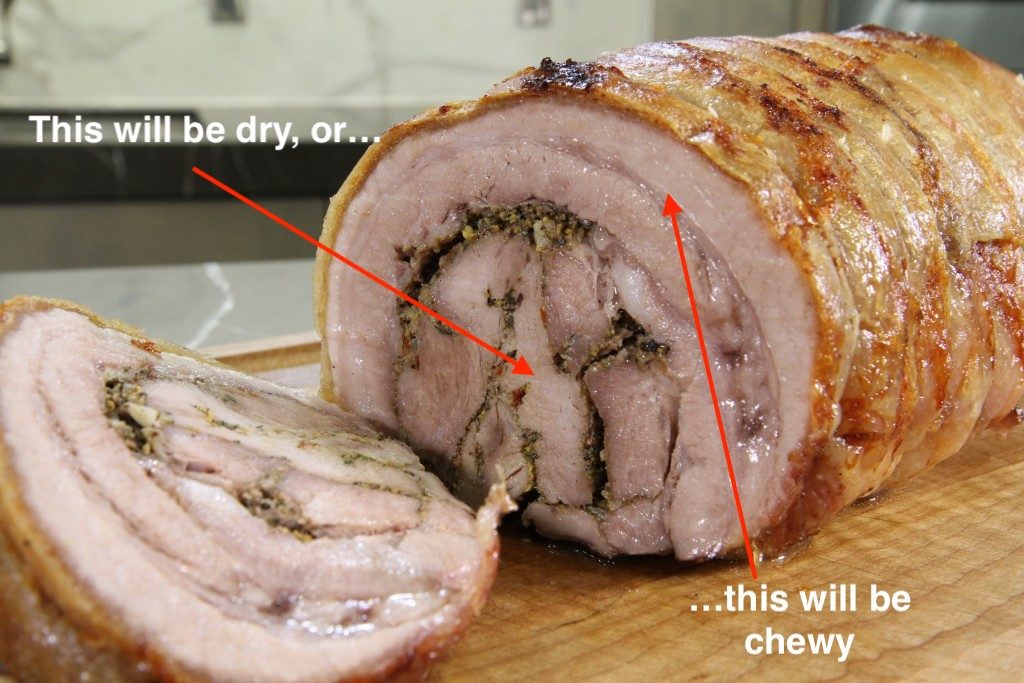
When we look at the meats involved in porchetta, we might start to see a problem. Porchetta is made of pork loin and a belly, and those two meats could hardly be more different. Loin is lean and tender with little to no connective tissue; belly is fatty and full of collagen. (Pork skin is also collagen-rich and tough.) In order to dissolve the collagen and render the fat in the belly, we’ll need to cook it to at least 170°F (77°C). But a pork loin is done at 145°F (63°C), and well past done by the time it reaches 170°F (77°C). Compound that problem with the desire for crispy pork skin, and we find an irreconcilable mess.
“But!” people will say, “the fat from the belly will protect the loin from drying out!” Hogwash. It’s time to put that old saw away and think about things from a thermal/scientific angle.
First, what we’re trying to preserve is moisture, which is water-based. If we’re concerned about our pork loin losing water, that means that water is flowing out of it, and if water is flowing out, how much chance is there that fat (oil) will be able to flow in? It can’t. In fact, the idea of fat or oil penetrating into meat at all is, frankly, laughable. Oil penetrating a water-based medium? Hardly. It may coat the outside, but it will not go in, and it will not stop water from leaking out up underneath it. So the fat of the belly cannot keep the loin from drying.
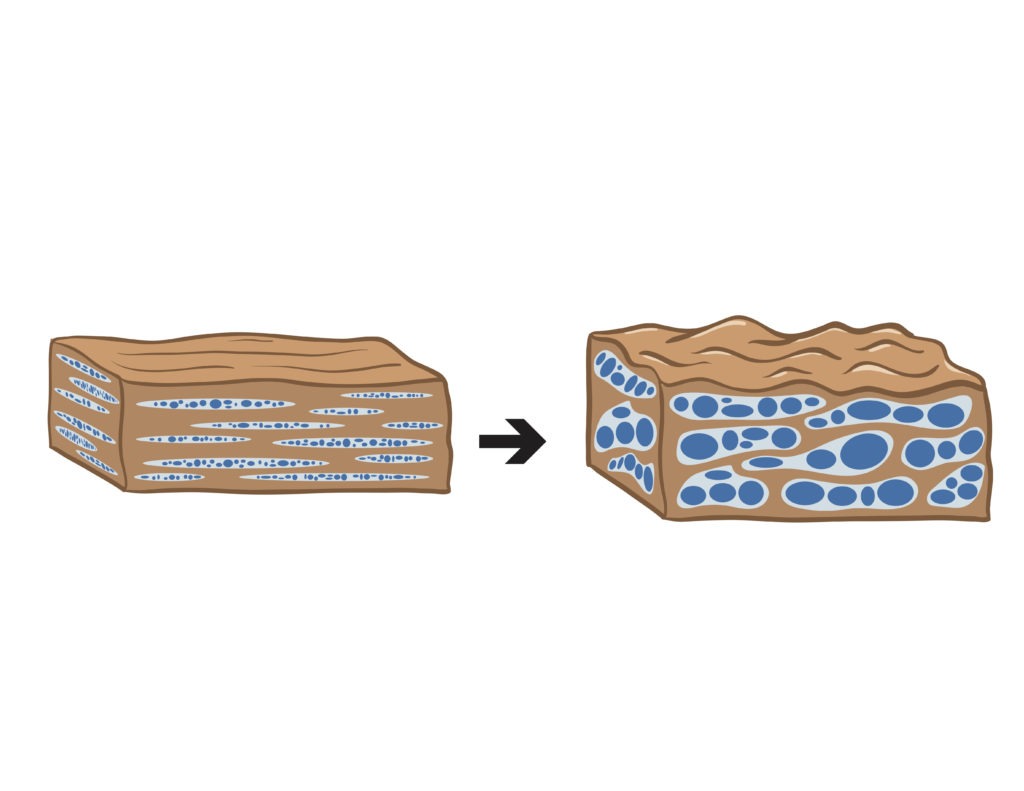
Beyond the basic oil/water problem, though, is the problem of cooking proteins. When the proteins in a pork loin are cooked as high as a pork belly needs to be, they constrict and squeeze water out from inside of them. No amount of fat-wrapping will stop those proteins from squeezing water out.
And so we see that porchetta presents us with some serious thermal challenges. J. Kenji López-Alt summarizes it well:
As the pork is … roasted, the fatty belly portion rich in juices and connective tissues ostensibly helps keep the relatively dry loin moist.
But we all know that this isn’t really how cooking works. All the fat in the world surrounding a lean, tightly textured muscle like a pork loin will not help keep it moist if you cook it past 150°F or so.SerioiusEats.com
On the other hand, belly, with its extensive network of connective tissue and abundant fat content, needs to be cooked to at least 160°F for a couple of hours in order for that tissue to slowly break down and for some of the fat to render.
And solutions…
Kenji’s proposed solution is simple: leave the loin out. As solutions go, it’s a winner. Is it completely traditional? No. But that’s the only strike against it that I can find. Yes, an all-belly porchetta roast is technically smaller, but it’s still quite large, and the richness of the meat makes it go far. In exchange for leaving the loin out, you get a shorter cook time, juicier meat, an easier preparation, and a lower cost. Win-win-win.
How to prepare an all-belly porchetta
To prepare an all-belly porchetta roast, start by deeply scoring the meat of a skin-on pork belly so that it can hold more seasoning. Then apply toasted, ground spices (the toasting brings out their flavors) to the meat and roll the whole thing up and tie it. Rub the skin with salt and baking powder to draw out the excess moisture and speed the cooking, and to help the skin puff up better when it turns to cracklings.
After a night’s rest in the fridge, the belly roll is cooked at a relatively low temperature to melt the collagen slowly into gelatin. It is kept in the range of 160–180°F (71–82°C) for about two hours for that melt to happen. The fat will also render during that time, improving the juiciness and texture of the meat. Using a ChefAlarm® to track those temperatures is key to getting the final juicy/tender texture just right.

Once the meat of the belly is super tender (a poke with a Thermapen® ONE can verify both the temperature and the texture), it’s time to make crackling. Remove the roast from the oven and crank the oven heat to 500°F (260°C). (Open a window because it’s going to get smokey.) Put the belly in the oven to crisp. If you want to understand the crackling-making process in depth, I recommend our article on Slow-Roasted Pork Belly with Chicharrones. But suffice it here to say that collagen that has been rendered in the skin leaves behind pockets of water, and those can be turned to steam in a high oven, expanding the pockets and leaving the skin crisp.
The porchetta should be flipped over once or twice during the high-heat stage so that the bottom (seam) side can be crisped as well. The meat temp will certainly rise during this part of the cooking, but that’s ok—with collagen-rich, fatty meats like this, going as high as 203°F (95°C) is just fine.
It’s a long process, but not a very difficult one, and the results it yields are well worth the effort.
It takes something special for a dish to stick around for more than a thousand years, and this one really has it. But with thermal knowledge and an understanding of how meat works, you can make it better than the Romans did. In fact, with modern tools like the Thermapen and the ChefAlarm, you can get results that would make an emperor jealous. This Holiday season, ditch your old standby dishes and make something spectacular to celebrate: make porchetta.
Easier Porchetta Recipe
Equipment


Ingredients
- 1 whole boneless skin-on pork belly—about 12 to 15 pounds
- 2 Tbsp whole black peppercorns
- 3 Tbsp whole fennel seed
- 1 Tbsp crushed red pepper
- 3 Tbsp finely chopped rosemary
- 12 cloves garlic grated or otherwise pulped
- Kosher salt
- 2 teaspoons baking powder
Instructions
Day 1
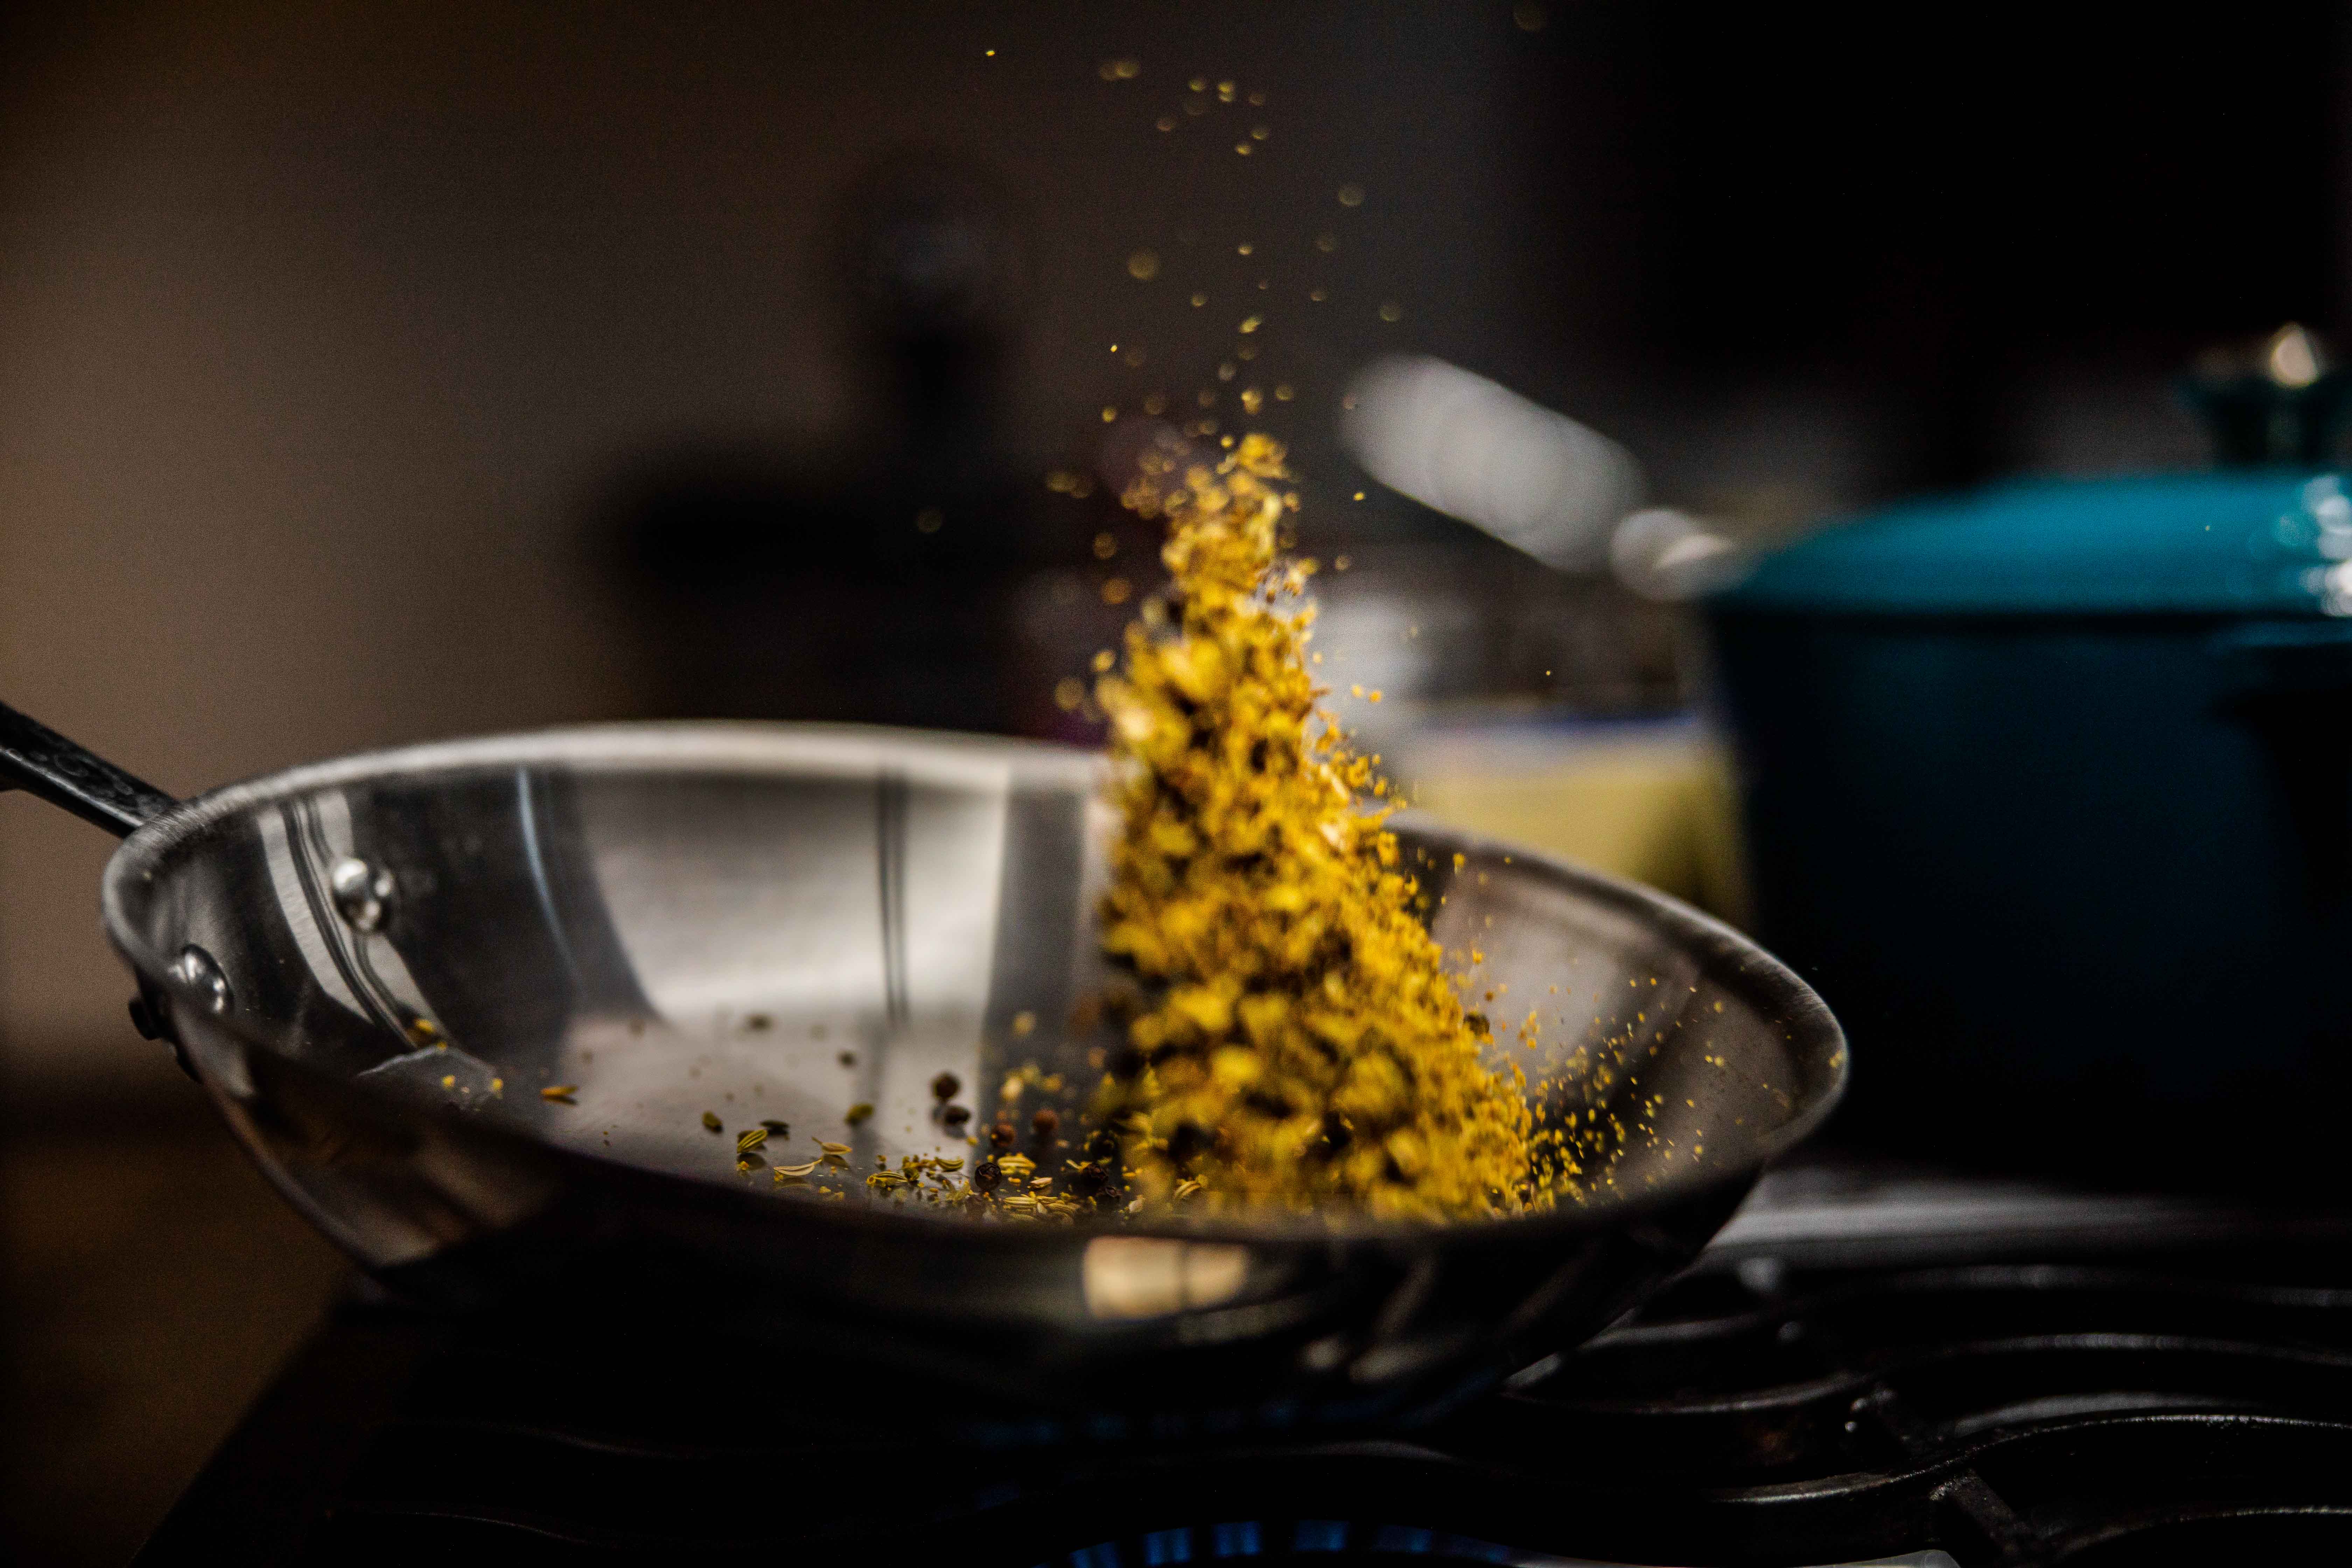
- In a dry skillet over medium heat, toast the peppercorns and the fennel seeds until quite fragrant and starting to brown. Remove the spices from the pan and allow them to cool.

- Grind the toasted spices together and set aside.
- Ground fennel, fennel pollen, and black pepper to season easier porchetta
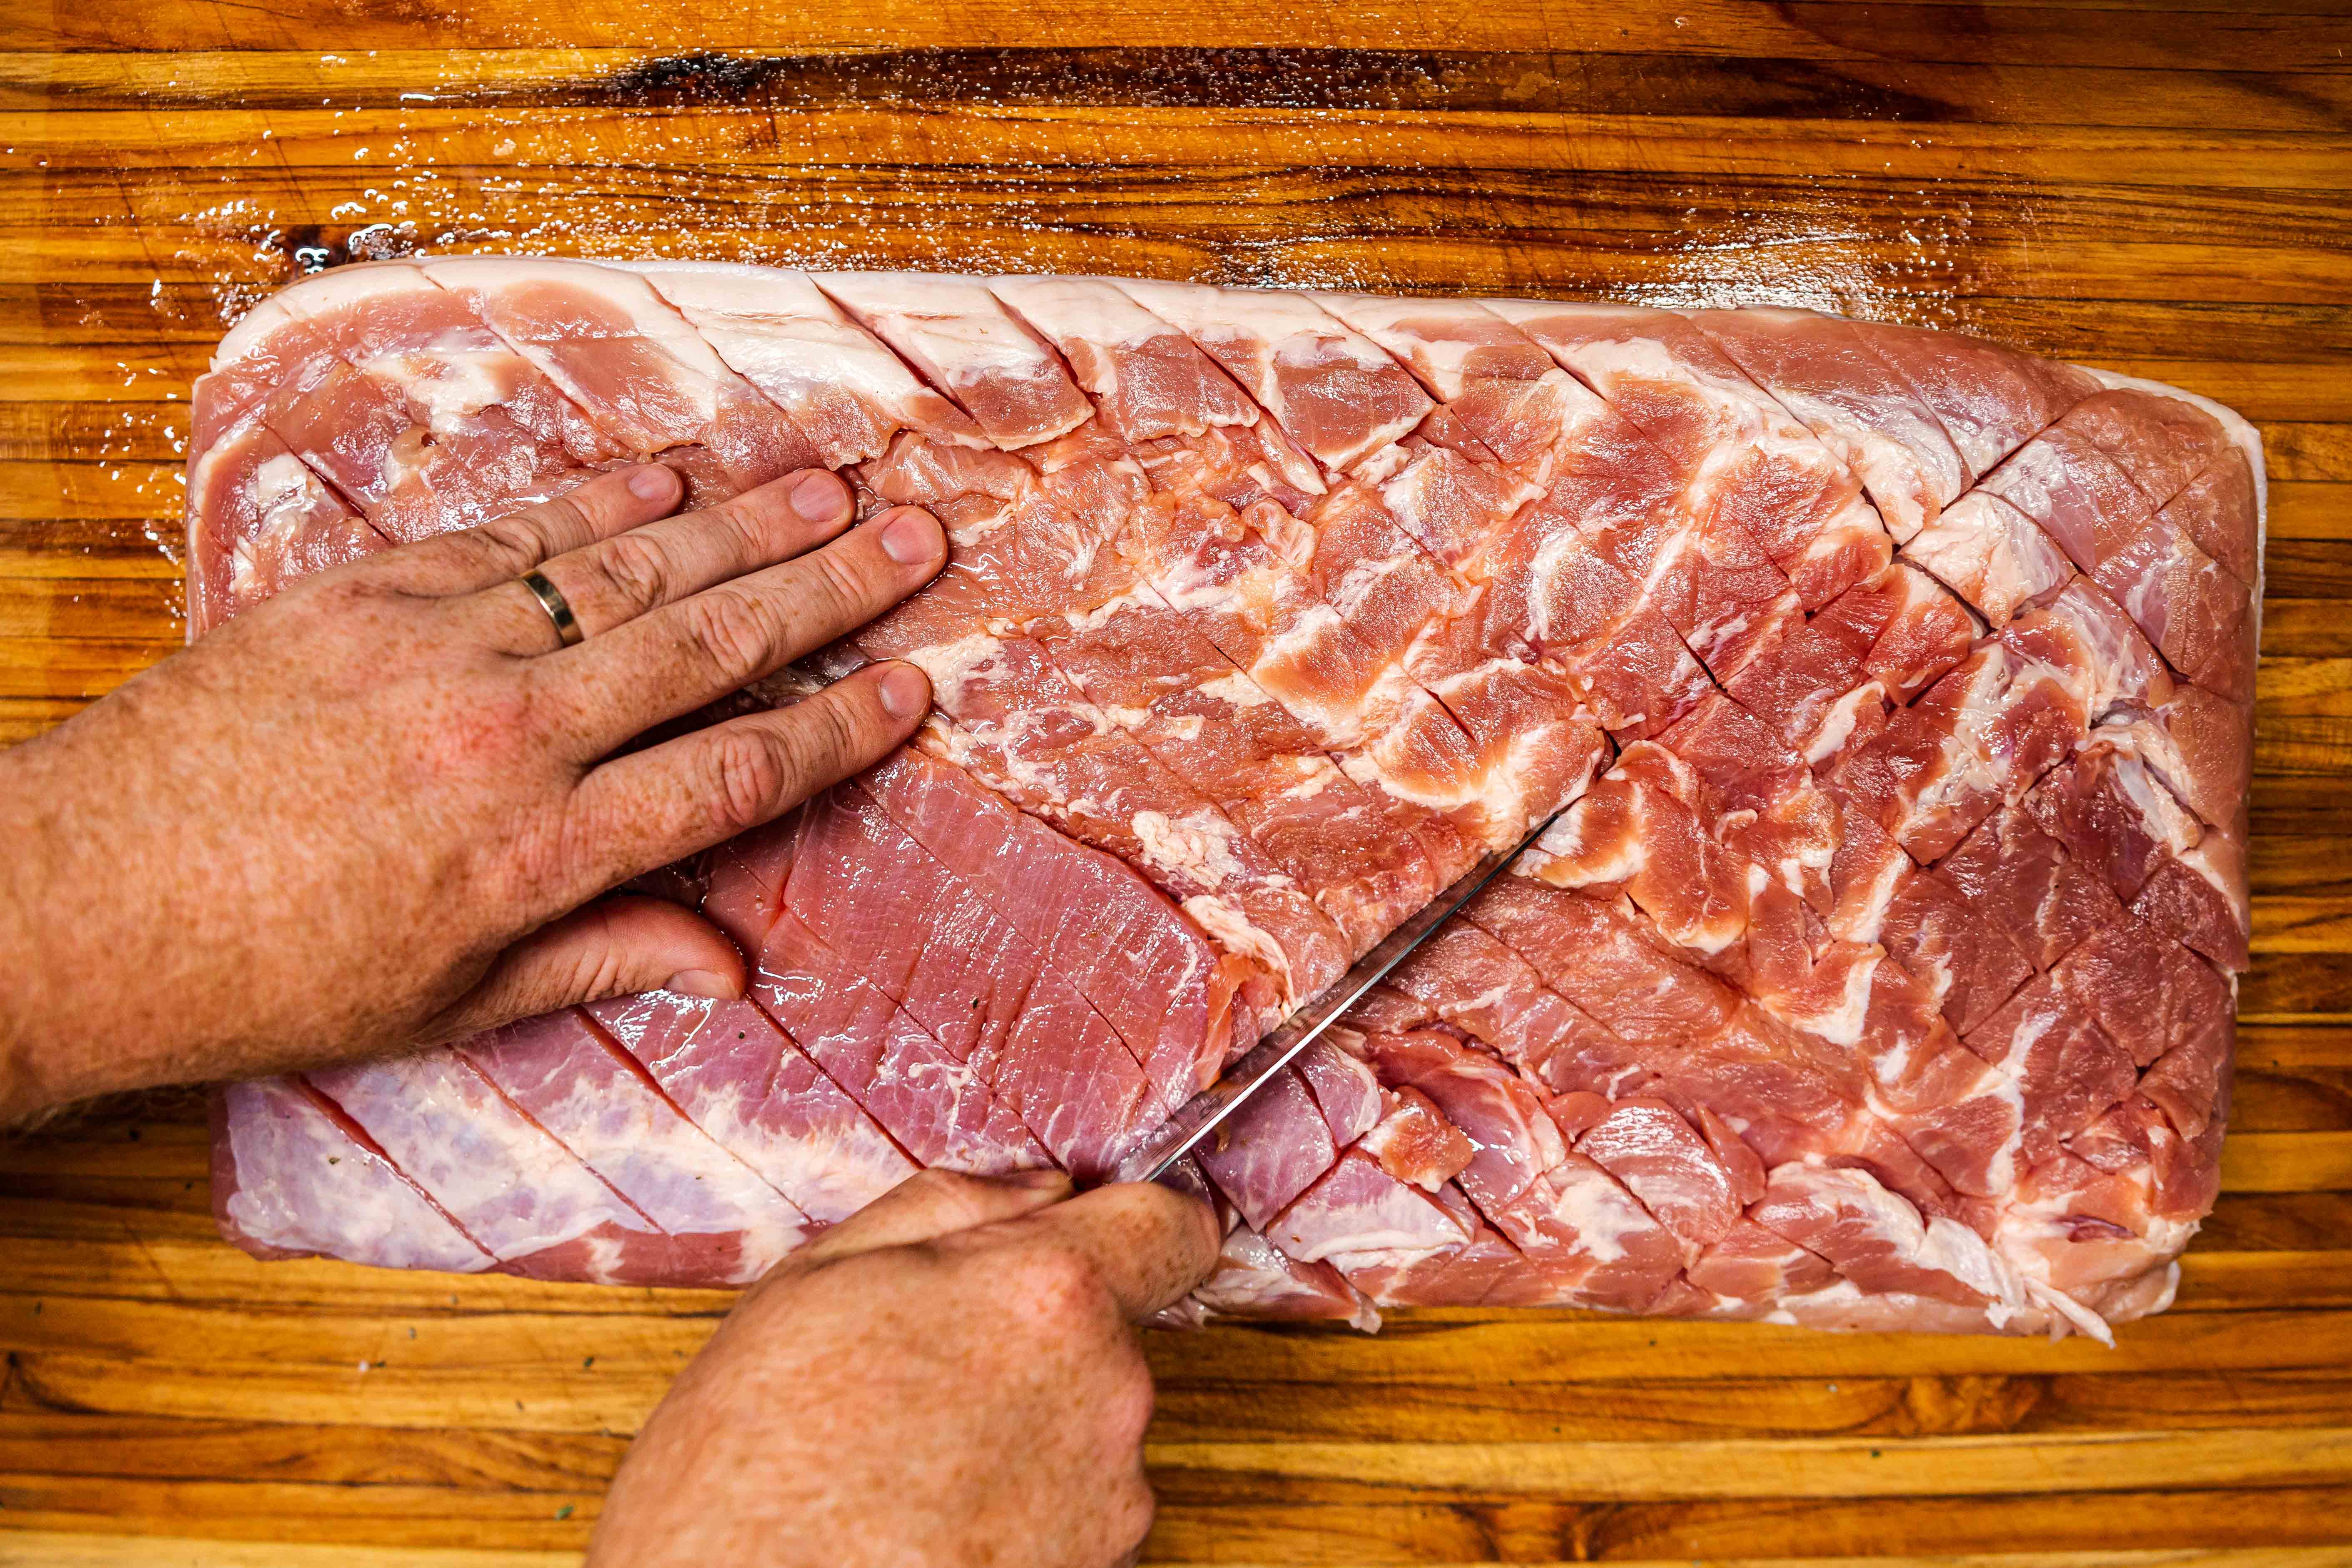
- Deeply score the meat of the pork belly in a diamond pattern. You can score all the way to the skin, but do not cut all the way through.
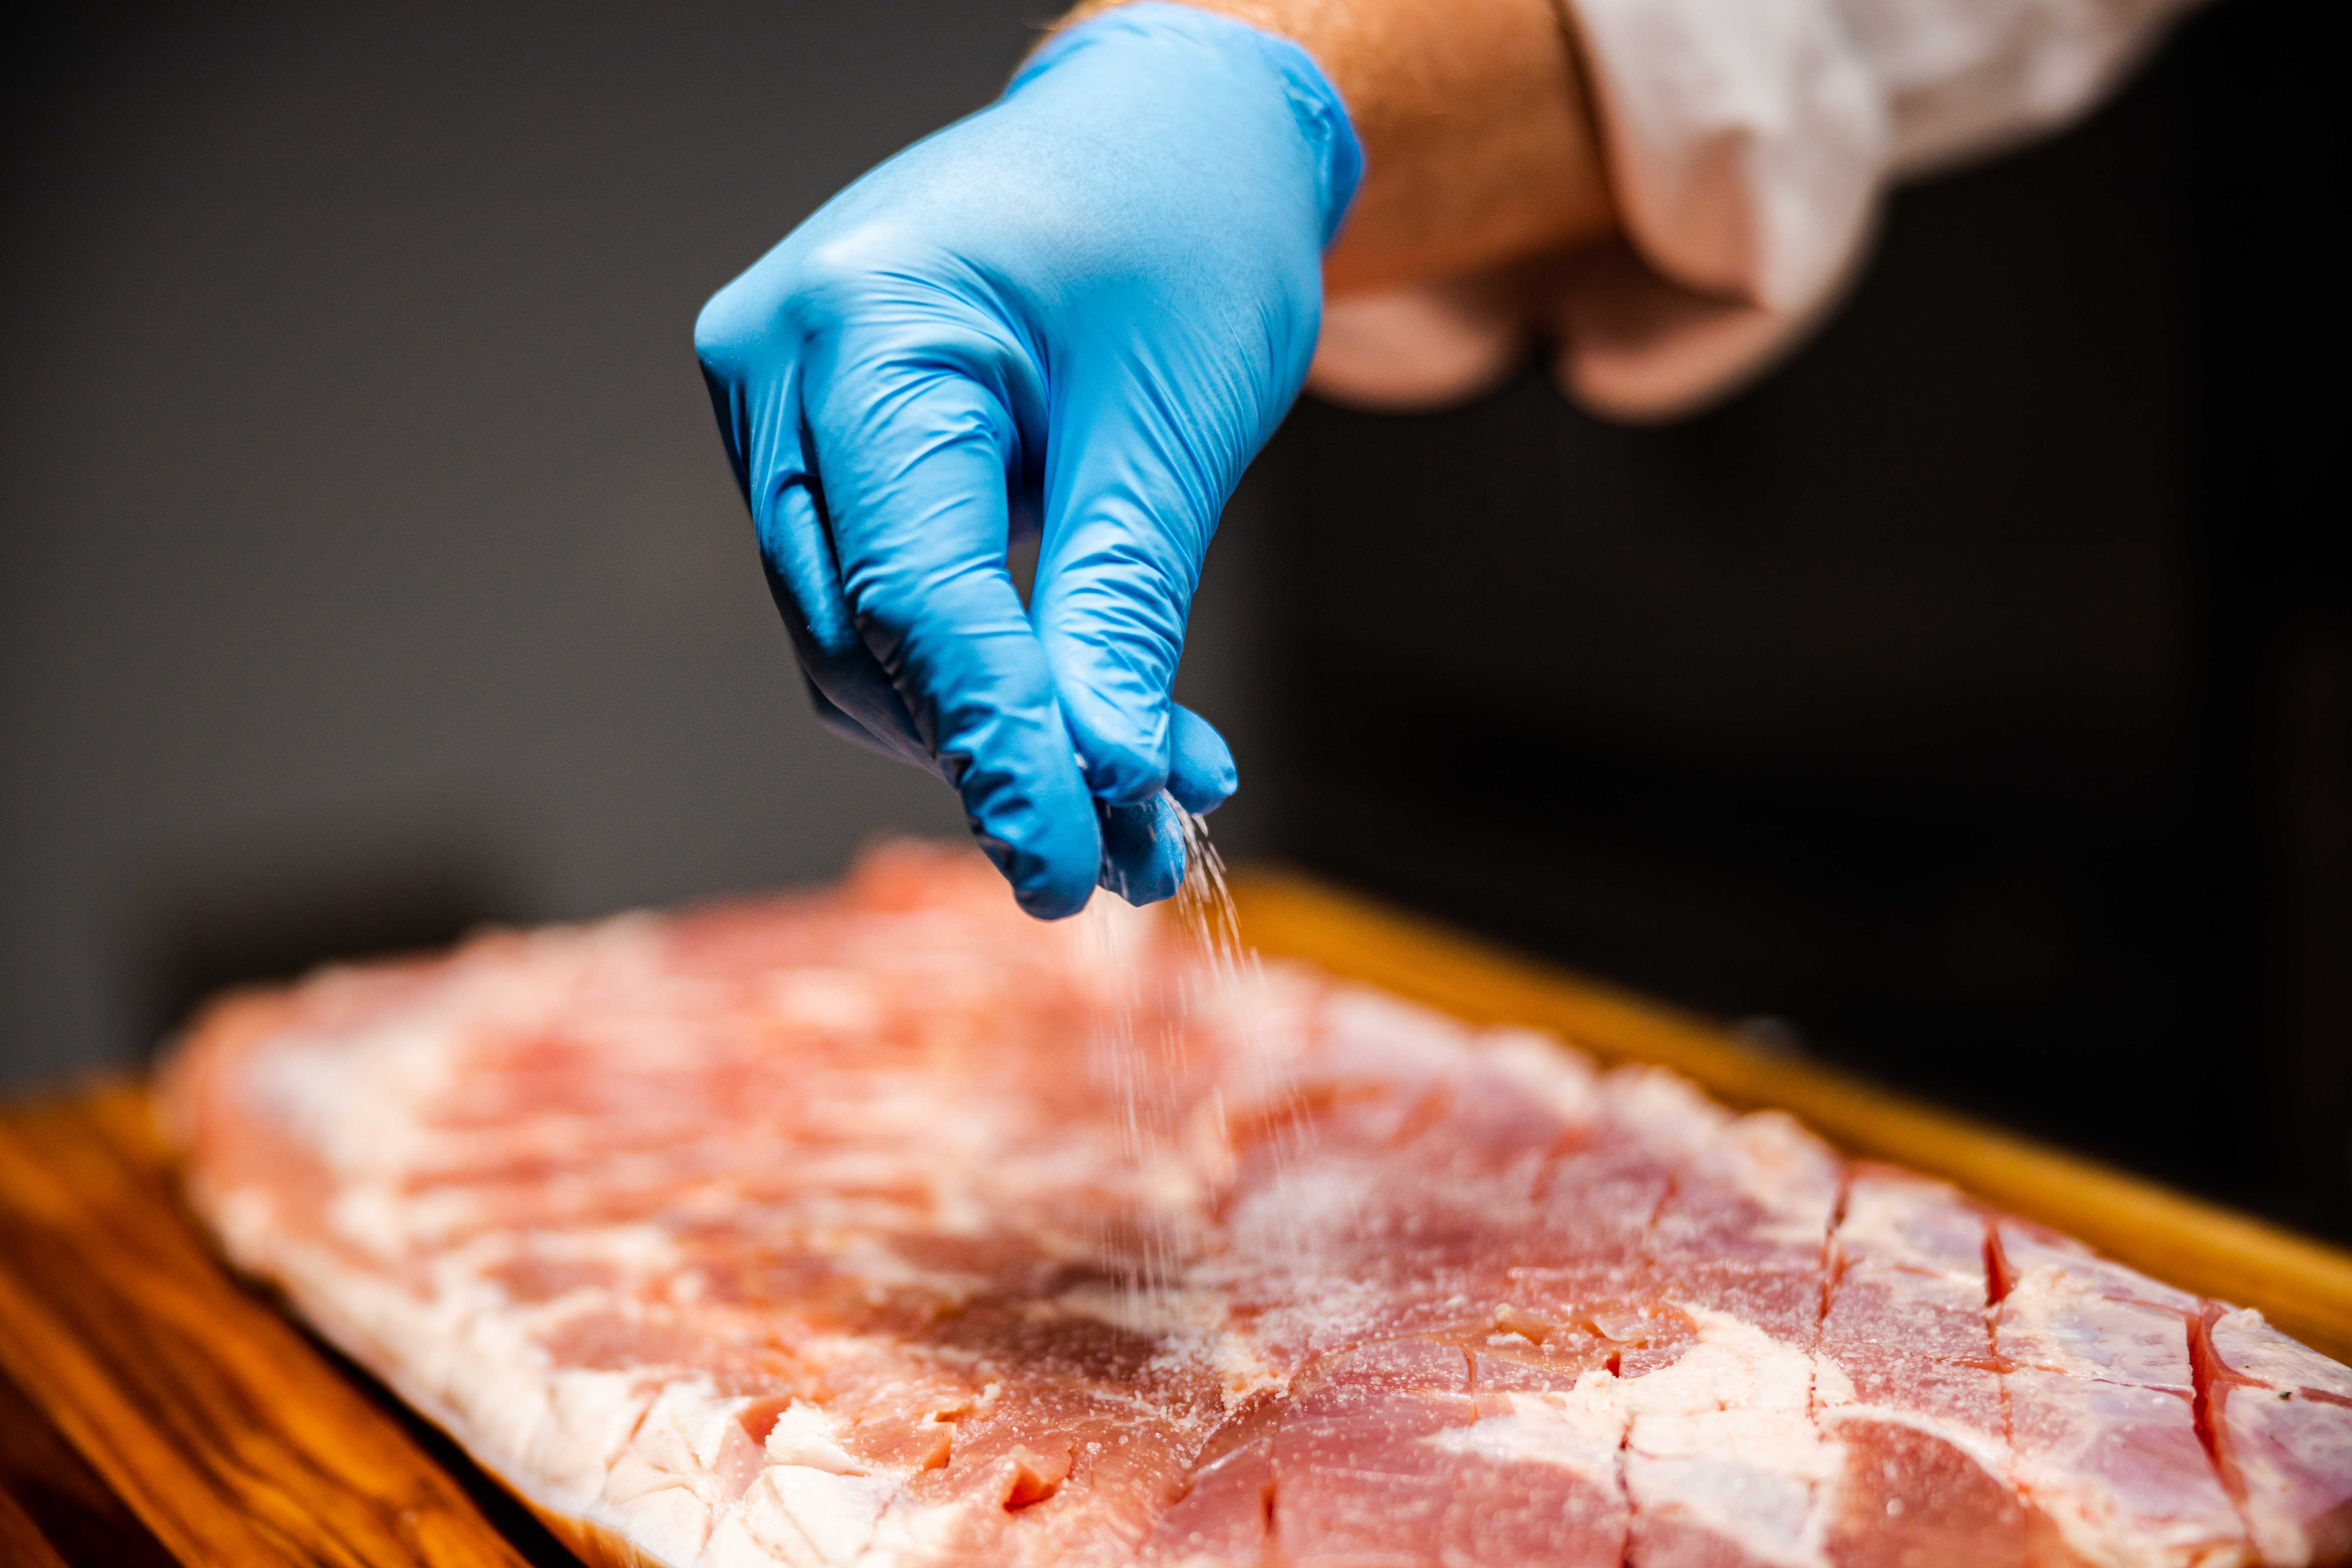
- Sprinkle the meat generously with salt.
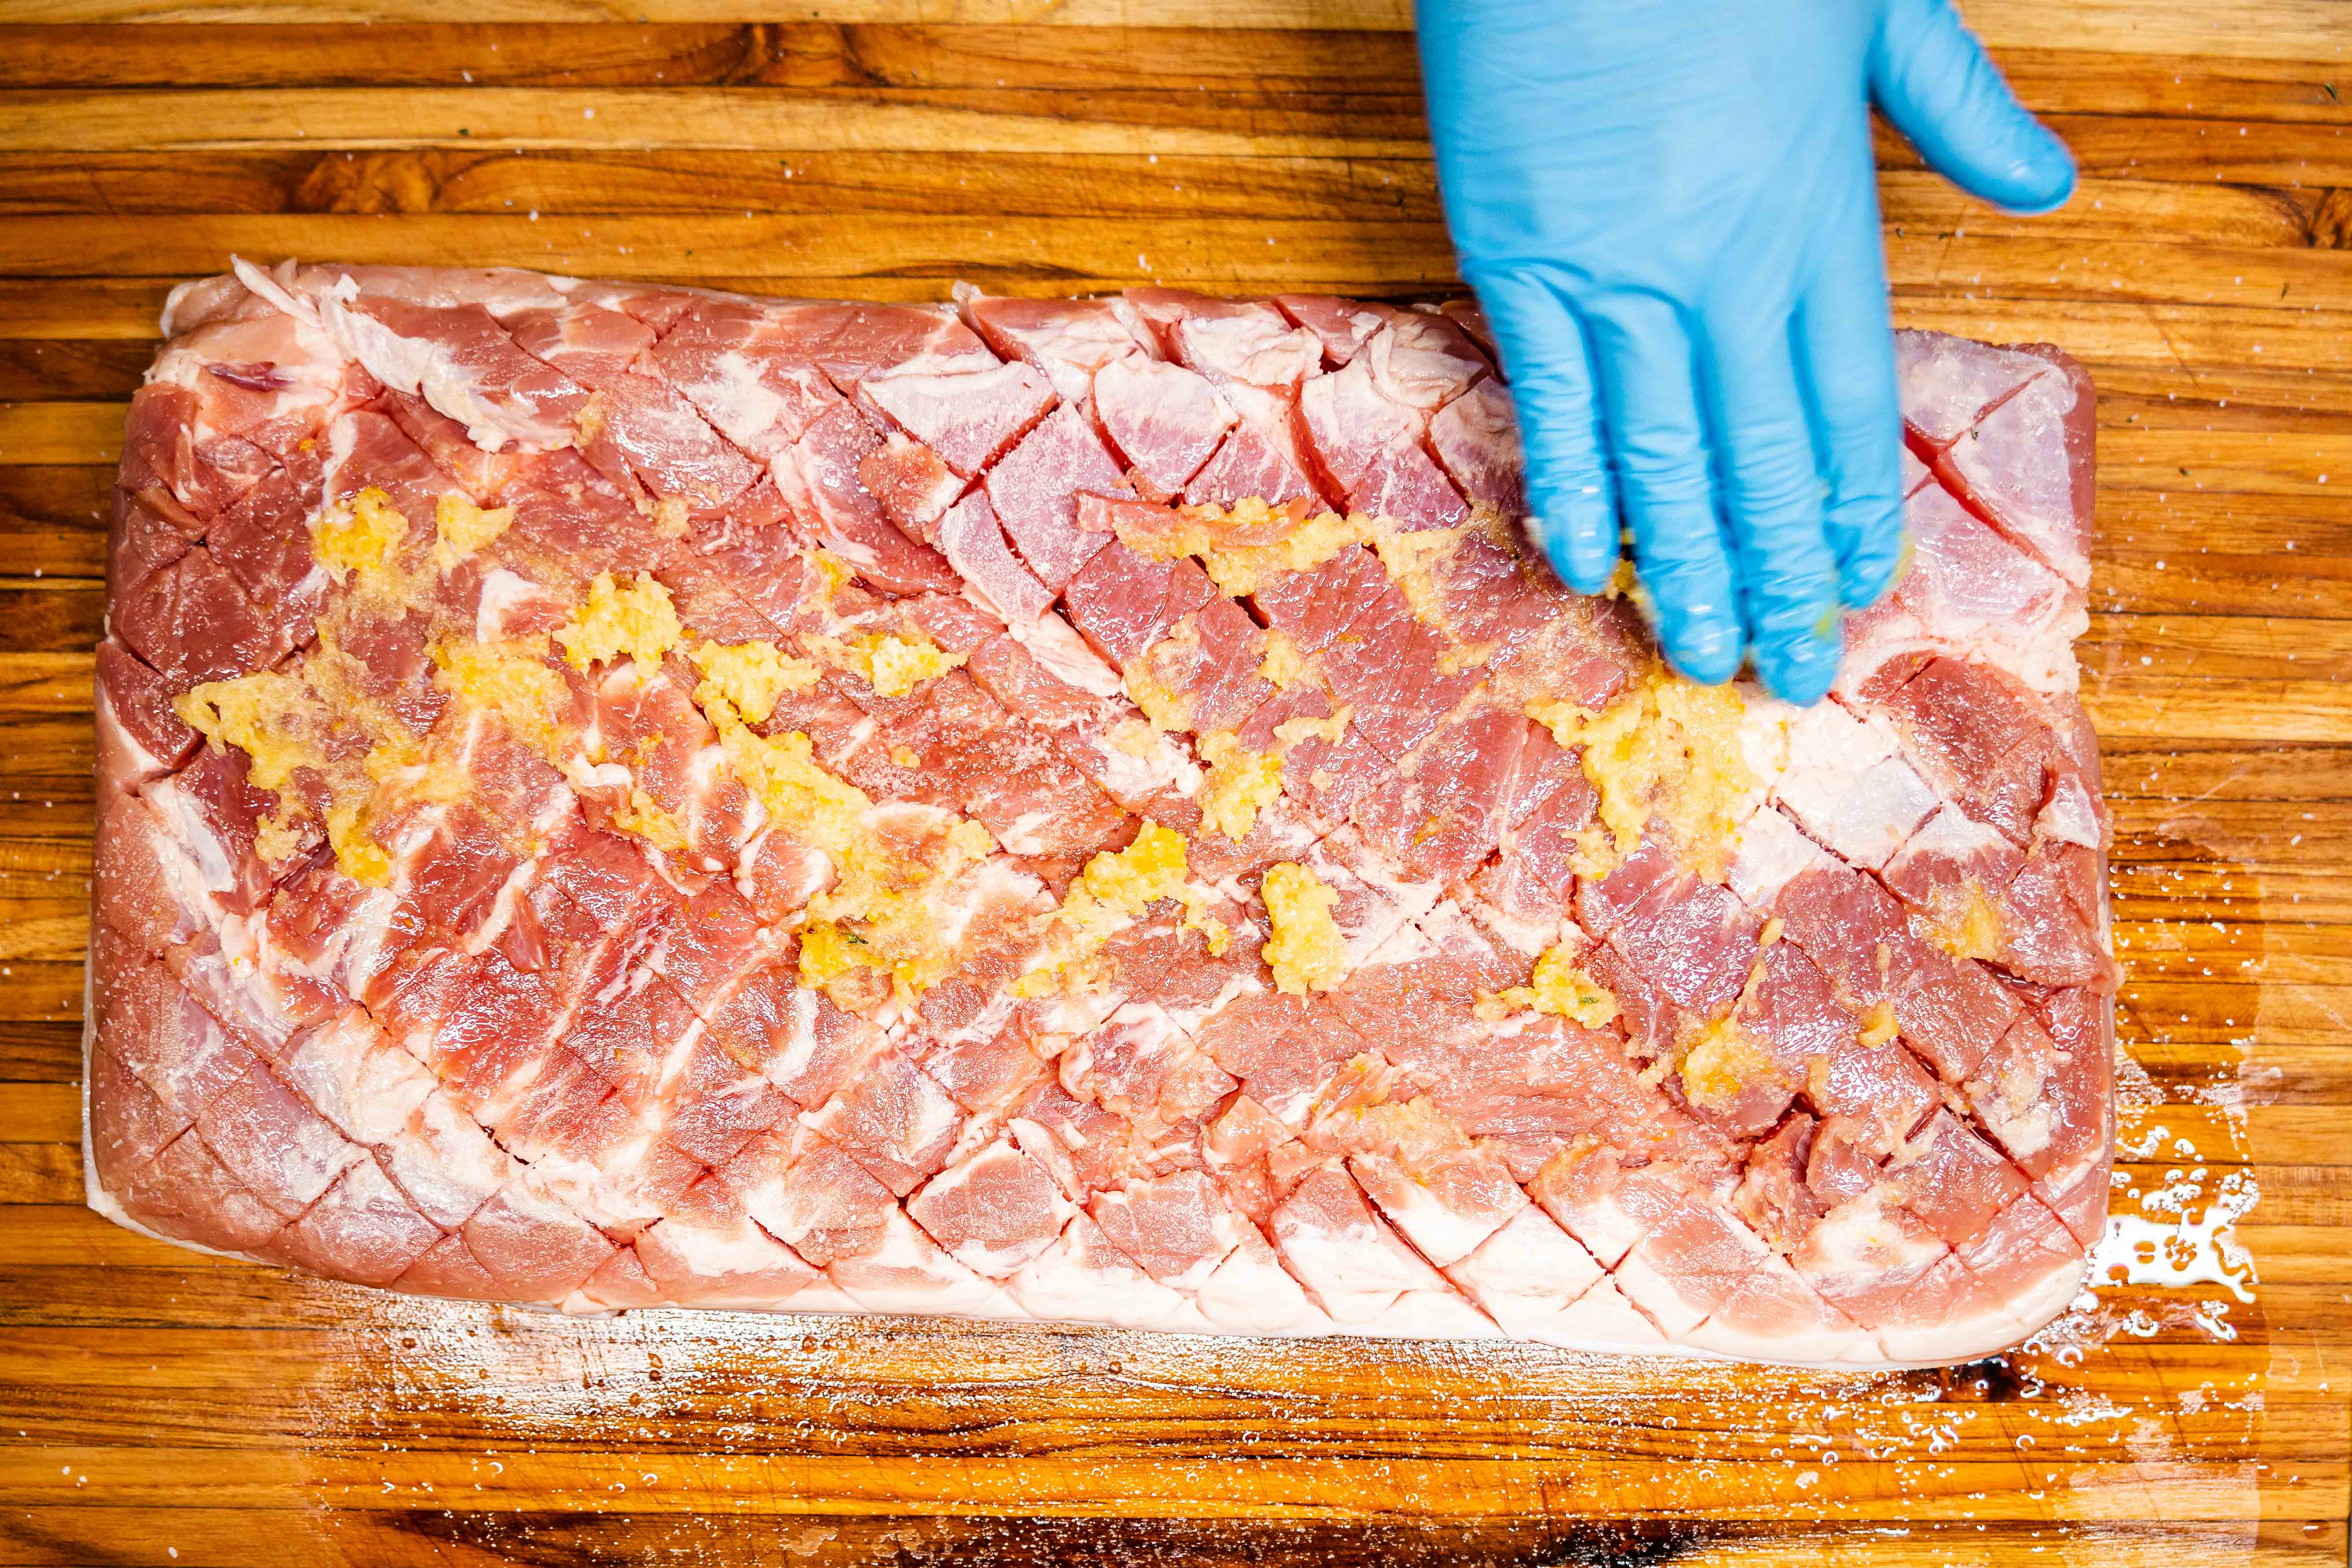
- Rub the grated garlic into the scored meat.
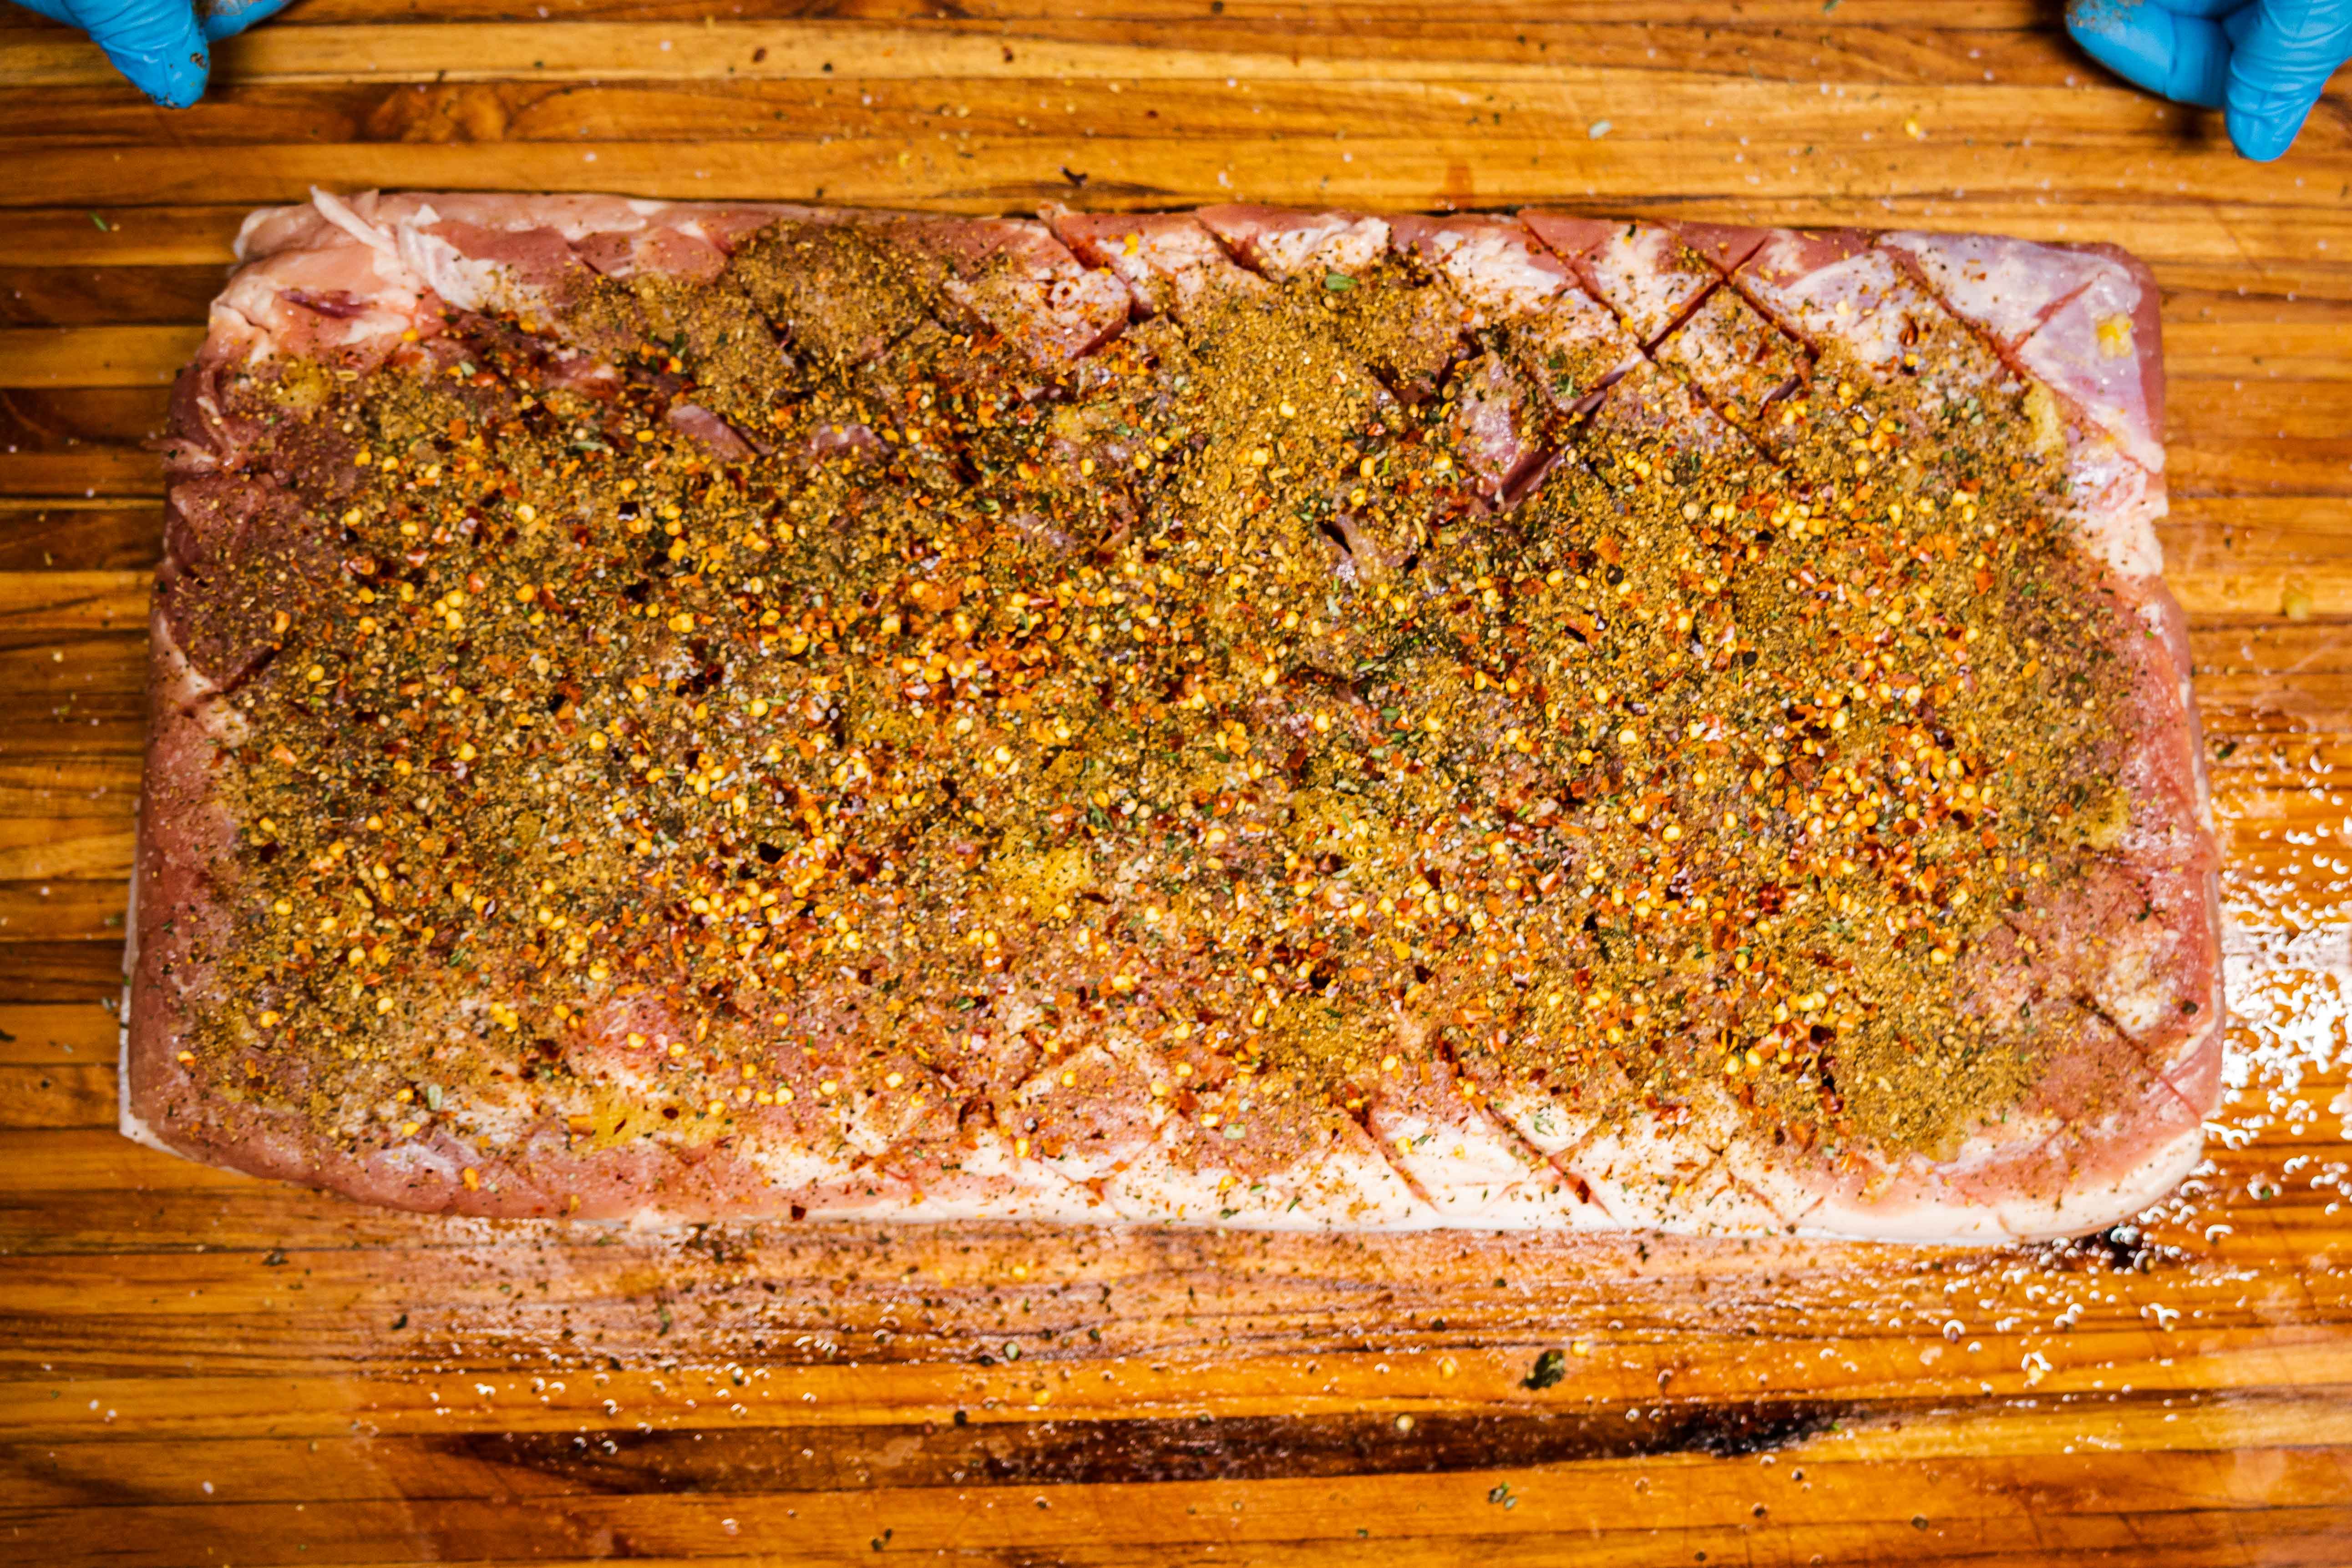
- Apply the ground, toasted spices to the meat. You want a very good coating, but you may not need to use all of it.
- Sprinkle on the chili flakes and the fresh herbs.
- Rub all the seasoning into the meat, making sure it gets into the scored channels.
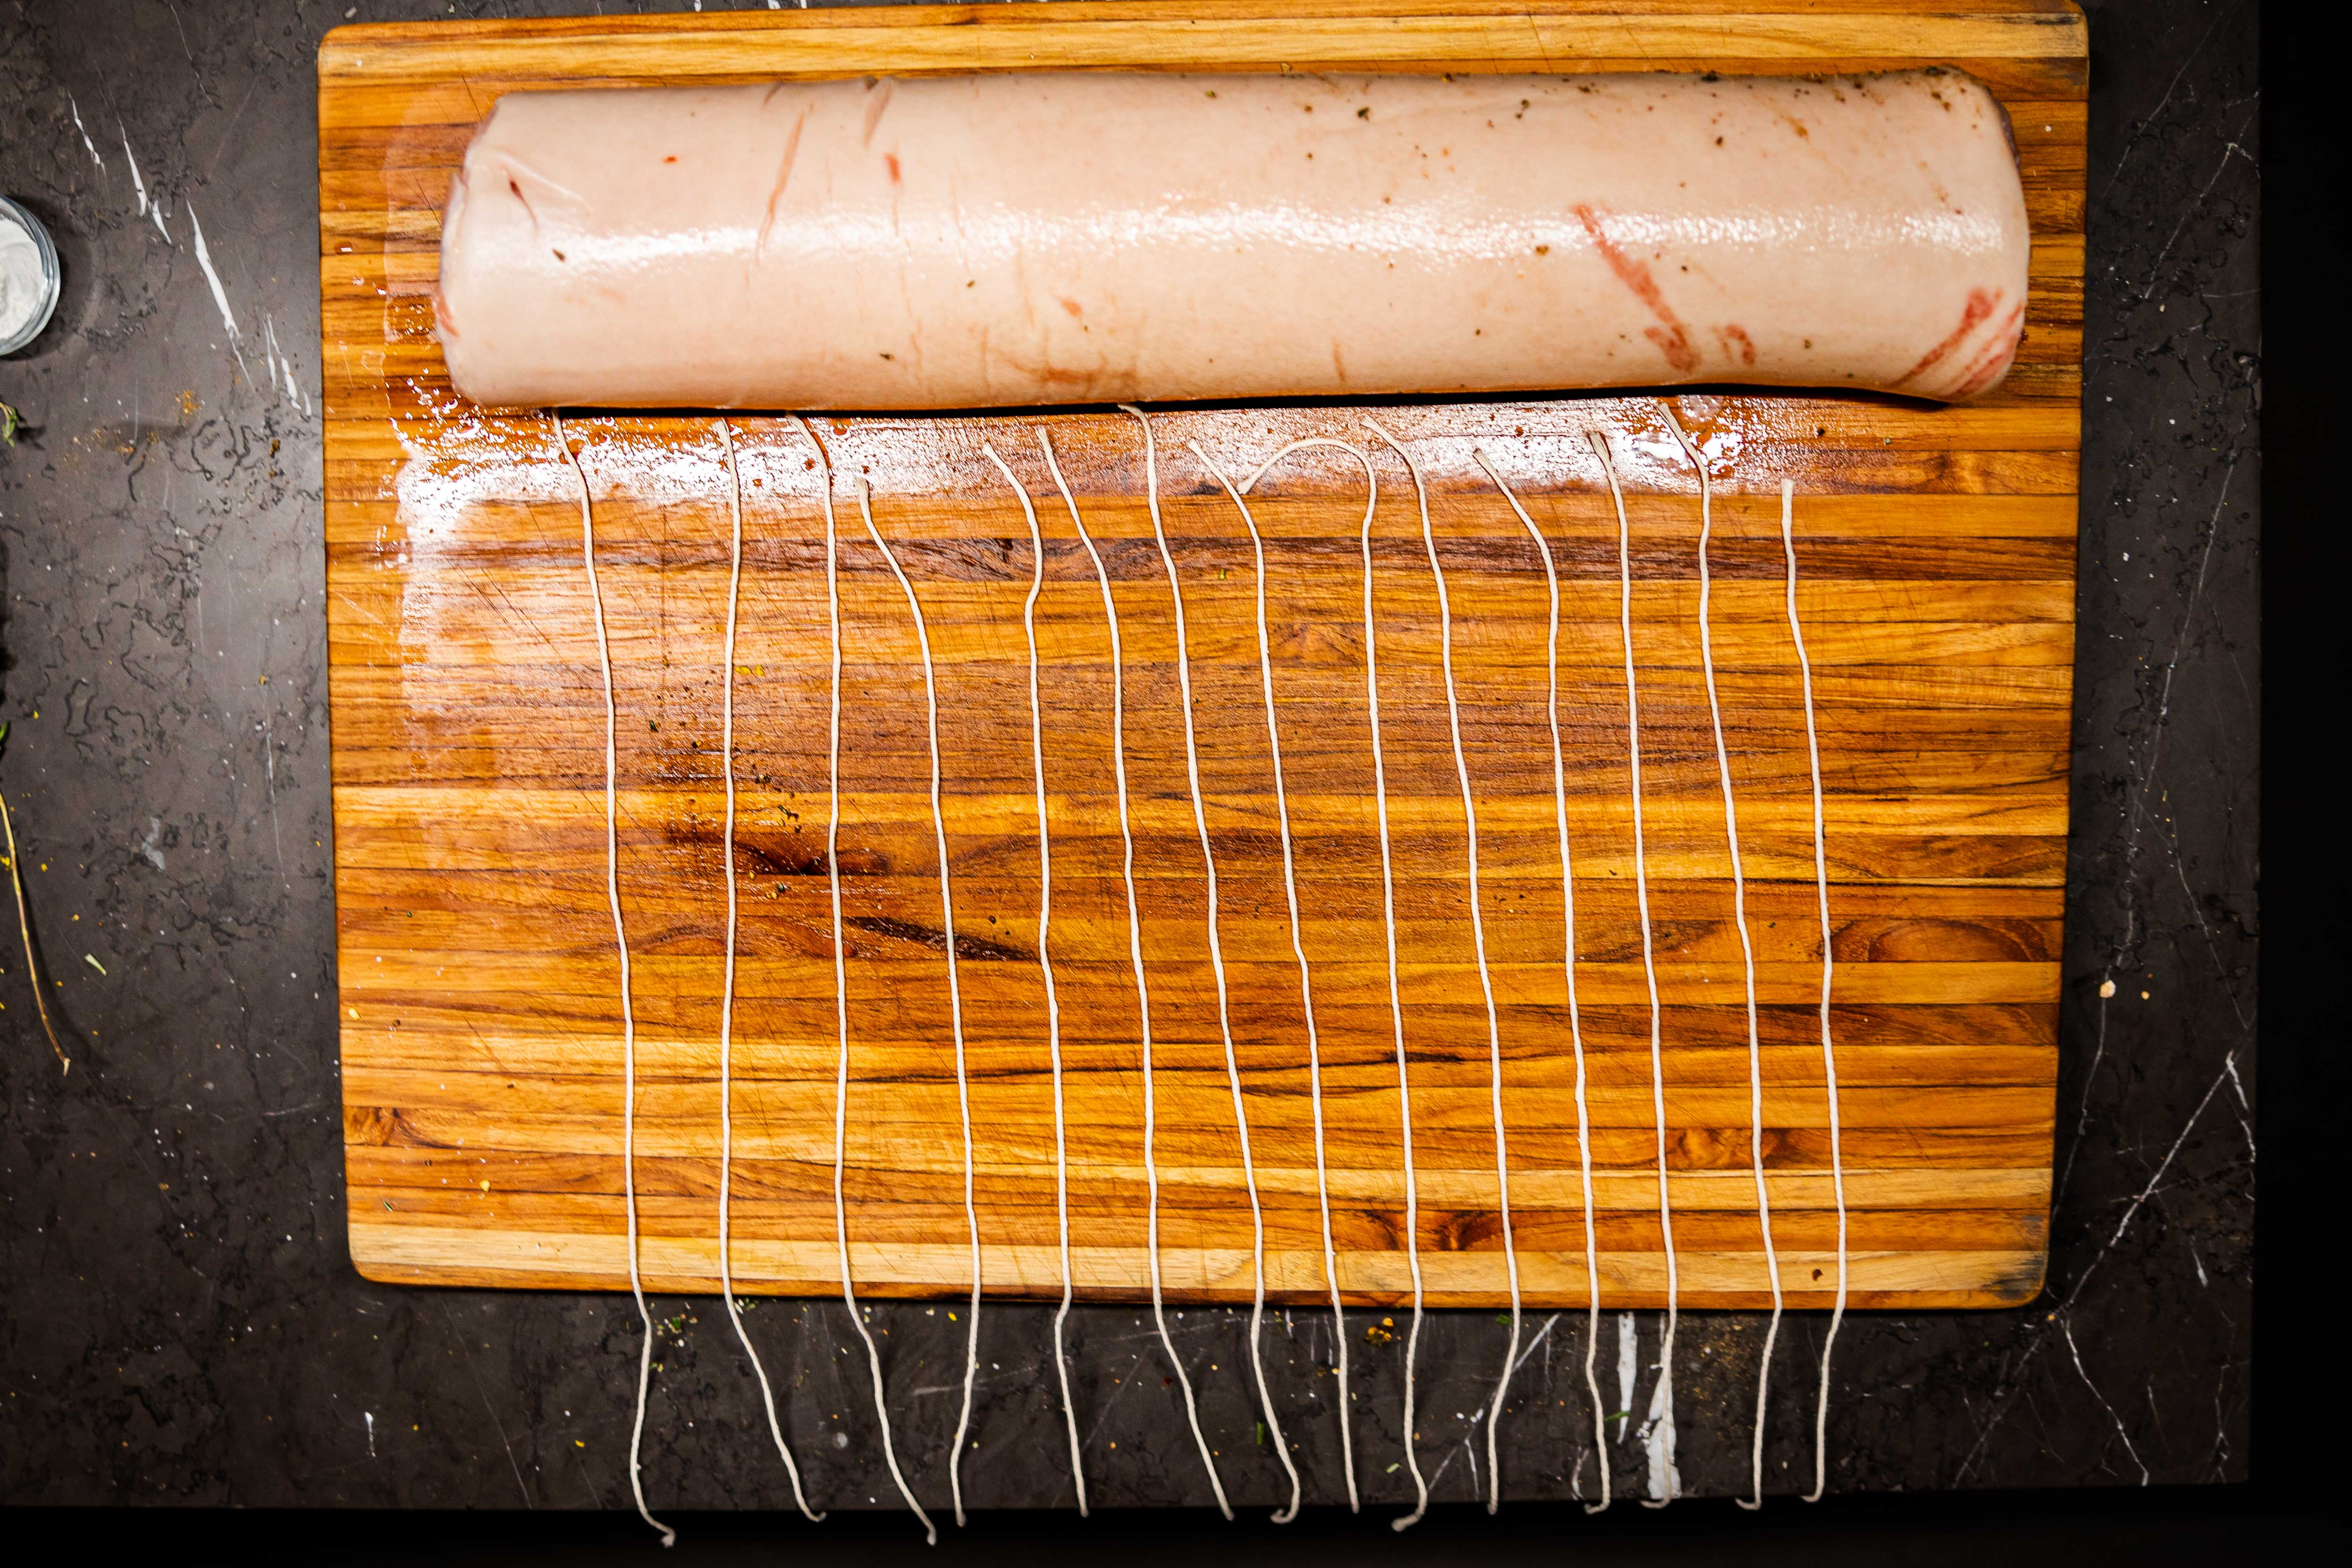
- Roll the belly up with the skin on the outside so that it makes a long tube. The skin might barely meet at the seam.
- Place pieces of butcher’s twine on your board about an inch apart. Pick up the belly roll and place it, seam-side-down, on the twine.
- Tie the roll, starting from the edges and moving toward the center. Pull each knot tight to compress the roll.
- Once the roll is fully tied, mix 2 Tbsp kosher salt with the baking powder and rub it all into the skin of the pork belly, coating it evenly.
- Wrap the belly tightly in plastic wrap and refrigerate overnight or for up to 3 days.
Day 2
- Preheat your oven to 300°F (149°C)
- Insert a probe into the center of the pork roll. (You may need to use a knife to make a slit for the probe to get through the skin.) Set the high-temp alarm on your ChefAlarm for 160°F and put the roast in the oven.
- When the roast reaches 160°F (71°C)—about two hours later—turn the oven temperature down to 225°F (107°C). (Check it with Thermapen ONE to make sure the whole thing has reached the target temp.)
- Reset the high-temp alarm for 180°F (82°C). We don’t want the pork getting over this temperature until the last step.
- Continue to roast, about another two hours, until a probe inserted through the porchetta encounters little to no resistance except for the skin.
- Remove the porchetta from the oven and increase the heat to 500°F (260°C).
- When the oven comes up to temp, put the porchetta—probe removed—back in the oven.
- Let it cook, the skin blistering, for 20–30 minutes, turning it over half-way through so that the bottom (seam) side can crisp as well.
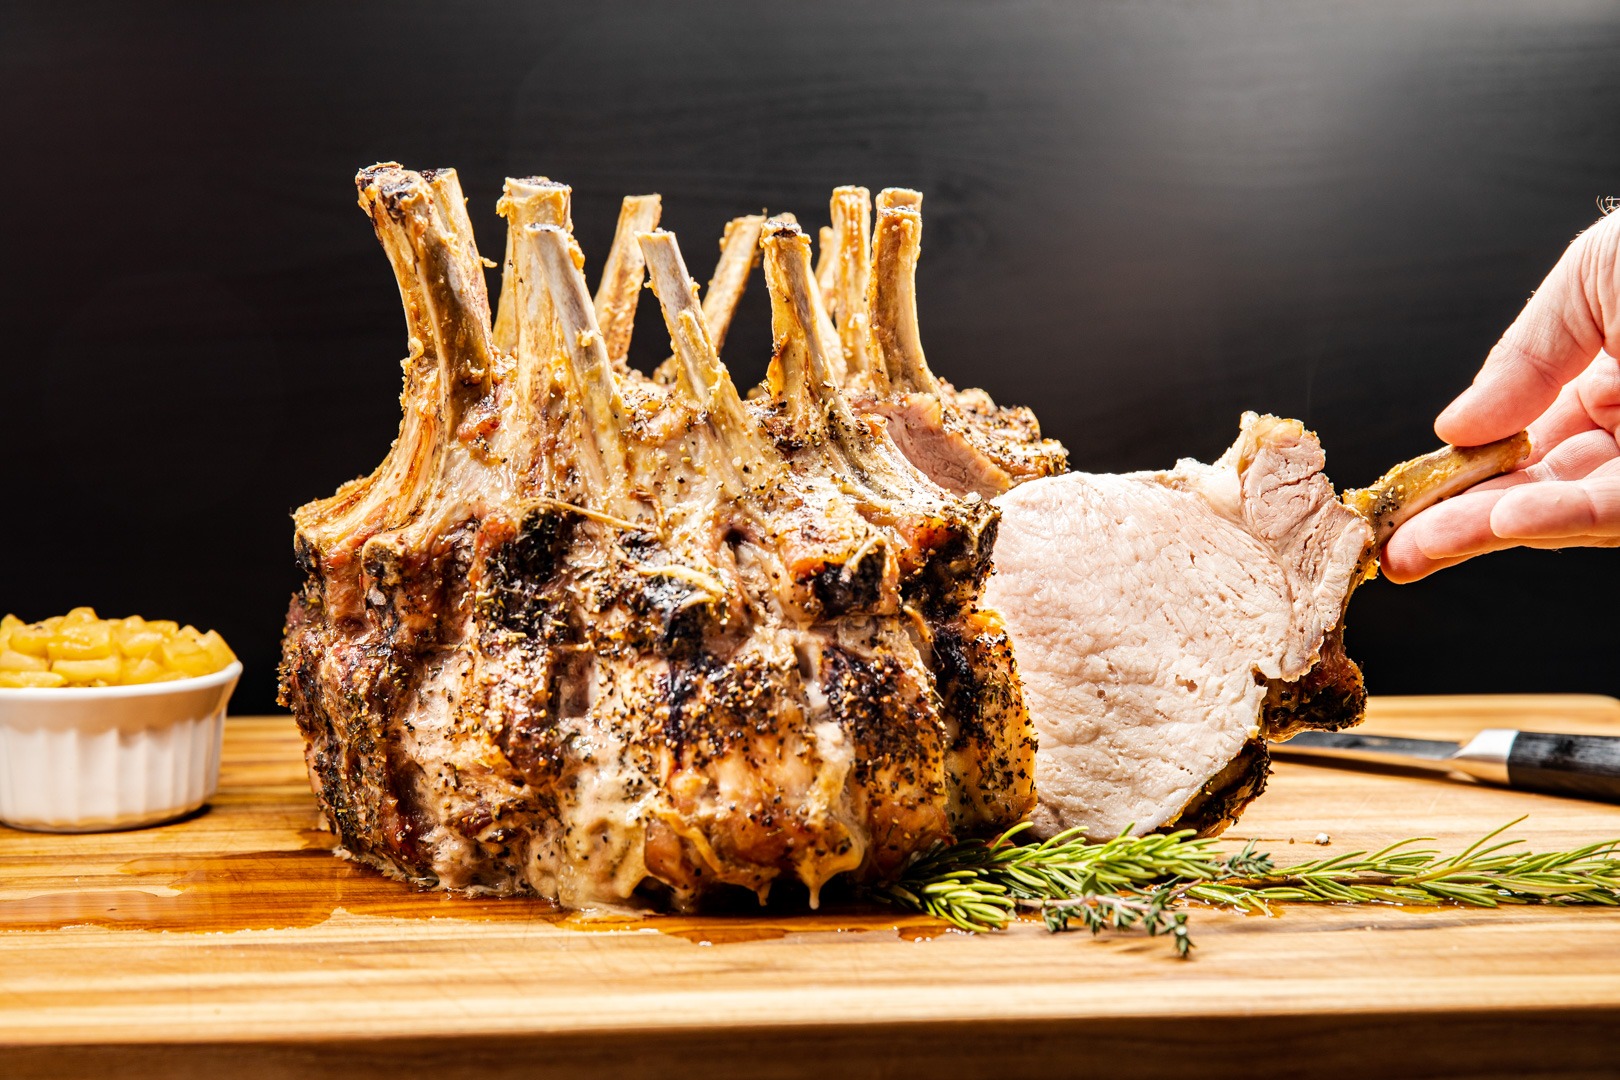
- Remove the roast from the oven and let it rest for 10–20 minutes.
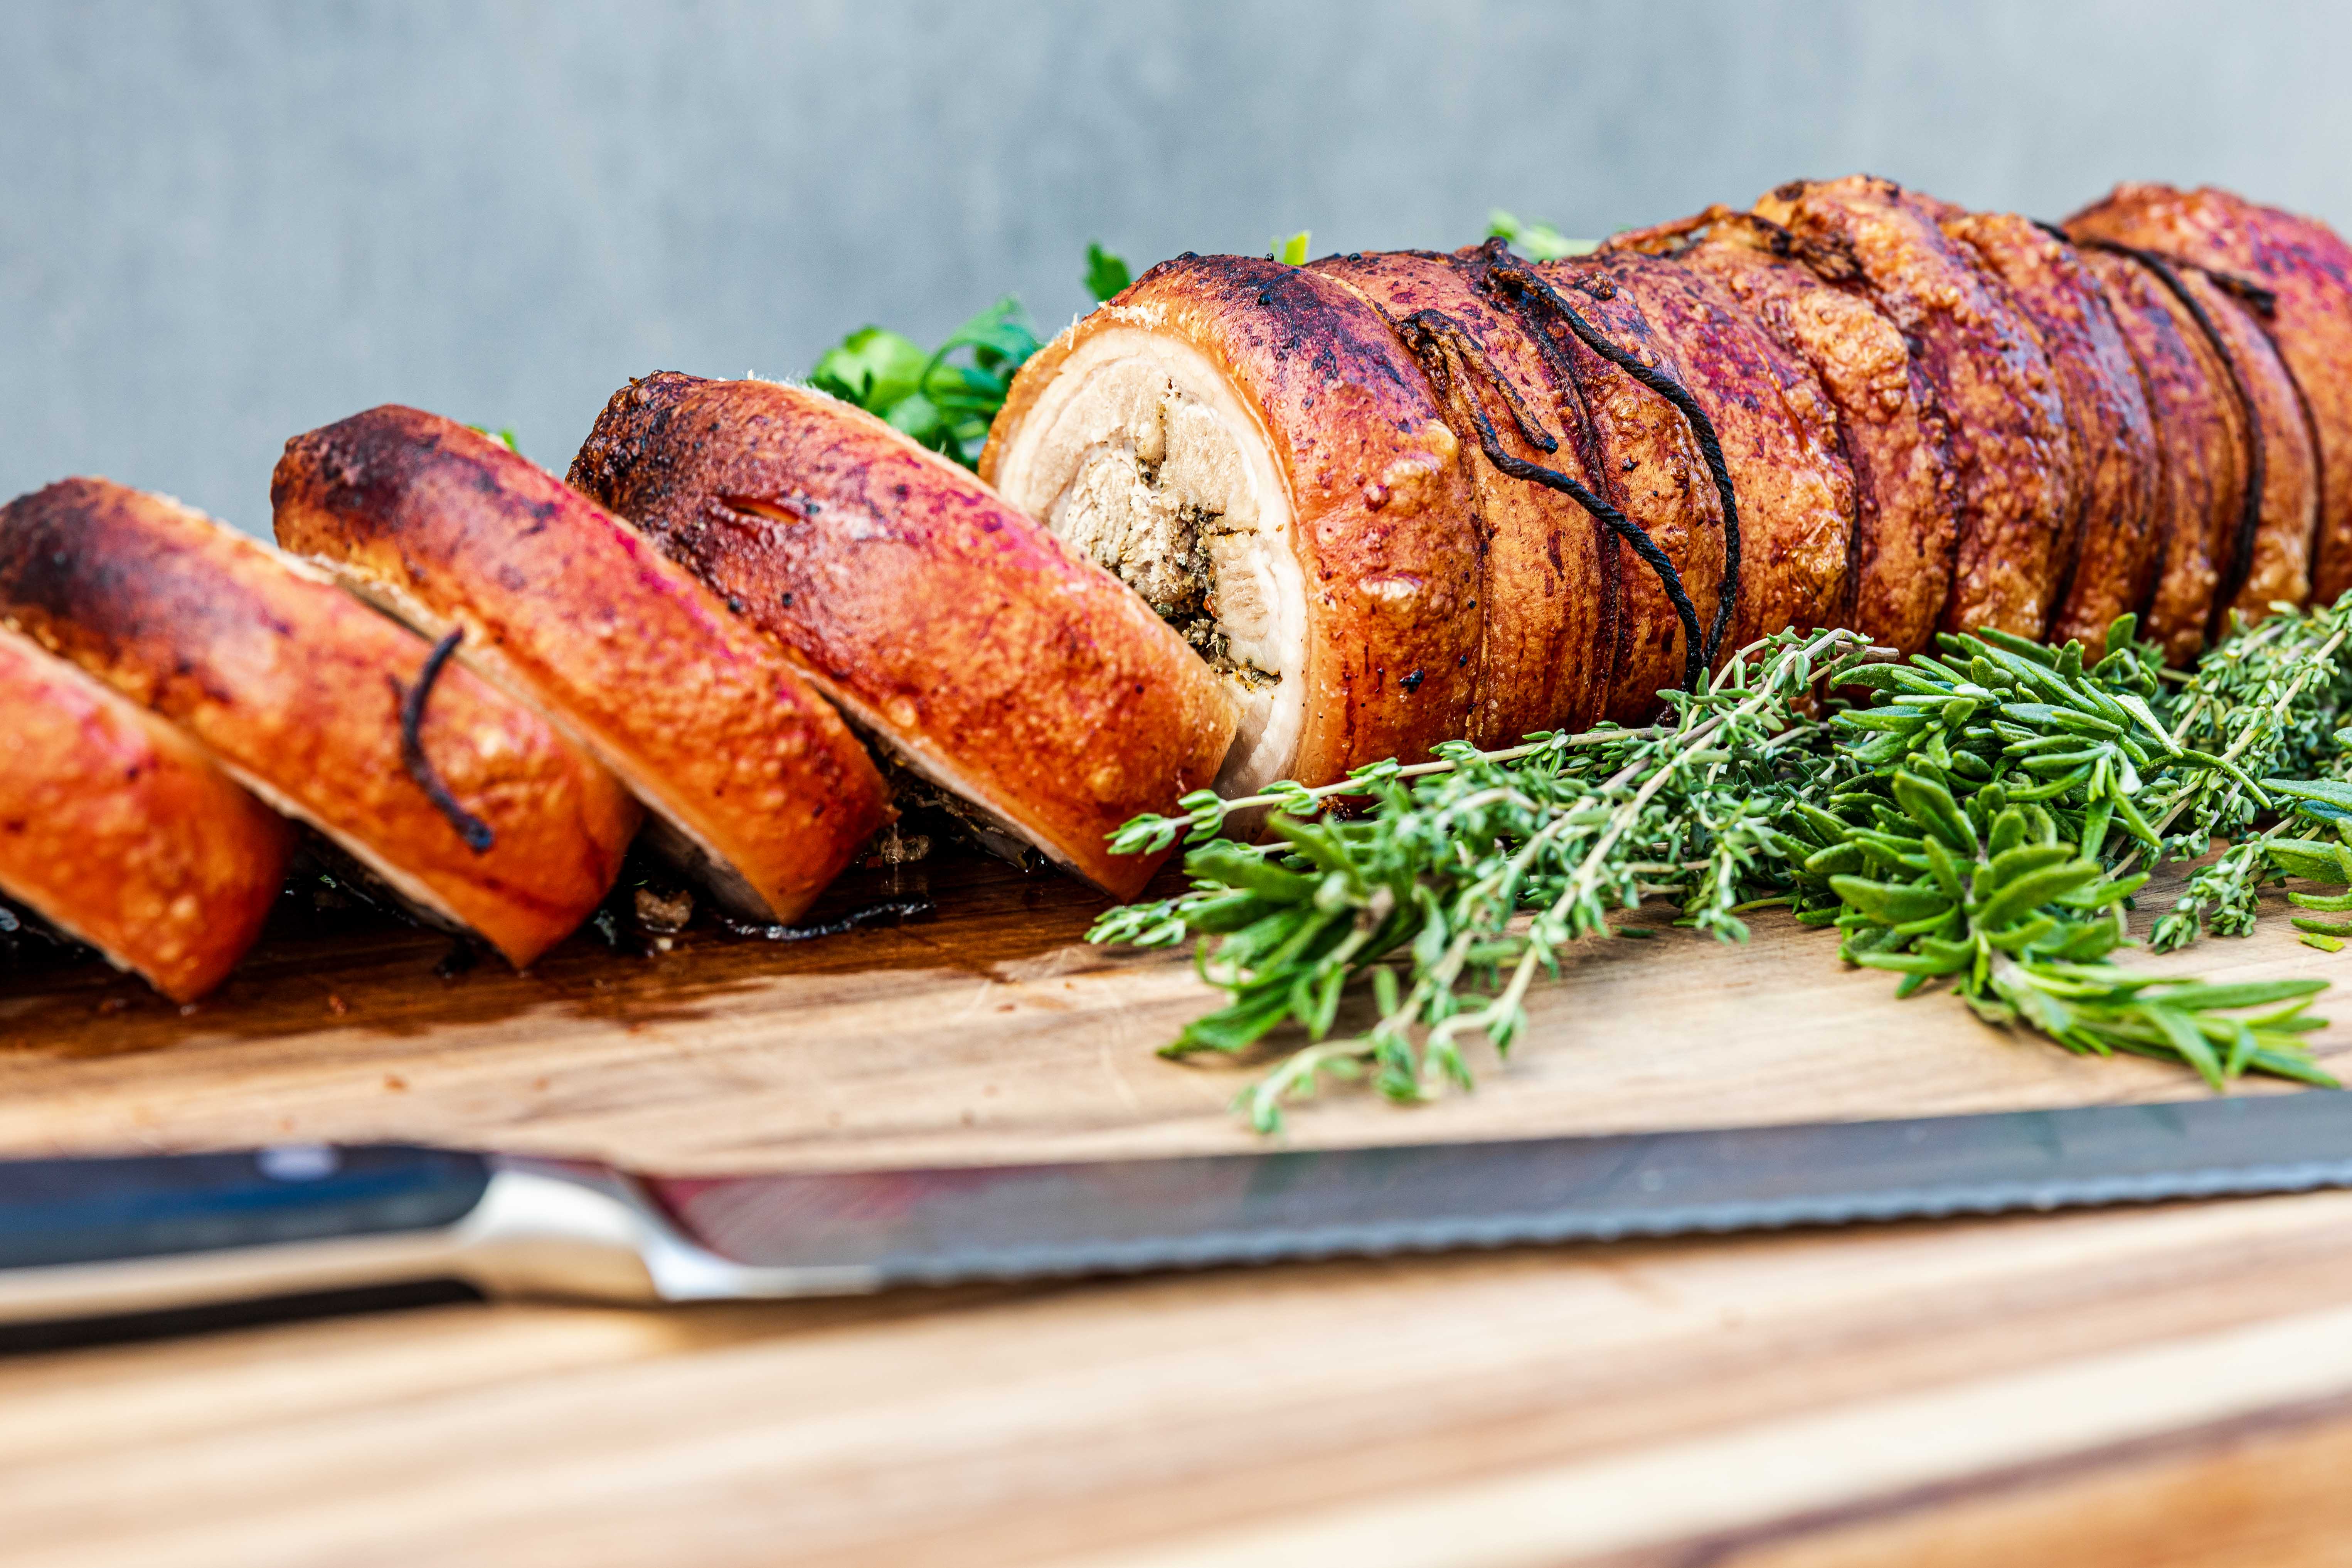
- Carve into thick slices with a sharp serrated knife and serve.

Shop now for products used in this post:


How many portions does this recipe make?
Any suggestions for complementing sides?
It will never knock smoked & roasted turkey using BGE off my Thanksgiving list, but definitely a Christmas meal or holiday potluck treat.
David,
“Portion” is very relative! It’s about 14 1-inch portions, which is fine for medium-hungry people, but maybe a little small for very hungry people.
Sides…Oh wow. Roasted potatoes, obviously. Sauerkraut would be amazing. Roasted beets, pan-roasted carrots (glazed), cauliflower puree, Brussels sprouts that have just a little bit of char on them from oven or pan roasting. Sweet and sour red cabbage would be amazing!
I understand keeping turkey for Thanksgiving, but absolutely give it a go for Christmas! I sure will.
It may be perfect, but it’s not authentic porchetta. In fairness, why don’t you show how to cook a real/authentic porchetta using the thermapen?
I have a thermapen; love it and use it all the time.
Ken,
It’s true, it isn’t authentic. But a true porchetta poses too many thermal barriers! If you do want to make an authentic porchetta roast, you would follow the same steps as in this cook, but with a butterflied, seasoned pork loin in the middle. You’d still need to cook the belly to 160°F and hold it for a few hours to render the collagen in the belly and the skin.
I personally am interested in trying to find a way to cook the two meats separately and combine them at the opportune moment, but I think that may be an untenable task.
I freeze the loin solid before I roll the porchetta around it. This gives the belly plenty of extra time before the loin gets to temperature.
Italians are cooking porchetta with the pork loin inside using sous-vide (water @ 150F) for 12-14 hrs after that in the oven at 530F for 20 min. Porchetta weighs in the beginning approx 30 lbs. Obviously not for commercial use.
Suggestion: Use two “money muscles” instead of loin to stuff the porchetta.
DJ,
Nice idea! I love it!
Exactly what entered my mind first. The money muscle and belly would both be done at the same time.
That’s what I do!! Much better
What if you brined the pork loin first? That would keep it moist for the long cook.
Larry,
That would certainly help, but cooking it all the way up to 180–203°F it will probably still dry out a good deal. Worth a try, though!
May not be traditional Italian but I’m betting it works on zubuchon,or Filipino roast pork belly. Am trying it now, wish me luck
Trying my first this 4th of July weekend. Can’t wait to taste it.
Hi there,
Thank you for such an informative piece! Love the suggestions when it comes to sides.
Could you give some time suggestions if I were to make a smaller portion, say 4-5 pounds? Do I still need to go through the full 4+ hours of cook time, or maybe just half it? Trying to time it just in time for dinner 🙂
Also, would it be ok to pre-cook the belly say 2 hours before service, and crank up the heat for the crackling just in time for dinner (including resting time). Thank you!
It will still be about the same amount of time, but you can get the “cooking” done and then crisp the skin later.
Up until the high sear step, can I hold the meat for 1-2 hours and then do the high sear step? I ask because I have to transport it to a dinner party an hour away. Nick
Yes!
If using a kamado, is it ok to slowly bring up to 180f internal as I can’t get the ceramic hot then drop it back down again?
Yes, that should work just fine.
I have cooked porchetta with butterflied herbed loin a bunch of times and find that, even though the loin is too dry on its own, it balances the richnes of the belly. Also, some people dont like the rich belly but love the herby loin. The idea of cooling it way down is interestung.